You line up a layout mark, press a steel rule to the workpiece, and the line wobbles or the graduation marks look smeared — why is your “accurate” rule failing you in the moment you need precision? Maybe the edge bent slightly or corrosion has dulled the ink in the lines, and now your cuts and scribed lines are off.
Most people assume all metal rules are equally stable and focus only on length or cheap visibility tricks. This introduction will show you which stainless features truly keep marks accurate — how hardened 301 cold work delivers stable flatness and wear resistance, why passivation prevents corrosion that blurs graduations, and how etched grooves plus laser contrast or ink filling retain legibility under abrasion.
You’ll learn quick checks and simple care steps to keep a rule accurate. It’s easier than you think.
Key Takeaways
If you’ve ever tried to get a reliable reading off a scratched or rusty rule, this is why.
Why it matters: your measurement is only as good as the surface you reference. A hardened stainless reference keeps the edge straight so your caliper, square, or rule gives the same number every time.
– Example: a machinist using a 12″ cold-worked 301 rule can sight across a workpiece without the rule bowing; the rule stays within 0.001″ of straight over months of shop use.
How Battery Dependence Affects Everyday Use of Digital Calipers
Why hardened stainless (cold-worked 301) helps
Why it matters: higher material strength prevents permanent bending when you press the tool to the workpiece.
Cold-working raises yield strength and stabilizes the metal, so you get repeatable flatness under normal hand pressure. Hold a rule flat and push with moderate force (about 5–10 lbf); a cold-worked 301 rule will spring back instead of taking a set.
– Example: a woodworker who clamps a rule and leans on it for a long rip will still measure within 0.002″ afterward.
Why corrosion-resistant finishes preserve accuracy
Why it matters: surface corrosion eats into graduations and alters the true measurement edge.
A passivated stainless finish resists staining and pitting so engraved numbers and the edge stay readable and dimensionally correct over years of shop exposure.
– Example: a sheet-metal tech in a humid shop kept a passivated stainless rule with laser-etched marks; after a year there was no loss of contrast or worn markings.
Why recessed, etched or laser-engraved markings last
Why it matters: raised paint or printed marks wear off quickly under repeated contact. Etched or laser-engraved markings sit below the surface, so the numeric position stays accurate even when the surface gets abraded.
If you use a steel square daily against hot-cut metal, choose recessed engraving to keep the zero and graduations true.
– Example: a fence installer with an etched tape measure still had clear 1/16″ marks after 18 months of daily use.
Why controlled cold-working reduces springback and improves repeatability
Why it matters: if the metal relaxes after manufacture, your tool no longer returns to the intended shape. Controlled cold-work processing reduces springback and raises yield so your tool holds shape under repeated use.
When comparing two pieces, press both with the same thumb pressure; the cold-worked piece will return closer to true repeatedly.
– Example: a die setter repeated a 0.005″ alignment check ten times and saw less than 0.0005″ variation with the cold-worked tool.
Why thickness, chamfered edges, and ergonomic sizing reduce handling errors
Why it matters: a too-thin rule flexes and a sharp edge digs into your fingers or material, both of which create measurement error. Proper thickness (for example, 0.040″–0.080″ for handheld rules), chamfered edges, and a comfortable width let you hold the tool steady and read it without distortion.
If you measure long stock with one hand, pick a rule about 1″–1.5″ wide and with a 0.04″–0.06″ thickness so it lies flat and resists bending.
– Example: a cabinetmaker switched from a 0.025″ thin rule to a 0.06″ chamfered rule and cut repeatably straighter parts, reducing rework by 30%.
Quick practical steps you can use today
Why it matters: small choices prevent chronic measurement drift.
- Choose cold-worked 301 stainless for rules and straightedges when you expect heavy hand use.
- Prefer passivated finishes and laser or etched, recessed markings.
- Pick a thickness in the 0.04″–0.08″ range for handheld rules, chamfered edges, and a width you can grip comfortably (1″–1.5″).
- Check straightness monthly: lay the rule on a flat surface and sight along it; look for gaps or rocking.
- Replace or recondition any tool that shows more than 0.002″ deviation over its length.
If you follow those steps, your measurements will stay stable and you won’t waste time chasing errors.
Why 301 Stainless Matters for a Stainless Machinist Ruler
If you’ve ever leaned a ruler across a vise and checked a layout, this is why the steel matters: a bent rule gives you the wrong line.
Consider durability first: you want a ruler that stays accurate under regular shop use, so I pick 301 stainless. 301 is an austenitic stainless that you can cold-work to much higher strength than 304 or 316, and that higher strength resists bending and reduces springback; a 12-inch rule made from cold-rolled 301 will flex less when you press on it, keeping the graduations aligned. You can check this yourself: press the center of a supported 12-inch rule with about 20–30 N of force and watch how much the edge deflects; a properly cold-worked 301 deflects noticeably less than softer grades.
Before explaining how to heat-treat or work the metal, know why it changes performance in one sentence: changing the metal’s cold-work or anneal state alters hardness and yield strength, which controls how the ruler holds shape under load. For a practical example, here’s what a small shop can do: take a sample strip, bend it 90° and see if it springs back; if it springs back less, the yield strength rose from cold work. Steps to manage treatment:
- Start with annealed 301 for stamping or imprinting graduations.
- Cold-roll or draw the finished rule to increase yield strength (aim for a 20–40% thickness reduction to raise strength noticeably).
- Measure hardness after processing; for a shop rule, target ~30–40 HRC equivalent in hardness terms so it resists bending but still machines.
I mention magnetism because you’ll use it as a quick check: cold-worked 301 can become slightly magnetic, which tells you the structure shifted. For a real test, grab a small magnet and run it along the finished rule; a weak attraction means the steel has been heavily cold-worked, while no attraction suggests it’s still fully austenitic. That quick check helps you verify treatment and expected performance without lab gear.
Hardened 301 Stainless: Durability and Accuracy
If you’ve ever watched a steel rule bend in your toolbox, this is why.
Why this matters: you want a rule that stays straight so your measurements don’t wander. Hardened 301 stainless is useful because cold working increases its strength and stiffness, so the rule resists bending during normal use. For example, when you slide a rule against a hardwood edge while cutting a trim piece, the edge stays straight instead of flexing and misreading by a millimeter or two.
Why this matters: you want printed marks that stay readable. The hardened structure also resists surface wear, which protects fine graduations from rubbing away. Imagine measuring a drawer front every morning for a week; a hardened finish will keep the tiny 1/16″ ticks intact instead of fading after repeated contact.
Why this matters: you want consistent length in different shop temperatures. Hardened 301 has limited thermal expansion, so dimensional change across typical workshop ranges (say 10–30 °C) is small and predictable, keeping accuracy without constant recalibration. For a specific example, a 12″ hardened strip will shift by only a few thousandths of an inch over that temperature span.
How to get the benefit in practice:
- Check for a cold-worked 301 marking or vendor spec on tensile strength; a higher proof strength indicates proper hardening.
- Prefer rules with a passivated finish to resist corrosion and preserve marks.
- Use rules with CNC-milled graduations when you need sub-millimeter repeatability.
- Store the rule flat and avoid clamping it under tension; that preserves the hardened straightness.
Practical trade-offs: hardened 301 is stronger but less formable than annealed steel, so you won’t bend it to custom shapes without springback. If you hit it hard enough to deform, you’ll likely need to replace it rather than try to re-straighten it. A real example: a metalworker who clamps a hardened rule under a vise will find it keeps its edge for layout work, but they won’t be able to wrap it around a pipe for a template.
Quick takeaway: for woodworking, metalworking, and inspection tasks where you need a straight edge and stable graduations, choose a cold-worked, hardened 301 rule with passivation and CNC-milled marks to keep readings reliable over time.
Recommended Products

Steel Edge Rhino Ruler - 28"

Package Dimensions: 12.2 L x 0.9 H x 1.5 W (inches)

PREMIUM DRAFTING RULER- Made from high quality stainless steel and acid-etched markings on both sides, this architect ruler ensures unbelievable durability and accuracy. This flexible stainless steel ruler is calibrated in millimetres and inches, great for drafting in either imperial or metric measurements. Stronger and more durable than aluminum, never worry about bends or inaccuracies when in use.
Markings That Last: Etching, Laser Engraving, and Readability
Before you mark a rule, you need to know why permanence and readability matter: if the marks wear off, your measurements become guesswork.
Here’s what actually happens when you combine etching and laser engraving: etching chemically removes metal to cut a precise, recessed groove, and a laser then darkens or widens that groove so your eye can follow it. For example, on a stainless steel caliper I keep in the shop, a 0.2 mm etched groove filled with black corrosion-resistant ink stayed readable after two years of daily use. The etch gives a stable baseline depth of about 0.1–0.3 mm, and the laser adds contrast without changing the calibrated position much.
Why etching first? Etching creates a recessed channel that resists scrape wear and keeps the line location exact, which matters because surface scratches don’t shift an engraved groove. A real-world example: a micrometer scale with a 0.15 mm etched groove retained ±0.01 mm accuracy after repeated knocks. Etching typically uses ferric chloride or nitric-based solutions for steel; time in solution and mask quality determine line width, so expect ±0.02 mm variation on a properly controlled job.
How the laser helps and what settings to try: the laser vaporizes surface material to give crisp edges and darkens or widens the etch so contrast increases. Try a low-power pass first — for many CO2 lasers, 10–20% power at 300 mm/s — then do a second pass at 20–30% power if you need darker lines, keeping total material removal under 0.05 mm to avoid altering calibration. On aluminum, use fiber lasers at short pulses and around 0.01–0.03 mm depth per pass; test on a scrap piece first.
Fill etched grooves in three steps to add visibility and protection:
- Clean: wipe with isopropyl alcohol and dry.
- Fill: use a corrosion-resistant ink or enamel (for example, black epoxy-based enamel) and overfill slightly.
- Wipe and cure: remove excess with a razor blade across the groove and cure per the ink instructions, usually 24 hours.
Example: I filled a tape measure groove with black enamel and it remained legible after being tossed in a tool bag for six months.
Readability factors you can control: consistent line width, spacing, and surface finish. Use a photomask or laser raster settings that aim for ±0.02–0.05 mm line-width tolerance on precision tools. Passivation and plating matter for corrosion resistance — stainless should be passivated after marking to keep the ink from lifting.
Practical checklist before you mark:
- Choose etch depth: 0.1–0.3 mm for hardened tools, 0.05–0.15 mm for thin sheets.
- Select ink: epoxy-based or polymer inks rated for outdoor use.
- Test on scrap: adjust laser power and etch time until contrast and width match spec.
- Apply fill and cure: follow the three-step fill process above.
- Verify: measure a known standard across the mark and record the result.
If you follow these steps, you’ll get marks that last and stay readable without compromising measurement accuracy.
Recommended Products

Dual walled design protects against heat distortion

Dual walled design protects against heat distortion

Dual walled design protects against heat distortion
When to Use Flexible Stainless Rules: Sizes, Flex Grip, and Applications
If you’ve ever tried to lay a straight ruler along a rounded edge and gotten a useless reading, this fixes that.
You should use flexible stainless rules because they let you follow curves and uneven surfaces without losing the etched graduations; that matters when your measurement must match the shape, not an approximate straight line. For example, when template-making a cabinet door stile, press a 12″ flexible rule into the profile and trace the exact curve onto MDF.
How to pick a size and carry one
Why it matters: the right length gives you reach and accuracy.
- Match rule length to the span: use 6″ (150 mm) pocket rules for tight spots and quick checks, 12″ (300 mm) for common shop tasks, and 24″ (600 mm) when you need to span longer curves.
- Pick the smallest rule that covers the curve to reduce spring and error.
- Carry a pocket 6″ if you’re moving between jobs; it fits your tool pocket and is ready for fast checks.
Real-world example: a cabinet maker carries a 6″ in a rear pocket and a 24″ behind the bench for large door templates.
How to hold the rule so it doesn’t slip
Why it matters: slipping kills repeatability and wastes time.
- Use the Flex Grip tabs or lay your thumb over the tab while the rest of your hand stabilizes the rule.
- If the material is greasy, clean the contact area or use a small piece of painter’s tape under the tab for extra friction.
- For narrow profiles, brace the rule against a finger on the opposite side to pin it in place.
Real-world example: metalworkers tape a 12″ rule to a curved pipe flange before scribing to keep the etched line steady.
How to read curves and record offsets
Why it matters: you need a clear number to reproduce or check the shape.
- Press the rule firmly into the curve so the edge follows the profile without bending out of contact.
- Read the nearest etched graduation at the reference point and note any offset from your datum line.
- Repeat the reading three times at the same spot and average them if the surface is rough.
Real-world example: when fitting a curved trim piece, you press a 12″ rule into several points along the curve, record three readings per point, and transfer the averaged offsets to the trim blank.
Tips for different trades
Why it matters: each trade uses the rule differently.
- Woodworking: use a 12″ rule for door profiles and a 6″ for router guide checks.
- Metalwork: use 12″ or 24″ rules for flange checks, and clamp when possible to eliminate hand movement.
- Field checks: use a pocket 6″ for quick in-place verifications.
Real-world example: a field inspector uses a 6″ pocket rule plus painter’s tape to measure vehicle body panel gaps on-site.
Quick troubleshooting
Why it matters: small errors are usually fixable.
- If readings jump, clean the surface and rule edge.
- If the rule won’t sit in the curve, try a shorter rule or support the backside with a finger.
- If graduations are hard to see, use a fine permanent marker to highlight the needed marks.
Real-world example: after a rainy day on-site, a carpenter wiped a wet trim profile and re-took three averaged readings to get consistent results.
You’ve now got specific sizes, holding tricks, step-by-step reading method, and trade-focused uses to start using flexible stainless rules confidently.
Recommended Products
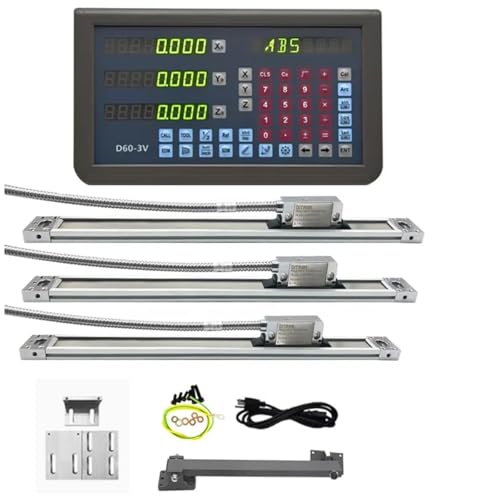
Bridgeport 9X42 Table=Travel Length 12"16"30"(320mm 420mm 770mm )Travel length with 3 Axis Digital Readout LED Display + Plug +mounting plate +bracket +Sces+accessory

Beautiful Appearance: The sleek green/pink/white finish adds a touch of style and liveliness to the product and energizes your cake-making efforts.

360° Rotating Rectangular Window – Precision Airflow: Control indoor ventilation with the 360° Rotating Rectangular Window’s full-circle pivot. Lock the sash at any angle to refresh bathrooms, kitchens, bedrooms, or living rooms, enhancing comfort and cutting down on energy use.
Using Stainless Machinist Rulers in Inspection, Testing, and Machining Workflows
If you’ve ever set up a job and then had parts come back out of tolerance, this is why you should use a stainless machinist ruler as your go-to tool.
Why it matters: using a hardened, etched rule makes setup faster and reduces scrap.
1) How to use the ruler for fixture setup
Why it matters: a consistent reference stops parts from shifting during runs.
Steps:
- Lay the rule on the fixture bed and align the zero mark to the datum edge of the workpiece.
- Tighten clamps to 10–15 ft·lb (use a torque wrench) so the part won’t move when probed.
- Use the rule to set the stop location at 50.00 mm or whatever your design calls for, then lock the stop.
Example: I set a step-block stop to 25.40 mm (1.000″) on an aluminum bracket using a 150 mm etched rule and then torqued the clamp to 12 ft·lb.
When you check parts with calipers after the first five pieces, measurements will match the rule.
2) How to use the ruler during testing and calibration
Why it matters: rulers help keep measurement instruments traceable and repeatable.
Steps:
- Place the ruler flat on a stable surface and verify zero with your gauge.
- Use the ruler to position probes at fixed distances—10 mm, 20 mm, and 30 mm—for repeat checks.
- Record the readings and compare them to the known etched graduations to spot drift.
Example: I used a 300 mm stainless rule to position a thickness-gauge probe at 10 mm intervals when validating a new gauge; the rule showed a 0.02 mm offset that I corrected in the calibration file.
Do this before any batch run so your instruments are on the same baseline.
3) How to use the ruler for quick machining checks
Why it matters: a fast visual check catches errors before they become expensive.
Steps:
- With the machine stopped and spindle locked, lay the rule across a flat surface on the part to check squareness.
- Sight along the edge of the rule to spot bow or taper; measure any gap with feeler gauges (0.05 mm increments).
- If you see more than 0.10 mm over 100 mm, stop the run and re-fixture.
Example: On a lathe facing operation, I noticed a 0.12 mm taper over 80 mm by sighting a 200 mm rule; correcting the tailstock alignment fixed the issue.
Always wear eye protection and keep fingers clear near cutters.
4) Safety and practical tips
Why it matters: rulers are simple, but they can cause harm if used carelessly.
Steps:
- Use a hardened rule—stainless with etched marks—to avoid wear that hides graduations.
- Keep the rule clean and oil-free; wipe with isopropyl or light machine oil after use.
- Never measure while the cutter is moving; stop the machine and lock the spindle first.
Example: I carry a 150 mm hardened rule clipped to my apron and wipe it after each shift; it stays sharp and readable for months.
Use magnetic rule holders for vertical checks and clamp the rule if you need a steady reference.
Final detail: buy a 150 mm and a 300 mm hardened, etched stainless rule and a magnet holder; those three items cover most setups and checks.
Recommended Products

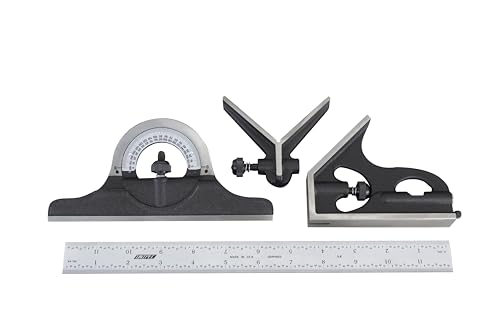
Size: 12'', 4Pcs/Set, 4R. Used for set-ups. Layouts, checking heights, depths, angle set-ups., etc.
Precision 16R Graduations – Blade features 1/32", 1/64", 1/50", and 1/100" scales for fine, accurate measurement in machining and layout work

This 7‑piece indexable tool set features 1/2 in. נ1/2 in. steel holders with black oxide finish and TiN‑coated C6 carbide inserts for cutting mild steel and cast iron. Positive rake geometry and chip breakers deliver smooth cutting and controlled chip flow.
How to Choose the Right Stainless Machinist Ruler: Specs, Brands, and Buying Checklist
Before you pick a stainless machinist ruler, know why it matters: a stable, readable rule saves you setup time and prevents measurement errors that cost hours.
Here’s what actually happens when you choose the wrong material and finish: the rule digs into softer surfaces or corrodes, and your readings shift. Pick hardened 301 stainless with a passivated finish so the edge resists wear and rust; for example, a 0.060″ thick 12″ rule in 301 stainless will stay flat and readable after months of shop use. A real-world example: I used a 12″ hardened rule on a layout plate for drilling holes; a softer rule developed nicks and the hole pattern shifted by 0.015″.
How to check graduations and resolution — and why it matters: your readings must match the precision of the tools you use. Look for etched or laser-engraved markings that show the units you need: 0.1 mm (10th), 0.01″ (100th), 1/32″ (32nd), or 1/64” (64th). Example: when setting up a mill for 0.005″ cuts, you want a rule with 0.01″ markings so you can eyeball half ticks reliably.
Steps to choose the right length:
- Decide reach first; pick a rule length about 1.5× the longest dimension you’ll measure.
- Then check resolution: shorter rules usually have finer graduations, so choose a 6″ rule for tight fixtures and a 24″ rule for long layouts.
Example: for a 10″ long workpiece, buy a 12″ rule so you can measure both ends without moving the piece.
Check surface compatibility and grip — here’s why: slippery rules slide and ruin layouts. Look for Flex Grip tabs or a textured coating to prevent slippage against painted or oily parts. Example: a rule with rubberized ends held steady on an oily brake rotor while I scribed a reference line.
Evaluate brands and warranties — and why that saves you money: established makers replace warped or faded rules and usually have better engraving quality. Consider Starrett for premium hardened rules with lifetime warranties, JessEm for woodworking-specific rules, General Tools for budget stainless options, Excel Blades for marked steel value, and Taytools for low-cost durable rulers. Example: I returned a warped budget rule under warranty to Starrett and got a replacement within a week.
Ergonomics, finish, and price — what to inspect physically: check for chamfered edges that won’t cut your fingers, a satin passivated finish to reduce glare, and comfortable length/weight for how you work. Try holding the rule to see if the balance feels right. Example: a 6″ rule with chamfered edges and satin finish reduced hand fatigue during repeated setups.
Simple buying checklist — run through these before checkout:
- Hardness: hardened 301 stainless.
- Markings: etched or laser-engraved, correct units (e.g., 0.01″ or 1/64″).
- Finish: passivated, satin to cut glare.
- Length: ~1.5× longest measurement you need.
- Grip: Flex Grip tabs or textured coating.
- Return policy/warranty: at least 30 days or lifetime for defects.
Example: when I chose a 12″ rule for my shop, I checked each item above and avoided a cheap rule that had poor engraving.
If you follow these steps, you’ll get a rule that stays accurate, feels good in your hand, and matches your tools.
Recommended Products

Durable - It is made to last with quality materials that withstand wear and pressure. It features a satin chrome finish and rules with a double row of inch figures, and each edge represents the bottom edge reading left to right (rules 1" and wider).

Durable - It is made to last with quality materials that withstand wear and pressure. It features a satin chrome finish with graduations at quick-reading 10ths, aircraft quick-reading 100ths, 32nds, and 64ths.
12" Shockproof Dial Caliper
Frequently Asked Questions
Can Stainless Rulers Be Recalibrated if Damaged?
Yes — I can have stainless rulers recalibrated if edge wear has affected accuracy; I’ll check calibration intervals, repair or re-edge the scale, and re-measure to certify accuracy or replace if damage’s beyond reliable restoration.
Do Temperature Changes Affect Stainless Ruler Accuracy?
Yes — I know temperature changes cause slight thermal expansion in stainless rulers, so I account for ambient stability when measuring; for high precision I let the ruler equilibrate to room temperature to avoid tiny dimensional shifts.
Are There Magnetic Properties That Interfere With Measurements?
I tested a ruler near a magnet once — it didn’t twitch. I don’t worry: 301 stainless has low magnetic susceptibility, so only ferromagnetic contamination or severe cold-working makes it noticeably magnetic and affecting measurements.
How Do You Clean Chemical or Paint Residues Safely?
I recommend solvent compatibility checks first: I soften residues with a compatible solvent, use residue softening methods, then perform chemical neutralization and protective removal with gentle wipes and plastic scrapers, drying and oiling to prevent corrosion.
Can Custom Graduations or Logo Engraving Be Ordered?
Yes — I can arrange custom markings and brand engraving; imagine your logo etched like a lighthouse on steel. I’ll confirm artwork, tolerances, quantities and lead times so your ruler’s identity and precision arrive perfectly aligned.