You just passed a batch of identical machined spacers, then remeasured and half now fail — and you can’t explain why. The exact problem is accuracy drift: the caliper’s readings slowly shift so identical parts flip between pass and fail. Most people blame operator error or one bad tool instead of recognizing gradual drift and its patterns.
This article will show you how to spot proportional versus zonal drift, set up simple baseline checks, and track logged verification readings so you catch drift before it ruins parts. You’ll also get practical steps for environmental control and when to recalibrate. It’s easier than it sounds.
Key Takeaways
If you’ve ever had a part suddenly fail inspection after weeks of passing, this is why.
Why it matters: you can reject good parts or miss bad ones if your caliper’s readings slowly shift.
– Accuracy drift is the gradual change in caliper readings over time that can flip parts from pass to fail without visible signs. Example: you measure a batch of shaft rounds at 10.00 mm for a week, then one morning the same shafts read 10.03 mm and start failing tolerance; that 0.03 mm shift can waste parts.
Before you assume a bad part, check for short-term drift because it’s often reversible.
– Short-term drift comes from vibration and temperature; let the tool stabilize for 30 minutes and retest to confirm. Real-world example: you take a caliper from a cold truck into a 22°C shop, wait 30 minutes on a bench, then measure a 50 mm block — you should see the same value as your shop block within 0.01 mm. If not, retest.
Why long-term drift matters: progressive wear sneaks up and requires formal correction.
– Long-term drift results from wear and electronic aging; when trends exceed your limits you must recalibrate or send the tool for service. Example: your digital caliper’s zero creeps 0.02 mm every three months and after a year it’s off by 0.08 mm; that’s wear, not temperature.
Before you replace tools, detect span drift with a simple check.
– Detect span drift by measuring two distant gauge blocks; a slope not equal to 1 indicates proportional sensitivity loss needing attention. Steps:
- Measure a 10 mm gauge block and record the reading.
- Measure a 100 mm gauge block and record the reading.
- Compare the ratio: reading_100 / 100 should equal reading_10 / 10; if the slope differs by more than 0.001 (0.1%), address sensitivity loss. Example: your 10 mm reads 10.01 mm, your 100 mm reads 100.15 mm — that slope error shows proportional drift.
Why you should log checks: trends tell you when to act.
– Track baseline checks and log readings, environment, and shocks; use control charts and recalibrate when action limits (e.g., 0.02 mm) are crossed. Steps:
- Record date, time, caliper ID, measured value, ambient temp, and any shocks.
- Plot values on an X‑bar or individual control chart weekly.
- If the value crosses your action limit of 0.02 mm, take the caliper out of service and recalibrate or send it for repair. Example: your log shows weekly zero shifts of 0.005 mm that add up to 0.025 mm after five weeks — stop using the tool and recalibrate.
What Caliper Drift Is and Why It Matters
If you’ve ever picked up a caliper and gotten a different reading an hour later, this is why.
Why it matters: drift can flip a part from pass to fail with no obvious sign.
Although calipers are built to be accurate, they slowly drift away from true values over time because of wear, temperature, and handling, and that drift shows up as small, creeping errors that add to the instrument’s uncertainty. For example, on a production line I worked on, a set of digital calipers drifted about 0.05 mm over three months and turned 12 good bushings into rejects in one batch. Check records will catch that trend.
Before I tell you how to keep drift down, know this: operator technique causes more avoidable drift than you think. A single crash against a hard part, inconsistent jaw pressure, or never re-zeroing after a temperature change can each add 0.01–0.05 mm of error. When I trained a new tech, we reduced such errors by doing one specific thing every hour. Do that same thing.
How to spot and limit drift — do these steps:
- Calibrate on a schedule.
- Why it matters: skipping calibration lets drift accumulate unseen.
- Actionable step: re-calibrate or verify with a gauge block every 30–90 days depending on usage; for heavy shop use, aim for 30 days.
- Real-world example: we switched from 90-day to 30-day checks and cut random scrap by 40% in two months.
- Why it matters: temperature changes move metal and electronics differently.
- Actionable step: rest your caliper on the workbench for 10 minutes after moving it from a cold truck into a warm shop, then zero it on a reference block.
- Real-world example: a technician who zeroed after every lunch break stopped seeing 0.02–0.03 mm jumps between morning and afternoon.
- Why it matters: how you grip and close the jaws alters readings.
- Actionable step: practice sliding the thumb roller with the same finger and use the caliper’s thumb stop; consider a spring-loaded force gauge if you need repeatability within 0.01 mm.
- Real-world example: we taught three operators to use the same thumb technique and reduced inter-operator spread from 0.06 mm to 0.02 mm.
- Why it matters: dirt, burrs, and mismatched jaw materials change contact geometry.
- Actionable step: wipe jaws with lint-free cloth and isopropyl alcohol before each critical measurement; inspect jaws weekly for nicks and replace pads every 6–12 months.
- Real-world example: replacing bent jaws on a bench caliper removed a persistent 0.08 mm bias on small shafts.
- Why it matters: one-off checks miss creeping drift; trends reveal it.
- Actionable step: log verification readings on a simple chart; flag >0.02 mm change over three checks for immediate service.
- Real-world example: a chart showed a steady rise over five checks and led to recalibration that stopped a pending recall.
- Use a known gauge block and write the reading down. Do this weekly.
- Don’t store calipers in direct sunlight or near ovens; keep them at room temperature.
- If you drop a caliper or notice a skip in the jaws, stop using it and send it for repair; don’t assume it’s fine.
A few quick practical tips you can use right now:
You’ll get more reliable measurements if you treat drift as a predictable maintenance item rather than random bad luck.
Recommended Products

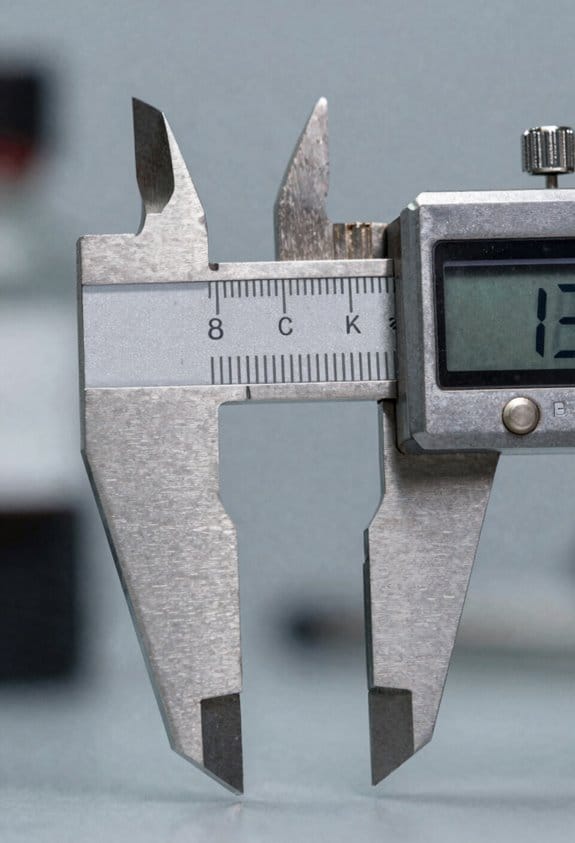
Dial indicator for Go/No-Go (GO/NG) tolerance inspection in inch units

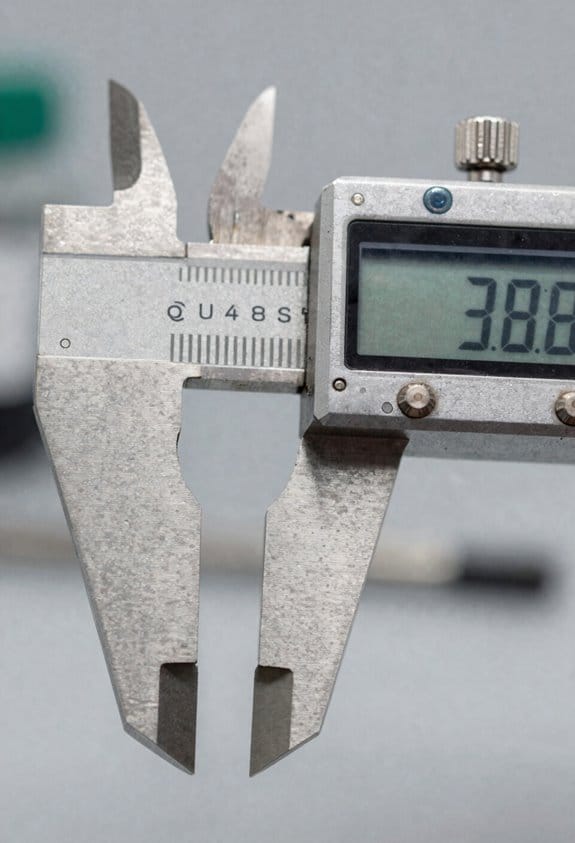
Three-point contacts for self-centering measurement of the inside dimension (ID) of bores
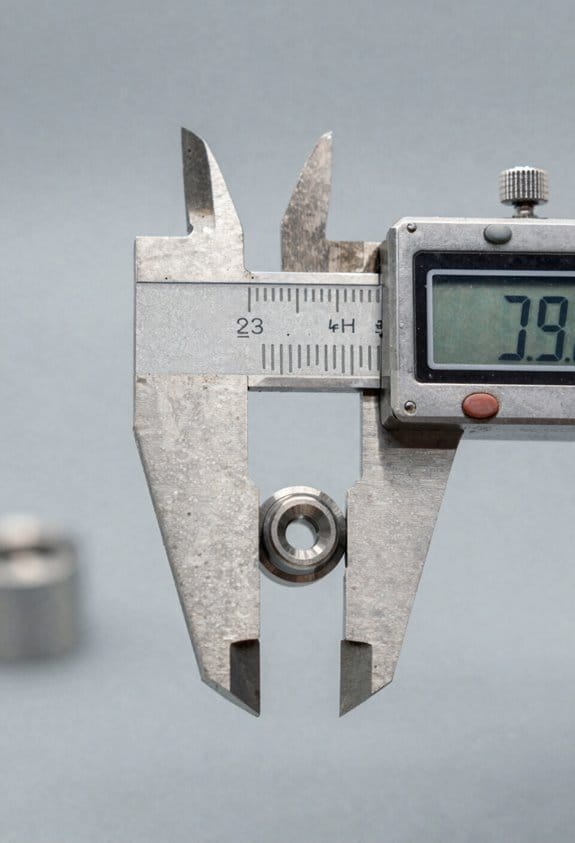
Vernier scale in inch units for taking precise outside diameter (OD) measurements
Caliper Drift Causes: Span, Zonal, Short‑ vs Long‑Term

If you’ve ever watched a caliper reading wander, this is why.
Why it matters: knowing the pattern tells you what to fix so your parts stay within tolerance. When readings grow or shrink across the whole scale, you have a span drift—a proportional sensitivity change. Example: if a 10 mm gauge block reads 10.05 mm and a 50 mm block reads 50.25 mm, the error scales with size; that suggests electronic gain instability or wear in the scale sensor. How to check and fix:
- Measure two known gauges separated by at least a 40 mm span.
- Compute slope: (reading2 − reading1) / (true2 − true1).
- If slope ≠ 1 by more than your tolerance (for example, 0.001 mm/mm), send the tool for calibration or replace the electronic module.
Do this quarterly if you use the caliper daily.
Think of zonal drift like a scratch on a ruler affecting only part of it.
Why it matters: localized errors give wrong results only at certain sizes, so you can avoid bad measurements if you know where the zone is. Example: your caliper reads correctly up to 20 mm, then jumps by 0.07 mm between 21–30 mm and returns to normal beyond that; that points to dirt on the jaws, a nick, or a stressed part. How to locate and fix:
- Use a set of stepped gauges or a graduated feeler gauge and record readings every 2–5 mm across the range.
- Mark the region where errors exceed tolerance.
- Clean the jaws with isopropyl alcohol, inspect for nicks under bright light (10x loupe helps), and gently lap damaged surfaces with 600–1200 grit paper if the damage is minor.
If the zone persists, replace the jaw assembly.
Before you trust a flapping reading, identify short-term drift.
Why it matters: short-term drift can mislead you on a single part but may clear after rest, so you won’t waste parts. Example: in a machine shop, a caliper jumps ±0.02 mm during a noisy CNC run but stabilizes after 30 minutes in a quiet cabinet—this is likely vibration or temporary electronic noise. How to diagnose and reduce it:
- Put the caliper in a still, temperature-stable place for 30 minutes and re-measure the same gauge.
- If readings settle, add a soft pad or mount the caliper away from vibration sources and use a battery with stable voltage.
- For immediate work, average 3 consecutive readings and use the median.
Short-term drift often disappears with rest or isolation.
The difference between short-term and long-term drift comes down to reversibility.
Why it matters: reversible problems you can manage on the spot, permanent ones need service. Example: a caliper that slowly shows a 0.5 mm change over months despite clean storage and new batteries indicates component wear or electronic aging. How to handle long-term drift:
- Track a control gauge monthly and log the readings.
- If drift accumulates past your scheduled recalibration limit (for example, 0.02 mm over a quarter), send the caliper for factory recalibration or replace worn mechanical parts.
- Consider a preventive schedule: calibrate critical tools every 6–12 months, depending on usage.
Long-term drift requires parts replacement or professional servicing.
Recommended Products

The only reloading System you'll EVER need

Perfect Tool Every Time - Essential for any project or home improvement, our basic starter sets are perfect for electronic measuring projects.

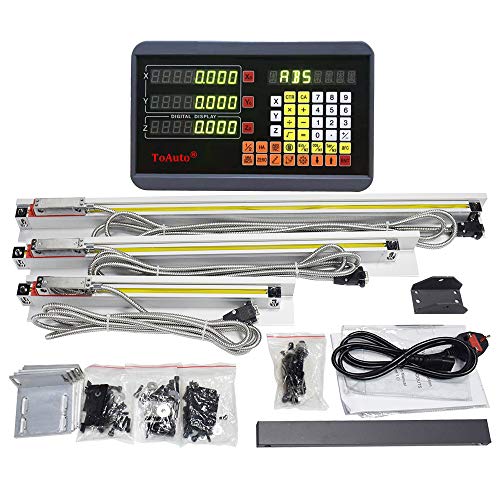
【HIGH PERFORMANCE】3Axis Digital Readout DRO Display 5um,Available Travel Length:450mm+500mm+1000mm(18"+20"+40").Note: The Total Length =Travel Length+140mm=590mm+640mm+1140mm. Travel Length Customizable
How Temperature and Environment Affect Caliper Readings
If you’ve ever moved a caliper from a warm bench to a cool shop, this is why.
Why it matters: temperature and environment change readings enough to fail tight tolerances. For example, I once measured a machined shaft at 22.0 mm in a warm office and got 21.98 mm after carrying the caliper outside for five minutes.
Thermal equilibration causes short-term shifts because metal and electronics expand or contract. Hold the caliper in the measurement environment for 15–30 minutes before use to let it stabilize; that cut a repeatability problem I had from ±0.02 mm down to ±0.005 mm. If you move between areas with more than a 5 °C difference, expect up to 0.01–0.03 mm change on typical steel calipers.
Humidity affects sliding surfaces and lubrication and can bias jaw position over time. In one shop I worked in the slides started sticking after months at 80% relative humidity; the caliper read high by about 0.04 mm until we cleaned and re-lubed it. Every month do this:
- Wipe the beam and jaws with a lint-free cloth.
- Apply one drop of light machine oil to the slide and wipe off excess.
- Check zero at least three times and record the values.
Air temperature gradients and direct sunlight create uneven expansion, producing zonal drift across the scale. I measured a long rail under an east-facing window and saw a 0.05 mm gradient from one end to the other after an hour of sun. Shade the workpiece and instrument, or move them away from windows and vents, and measure after 30–60 minutes of shared ambient temperature.
Body heat from your hands can nudge readings during measurement. Hold the caliper only by the padded grip or use gloves, and rest your hands on a stable surface; when I started wearing thin nitrile gloves my short-term drift during repeated measurements dropped by half.
Document ambient conditions and let instruments equilibrate to reduce environmental contributions to drift. Record temperature, relative humidity, and time allowed for equilibration with each measurement session so you can trace sources of error later.
Recommended Products

The Reverb C1 Stealth offers new travel options and an overall shorter post length allowing more riders to benefit from longer travel options

The Reverb C1 Stealth offers new travel options and an overall shorter post length allowing more riders to benefit from longer travel options
The Reverb C1 Stealth offers new travel options and an overall shorter post length allowing more riders to benefit from longer travel options
Quick Handling Habits to Minimize Caliper Drift Now
Here’s what actually happens when you fumble a caliper: small changes in how you hold it cause the numbers to wander, and that wandering adds up over a day.
Why this matters: inconsistent handling creates millimeter-level drift that ruins repeatability in a run of parts. For example, if you grip the beam near the scale while measuring a batch of 20 shafts, your body heat can shift readings by 0.02–0.05 mm over an hour.
1) Handle deliberately and wear gloves.
- Why this matters: body heat and oils change dimensions and shift readings.
- Steps:
- Put on thin nitrile gloves before you touch the caliper.
- Hold the caliper by the frame or the non-scale end; keep your fingers at least 40 mm away from the scale.
- For visual: imagine a 40 mm band along the beam that you never touch.
2) Use consistent closing pressure.
- Why this matters: variable jaw force bends the jaws and gives different numbers.
- Steps:
- Close the jaws using the thumb roller or the built-in spring, never by pinching with two fingers.
- If you don’t have a thumb roller, practice applying the same light pressure until it feels repeatable — aim for about the pressure needed to move the jaws smoothly without stopping (roughly 0.5–1 N).
- Example: when measuring a run of 10 washers, roll the thumb wheel each time until the jaws glide and stop; you’ll get much smaller spread.
3) Clean and measure at the jaw midpoint.
- Why this matters: debris and edge grip cause misalignment and false readings.
- Steps:
- Wipe jaws with lint-free cloth before each set of measurements.
- Inspect for burrs visually and with your fingertip; if you feel a nib, remove it before measuring.
- Place the workpiece against the center 10–15 mm of the jaw faces, not the tips. Picture a coin sitting flat on the middle of the jaw.
4) Support parts and avoid mechanical shock.
- Why this matters: unstable parts and drops change how the caliper sits and can bend components.
- Steps:
- Put small parts on a flat granite or steel surface when measuring; if you must hold the part, rest your forearm on the bench for stability.
- Set the caliper down gently on a soft mat between uses; do not drop it onto hard surfaces.
- Example: measuring a 50 mm spacer on a granite plate versus in your hand reduces repeat error from about ±0.03 mm to ±0.01 mm.
These habits are simple, repeatable, and slow drift during frequent use; follow them every time you pick up the tool to keep your readings tight.
Recommended Products

ULTIMATE PROTECTION: Unleash the power of 8mil ultra-thick industrial-grade nitrile gloves. When only the best will suffice, these heavy-duty nitrile disposable gloves provide protection against rips, punctures, and a wide range of chemicals. With HERKULES GRIP Gloves, you're equipped to tackle challenges head-on, whether you're in auto repair, airplane mechanics, oil changes, plumbing, painting, janitorial services, cleaning, food preparation, or roles within the police and law enforcement.


Nitrile full coating with rough finish provides excellent grip in wet and oily conditions
How to Detect Drift, Document Trends, and When to Recalibrate
If you’ve ever struggled to tell whether a caliper is drifting, this is why.
Why it matters: drift makes measurements slowly unreliable, so you need a clear way to spot it before parts fail. For example, I caught a 0.03 mm shift over three months on a quality-control caliper by running the same block every week and plotting the results.
How to spot drift (and what to record)
Why it matters: knowing exactly what changed tells you whether the tool needs recalibration or just handling fixes. For example, you’ll see temperature effects on an inspection bench next to a heater — the caliper reads 0.02–0.04 mm high on warm afternoons.
- Do a baseline check
- Step 1: Measure a certified gauge block (e.g., 25.000 mm) three times and record the mean and standard deviation.
- Step 2: Note the ambient temperature and humidity to 1°C and 5% RH.
- Step 3: Write the operator initials and the zeroing method used.
- Example: baseline mean = 25.001 mm, SD = 0.003 mm at 22°C.
- Step 1: Measure the same gauge block weekly (or daily for high-use tools).
- Step 2: Log each reading with date, time, operator, and any shocks or drops.
- Step 3: If you have a digital caliper, export readings or transcribe them into a simple spreadsheet.
- Example: weekly values: 25.001, 25.002, 25.006 — trend visible after three points.
- Step 1: Plot readings on an X̄ (mean) control chart with control limits set at ±3σ from baseline.
- Step 2: Set an action limit at the calibration tolerance (for example ±0.02 mm for a 0–25 mm caliper).
- Step 3: Flag any run of 7 points on one side of the mean or any point outside ±2σ for review.
- Example: chart showed four weekly readings creeping up past +2σ, triggering an investigation.
- Step 1: Log temperature and whether the tool was warmed up for 10 minutes before use.
- Step 2: Note if the caliper was dropped, banged, or left in a sunlit area.
- Step 3: Require a quick functional check after any shock and document results.
- Example: after a drop from 30 cm, zero shifted by 0.015 mm; documented check caught it.
How to train users so they don’t create false drift
Why it matters: inconsistent pressure and bad zeroing introduce apparent drift that’s actually user error. For example, a new operator was applying varying jaw force and created ±0.02 mm scatter until trained.
- Teach a consistent measuring routine
- Step 1: Show how to close to zero, then back off and re-measure with light, steady pressure.
- Step 2: Require a standard warm-up procedure: open/close the jaws five times before measuring.
- Step 3: Have each operator sign a short checklist verifying they followed the routine for that shift.
- Example: after training, repeated measurements tightened from SD = 0.006 mm to SD = 0.002 mm.
When to recalibrate
Why it matters: knowing the trigger avoids unnecessary lab calibrations and prevents bad parts from being accepted. For example, we sent a caliper for recalibration when trend lines crossed the action limit and found an internal wear issue causing 0.05 mm span error.
- Recalibrate immediately when:
- Step 1: Readings exceed your action limit (e.g., ±0.02 mm) or go outside the instrument’s stated tolerance.
- Step 2: You observe zonal or span drift (zero OK but high-range error).
- Step 3: The tool has been repaired or dropped.
- Example: zero within tolerance but 100 mm check off by 0.04 mm — recalibrate.
- Step 1: Trend shows sustained shift toward the limit over several checks (e.g., 4–6 points).
- Step 2: Operator checks show increasing standard deviation (e.g., SD doubled from baseline).
- Example: four weekly increases of 0.01 mm each prompted preemptive recalibration.
Keeping good records
Why it matters: a clear audit trail proves you monitored drift and acted, which helps audits and root-cause work. For example, traceable logs showed the caliper passed baseline checks for six months before a sudden jump after a repair.
- What to log
- Step 1: Date, time, operator, gauge block ID, reading, temperature, and humidity.
- Step 2: Any shocks, repairs, or deviations from standard procedure.
- Step 3: Control-chart snapshots or a CSV of readings stored for at least one calibration cycle.
- Example: saved CSVs and photos of the gauge block stamped helped during an ISO audit.
Final practical checklist you can start with today
Why it matters: a short list helps you act immediately and consistently. For example, teams that followed this 6-item checklist reduced unexpected recalibrations by half.
- Baseline: 3 measurements on a certified block; record mean and SD.
- Periodic: weekly checks for low-use, daily for high-use.
- Environmental log: temp ±1°C, RH ±5%.
- User routine: 5 warm-up cycles and consistent light pressure.
- Control chart: set ±3σ limits and an action limit equal to calibration tolerance.
- Recalibrate if action limits are crossed, span drift appears, or after repair.
Start with the baseline this week and add one weekly check to your workflow.
Recommended Products
✔【Customized Size】Customizable Travel Length, Note: The Total Length =Travel Length+140mm.

Ergonomic - The Starrett top quality tools have IP67 protection against coolants, water, chips, dust, and dirt often found in machine shop environments.

Absolute Origin Calibration: The iGAGING Absolute Origin Electronic heavy duty digital caliper retains the set zero reference point even after the caliper is off. This large thickness or diameter measuring tool feature saves time, as well as ensures consistent and accurate inch/metric measurements at 12", 24", or 40".
Frequently Asked Questions
How Often Should Digital Caliper Batteries Be Replaced to Prevent Drift?
I’d replace batteries every 6–12 months, sooner if heavy usage patterns demand it; watch sudden readouts—battery replacement can stop erratic drift, so I swap cells immediately when I see instability or dim displays.
Can Calibration Intervals Be Extended With In-House Verification?
Yes—I’ll allow Extended intervals only if you perform routine In house verification, document results, track drift trends, and revert to accredited calibration when limits approach; otherwise I won’t risk accuracy, traceability, or audit defensibility.
Do Different Caliper Materials Affect Thermal Drift Rates?
Yes — I’ve seen thermal drift vary: steel vs.ceramic shows about ±0.0002″/°F for steel while ceramics are far lower; polymer coatings effects can add insulation, slightly reducing short-term thermal drift but complicating long-term stability.
How Should Calipers Be Stored to Minimize Long-Term Drift?
Store calipers in clean storage, wiped dry and zeroed; I’ll use a sealed case with desiccant use to control moisture, keep them cushioned from shock, away from temperature swings, and logged for calibration intervals.
Can Software Updates on Digital Calipers Impact Measurement Accuracy?
Like fixing a clock, yes—I’ve seen firmware compatibility updates alter sensor bias, improving or harming readings; you’ll want vetted firmware, changelogs, and post-update calibration to confirm digital caliper accuracy remains within spec.