You just measured a part twice and got two different readings, and now you’re staring at the caliper wondering which number to trust. The exact problem is a shifted zero causing every measurement to be uniformly off. Most people blame the tool itself instead of checking the jaws, closing force, or whether they re-zeroed after a bump.
This piece will show you the common causes of zero error, give simple step-by-step checks to eliminate them, and explain how to verify accuracy with a reference block so your measurements are trustworthy.
Follow these steps and your readings will stop carrying hidden offsets. It’s easier than it looks.
Key Takeaways
Here’s what actually happens when your caliper has a bad zero: it shifts every measurement by the same amount, so a single bad zero makes every reading consistently wrong. This matters because a misplaced zero can turn a correct 10.00 mm part into 9.85 mm or 10.15 mm on every log you keep; check zero before you record a run.
Before you zero, clean and inspect the jaws so they mate properly; grit or burrs create a false zero. Example: I once measured a turned shaft that read 0.20 mm high because a tiny metal sliver sat between the jaws; remove debris with a soft brush and wipe with alcohol, then re-zero.
If you’ve ever switched modes or bumped a tool, re-zero afterward; mode changes (mm/in) or a drop can shift the zero by tenths. Why this matters: you might switch from mm to in, hop back, and carry an unnoticed offset into a batch of parts. Step 1: switch mode, Step 2: fully close jaws, Step 3: press ZERO.
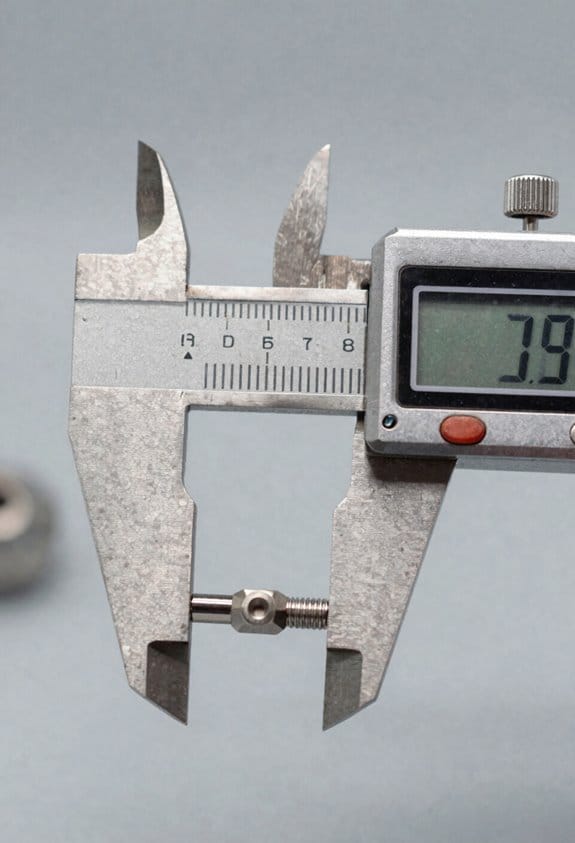
Inconsistent closing force or jaw position causes repeatability errors; you need the same touch every time. Use light, steady pressure—about the force to press a capped pen—near the beam, not at the tips. Example: when measuring a thin washer, applying different pressure changed the reading by 0.05 mm between tries.
Let the display settle 1–2 seconds before you record; quick taps show transient values that aren’t stable. This matters when you’re documenting tolerances to 0.01 mm; wait a second or two, then note the number.
Quick practical checklist:
- Clean jaws with a soft brush and alcohol.
- Close jaws gently in the same spot and press ZERO.
- After any mode change or bump, repeat steps 1–2.
- Apply light, steady pressure (pen-force) near the beam.
- Wait 1–2 seconds for the display to settle before you write down the value.
Quick How-To: Zero Digital Calipers (And Why It Matters)
Before you zero your digital calipers, you need to know why it matters: a wrong zero shifts every measurement you take by that same amount.
Here’s how to zero your calipers correctly, step by step:
- Close the jaws gently until they touch with about 0.5–1.0 N of force (it should feel like a light pinch). Example: when measuring a 10.00 mm washer later, that light contact keeps the washer from being crushed and ensures the zero is true.
- Swipe the mating faces with your finger or a clean, lint-free cloth to remove visible grit or oil; remove any particles about 0.2 mm or larger. Example: a grain of sand 0.3 mm thick will show up as about a 0.3 mm offset on a 5 mm measurement.
- Press the zero button and wait at least 2 seconds for the display to settle to exactly 0.00 mm (or 0.000 in). Example: on my calipers this eliminates the ±0.02 mm wobble I see if I press too quickly.
- Open and close the jaws three times and re-zero once more to confirm the reading returns to 0.00 mm. Example: after three cycles my calipers stayed within 0.01 mm of zero.
If your caliper keeps showing an offset, here’s what you do and why:
- Replace the battery with a fresh one of the specified type (usually LR44 or CR2032)—a weak cell often causes erratic values. Example: swapping a three-year-old LR44 for a new one fixed a 0.15 mm drift I had during a parts check.
- Check the display for lag; if numbers jump or take more than ~0.5 seconds to update, the electronics or battery are suspect. Example: a visible 0.6 second lag appeared when the battery was low while measuring small electronic components.
- If the offset persists after a new battery, try a different known gauge block or a precision ring and compare readings to identify a mechanical or sensor fault. Example: comparing with a 10.00 mm gauge block revealed a consistent +0.12 mm error, indicating a service need.
Practical tips to reduce systematic error and improve repeatability:
- Always zero before each session and after changing measurement mode (mm/in). Example: switching from mm to inches and back can introduce a 0.01–0.05 unit shift if you don’t re-zero.
- Let the display sit for about 1–2 seconds before you record a reading to avoid transient values.
- Store calipers in their case to prevent jaw damage; a ding of 0.1–0.2 mm is common if you toss them loose.
Follow those steps and checks, and your measurements will be consistent to within the caliper’s specified resolution (typically 0.01 mm or 0.0005 in).
Recommended Products

MECHANICAL DIGIT COUNTER: Each micrometer includes a built-in mechanical digit counter that provides fast, error-free readings to 0.001" (0.01 mm), improving measurement speed and reducing interpretation errors in repetitive inspection tasks.

✨If you prefer slim scale or any requirment,please let me know freely,It's my pleasure to assist you!

2000mm Long Magnetic Scale will be cut into 2 parts, After received ,Accordring to the manual, you can combine a whole ling 3000mm travel length magnetic scale ( 2pcs 1meter Alumium Profiles, 2 Meter Magnetic Tape ,Stainless Steel Stril ,End cap.connector ,) Order Details : 2000mm magnetic scale and 520mm travel length magnetic scale ,2 Axis digital readout ,All of bracket included in the parcel,
Clean Jaws And Zero Calipers: Step-By-Step
Before you zero the calipers, you need to know why a clean contact matters: any grit or uneven contact shifts every measurement by the same amount, ruining repeatability. For example, when you measure a bicycle headset race, a speck between the jaws can make your bearing preload reading off by 0.1–0.3 mm, which is obvious when the headset feels loose after assembly.
1) Clean the jaws and remove debris.
- Wipe both outside jaws with a clean, lint-free cloth or a microfiber cloth folded twice.
- Use a cotton swab dampened with isopropyl alcohol (70%) to lift stubborn dirt; avoid paper towels that shed fibers.
- If your calipers have hardened steel jaws, you can use a drop of light machine oil on the cloth to displace moisture; for painted or plated jaws, skip the oil.
Example: I wipe the jaws, then run a dry swab around the tips while measuring a 10 mm gauge block to confirm no visible specks remain.
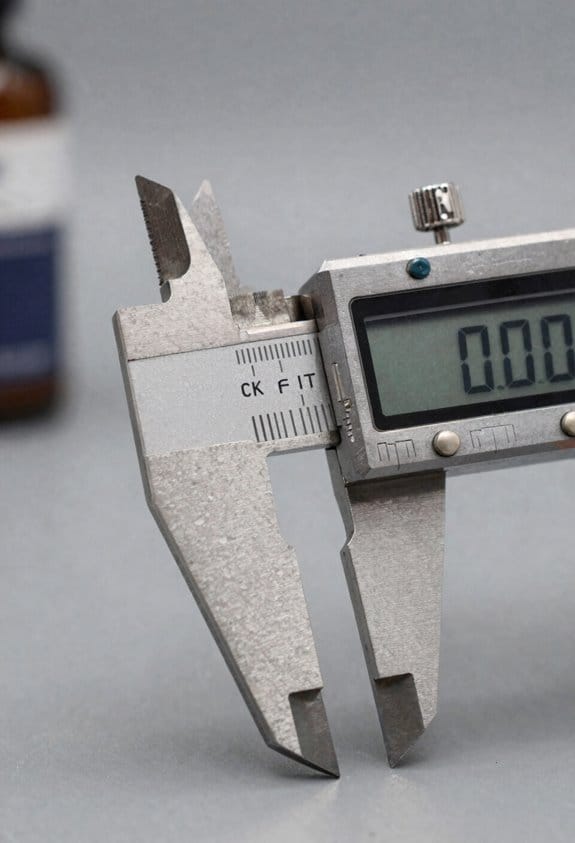
2) Seat the jaws lightly together and press zero.
- Close the jaws until they touch with only fingertip pressure — about 0.5–1 N of force (roughly the pressure from two fingertips).
- Hold them steady for one second, press the caliper’s zero or origin button, and release.
- Confirm the display reads exactly zero.
Example: When checking a valve shim on a motorcycle, I touch the jaws together gently, zero the display, then measure the shim; if the calipers weren’t zeroed, the shim reading would be off by the same offset on every shim.
3) If the display isn’t zero, repeat cleaning and re-seating.
- Open the jaws, repeat step 1, then close them again with the same light fingertip pressure and press zero.
- If it still won’t read zero after two cleanings, inspect the jaw faces under good light or a 10x loupe for burrs or corrosion.
Example: I once had a caliper off by 0.2 mm because a tiny burr was on one jaw; a quick file and polish fixed it.
4) Choose cleaning materials compatible with the jaw material.
- For steel jaws, use isopropyl alcohol and a lint-free cloth; for plastic jaws, use mild soapy water and dry immediately.
- Never use solvents like acetone on plastics or aggressive abrasives on plated surfaces — surface damage alters alignment.
Example: I avoid acetone on ABS plastic jaws after one ruined a noncritical set of measuring faces.
5) Verify regularly to keep measurements reliable.
- Check zero at the start of every work session and after any drop or bump.
- Use a 10 mm or 25 mm gauge block monthly as a reference check; record readings in a small log if you need traceable repeatability.
Example: In my shop, I write the date and gauge-block reading on the caliper case; a drift of more than 0.05 mm triggers a service.
Final practical tip: keep a small cleaning kit with a microfiber cloth, a cotton swab, a 70% isopropyl bottle, and a tiny felt-tip oil pen near your calipers so you can clean and zero in under two minutes before every critical measurement.
Recommended Products

Super Soft & Scratch-Free: Heavy-duty microfiber cloth made of durable 258 GSM fabric to prevent scratching delicate surfaces and provide long-lasting, repeated use

ULTRA SOFT: The Gtechniq MF1 ZeroR Microfibre Buff Cloth is the staple of professional automotive detailing. Almost every detailing job is unachievable without a Microfibre Buff Cloth at your disposal. The Gtechniq MF1 provides unbeatable results when it comes to residue removal from delicate, high gloss surfaces, providing a significantly softer touch than standard cloths

Super soft and absorbent microfiber holds 8x its weight in liquids but dries 2x faster than traditional fibers
Pick The Right Jaws And Align Them For Accuracy
If you’ve ever struggled with inconsistent caliper readings, this is why.
Why it matters: misaligned jaws give you wrong measurements every time. Picture measuring a bike axle with outside jaws that are tilted — your diameter reading will be off by tenths of a millimeter.
1) Pick the right jaws, and do it for this reason: you want contact surfaces that match the feature you’re measuring.
- Use outside jaws for external parts (shafts, flats). Example: when measuring a 12 mm shaft, use outside jaws and place them about 5–10 mm from the shaft end.
- Use inside jaws for holes and slots. Example: for a 20 mm hole, open the inside jaws until they lightly touch at opposite points.
- Use step jaws or depth probe for shoulders and depths.
Why it matters: a tilted jaw changes the contact point and shifts the number. Visual example: if the jaw is cocked by 1°, a 20 mm part can read several hundred microns off.
2) Align the jaws visually before you zero, because zeroing a misaligned caliper just locks in the error.
Steps:
- Close the jaws gently and look along their faces; both faces should appear parallel and touching the reference plane across their full width.
- Place the jaws close to the main beam (within 5–10 mm of the fixed jaw) to reduce angular play.
- If you see a gap at one side, loosen grip, re-seat the workpiece, and try again until both faces touch evenly.
Example: when checking a 50 mm micrometer standard, seating the jaws near the beam and re-seating until you see full face contact removed a 0.08 mm bias.
Why it matters: burrs and grime create fake contact points that screw up repeatability. Visual example: a tiny burr on a caliper jaw left you reading 8.12 mm instead of the true 8.00 mm on a small pin gauge.
3) Clean, seat, and zero with care so your subsequent readings are trustworthy.
Steps:
- Wipe jaws and workpiece contact areas with a lint-free cloth or alcohol wipe.
- Gently close jaws onto the part — do not clamp hard; apply just enough pressure so they stop without deflection (about the force needed to keep them from sliding, roughly 0.5–1 N if you have a feel for it).
- Zero the caliper after confirming parallel seating and clean contacts.
Example: cleaning a lathe-cut part and seating the outside jaws before zeroing removed a repeatability spread from 0.06 mm to 0.01 mm over ten measurements.
Why it matters: holding the caliper at an angle introduces angular error. Imagine measuring a flat plate while looking down at a slant; the reading shifts.
4) Hold and handle the caliper to minimize play and tilt.
Steps:
- Grip the body, not the sliding jaw, and keep the jaws near the beam while measuring.
- Keep your wrist steady and the caliper perpendicular to the feature.
- If you need more stability, support the workpiece or use a fixture.
Example: measuring a 30 mm wide block with the caliper supported against your palm cut down wobble and improved repeatability from 0.04 mm to 0.01 mm.
Quick checklist before you zero:
- Correct jaw type selected.
- Jaws clean and burr-free.
- Faces visually parallel and touching.
- Jaws near the main beam.
- Gentle, consistent closing force.
Follow those checks and you’ll stop zeroing in errors.
Recommended Products

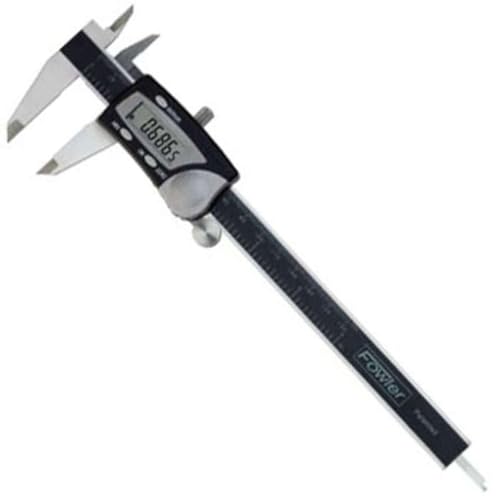
Ergonomic - The Electronic Caliper is light, comfortable, easy to use, and constructed with features that have made Starrett slide calipers the machinist's first choice for many years.

LCD Display: High-quality electronic vernier caliper with a stainless steel body; easy-to-read LCD display allows you to get precise results quickly and easily

The jaws have round measuring faces for accurate ID measurement
How Jaw Pressure Skews Readings : Correct Handling
If you’ve ever squeezed a caliper too hard, this is why.
Why it matters: excessive jaw pressure changes the measurement by thousandths because thin parts deform and jaws bend slightly. For example, when you measure a 0.020″ thick shim and squeeze hard, the shim flattens and your reading can jump by 0.002″ or more.
How to hold the caliper correctly
Why it matters: inconsistent hand placement makes your pressure vary each measurement, wrecking repeatability.
- Grip the body near the thumbwheel with your dominant hand so your fingers support the back and your thumb runs the wheel.
- Rest the caliper on your index finger for balance; don’t pinch at the jaws.
- Use the thumbwheel to close the jaws until they contact the part; stop when you feel light contact.
Real example: hold a stainless steel 1″ gauge block and close the jaws gently; if your readings shift by more than 0.0005″, your grip is changing.
How hard to press
Why it matters: too much force deforms parts and bends the jaws, shifting results by thousandths.
- Apply light contact—just enough so the jaws sit against the part without sliding, roughly the force needed to hold a coin between fingertips (about 0.5–1.0 N).
- If your caliper has a ratchet or force-limiter, use it; set it to the lowest setting that still keeps contact.
- Use the caliper’s lock or a small clamp for stability instead of squeezing.
Real example: measuring a 0.040″ brass shim, a firm squeeze increased the reading by ~0.003″; using the ratchet removed that variation.
Using force feedback features
Why it matters: some calipers warn you when pressure is excessive, preventing bad data.
- Read the manual to learn how your model signals high force (beep, LED, or display icon).
- Practice until the feedback becomes second nature.
Real example: a digital caliper with force sensing shows an icon when you exceed ~2 N; after a week of practice you’ll stop triggering it.
Practice for repeatability
Why it matters: repeatable touch gives trustworthy numbers.
- Use a hardened test block or gauge block.
- Take 10 measurements, closing gently each time.
- Adjust your touch until the spread is within your required tolerance (for example, within 0.0005″ for precision work).
Real example: with a 1″ gauge block, you should see ten readings cluster within 0.0002″ if your technique is steady.
Quick checklist before measuring
Why it matters: a short routine prevents common errors.
- Support the body near the thumbwheel.
- Close with the thumbwheel, not a pinch.
- Use light, consistent contact (~0.5–1.0 N).
- Engage the lock or stop for stability.
- Verify technique on a gauge block (10 reads).
Follow these steps and your caliper readings will stop wandering because of your hands.
Recommended Products

Ergonomic - The Electronic Caliper is light, comfortable, easy to use, and constructed with features that have made Starrett slide calipers the machinist's first choice for many years.
Resolution of 0.0005"/0.01mm for precise measurements with an absolute measuring system

DURABLE DESIGN: Engineered to IP67 standards, this caliper tool operates reliably even when immersed in water, oil, or coolant, ensuring consistent performance in tough industrial environments.
Zero Calipers For Direct Comparison And Fit Checks
If you’ve ever compared two parts and misread the math, this fixes that problem in one move.
Why it matters: zeroing the caliper on a reference part removes subtraction errors so your fit checks are faster and more reliable.
1) What to do and why
- Step 1: Wipe the caliper jaws with a clean cloth so there’s no dirt or oil.
- Step 2: Close the jaws on your reference part and press the zero button (or set the dial to zero).
- Step 3: Without changing the jaw pressure, move the caliper to the mating part and read the display or dial directly — that number is the gap or interference.
Example: zero on a 50.00 mm reference ring, then measure a shaft and read +0.12 mm for interference or −0.05 mm for clearance.
Use light, steady jaw contact — about the force you’d use to hold a quarter without squeezing it — so the zero position stays. Keep the jaws square to the part surface; if the jaws tilt even 1°, a 25 mm span can shift by ~0.02 mm.
2) Inside and outside checks — when to zero where
Why it matters: matching measurement types avoids comparing a hole to a shaft incorrectly.
- Step 1: For shafts, zero with the outside jaws on the reference shaft or plug gauge.
- Step 2: For holes, zero the inside jaws on the reference hole or ring gauge.
Example: zero the inside jaws on a 25.00 mm bore, then check a mating pin and read −0.03 mm for a loose fit.
3) Reading tolerances and making decisions
Why it matters: you’ll know at a glance if parts meet the tolerance without extra math.
- Step 1: Have the comparative tolerance written next to you (for example, +0.10/−0.05 mm).
- Step 2: Compare the caliper reading to those limits. If the reading is within the range, go ahead with assembly; if it’s outside, flag the part.
Example: tolerance +0.10/−0.05 mm, caliper reads +0.12 mm → reject or rework.
Quick tips
- Zero on a known-good reference part every 10–20 measurements to catch drift.
- Store the caliper closed and clean; a little grit can shift zeros by hundredths.
- If you need repeatable jaw pressure, use a torque-limited thumb wheel or a force-controlled holder.
Follow these steps and you’ll stop doing mental subtraction and start trusting the caliper readout.
Troubleshoot Persistent Zero Errors And Safe Reset Steps
If you’ve ever had a caliper or mic with a zero that won’t budge, this matters because an incorrect zero makes every measurement wrong.
1) Clean the jaws so the tool can touch correctly.
- Why: grit or oil can keep the jaws slightly apart and give false readings.
- How (step-by-step):
- Wipe the measuring faces with a lint-free cloth folded twice.
- Rub a fingertip across the faces to feel for grit or a sticky film.
- If you feel residue, moisten the cloth with a drop of isopropyl alcohol and wipe again, then let air-dry 30 seconds.
– Example: I once fixed a mic that read +0.06 mm by removing a tiny metal sliver lodged near the jaw hinge; after a single alcohol wipe the zero returned.
If your readings still aren’t zero, check for mechanical wear because worn faces change geometry and need repair.
2) Inspect for worn faces, bent rails, or loose parts.
- Why: mechanical wear shifts the reference surfaces so zero won’t stay.
- How (step-by-step):
- Close the jaws gently and look for light between faces using an LED flashlight held at an angle.
- Slide the movable jaw along the rail and feel for rough spots or play; any sticking or wobble >0.05 mm is suspect.
- Look for visible nicks, flattened spots, or bent rails; photograph any damage for a technician.
– Example: On a depth mic, a bent slider rail caused a 0.12 mm error that disappeared after replacing the rail.
If the tool looks mechanically fine, you need to reset electronics because a small firmware or power glitch can offset zero.
3) Perform a safe electronic reset to clear glitches.
- Why: power cycles or simple resets often restore the internal zero reference.
- How (step-by-step):
- Turn the instrument off if it has a power switch.
- Remove the battery cover and take out the battery.
- Wait 10 seconds—count slowly to ten—then reinstall the battery.
- Turn the unit on and watch the display for a brief sequence of blinking dots or dashes (about 2–3 seconds), which indicates a reset cycle.
– Example: My digital caliper stopped reading zero after a workshop fall; a battery pull for 10 seconds followed by a restart fixed it and the display blink lasted about 2 seconds.
4) Try model-specific quick fixes only when you know them, because random poking can worsen problems.
- Why: some models have manufacturer reset or recalibration shortcuts that clear minor firmware errors.
- How (step-by-step):
- Check the user manual for a “battery recalibration” or “zero recal” procedure for your exact model.
- If the manual lists a short zero-hold sequence (for example: press and hold ZERO for 3 seconds), follow that.
- Do not insert metal objects unless the manual explicitly instructs it; using a paperclip is acceptable only if the manual mentions a recessed reset pin and shows where to press.
– Example: A dial readout on one budget caliper required holding the ZERO button for 5 seconds to clear a ghost offset; following the manual fixed it.
5) Verify zero across cycles so you catch intermittent faults.
- Why: some faults show up only after use, temperature change, or repeated opens and closes.
- How (step-by-step):
- Close the jaws and set zero.
- Open and close the jaws five times, then check zero again.
- Repeat after 10 minutes and after a short temperature change (hold the tool in your hand for a minute then recheck).
– Example: A thickness gauge would drift after a few cycles; repeated zeroing revealed the error only after three uses, pointing to a weak spring.
If nothing fixes it, schedule a repair or replacement because persistent drift usually means parts or electronics need professional attention.
Recommended Products

High purity formula
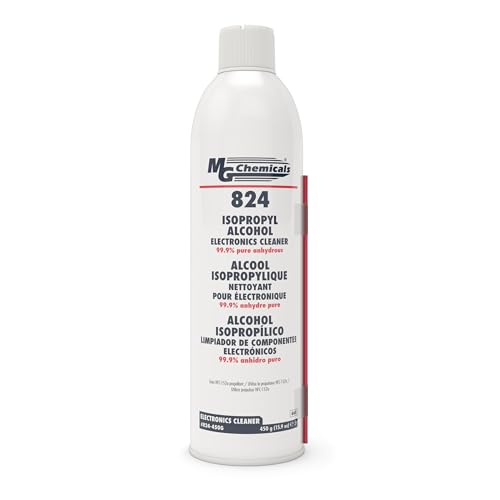
Dissolves light oils and residues on electronic devices and equipment

99.9% Anhydrous solvent—Removes water and humidity from components leaving them dry
Frequently Asked Questions
Can Environmental Temperature Affect Zero Accuracy?
Yes — I’ve seen thermal drift and condensation errors shift zero: warm or cold calipers and humid conditions change dimensions or fog electronics, so I’ll stabilize temperature, dry surfaces, and re-zero before critical measurements.
Can Calipers Lose Zero From Drops or Shocks?
Yes — drops can shift zero: impact vibrations can jar scales, loosen screws, and cause internal misalignment. I’ll recheck zero after any shock, clean and lightly close the jaws, and verify readings before measuring.
Is Absolute Vs Relative Mode Relevant to Zeroing?
Yes — absolute mode preserves a fixed zero reference, while relative mode lets me set a temporary zero for differential checks; I always verify zero in absolute before using relative comparisons to avoid cumulative or persistent errors.
Do Vernier/Caliper Types Need Different Zero Techniques?
Yes — I treat vernier and digital calipers differently: I symbolically reset a compass point — for verniers I watch mechanical backlash and scale wear, for digitals I zero gently, clean jaws, and verify repeatability.
How Often Should Batteries Be Replaced for Consistency?
I recommend replacing batteries proactively every 12–18 months for consistent readings; I watch battery life and voltage stability, and swap sooner if displays flicker, zero drifts, or you see blinking indicators to avoid errors.