You just measured a critical shaft with a caliper and the result doesn’t match the micrometer or the print — was the caliper wrong, your technique, or the part?
You need to know exactly when a caliper can be trusted and when it forces a rework or a scrap decision.
Most people assume a visual zero check or a quick drop-in is enough and skip documented calibration steps.
This piece shows step‑by‑step checks, quick troubleshooting, and the exact tolerance rules and records you’ll need so your measurements link to traceable standards and auditable certificates.
You’ll get clear pass/fail checks, interval recommendations, and what to record for IATF or NADCAP audits.
It’s simpler than it looks.
Key Takeaways
If you’ve ever worried that a bad caliper reading will ruin a batch, this is why.
You care about caliper calibration because accurate measurements directly affect product quality, safety, and reject rates. For example, a machinist in a small aerospace shop found a 0.10 mm drift in a set of digital calipers that would have caused out-of-spec parts; catching that saved a full production run.
Before explaining how, here’s why audit and compliance drive interest.
Audit requirements like IATF 16949, NADCAP, and ISO/IEC 17025 force documented calibration schedules and evidence, and auditors will expect traceable certificates and dates. A quality manager prepping for an IATF audit will pull every caliper certificate from the past year and check lab accreditation details.
Why you’ll search practical calibration info.
You search because you need clear intervals, quick shop-floor checks, and rules for when to send tools for full lab calibration. For example, a production lead sets a 3-month interval for shop checks and a 12-month interval for accredited lab calibrations after tracking tool drift for six months.
How to decide intervals (and what to do on the shop floor).
Why this matters: choosing the wrong interval wastes money or risks bad parts.
- Set a baseline: calibrate all new calipers at an accredited lab and record the date.
- Shop-check schedule: do a zero and a 50 mm check every week; do a 0–100 mm multi-point check monthly.
- Lab calibration interval: send to an accredited lab every 12 months unless drift exceeds tolerances.
Example: an automotive supplier checks 0 mm, 25 mm, 50 mm, 75 mm, and 100 mm monthly and extended lab calibration to 18 months after six months of stable results.
What buyers and quality teams actually look for when buying calibration services.
Why this matters: the wrong certificate won’t pass audits.
- Confirm lab accreditation (ISO/IEC 17025) on the certificate.
- Verify measurement uncertainty and traceability to national standards on the report.
- Request a scope that lists calipers and ranges.
Example: a buyer rejected a calibration report because the lab omitted uncertainty values, and the vendor reissued the certificate within 48 hours.
Simple technician procedures you can do every day.
Why this matters: easy checks catch problems before they affect parts.
- Clean: wipe jaws and faces with lint-free cloth and isopropyl alcohol.
- Zero check: fully close caliper and press zero; confirm it reads 0.00 mm.
- Multi-point verification: measure gauge blocks at 25 mm, 50 mm, and 100 mm; record deviations.
- Recordkeeping: log date, user, readings, and any adjustments.
Example: a technician found grit between jaws that caused a 0.05 mm error by following these four steps during morning setup.
What certificates should include so you won’t fail an audit.
Why this matters: auditors check specifics.
- Lab name and accreditation body with certificate number.
- Date of calibration and next due date.
- Measured values, uncertainty, and pass/fail against specified tolerances.
- Traceability statement to national standards.
Example: during an internal audit, a team flagged a certificate missing the next-calibration date and requested the lab add it within one business day.
Quick checklist for when to send calipers to the lab.
Why this matters: you’ll avoid unplanned downtime.
- If shop checks show drift greater than your tolerance (e.g., >0.02 mm), send to the lab.
- If the caliper has physical damage or drops, send it immediately.
- If the routine lab interval arrives, send it even if shop checks look fine.
Example: a shop held an extra set of calibrated calipers and avoided downtime while the damaged ones were overnighted to the lab.
Follow these steps and you’ll get consistent results, pass audits, and keep scrap low.
Why People Search “Caliper Calibration” Today
If you’ve ever doubted a measurement, this is why. Why you calibrate matters because your product quality and safety depend on how close a caliper reading is to the true size.
Calibration reduces measurement uncertainty. Measurement uncertainty is the doubt about how near your reading is to the real value. For example, if you measure a shaft and your caliper has ±0.05 mm uncertainty, a 10.00 mm reading could actually be 9.95–10.05 mm.
Before you maintain a caliper, know why each task matters. Here are specific maintenance steps you should do and when:
- Clean the jaws and beam every day.
- Use a lint-free cloth and isopropyl alcohol.
- If you work with oils, do this after every shift.
- Example: after measuring engine valves, wipe off metal shavings and oil so readings don’t stick.
- Close the jaws, press zero, and confirm the display reads 0.00 mm (or 0.000 in).
- If it shows more than ±0.02 mm off, re-zero and recheck; if still off, service it.
- Use gauge blocks or a calibrated ring gauge every 3 months if you measure daily, or every 6–12 months for light use.
- When you verify, record the measured value, the standard’s certified value, and the difference.
- Example: compare to a 25.00 mm gauge block; if you read 24.96 mm, log a −0.04 mm deviation.
Calibration gives you traceable references so results match between labs and suppliers. Traceability means your measurements link back to an official standard via documented comparisons. For instance, a supplier’s caliper certified against NIST-traceable gauge blocks lets you accept their part inspections without repeating every check.
Keep records for audits and process control. Record these items each time:
- Date
- Caliper ID
- Standard used and its serial number
- Measured values and deviations
- Technician initials
Signs you should recalibrate are clear; watch for them. Recalibrate when you notice any of these:
- Drift: repeated zero changes greater than ±0.02 mm over a day.
- Inconsistent readings: the same part measured twice gives different numbers beyond your tolerance.
- Physical wear: chipped jaws, bent beam, or loose slider.
- After impact: the caliper was dropped or hit.
If you follow these steps, you’ll know when to act and how accurate your measurements really are. A well-kept caliper with logged verifications keeps rejects low and inspections trusted.
Who Looks for Caliper Calibration Guides: Manufacturers, Labs, Techs
If you’ve ever needed a quick calibration fix on the shop floor, this is why people look for guides.
You want manufacturers to keep parts within spec so production isn’t held up; they typically search for step-by-step procedures, acceptable tolerance numbers (for example, ±0.02 mm for critical bores), and sampling plans (inspect 1% of parts every hour on high-volume lines). A concrete example: a valve-maker checks calipers every 4 hours during a shift, records deviations on a paper log, and rejects any tool drifting beyond 0.02 mm.
Calibration labs look for documented methods and traceability because accreditation depends on them. You need the procedure number, reference standards (e.g., gauge blocks to XYZ standard), uncertainty calculations, and a chain of custody. Example: an accredited lab follows a written method that lists instruments, step-by-step measurements, and calculates expanded uncertainty using k=2, then files the certificate with signed traceability.
Manufacturing technicians want short, clear steps you can follow without leaving the machine. Tell them: 1) zero the caliper on a certified block, 2) measure three sizes (5 mm, 25 mm, 100 mm) and record mean and range, 3) clean and re-lubricate jaws if sticky. Example: a tech saves 10 minutes per check by following a laminated 3-step card taped at the bench.
Independent technicians and maintenance crews look for quick references and practical tips to keep tools usable between lab calibrations. Tell them when to escalate: if range exceeds tolerance twice in one week, send out. Example: a field tech uses a pocket-sized checklist and sends tools for full calibration after two failed in-house checks.
Purchasing and quality teams use guides to vet suppliers and confirm incoming tools. You want supplier audit items like calibration interval, certificate format, and traceable standards listed, plus a pass/fail checklist for incoming shipments. Example: a quality buyer rejects a supplier batch when certificates lack a reference to a national standard.
Make guides modular so each role finds what they need fast: a one-page quick check for techs, a detailed method with uncertainty workup for labs, and an audit checklist for purchasing. For each module, include the exact tolerances, required reference standards, and where to record results.
What Caliper Calibration Topics Users Want Most (Procedure, Tolerances, Certificates)
Here’s what actually happens when you need a usable caliper calibration guide: you want a clear procedure, pass/fail numbers, and a certificate that proves traceability.
Why this matters: if you don’t have those three things, you can’t prove your measurements are reliable to a customer or an auditor. A quick example: you pull a caliper from a production line, measure a 10.00 mm pin, and your record shows 10.12 mm with no tolerance or certificate — the customer rejects the lot and you waste a day troubleshooting.
1) What procedure should you follow?
Why this matters: a repeatable procedure keeps your checks consistent so errors are obvious.
Real example: a maintenance tech at a small shop checks a bench caliper before a run, using gauge blocks and a stable bench.
Steps:
- Clean the jaws and zero the caliper on closed jaws.
- Check zero with the jaws closed; record any offset (in mm or inches).
- Measure gauge blocks at 0, 10, 50, and 100 mm (or equivalent inches) and record readings.
- Repeat each measurement three times and record the average and the range.
- Note environmental conditions: temperature (°C), humidity, and operator initials.
- Compare readings to your tolerances and decide pass/fail.
Follow those steps exactly every time.
2) What tolerances and uncertainty should you use?
Why this matters: tolerances tell you when a tool is usable, and uncertainty shows how confident you can be in a measurement.
Real example: a quality inspector accepts parts to ±0.05 mm tolerance and needs the caliper uncertainty to be less than half that.
- Decide pass/fail tolerances: a common rule is to set the caliper tolerance at one-third to one-half of the part tolerance. For a part tolerance of ±0.05 mm, set the caliper tolerance to ±0.017–0.025 mm.
- Estimate uncertainty: list error sources (resolution, repeatability, calibration standard, temperature). Add them in quadrature (square root of sum of squares). If your combined standard uncertainty is 0.012 mm, apply a coverage factor k=2 to get expanded uncertainty ~0.024 mm.
- Use the expanded uncertainty alongside your tolerance. If expanded uncertainty + observed deviation exceeds your caliper tolerance, fail the tool.
3) What should be on the calibration certificate?
Why this matters: a certificate proves traceability and satisfies auditors.
Real example: a supplier sent a certificate showing standards traceable to the national lab; the customer accepted parts without extra inspection.
Essential items for the certificate (one per line):
- Identification: caliper model and serial number.
- Who calibrated it: lab name, address, and contact.
- Date of calibration and next due date.
- Measured values vs. standards at each check point (e.g., 0, 10, 50, 100 mm).
- Expanded uncertainty and coverage factor (k).
- Reference to the standards used and their traceability.
- Environmental conditions during calibration.
- Statement of conformity or pass/fail decision and the technician’s signature.
4) How often should you calibrate and verify?
Why this matters: the right interval avoids wasted time and prevents undetected drift.
Real example: a production line running 24/7 checked calipers weekly and caught wear before parts went out.
Rules you can follow:
- Start with a baseline interval of 6 months for regular use and 12 months for light use.
- For high-use or critical measurements, move to 3 months.
- Shorten the interval if you see increasing drift, drops, or any mechanical damage.
- Use interim quick checks (zero and one gauge block) daily or per shift for critical tools.
5) How do tolerance, certificate, and interval work together?
Why this matters: using them together keeps measurement risk low and documentation audit-ready.
Real example: a shop reduced customer rejections by 70% after tightening caliper tolerances, documenting certificates, and switching to quarterly calibrations for high-use tools.
Actionable checklist:
- Set caliper tolerance = 1/3 to 1/2 of part tolerance.
- Require a certificate with uncertainty and traceability listed.
- Calibrate every 3–12 months depending on use; do quick checks daily for critical tools.
- Record three repeat measurements per check and save the results.
If you want, I can draft a one-page calibration form you can print and use on the shop floor.
Caliper Calibration: A Concise Step-By-Step Procedure
Here’s what actually happens when you calibrate a caliper on the shop floor: it keeps your parts within spec and saves you rework. Use this quick, numbered routine so you can get reliable measurements every time.
1) Clean the jaws and measuring faces.
- Why it matters: dirt or burrs change readings by hundredths of a millimeter.
- How: wipe surfaces with lint-free cloth and isopropyl alcohol; use a soft brush for debris in the slide.
- Real example: a machinist I worked with removed a tiny steel shaving from the jaw, which reduced a repeated error from 0.06 mm to 0.01 mm.
- Critical tip: press the jaws together gently after cleaning to check for smooth contact.
2) Perform a zero check and note any offset.
- Why it matters: an unzeroed caliper gives consistently wrong numbers.
- How: close the jaws slowly until they touch, then check the display or dial. If the readout isn’t zero, press the zero/reset button on digital calipers or rotate the dial bezel to align for dial calipers; if you can’t reset, record the offset in your log (example: +0.03 mm at closed position).
- Real example: you’ll avoid scrapping a run of 50 parts if you catch a +0.05 mm zero error before cutting.
3) Check at multiple points across the range with calibrated standards.
- Why it matters: accuracy can vary at different openings.
- Steps:
- Use gauge blocks or certified ring/step gauges (e.g., 10 mm, 50 mm, 150 mm).
- Measure each standard three times, closing and opening between reads.
- Record the average and deviation from the standard for each point.
– Real example: when measuring a 150 mm standard, you might see +0.02 mm near the closed end and -0.04 mm near full travel, which tells you the slide wears unevenly.
4) Adjust bezel or note mechanical limits if applicable.
- Why it matters: dial alignment and loose bezels create reading errors.
- How: for dial calipers, loosen the clamp, rotate the bezel so the needle points to the correct marking, then re-tighten gently while holding the reading steady; for digital calipers, check battery and contact surfaces if readings jump.
- Real example: aligning the bezel fixed a 0.10 mm visual mis-read that caused repeated inspection failures.
5) Document results and apply traceable labeling.
- Why it matters: traceability proves the tool was fit for use at the time of measurement.
- Steps:
- Fill out a calibration record that lists standards used, measured values, deviations, date, and technician name.
- Issue or attach a calibration label with next due date (common interval: 12 months unless your process requires 6).
– Real example: your QA auditor will accept a caliper with a clear sticker dated 2026-03-21 and a paper certificate referencing the gauge block serial numbers.
Final checklist before you put the caliper back in service:
- Cleaned? Check.
- Zeroed or offset logged? Check.
- Measurements at 3+ points recorded? Check.
- Bezel/battery checked? Check.
- Certificate and label applied? Check.
Follow these steps each time you calibrate and you’ll avoid hidden errors that cost time and parts.
Recommended Products

The only reloading System you'll EVER need

【HIGH PERFORMANCE】3Axis Digital Readout DRO Display 5um,Available Travel Length:450mm+500mm+1000mm(18"+20"+40").Note: The Total Length =Travel Length+140mm=590mm+640mm+1140mm. Travel Length Customizable
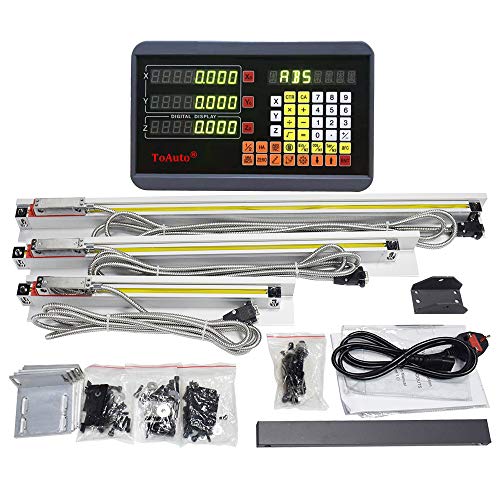
✔【Customized Size】Customizable Travel Length, Note: The Total Length =Travel Length+140mm.
Common Calibration Problems and Quick Fixes for Calipers
If you’ve ever got calipers that give different readings each time, this is why.
Why this matters: inconsistent calipers cost you time and ruined parts.
Example: you measure a shaft for a bearing and the caliper reads 12.00 mm, then 12.06 mm, then 11.98 mm — that variation can make the bearing sit too tight or too loose.
1) Worn or nicked jaws — what to do and why it matters
Why this matters: damaged jaws stop the caliper from making consistent contact, so your measurements shift.
Example: a machined block shows a visible chip on one jaw and your part measures 0.05 mm smaller when you flip the caliper.
Steps:
- Inspect the jaw faces under a bright light and magnifier for nicks or uneven wear.
- If wear is minor, stone the faces flat with a 400–600 grit fine stone using light, even strokes across a flat plate; keep the angle zeroed.
- If you see deep chips or you can’t restore flatness within 0.02 mm, replace the jaws or the caliper.
Tip: mark the stone direction and count strokes — 30–50 light passes usually suffices.
2) Beam flex or bent frame — what to do and why it matters
Why this matters: a bent beam gives different readings depending on how hard you press, so repeatability dies.
Example: under light fingertip pressure the jaws read 25.00 mm; with firmer pressure they read 25.08 mm.
Steps:
- Close the caliper and slide the jaws slowly while watching for wobble or binding; run a straightedge along the beam to check straightness.
- Avoid applying more than light fingertip force — calibrate using a controlled feel or a 0.5–1 N spring if you need consistency.
- If the beam visibly bends or the straightedge gap is greater than 0.02 mm, replace the caliper; don’t try to bend it back yourself.
Tip: store calipers flat or hanging, never with heavy items on them.
3) Zero drift and electronics — what to do and why it matters
Why this matters: drifting zero ruins every measurement until you recalibrate.
Example: you zero at 0.00 mm, then measure a gauge block and get +0.04 mm after a few minutes.
Steps:
- Clean the sliding surfaces with a lint-free cloth and isopropyl alcohol; remove grit from the guides.
- Check the battery voltage (digital calipers usually need 1.5 V CR2032); replace if under 3.0 V or when the display dims.
- Re-zero at closed position, then verify at a known gauge block (for instance 25.00 mm) and again at another point (e.g., 50.00 mm) to confirm linearity.
Tip: perform zero checks before every critical run.
4) Thermal expansion — what to do and why it matters
Why this matters: temperature changes change metal size, so your part won’t match cold measurements.
Example: you grab calipers from a cold bench and measure a hot engine part; dimensions differ by 0.03–0.1 mm.
Steps:
- Let your calipers and the part sit in the workshop for at least 15–30 minutes to reach ambient temperature (20–23 °C is typical).
- Hold metal tools by the frame, not the jaws, and avoid measuring immediately after handling for more than 10 seconds.
- If you need high-precision work, note the temperature and apply a correction: steel expands about 11.7 µm/(m·°C), so a 100 mm part changes ~0.00117 mm per °C.
Tip: keep a small thermometer near your bench.
Routine checks to keep small problems from becoming big ones — why they matter
Why this matters: quick periodic checks catch wear before it ruins parts.
Example: a weekly quick check prevented a worn jaw from scrapping an $800 shaft last month.
Steps:
- Weekly: close and zero the caliper, check one gauge block (25.00 mm).
- Monthly: inspect jaws visually, clean guides, check battery.
- Annually: send for professional calibration if you need traceable accuracy or if measurements are critical to safety.
Tip: log the checks with date and result; a simple notebook works.
Follow these steps and you’ll get repeatable measurements fast.
Recommended Products

Disc Brake Caliper Tool Set: These brake tools are used for brake repair and replacement jobs; Disc brake kit includes caliper adapters (1-3/16" to 2-1/2") and a caliper rotation tool with left-handed threads
![CBRIGHT Sharpening Stone Set, 6pcs 3000# Ruby Whetstone Kit Small Fine Polishing Sharpener Stone for Sharpen Chisel Gouge,Knife and Bladed Cutting Tools, Variety of Shapes[Length:100mm(3.94Inch)]](https://m.media-amazon.com/images/I/412xKqlUNXL._SL500_.jpg)
[6pcs 3000# Fine Ruby Stones]ruby whetstone material with Length:100mm(3.94Inch) ,fast polishing of various metals, high efficiency polishing, high temperature calcination made of sophisticated technology and high temperature resistance.

【Four-Sided, Dual Tooth】Features a four-sided design. Two of its sides withcoarse teeth, ideal for tackling larger and chunkier rust. The remaining sides are equipped with fine teeth, perfect for intricate cleaning and final polishing. Additionally, its tip is designed for removing rust around the edges of brake discs and hubs.
How IATF 16949 and NADCAP Change Calibration Requirements
If you’ve ever had an auditor ask for calibration paperwork, this is why.
Why it matters: without traceable calibration, your parts can fail and your audits will flag you. Example: I once saw a shop lose a job because a batch of calipers had no link to a reference standard and the customer rejected 2,000 machined rings.
What IATF 16949 requires for your calipers
Why it matters: IATF wants a documented chain from tool to standard so you can prove measurements are valid. Example: picture a blue Mitutoyo caliper with a sticker showing “Calibrated 03/15/26 — Lab A — Ref Std #45” sitting on a QC bench.
1) Chain of traceability you must keep:
- Record the caliper ID, who calibrated it, date, and the reference standard ID.
- Include the standard’s last calibration date and the lab that calibrated the standard.
- Store a scanned certificate linking the caliper to the reference, not just a handwritten note.
2) Practical intervals to set:
- Start with 3 months for high-use calipers, 6 months for moderate use, 12 months for rarely used ones.
- If a caliper is dropped or shows a suspect reading, recalibrate immediately.
3) Labeling and records:
- Place a durable label on the caliper with: asset number, last calibration date, next due date.
- Keep records for at least the customer contract period plus 2 years.
How NADCAP changes what your lab must do
Why it matters: NADCAP requires accredited labs and stricter controls so your calibration can survive supplier or aerospace audits. Example: an aerospace supplier had to switch to an accredited lab after a NADCAP audit cited unvalidated procedures.
1) Use accredited labs or have equivalent internal accreditation:
- If you use an external lab, get their certificate showing NADCAP or ISO/IEC 17025 accreditation and keep it on file.
- If you do calibrations in-house, maintain an internal accreditation program with documented competency records.
2) Measurement uncertainty and environment controls:
- You must document measurement uncertainty for each caliper; calculate and store the uncertainty value with the certificate.
- Control environment: maintain room temperature at 20±2 °C and humidity at 40–60% when calibrating, and log these values for each session.
- Validate procedures annually and after any major change.
3) Personnel and procedure requirements:
- Train techs with a written training matrix; keep signatures and training dates.
- Use step-by-step written methods for each caliper type and keep method revision numbers on each certificate.
Practical checklist you can implement this week
Why it matters: small steps reduce nonconformances and make audits quick. Example: print a sheet, walk the shop, and fix missing labels in one afternoon.
1) Do this now:
- Tag every caliper with an ID sticker.
- Scan current certificates and save them in a folder named “Cal Certs — YYYY”.
- Set initial calibration intervals: 3/6/12 months as above.
2) Do this within 30 days:
- Require external labs to provide accreditation proof; file it.
- Add temperature and humidity logs to your calibration form.
- Create a one-page method for caliper zeroing and repeatability checks.
3) Do this in 90 days:
- Implement measurement uncertainty entries on certificates.
- Train at least two people on the written methods and log their training.
- Review supplier compliance: ask key suppliers for their calibration evidence.
If you follow these steps, your measurement records will show who did the work, when, and against what reference — and you’ll cut audit risk while improving product conformity.
Why Traceability and Timestamps Matter in Caliper Calibration
If you’ve ever needed to defend a measurement in an audit, this is why.
Why it matters: traceability proves your caliper’s readings tie back to official standards, and timestamps prove when those readings were valid.
Example: during an IATF 16949 audit, an auditor asks for the last calibration for a part-measuring caliper used on a transmission case; you show a certificate with a standard’s serial number and a timestamped log entry. That combination makes the measurement defensible.
Why traceability matters for your calipers
Why it matters: without traceability, you can’t show a caliper was compared to a recognized standard, so parts could be rejected or reworked unnecessarily.
Example: a machinist measures a shaft and it fails; the supplier asks whether the caliper was traceable to a national lab standard — you produce a certificate showing the reference gauge block serial and its calibration lab.
Steps to make your calipers traceable:
- Record the standard used: write the reference device type and serial number (e.g., “1.0000 in gauge block, SN 12345”) on the caliper’s record.
- Keep the calibration certificate with a matching unique ID (e.g., CAL-2026-045) in a digital folder and a paper binder.
- Link the caliper to the standard in your asset list: caliper ID → certificate ID → standard serial.
Why timestamps matter for your calipers
Why it matters: timestamps show when a caliper was last valid; an altered or missing time breaks the audit trail and will get questioned.
Example: you calibrated a caliper on 2026-02-10 at 09:15; an auditor compares the timestamp to production records and confirms measurements taken on 2026-02-12 are covered.
Steps to protect timestamp integrity:
- Use an ISO/IEC 17025 or NADCAP-compliant lab that issues certificates with date and time (e.g., “2026-02-10 09:15 UTC”).
- Put a visible calibration sticker on the caliper with the date and the next due date (e.g., “Cal: 2026-02-10 — Due: 2027-02-10”).
- Store certificates with immutable logs: use PDF/A files with embedded metadata or a calibration management system that locks timestamps.
Practical actions you can do this week
Why it matters: taking simple steps now prevents audit headaches later.
Example: walk the shop and pick three frequently used calipers; within one hour you can label them and file their certificates properly.
Steps (do these):
- Tag three calipers with a sticker including caliper ID, last cal date, next due date, and certificate ID.
- Scan or upload the matching certificates into a single folder and name files like “CAL-2026-045_CaliperA_20260210.pdf”.
- Add the caliper entries to your asset list with the standard’s serial number and the certificate ID.
A final, concrete note
Why it matters: auditors will check both chain of custody and timestamp integrity, and you want to fail that check as rarely as possible.
Example: a single missing timestamp forced a shop to rework 200 parts; the fix was showing certificate metadata with the correct UTC time.
Actionable detail: start with three calipers today, use the filenames and sticker formats above, and keep a paper binder with certificate copies marked by certificate ID.
How Bluetooth/IoT Calipers Change Calibration Process and Records
Here’s what actually happens when you connect a Bluetooth caliper to your phone or shop network: your calibration workflow becomes mostly automated, and that speeds things up.
Why it matters: automated records cut transcription errors and save technician time. For example, in a machine shop I visited, a tech paired calipers to a tablet and cut daily record entry time from 20 minutes to 5 minutes.
How the data flows (practical steps):
- Pair the caliper: enable Bluetooth on the caliper and your device, then tap the caliper name in the phone’s Bluetooth settings. Most models show a pairing code—type it in.
- Open the measurement app or your shop’s calibration software and select the device ID that matches the caliper’s serial number.
- Take the measurement; the app timestamps and uploads the value automatically to your server or cloud.
- Verify the entry: check the reading, timestamp, and serial number on the app before you finish the job.
What you get from automatic uploads:
- Fewer transcription mistakes because readings go straight from tool to record.
- Every entry tied to a serial number and time, which helps during audits.
- Automatic tracking of calibration intervals so you know when the next check is due.
Example: a quality lead used Bluetooth calipers across three production lines; audit time dropped from two days to half a day because every reading had a timestamp and serial number.
Condition monitoring and predictive maintenance — why you care: the caliper can report wear or drift trends so you catch problems before they cause bad parts. For instance, if measurements slowly shift 0.01 mm per week, your software can flag a tool for inspection after a preset drift threshold.
Steps to use condition data:
- Configure thresholds in the app (for example, 0.02 mm drift over 30 days).
- Let the software log each reading and calculate trend lines.
- Receive alerts when thresholds are exceeded and schedule a maintenance check.
Security and process controls you must have:
- Use a secure Wi‑Fi or a segmented shop network—don’t pair tools to public or guest networks.
- Define roles: who reviews logs, who approves calibration certificates, and who responds to alerts.
- Keep validated procedures for how measurements are taken and how the app records them; a written SOP with screenshots works well.
Example: a small lab restricted caliper pairing to an isolated VLAN and required two people to sign off on recalibration events, eliminating unauthorized changes.
Quick checklist to get started:
- Pair device to a secured system.
- Set up serial-numbered device IDs in your software.
- Define drift thresholds and alert rules.
- Train staff on the SOP and sign-off steps.
- Archive records off-tool for audit access.
You’ll save time and reduce errors, but keep the human checks and secure networks in place so your automated records stay reliable.
Recommended Products

Jobsite Precision: The T1 Tomahawk is a contractor grade digital tape measure built for tradespeople who need faster, more accurate measurement capture and improved jobsite efficiency

NeoMAGNIFIER: Provides enhanced visibility, making it easier to read small text or view intricate details

NeoMagnifier: Provides enhanced visibility, making it easier to read small text or view intricate details
Best Content Formats to Capture Clicks: Checklists, SOPs, Videos
If you’ve ever tried to follow a written procedure and missed a step, this is why.
Why it matters: the right format gets your team to click, read, and apply guidance fast. Checklists work best when you need repeatable, quick actions you can do without pausing. For example, a calibration tech at a bench can run a 7-step checklist in under three minutes to verify a caliper: 1) zero the caliper on a known gauge block, 2) confirm battery at ≥75%, 3) select metric mode, 4) measure three sizes (5 mm, 25 mm, 50 mm), 5) record mean and range, 6) compare to ±0.02 mm tolerance, 7) sign and timestamp the entry. That sequence prevents missed actions and gives you a pass/fail result.
Before you pick a format, know what traceability auditors will look for in your records.
Why it matters: SOPs give structure that meets audit checkpoints. An SOP should list purpose, scope, required tools, step-by-step method, acceptance limits, and record location. Example: a lab SOP for caliper calibration includes purpose (ensure dimensional accuracy), scope (0–150 mm digital calipers), tools (gauge blocks, surface plate, temperature strip), limits (±0.02 mm), and a 12-step method with expected readings at 5 specific sizes. Use that format so your lab can reproduce results and satisfy traceability.
If you want guidance at the bench, use a one-page quick guide.
Why it matters: quick guides put tolerances and setup tips where you need them. A good quick guide shows three key tolerances, two setup photos, and a single troubleshooting note on one page. Example: a laminated bench card listing zero procedure, three target sizes, and a small photo showing correct hand placement on the caliper jaw helps a tech finish a check in under 90 seconds.
The fastest way to reduce procedural errors isn’t longer documents—it’s video checklists.
Why it matters: videos show exactly what you should do and confirm you did it. Make a 90–120 second video that follows a checklist: 1) show tools laid out, 2) demonstrate each measurement with close-ups, 3) display the readout and record the value, 4) state pass/fail aloud, 5) include a final timestamped screen. Add clear captions, timestamps at each step, and a downloadable PDF checklist. Example: record a tech measuring 25 mm with hands visible, include a 5-second freeze on the readout, and embed a caption that reads “Record value: 25.01 mm — within ±0.02 mm.”
A few practical tips to make formats stick:
- Use numbered steps for procedures so techs can follow without guessing.
- Put one bold term per paragraph: “tolerance,” “scope,” or “timestamp.”
- Export checklists and SOPs as printable PDFs and keep a folder on the shared drive labeled Calibration_Procedures_v{date}.pdf.
End with a concrete action: pick one instrument, make a one-page checklist, and run it three times this week while recording timestamps.
Recommended Products

Ergonomic - The Starrett top quality tools have IP67 protection against coolants, water, chips, dust, and dirt often found in machine shop environments.

Absolute Origin Calibration: The iGAGING Absolute Origin Electronic heavy duty digital caliper retains the set zero reference point even after the caliper is off. This large thickness or diameter measuring tool feature saves time, as well as ensures consistent and accurate inch/metric measurements at 12", 24", or 40".

Ergonomic - The Electronic Caliper is light, comfortable, easy to use, and constructed with features that have made Starrett slide calipers the machinist's first choice for many years.
How Labs and Vendors Turn Caliper Calibration Content Into Leads
How do practical caliper resources turn readers into leads?
Here’s what actually happens when you give someone audit-ready content: they trust you enough to share contact details. If you publish a clear SOP for caliper checks, a sample calibration certificate, and a traceability guide, a quality manager can see your competence and feel safe requesting a quote. Example: a small aerospace shop downloaded a one-page SOP, then scheduled a call within 48 hours because the certificate matched their audit format.
How should labs present SOPs and certificates so buyers act?
Why it matters: buyers scanning documents want to know they’ll pass audits.
Steps:
- Post a one-page SOP and a downloadable PDF certificate sample behind a short form (name, company, email).
- Label each file with a clear filename pattern—SOP_Caliper_Check_v1_2026.pdf—so buyers can match audit files instantly.
- Add a 60–90 second intro video showing the SOP being used on a bench; embed it on the download page.
Real example: a calibration lab posted a 75-second video of a technician performing a caliper check; procurement emailed within 36 hours asking for a bulk service quote.
What content helps vendors move buyers toward purchase?
Why it matters: practical setup info removes buying friction.
Steps:
- Publish a 2-minute setup clip for each caliper model and a one-sheet comparison chart (accuracy, range, price).
- Offer a downloadable “quick-start” PDF that walks through the first three calibration checkpoints with photos.
- Bundle the chart and quick-start behind a form or capture on a product demo request.
Real example: a vendor’s comparison chart reduced purchase decision time from three weeks to five days because an inspector could instantly see which model met tolerance.
How do vendor–lab partnerships generate leads?
Why it matters: buyers prefer one-stop onboarding for tools plus calibration.
Steps:
- Create a bundle page listing tool + annual calibration plan with a fixed price and a sample service level agreement (SLA).
- Share a short case study PDF of a customer who bought the bundle and passed their next audit without extra training.
- Make a single click-to-schedule call-to-action for technical onboarding.
Real example: a tooling reseller partnered with a local lab and saw bundle inquiries increase by 45% in two months after publishing an SLA and case study.
How should you nurture leads after a download?
Why it matters: most leads need a gentle sequence to convert.
Steps:
- Send the download immediately, then an email at 48 hours with a 5-question qualification form.
- At day 7, offer a 10-minute live demo link; at day 14, send a reminder plus a one-page ROI checklist.
- If the lead fills the demo form, trigger a calendar invite and a technician prep sheet.
Real example: a lab used this sequence and raised demo-to-sale conversions from 6% to 18% in three months.
What metrics should you track to prove ROI?
Why it matters: you need numbers to justify changes.
Steps:
- Track form conversion rate, demo request rate, and booked-demo-to-sale rate.
- Measure time-to-first-contact (goal: under 48 hours) and download-to-demo window (goal: under 7 days).
- Attribute revenue to content by using a unique campaign code on download forms.
Real example: tracking those five metrics let a vendor identify three high-performing assets that produced 70% of qualified demos.
Quick tactical recommendations you can implement this week
Why it matters: small, concrete actions create fast momentum.
Steps:
- Create one SOP PDF and one 60-second SOP video.
- Make a one-sheet comparison chart for your top three calipers.
- Build a 3-email nurture sequence: immediate download, 48-hour qual form, 7-day demo invite.
Example: do these and you’ll likely see a demo request within one week.
Final note: use clear CTAs—“Download SOP,” “Request 10-minute demo,” or “Get bundle price”—so you can measure who’s really interested.
Recommended Products

Calibration standard for checking the measurement accuracy of calipers and height gauges from 1" to 12"

REDESIGNED FOR EFFICIENCY: Updated dial movement ensures ultra-smooth sliding and consistent performance, while the satin chrome finish reduces glare and improves readability on the shop floor. This design minimizes backlash and ensures stable readings, even in environments with vibrations or sudden movements.

REDESIGNED FOR EFFICIENCY: Updated dial movement ensures ultra-smooth sliding and consistent performance, while the satin-chrome finish reduces glare and improves readability on the shop floor. This design minimizes backlash and ensures stable readings, even in environments with vibrations or sudden movements.
Frequently Asked Questions
How Often Should I Recalibrate Calipers Stored in Controlled Environments?
I’d recalibrate calipers stored in controlled environments every 6–12 months, with routine checks weekly and long term tracking of drift; shorten intervals after shocks, heavy use, or failed checks to maintain NIST-traceable accuracy and compliance.
Can Worn Jaws Be Reliably Compensated Instead of Repaired?
Like a worn coin’s shine, I’ll say no—jaw wear can’t be reliably compensated; material buildup might mask loss, but true accuracy needs repaired or replaced jaws, or documented calibration limits and traceable adjustments.
Are Consumer-Grade Digital Calipers Acceptable for Supplier Audits?
No, I wouldn’t accept consumer calipers for supplier audits; consumer calipers lack audit relevance due to limited accuracy, traceability, and calibration control, so I’d require certified, NIST-traceable gauges for reliable audit measurements.
How Do Temperature Variations During Transport Affect Calibration Intervals?
I’d note that a 10°C swing can shift readings noticeably, so I shorten intervals after heavy thermal cycling and shipment vibration; I’ll recalibrate sooner and add data logging to catch drift between standard cycles.
Can Calibration Certificates Be Digitally Notarized for Overseas Suppliers?
Yes — I’ve used digital notarization plus remote apostille services to validate calibration certificates for overseas suppliers, ensuring legal acceptance, secure timestamps, and traceable signatures while meeting export/import and quality-system audit requirements.