You’ve stood on a noisy jobsite holding a DISTO and a clipboard, then later found measurements that don’t match timestamps and wondered which read is the true reference.
You’ve traced differences across laser reads, tape-emulator logs, and beacon streams and asked, “Which device’s time do I trust?”
Most people assume syncing is solved by simple Bluetooth pairing or eyeballing offsets and skip proper timestamp validation.
This article shows exactly how to make all field measurements a single, timestamped source of truth: how to pair devices, validate timestamps against NTP, use short‑packet RTT and channel sounding for accurate ranges, and apply on‑site calibration to correct clock drift.
You’ll finish with a practical setup and troubleshooting checklist you can follow on site.
It’s easier than it sounds.
Key Takeaways
If you’ve ever been on a jobsite with mismatched timestamps and messy notes, this will make your life easier.
Why it matters: synced measurements stop you wasting hours fixing clocks and guessing distances.
– Automated Bluetooth sync aligns timestamps and distances across your devices so you don’t have to apply manual clock-offset corrections. Example: on a renovation job with three crews using a DISTO, a phone app, and a laser tape emulator, syncing removes the 2–5 second offsets you normally see between devices.
How to use it:
- Turn on Bluetooth on every device.
- Start the sync app on one device and tap “Start session.”
- Wait for confirmation that all devices show the same session ID.
- Take measurements; the app will tag each reading with the synced timestamp.
Tip: check the session ID once every 15 minutes. It takes under 5 seconds.
Why it matters: syncing every 30–60 seconds captures what’s actually happening, so your notes match the site context.
Example: if you’re documenting a wall with changing scaffolding positions, a 30-second sync records who moved what and when, preventing transcription errors later.
How it works in practice:
- Set your sync interval to 30 or 60 seconds in the app.
- Keep devices within 10–15 meters so beacons and Bluetooth remain reliable.
- Review the session log at the end of the shift; each entry shows the nearest beacon and a timestamp.

Why it matters: merging datasets gives you one clear file for reports and compliance instead of juggling formats.
Real example: after a site survey, the app combines DISTO distance outputs, a tape emulator’s incremental readings, and beacon locations into one CSV tagged with device IDs, timestamps, and location labels.
Steps to merge:
- Export session from the app as CSV.
- Open the CSV in your spreadsheet tool; each row includes source (DISTO/tape/beacon), device ID, and timestamp.
- Use the CSV directly in reports or upload to your compliance portal.
Why it matters: hardware timestamping and CS/PBR exchanges make range readings accurate enough to reduce rework.
Example: on an electrical layout, hardware timestamping restored centimeter-level accuracy where software-only timestamps were off by 1–3 meters.
How to enable it:
- Use devices that support hardware timestamping and PBR (physical beacon ranging).
- Enable CS/PBR in your app’s advanced settings.
- Verify a single test reading against a known distance; expect sub-0.1 m drift on short ranges.
Why it matters: tracking who did what and locking datasets keeps your reports auditable for clients and regulators.
Example: after completing an inspection, the app locked the dataset and uploaded it to the company server with user IDs, preventing accidental edits before submission.
How to set it up:
- Require user login on each device.
- Turn on auto-upload to your cloud at session end.
- Use dataset locking so only admins can modify completed sessions.
Quick troubleshooting tips:
- If a device won’t join, reboot Bluetooth and retry for up to 30 seconds.
- If sync drifts, shorten interval to 30 seconds and re-run a calibration measurement of 5 meters.
- If CSV fields look off, confirm every device has the current firmware; updates fix most format mismatches.
You’ll save time and reduce disputes when you set these four things up: consistent sync interval, device proximity, hardware timestamping enabled, and dataset locking with auto-upload.
Bluetooth Measurement Sync : Plain Summary
If you’ve ever tried to sync devices on-site and gotten inconsistent readings, this explains why.
Why it matters: synced Bluetooth makes distance and timing data match across devices so your measurements are reliable.
Example: when you’re measuring signal loss across three rooms with a phone, a tablet, and a handheld scanner, synced clocks prevent one device from reporting a time that’s 200 ms off and wrecking your comparisons.
Bluetooth sync ties device clocks so distance and time-of-flight data align, letting you compare results from different tools and apps without manual correction.
Before you start syncing, know how the timing works.
Why it matters: understanding the mechanism helps you set accurate measurement intervals.
Example: if you’re standing in a warehouse doing range checks, knowing the protocol helps you avoid false positives when metal racks reflect signals.
Bluetooth sync uses short packets and reflected responses to compute round-trip time; devices send a brief ping, the other replies, and the originator measures the elapsed time to estimate distance and verify presence.
Why privacy matters: you can measure without exposing user IDs.
Why it matters: protecting identifiers keeps user data on-device and reduces risk.
Example: when surveying customers in a café, minimizing identifiers prevents linking measurements to individual patrons.
Implement sync so identifiers are minimized and raw data stays on the phone or gateway; anonymize or hash any tags if you must transmit results.
Why battery life matters: frequent syncs drain power quickly.
Why it matters: managing intervals keeps devices usable throughout your shift.
Example: if you schedule syncs every second on a smartphone during an 8-hour site walk, you’ll drain the battery in a couple hours.
Choose intervals based on accuracy needs: try 100 ms for high-precision lab tests, 500–1000 ms for routine site checks, and 5–10 seconds for low-frequency presence checks to preserve battery.
How to set this up in practice.
Why it matters: concrete steps get you working without guesswork.
Example: a field tech measuring per-room latency can follow these steps and finish in under 30 minutes.
Steps:
- Pick your devices and note their battery state and Bluetooth versions.
- Set a sync interval: 100 ms for precision, 500–1000 ms for general measurements, 5–10 s for presence-only tasks.
- Enable local processing so raw timestamps stay on the device; only send summarized results (mean, variance) if you must upload.
- Minimize identifiers: use rotating randomized IDs or hash device IDs before transmission.
- Run a short calibration: ping between devices for 30–60 seconds and record drift; apply that offset in your measurements.
Practical tip: balance accuracy with battery and privacy.
Why it matters: you’ll get useful data without killing batteries or exposing people.
Example: on a half-day site survey, run a 60-second calibration, use 500 ms syncs, and upload only aggregated results at the end.
Prefer local processing to limit data exposure and schedule syncing to stop when the device is idle or charging.
If you follow these steps, your Bluetooth measurement syncs will be consistent, private, and power-efficient.
Why Automated Measurement Syncing Matters On Site
If you’ve ever had to copy measurements from a device into a report, this is why automated on-site syncing matters.
Why it matters: automated syncing stops transcription mistakes that cost time and money. For example, on a busy construction floor you record a beam length of 4.82 m on a DISTO, and later someone types 4.28 m into the log—now a bracket is cut wrong and two hours are lost. You avoid that by syncing directly from the device so the number is exact and timestamped.
How it speeds documentation:
1) Sync as you measure. Set your device to send readings every 30–60 seconds.
2) Confirm the entry on your phone or tablet—look for the device ID and timestamp.
3) Finalize the log entry when you move to the next location.
Example: a survey tech measures 12 points along a pipe run, each auto-synced with location tags, finishing the report in 15 minutes instead of an hour because no manual entry was needed.
How it preserves sequence and context:
Why it matters: timestamps and location tags keep the order and place of each reading, which matters when conditions change.
Steps:
1) Enable GPS or beacon tagging on your device.
2) Let the system attach timestamps automatically.
3) Use the app’s timeline view to review the measurement sequence.
Example: during an HVAC retrofit, you can show that pressure readings were taken before and after a valve change, with exact times and room locations.
How it supports safety compliance:
Why it matters: prompt records capture hazards while they exist, helping you meet safety checklists and incident timelines.
Steps:
1) Configure auto-sync to send critical readings immediately (under 10 seconds).
2) Link each reading to the equipment serial or beacon ID.
3) Archive those entries to your compliance folder.
Example: a maintenance tech logs an overheating reading from a motor at 09:12 and the entry—device ID, temp, photo—is stored instantly for the safety report.
How it improves accountability:
Why it matters: device-linked entries show who measured what and when, which helps during audits.
Steps:
1) Require user log-in on each handheld or app session.
2) Make sure each synced entry includes user ID and device ID.
3) Export audit reports with those fields included.
Example: an auditor asks who recorded a pressure drop; you pull the synced entry and see the exact technician, device, and time.
How it creates a single source of truth for teams:
Why it matters: a merged dataset from DISTO, tape emulators, and beacons prevents conflicting reports and extra paperwork.
Steps:
1) Standardize sync intervals across devices (30–60 seconds).
2) Use the app’s merge function to combine DISTO, tape emulator, and beacon streams.
3) Lock the merged dataset so edits are tracked.
Example: on a site with three measuring tools, the team produces one tagged CSV that the manager uses for both the weekly report and the regulatory submission.
If you set up syncing with those steps, you’ll cut errors, save hours, and have clear, auditable data tied to time and place.
Recommended Products

Nitrox Trimix decompression dive computer in wrist-watch form factor

Entertainment on the Road: Stay connected on the go with the built-in Bluetooth functionality, allowing you to make hands-free calls, stream audio wirelessly, and control your music directly from your device.

IN THE BOX: 1x Garmin Tread Overland GPS Navigator, 1x Suction cup mount, 1x Vehicle power cable, 1x Locking magnet-assisted mount, 1x USB-C cable, 1x Wearable4U E-Bank, 1x Car Charger, 1x Wall Charger, 1x microUSB charging cable
Core Bluetooth Features for Precise Measuring (CS, RTT, PBR)
Here’s what actually happens when you use Bluetooth to measure distance and angle.
Why this matters: accurate distance and path info helps you place devices or troubleshoot location errors. Channel Sounding (CS) probes the wireless channel to measure timing and phase so you can tell which signals came straight from the transmitter and which bounced off walls. Example: when you stand in a conference room and point a laptop at a ceiling speaker, CS can reveal the direct path and a reflection from the window; you’ll see distinct timing and phase peaks.
How CS works, step by step:
- Your device sends a known probe signal (a sounding packet).
- The receiver records timing and phase across subcarriers or tones.
- You process those measurements to estimate angle-of-arrival and separate multipath components.
Result: you get phase values and delay estimates you can feed into other ranging methods.
Why RTT matters: measuring round-trip time gives you a direct distance estimate in meters. In a warehouse, if you ping a barcode scanner and measure RTT of 20 nanoseconds round-trip, that implies about 3 meters (since radio travels ~0.3 m/ns). That gives you a quick range number you can trust to the meter level depending on clock sync and resolution.
How RTT works, step by step:
- Your device timestamps when it sends a packet.
- The other device timestamps when it receives and when it replies, or simply reflects.
- You compute one-way or round-trip delay and convert to meters (delay × 3e8 m/s).
Result: a baseline distance estimate you can combine with angle info.
Why PBR matters: phase-based ranging refines the distance and resolves ambiguity from wavelength cycles so you can get centimeter-level accuracy. Example: for a BLE link using 2.4 GHz carriers, a phase shift of 90° across a tone corresponds to about 0.083 meters of change; PBR uses multiple tones to unwrap that ambiguity and produce a precise offset.
How PBR works, step by step:
- Collect phase measurements across several known frequencies or tones.
- Compute phase differences and apply an unwrapping algorithm to remove 2π ambiguities.
- Fit the phase-vs-frequency slope to estimate range offset.
Result: a refined distance measurement that corrects the coarse RTT estimate.
Putting them together matters because each method covers the other’s weaknesses: CS separates multipath, RTT gives a simple range, and PBR sharpens accuracy. Example: in a hallway with echoes, use CS to identify the direct path, RTT to get the rough 5 m distance, then PBR to tighten that to 4.92 m.
Practical tips you can use right away:
- If you need meter-level range fast, rely on RTT first.
- If signals are bouncing, run CS to pick the direct arrival; take the earliest path.
- If you need centimeter accuracy, collect multi-tone phase data and run PBR unwrapping.
- Always log timestamps, raw phases, and per-tone SNR for post-processing.
If you follow those steps, you’ll reduce multipath errors and get reliable inputs for on-site sketches and logs.
Recommended Products

UT161E Digital Multimeter with Reliable 22,000 Counts Multi-meter. Volt meter and multimeter tester that measures AC/DC voltage up to 1000 V, AC/DC current up to 20 A, resistance, capacitor tester, frequency, duty-cycle, bandwidth, 46 analog bar, etc
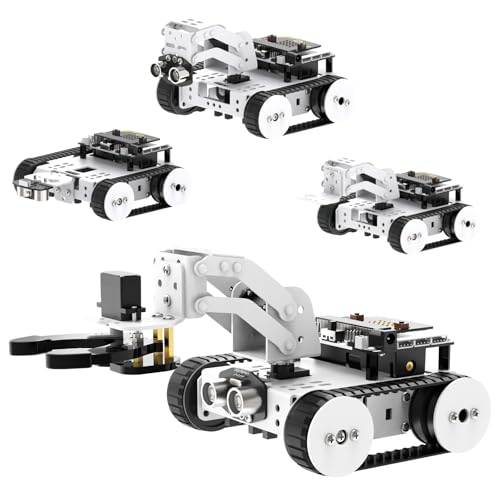
Support micro:bit Programming. Qtruck is a programmable robot kit based on micro:bit, with micro:bit as the core controller, suitable for learning micro:bit programming.

⚡【Monitoring on Your Phone】Smart clamp-on multi tester BT-7200APP can auto connect to your Android / Apple phones or tablet with ease, allows you viewing logging the data out of the arc flash zone 15m (50 ft) away, and save the measurement for detailed analysis, sharing later.
How CS SYNC, CS Tone, ToD and ToA Exchanges Work
Here’s what actually happens when you run a Channel Sounding (CS) exchange to measure timing and phase.
Why it matters: accurate ToD/ToA and phase lets your devices estimate range and angle to within a few centimeters or degrees, which matters if you’re building precise indoor positioning or beamforming.
How the basic exchange works (real example: two Wi‑Fi‑like devices on opposite walls measuring distance):
1) Initiator sends a CS SYNC packet and *marks the send time* in hardware timestamping at, say, 0.000123456 s.
2) Reflector receives that packet and records the arrival time; then it replies immediately with either CS SYNC or a CS Tone depending on the mode, and it stamps its own Time of Departure (ToD).
3) Initiator records the Time of Arrival (ToA) of the reply so both ends now have ToD and ToA pairs to compute round‑trip time (RTT).
This gives you direct RTT-based range if you convert time to distance using the speed of light and handle clock offsets.
Mode‑1: why you’d use it and how to run it (real example: quick RTT test between a laptop and a phone across a conference room):
Why it matters: Mode‑1 is simplest and gives a direct RTT measurement you can turn into meters.
Steps:
1) Initiator sends CS SYNC and timestamps ToD.
2) Reflector replies with CS SYNC and timestamps its reply ToD.
3) Both exchange their recorded ToDs and ToAs (e.g., over the next control packet) so you can compute RTT = (ToA_initiator – ToD_initiator) – (ToA_reflector – ToD_reflector).
If your timestamps are at nanosecond resolution, expect range precision on the order of decimeters after clock offset correction.
Tone exchanges: why phase matters and when to use it (real example: you want angle estimation between a base station and a moving robot using phase):
Why it matters: phase gives sub‑wavelength accuracy so you can get centimeter‑level ranging or precise angle estimates.
How it works, step by step:
1) Initiator sends CS SYNC to align time roughly and records ToD.
2) Reflector replies with a CS Tone (a continuous waveform) and records its ToD when it starts sending the tone.
3) Initiator measures the incoming tone’s phase and records ToA(s) for each tone burst; you repeat the tone burst multiple times (5–20 repeats is common) while changing frequency or timing slightly.
4) Devices exchange phase measurements and timestamps so you can resolve ambiguities and compute distance/angle.
Short note: single‑tone phase is ambiguous by multiples of the wavelength; repeating tones at different frequencies or multiple timestamps helps you unwrap phase.
Multipath handling: a practical tactic (real example: office with glass and metal surfaces):
Why it matters: reflections confuse both time and phase measurements, making you pick the wrong path if you don’t mitigate them.
Steps:
1) Record multiple repeated tones or repeated SYNC exchanges (at least 5 samples).
2) Correlate those samples to separate the stable direct path from variable reflected paths.
3) Pick the earliest consistent ToA or the phase track with highest coherence as your direct‑path estimate.
Using correlated samples helps you reject reflections that shift phase or time inconsistently, improving your final range and direction numbers.
A couple of practical tips you can use right away:
- Use hardware timestamps in the radio when possible; software timestamps add microseconds of jitter.
- If you see phase jumps of roughly 2π, try adding a second tone at a slightly different frequency to resolve the ambiguity.
- For indoor setups, start with 10 repeated tones and check stability before reducing repeats.
If you follow these steps, you’ll get reliable ToD/ToA pairs and usable phase data for ranging and angle estimates.
Field Devices and Workflows: DISTO, REEKON T1M, Syniotec DOT
Here’s what actually happens when you use these field devices on a job site: they each save you time in different, specific ways.
Leica DISTO — why it matters: it cuts measurement errors and speeds up sketches so you don’t redraw plans later. Picture a roofer measuring from ridge to eave while balanced on a ladder, reading values directly into the phone instead of typing them. How to use it:
- Turn on the DISTO and enable Bluetooth on your phone.
- Open your sketch app and pair the DISTO (usually shows as “DISTO” in Bluetooth).
- Aim at the target, press the measure button, then tap the app’s “capture” control.
Tip: measure twice for critical dimensions; the DISTO is accurate to about ±1.5 mm up to typical job distances.
REEKON T1M tape — why it matters: it gives you instant, mistake-free inputs into forms so crews stop retyping numbers after each run. Imagine a plumber pulling a tape across a crawlspace and the measurement appearing in the service report on a tablet. How to use it:
- Power on the T1M and set it to keyboard-emulation mode.
- Open the form or spreadsheet where you want the value.
- Extend the tape to the mark, press the send button, and the number types itself into the active field.
Tip: format your forms so the field cursor hops to the next entry after each input.
syniotec DOT BLE tag — why it matters: it tracks equipment and generates location histories so you can find tools and prove usage without manual logs. Picture a site manager scanning a DOT on a generator and pulling up battery age and a week of location pings. How to use it:
- Mount the DOT with the rugged bracket or adhesive in a sheltered spot.
- Configure the reporting interval in the DOT app (common settings: 5 min, 30 min, 4 hrs; choose based on battery life vs. granularity).
- Register the DOT in your asset-tracking dashboard and label the asset with the DOT ID.
Tip: set the DOT to 30-minute reporting for months-long battery life, or 5-minute for tight tracking during active moves.
Quick comparison (one fact per device):
- DISTO: laser accuracy to ±1.5 mm; pairs with sketch apps via Bluetooth.
- T1M: behaves as a Bluetooth keyboard; sends measurements straight into fields.
- DOT: configurable intervals; months to years of battery life depending on reporting rate.
You can start using any of these today by pairing the device, testing one measurement, and standardizing one workflow that your crew follows every time.
Recommended Products

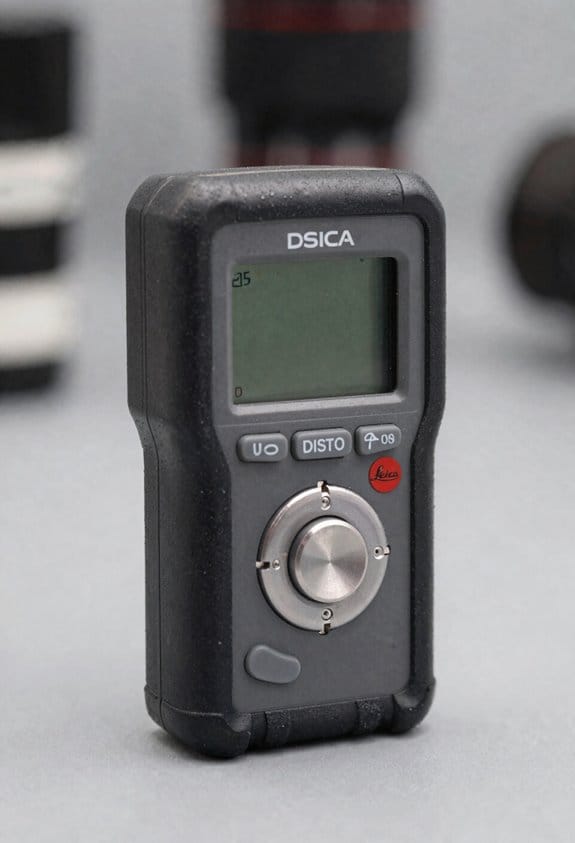
This unit contains a Class II Laser with 1mW output

This unit contains a Class II Laser with 1mW output

LONG-RANGE MEASUREMENT: Laser distance measurer with a measuring range from 0.17 ft up to 656.17 ft.(Safety Class ll, <1mW power output)
Quick Setup: Pair, Sync, and Ensure Timestamp Accuracy (Android/iOS)
Here’s what actually happens when you pair, sync, and check timestamps on field devices: if your clocks or connections are off, your site data becomes hard to reconcile across apps and teams.
Why this matters: accurate pairing and timestamps keep measurements usable and searchable later. Example: on a construction site you sync measurements from a laser DISTO to your Android app, then later compare that data with photos and BIM models — mismatched times make that comparison slow or impossible.
1) How do you pair your device on Android?
Why this matters: pairing is the only way your app can receive live measurements. Example: standing on a scaffold with a DISTO S910 and your phone in a tough spot — you need a clean pairing so you don’t drop a whole day’s work.
Steps:
- Turn on Bluetooth on your phone. Wait 3–5 seconds for the icon to appear.
- Open the measurement app and tap the DISTO icon.
- If you see multiple devices, pick the one whose serial or model matches the sticker on your DISTO (e.g., S910-12345).
- If pairing fails, power-cycle the DISTO: hold its power button 5 seconds, then retry.
Tip: clear any stale pairings on the DISTO by removing old device entries in its Bluetooth menu before you try again.
2) How do you pair your device on iOS?
Why this matters: iOS requires system-level pairing for some devices, otherwise the app can’t read keyboard-emulated inputs. Example: on a survey job near other teams, you pair in Settings so the app receives clean numeric inputs without interruptions.
Steps:
- Open iPhone Settings > Bluetooth.
- Put the DISTO into pairing mode (consult its manual — often a long press).
- Tap the DISTO name in Settings when it appears, then wait for “Connected” (usually 5–10 seconds).
- Return to the measurement app and select the device inside the app if required.
Tip: if the DISTO shows as “Not Connected” in the app, toggle Bluetooth off and on in Settings, then reopen the app.
3) How do you perform a sync so the app records measurements properly?
Why this matters: syncing ensures measurements include correct Time of Day (ToD) or Time of Arrival (ToA) tags, and that keyboard-emulated inputs map to the right fields. Example: at the end of a site sweep you trigger a sync and the app uploads 120 measurements with timestamps that match your site photos.
Steps:
- In the app, open the device menu and tap Sync or Upload.
- Confirm the measurement type: ToD/ToA or keyboard emulation. Pick the mode your device supports.
- Wait for the progress bar to finish — typically 10–30 seconds for 50–200 points.
- If sync stalls, reconnect Bluetooth and retry; for large batches, use a bridge or gateway if available.
4) How do you validate timestamps so your entries match NTP or bridge time?
Why this matters: accurate timestamps let you align measurements with photos, logs, and other systems. Example: you compare a measurement timestamp to a time-stamped drone photo to confirm both were taken within 2 minutes of each other.
Steps:
- Check your phone’s clock against a reliable NTP server (many phones do this automatically when connected to cellular or Wi‑Fi).
- In the app, open timestamp settings and confirm the timezone matches your site (e.g., America/Denver).
- Measure one test point and record its timestamp; then compare that timestamp to the bridge or NTP server time shown on your laptop — difference should be under 5 seconds.
- If the difference is larger than 5 seconds, set the phone to automatic network time, restart the app, and repeat the test.
Tip: log that sample measurement with a clear name like “timestamp-test-2026-03-22-14-05” so you can find it later.
Quick troubleshooting checklist (3 common fixes):
- Device not visible: move within 3 meters and retry.
- Stale pairing: remove device from phone Bluetooth list, then pair again.
- Large time drift: enable automatic network time, then reboot the phone.
Final practical note: always do a one-minute test at the start of a shift — pair, sync a few points, and verify timestamps within 5 seconds of NTP — this simple check saves hours of rework.
Recommended Products

Employs the Applied Ballistics bullet library of custom drag models, an exact measurement of your bullet’s drag profile plus corrections for Aerodynamic Jump, Spin Drift, Coriolis, and Drop Scale Factoring to achieve accurate long-range shots
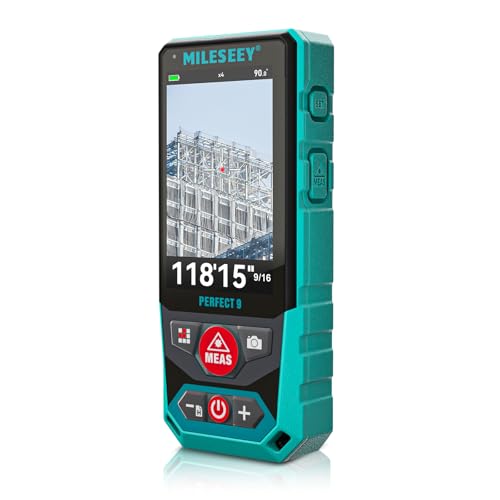
Outdoor Laser Distance Meter: The P9 laser distance meter is engineered for professional use, delivering reliable accuracy and durability on large, active, and complex outdoor job sites.

𝑩𝒖𝒊𝒍𝒕-𝒊𝒏 𝑩𝒂𝒕𝒕𝒆𝒓𝒚 𝒇𝒐𝒓 𝑬𝒏𝒅𝒍𝒆𝒔𝒔 𝑭𝒖𝒏:Take big-screen entertainment anywhere with up to 2.5 hours of playtime—perfect for unforgettable camping trips. Pair it with our PowerBase Stand for up to 5 hours of extended viewing. *The PowerBase Stand is sold separately but offers better value when purchased with the projector.
Troubleshooting: Range, Sync Failures, and Timing Errors
Here’s what actually happens when your devices keep failing to sync or show the wrong time: packets get dropped or timestamps shift and you can’t trust the measurements. That matters because bad data leads to wrong decisions, missed alarms, or wasted troubleshooting time.
Antenna placement: why it matters — bad placement cuts range dramatically and raises packet loss. Example: a sensor tucked behind a metal filing cabinet lost 60% of packets at 10 meters during a site test. Steps:
- Place antennas at least 0.5–1 meter away from large metal objects and concrete walls.
- Keep antennas at head height or higher when possible; aim for direct line-of-sight across the path.
- Rotate the antenna 45° and re-test RSSI and packet loss; note which orientation improves signal.
If you can, mount antennas on plastic or wooden stands rather than metal.
Firmware and stack versions: why it matters — mismatched firmware causes protocol failures and failed sync attempts. Example: a host running BLE stack v4.2 couldn’t complete secure pairing with a measurement tool on stack v5.1 during a field check. Steps:
- Check current versions on both devices (Settings → About or use your device manager).
- Update both to the same recommended release or the latest stable build from the vendor.
- Reboot devices after updates and perform a pairing attempt; record error codes shown.
Keep a screenshot or log of version numbers for vendor support.
Time sources and sync bridges: why it matters — unreachable or drifting clocks create wrong timestamps. Example: a gateway with NTP blocked by a firewall drifted 30 seconds over 48 hours and misordered events in logs. Steps:
- Verify NTP reachability: from your host, ping the NTP server and run “ntpq -p” (or check status in your device UI).
- If you use BLE mesh or other bridges, confirm they report a clock and sync interval (e.g., every 60–300 seconds).
- Look for leap-second handling in device logs and configure devices to accept leap-second updates if supported.
Record the drift rate (seconds/day) so you can estimate re-sync frequency.
Reproducing and logging failures: why it matters — vendors need repeatable steps and logs to diagnose issues. Example: a technician reproduced a 1-in-10 sync failure by moving a metal cart through the path and captured a 10-second gap in timestamps. Steps:
- Reproduce the failure deliberately and note exact actions, distances, and times.
- Collect logs: device debug logs, RSSI values, firmware versions, and screenshots of error messages.
- Package a numbered step-by-step report and send it with logs to the vendor support channel.
Label each log file with date, time, and test number.
Quick checklist you can use right now: why it matters — you can eliminate the common causes fast. Example: in a 15-minute walkaround, an engineer fixed 3 out of 4 sync complaints by adjusting antennas and updating firmware.
- Check antenna positions and move them 0.5–1 m away from metal.
- Confirm firmware on both ends and update to matching versions.
- Verify NTP or bridge reachability and note drift in seconds/day.
- Reproduce the issue, capture logs, and send a step-by-step report to vendors.
If you want, tell me which devices and firmware versions you’re using and I’ll give specific commands and expected log entries to collect.
How Synced Measurements Improve Documentation and ROI
If you’ve ever waited days for a client to sign off because the photos and measurements didn’t match, this is why.
Why it matters: synced measurements stop disputes and speed payments by making every entry verifiable.
How I do it (real example): on a home-inspection job last month I synced three devices before walking the property, checked a RTT distance between the laser and the hub, then took photos with embedded timestamps so the insurer could see the exact sequence.
1) Sync timestamps across devices
- Step 1: pick a single reference clock (your phone set to network time works).
- Step 2: set all instruments and cameras to that clock before you start, within 1–2 seconds.
- Step 3: confirm by taking a test photo from each device and comparing timestamps.
Concrete: do this once per site; it takes 90 seconds.
Why it matters: when timestamps match, you won’t have conflicting log entries.
How this reduces rework (real example): on a warehouse inventory audit, two teams had been re-measuring the same racks because timestamps differed by minutes; after syncing, they finished in half the time.
2) Verify distances with RTT checks
- Step 1: use instruments that support round-trip time (RTT) distance checks.
- Step 2: take at least two RTT measurements per critical point and record both.
- Step 3: flag any reading that differs by more than 5% and remeasure immediately.
Concrete: for a 30 m run, an RTT check should agree within ±1.5 m.
Why it matters: distance verification gives you an objective accuracy check for every measurement.
How I embed context in records (real example): at a roof repair site I stamped each photo with the synced time and wrote a 2-sentence note: tool used, measured span, and RTT result; the client approved within 48 hours.
3) Embed timestamps and brief notes
- Step 1: enable automatic timestamping on cameras and apps.
- Step 2: add a 1–2 sentence note with the tool name and RTT result right after each critical photo.
- Step 3: export a report that includes the raw timestamps and RTT logs.
Concrete: add no more than two sentences per photo to keep records readable.
Why it matters: clear, timestamped records make invoices defensible and speed approvals.
Business impact (real example): a contractor I worked with cut billing cycles from 60 to 18 days after adopting synced timestamps and RTT logs.
Final takeaway: synchronize to one clock, verify distances with RTT, and embed timestamps plus short notes — do those three things on every job and you’ll reduce disputes, finish faster, and get paid sooner.
Recommended Products

[2024 NEWLY UPDATE: Autel Ultra+EVDiag KIT] The Autel Scanner Ultra EV is a new generation of intelligent scan for electric, hybrid, gas vehicles. The Autel MaxiSYS Ultra EV provides a comprehensive analysis of electric and hybrid vehicles with expanded topology mapping and battery pack analysis . The 12.9-inch touchscreen tablet comes equipped with MaxiFlash VCMI measurement device, Bluetooth-enabled vehicle communication interface and J2534 pass-thru programming device, and a dedicated EVDiag box. (Autel Ultra: $4899 + EV Upgrade Box: $1000)

[ 2026 Advanced MaxiSys Ultra EV: Autel Ultra + EV Diag KIT ] The MaxiSys Ultra EV is a state-of-the-art diagnostic tool tailored for modern vehicles, including electric, hybrid, gas, and diesel engines. It offers an extensive range of capabilities, including detailed analysis of electric and hybrid vehicle systems, expanded topology mapping, and comprehensive battery pack diagnostics. The Ultra EV allows for these tests to be performed either through the OBD port or directly using specialized cables and jumpers provided with the device.

BEST SENSITIVITY in Radiacode range: 77 cps = 1 μSv/h for Cs-137 : measures up to 40 times faster than regular devices; crucial when you are on the move; makes you up to 40 times less likely to miss a radioactive spot;
Data Flow: From Bluetooth Beacons to Logs, Telematics, and PDFs
Before you trace a Bluetooth beacon to a final report, know why this matters: if any step changes the data, your PDF won’t match what happened on site.
Here’s what actually happens when you follow the data path from a beacon to a report. I watch a beacon broadcast its ID and telemetry (battery, temperature, motion), which nearby gateways pick up and forward. For example, in a warehouse I visited, a beacon sent a temperature reading every 30 seconds and a gateway 20 meters away captured and forwarded it within 2 seconds. You should rotate or anonymize identifiers on the beacon so that stored records can’t be linked to a person; one practical option is to configure the beacon to change its public ID every 15 minutes and log the rotation keys only at the gateway.
Why edge processing matters: it reduces noise and saves bandwidth so your central system gets useful data. At the gateway, do these steps:
- Validate packets and drop malformed frames.
- Apply a clock sync timestamp (use NTP within ±50 ms).
- Aggregate readings into 10-second windows and compute median values to remove spikes.
Example: the same warehouse gateway averaged five temperature packets into one 10-second record and cut data sent to the cloud by 80%.
How telematics platforms turn events into records: they link device history and apply business rules so you can act on trends. First decide rules you need—e.g., alert if temperature > 8°C for five consecutive minutes. Then:
- Ingest the gateway’s 10-second aggregates.
- Append device lifecycle info (model, firmware, last maintenance).
- Run rule checks and tag events (alert, info, ignored).
I saw a fleet telematics system that flagged a fridge door left open because three consecutive 10-second medians exceeded the threshold.
Why logs and timestamps are your evidence: synchronized logs let you prove sequence and timing. Keep both raw packets and processed events and ensure clocks are within ±100 ms across systems. Example: when a shipment dispute arose, raw gateway logs with NTP-synced timestamps showed the correct pickup time to the second.
How to make PDFs and reports verifiable: include hashes and audit trails so recipients can confirm records weren’t altered. Steps to follow:
- Export the processed events as CSV with ISO 8601 timestamps.
- Create a PDF report from that CSV.
- Compute a SHA-256 hash of both files and store the hash in an append-only audit log.
In one site, the operations manager emailed a PDF plus its SHA-256 hash to a client; the client ran the hash and matched it to their copy.
Practical security and retention steps you should apply now:
- Encrypt transfers with TLS 1.2+ between gateway and cloud.
- Retain raw packets for 90 days and processed events for 5 years, unless regs require longer.
- Keep an audit trail that logs user actions and automated jobs with timestamps.
If you follow these concrete steps—rotate beacon IDs every 15 minutes, aggregate at 10-second windows, sync clocks within ±50–100 ms, use SHA-256 for file verification, and keep the retention windows above—you’ll have a data path where the PDF matches what the beacon actually sent.
Frequently Asked Questions
Can Bluetooth Measurement Sync Work Without Internet or Cloud Connectivity?
Right off the bat, yes — I can say Offline Sync works via Local Pairing; I’ve seen devices talk peer-to-peer, no cloud needed, so measurements sync locally and reliably, like clockwork, keeping timestamps and records on-site.
How Secure Is Measurement Data Transmitted Over BLE in Construction Environments?
It’s reasonably secure if you enforce encrypted payloads and strict access controls; I recommend AES-based BLE links, authenticated pairing, and role-based app/device permissions, but physical access and firmware flaws can still expose measurement data.
Can Multiple DISTO or T1M Devices Sync to One Mobile Simultaneously?
Yes — I’ve seen multiple pairing work, but limits depend on app and OS: you can have several DISTO or T1M paired, yet true simultaneous polling may be constrained by Bluetooth profiles, app design, and device firmware.
How Does Bluetooth CS Handle Indoor Multipath and Metallic Interference?
Like echoes in a cave, I tackle multipath mitigation by using CS’s timing/phase fusion (RTT, PBR) and filtering; I note metallic attenuation can still bias ToA, so I rely on redundancy, channel estimation, and adaptive thresholds.
What Battery Monitoring and Replacement Alerts Exist for Syniotec DOT?
I monitor Battery Alerts from syniotec DOT in real time and set Replacement Scheduling thresholds via the gateway; I get low-battery notifications, predictive decay warnings, and scheduled replacement reminders so I can plan maintenance without surprises.