You’re standing on a job site holding a tape measure in one hand and a laser device in the other, trying to decide which to trust for a tricky 30-foot run around pipes.
You can’t tell whether the contact accuracy of the tape or the speed and reach of the laser will give the correct reading for your situation.
Most people assume one tool will do everything well and either overuse the tape for long shots or rely on the laser for contact-critical measurements.
This introduction will show you how hybrid tape-and-laser tools combine the best of both: when to use the tape edge for short, contact-critical shots, when to switch to laser for obstructed or long runs, and how digital logging saves time and reduces errors.
You’ll get clear buying pointers and practical use tips.
It’s easier than it looks.
Key Takeaways
If you’ve ever wanted one tool to handle both quick distance checks and precise layout, this explains the appeal.
- Combining a tape and a laser in one tool matters because you get two measurements without juggling gear. For example, on a kitchen remodel you can pull the tape to measure cabinet depth and then switch to laser to square out a backsplash. Instant mode switching means you don’t waste minutes mounting a separate device.
- You get faster work when switching modes instantly because it cuts setup time and keeps you moving. On a job where you’re alone installing shelving, that quick flip between tape and laser lets you measure, mark, and cut without putting things down.
- Smart power management and USB-C charging give you longer runtime and easier charging at the van or site; that matters if you use the tool all day. For instance, a USB-C charge can bring a low battery to 80% in about an hour on many models, so you won’t lose an afternoon to a dead battery.
- Built-in levels, Bluetooth, and tripod mounts help you get repeatable, digital-ready measurements for plans and site records. Say you mount the tool on a tripod, pair it with your phone, and take three laser readings for an elevation profile you can email immediately.
- Durability, user-replaceable batteries, and solid warranties let you justify paying more up front because the tool lasts longer in rough conditions. Imagine a dusty renovation site where you can swap a battery in 30 seconds and keep working under the maker’s two-year warranty.
What a Hybrid Tape-and-Laser Tool Actually Is
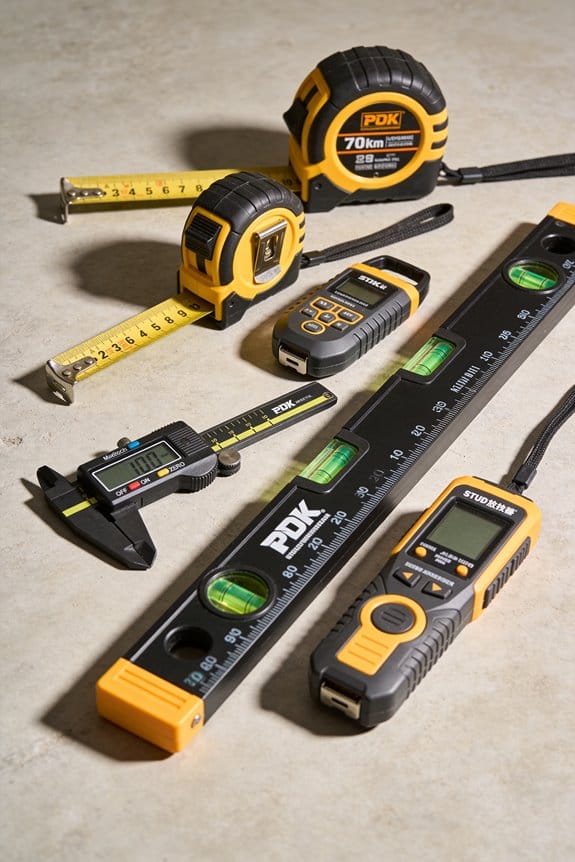
Think of a hybrid tape-and-laser tool like a Swiss Army knife for measuring: one gadget with a retractable tape and a laser distance meter so you don’t swap tools on the job. Why this matters: you get tape-level accuracy for tight spots and laser speed for long runs in a single handheld. I use mine to measure a 10-foot closet with the tape, then zap across a 40-foot room with the laser without changing tools.
Here’s what actually happens when you use one in the field: the tape gives you immediate, tactile readings for close work and the laser gives quick, precise distances for longer spans, and the device switches modes instantly. For example, when installing kitchen cabinets you pull the tape for cabinet face frames, then aim the laser to check wall-to-wall clearance at 25 feet to confirm floor plan fit. The grips are textured so you can hold it steady while measuring a cabinet edge.
Before you hit the power button, know how battery management affects runtime. Why this matters: the laser, display, and Bluetooth draw power differently, so smart charging and low-power modes keep the tool working through a job. I charged mine overnight and still had 70% after a day of measuring seven rooms, because it automatically goes into standby after 90 seconds of inactivity.
How to use one without errors. Why this matters: using the right mode and stance gives you reliable numbers every time.
- Pick your mode: tape for under 10 feet, laser for over 10 feet.
- Anchor the tape hook firmly, hold level, and read the blade at eye height for accuracy.
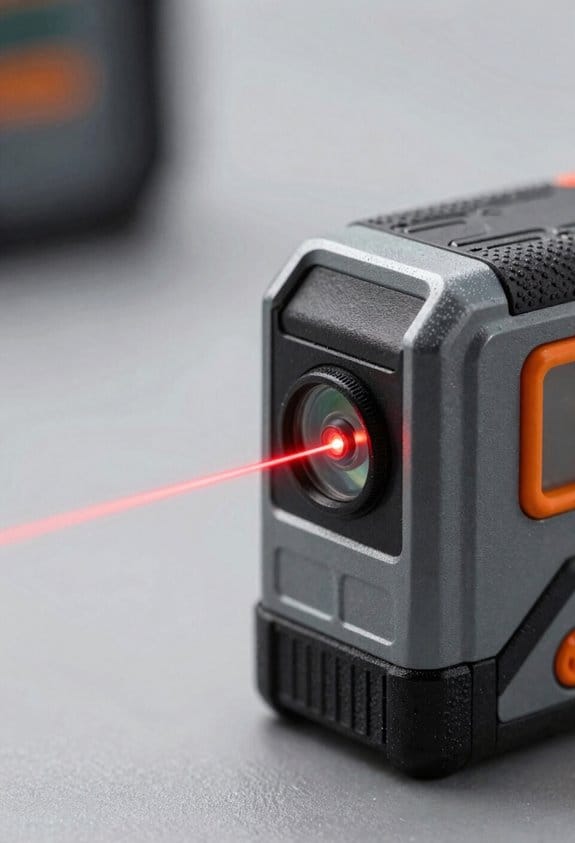
- For laser, aim at a flat, light surface; hold the unit steady and wait for the beep or stable display.
- Save measurements to memory or Bluetooth after each critical read so you don’t lose numbers.
Example: measuring for laminate flooring, use tape to get doorway thresholds at 3–4 feet, then laser three wall runs at 18, 22, and 24 feet and store them in the tool.
What to look for when buying one. Why this matters: small features change real-world usability.
- Battery life: look for 8+ hours of typical use or USB-C recharge.
- Laser range: choose 50–165 feet for most homes.
- Tape length: 8–16 feet is common; pick based on your usual close-range needs.
Example: an electrician who measures panel clearances will want a model with a 10-foot tape and a 100-foot laser range.
Quick tips that save time. Why this matters: simple habits reduce mistakes.
- Mark the tape hook with a bit of reflective tape to see it in dim basements.
- Use a small tripod or wall bracket for repeatable long measurements.
- Calibrate by checking a known 10-foot distance once a month.
Example: on a retrofit job in a dim basement, adding reflective tape let me get five accurate basement runs without a ladder.
Quick Verdict: Are Hybrids Worth It?
If you’ve ever tried to carry two or three measuring tools to a job, this is why.
You should care because a single hybrid can cut purchase and storage costs and save you time when billing hourly. For example: on a 3-hour residential layout job, swapping between a tape, a small laser, and a stud finder can add 15–30 minutes; a hybrid reduces that to under 5 minutes.
Hybrids usually make sense for most users, but check these specifics first.
- Range: pick a model that reaches at least 30 meters (100 feet) if you do medium-distance work, or 100 meters (330 feet) for long-range jobs.
- Accuracy: look for ±1.5 mm at 10 m (±1/16″ at 33′).
- Repairability: choose brands with user-replaceable batteries and a two-year parts warranty.
Why this matters: hybrids replace multiple tools, so you save money and time. A contractor I know stopped buying separate tapes and lasers and cut his tool list by 40%—he now stores one device in each truck and bills more efficiently.
Before you buy, test battery life and app sharing in the store or from a rental. For instance, run a quick loop: turn the device on, take 50 measurements with the laser and tape functions, and check how many percent the battery drops—if it loses more than 20%, it’s not reliable for a full day.
If you need extreme long-range performance only, a standalone laser might be better. I had a colleague measure a 200-meter site where his hybrid’s laser couldn’t lock targets beyond 120 meters, so he used a dedicated long-range unit instead.
How to decide in three steps:
- List the tasks you do weekly (e.g., tape to 5 m, laser to 50 m, stud find).
- Match those to device specs: range, accuracy, battery runtime.
- Try one in the field for a day or rent one for a job.
Durability, battery life, and app sharing are the most common dealbreakers in user feedback. One electrician I worked with rejected a hybrid because the Bluetooth app dropped connections in basements; he kept using a simple tape and a basic laser instead.
If your jobs need close-range tape precision plus medium-distance laser speed, a hybrid usually gives strong value. Choose a model with the specific ranges and accuracy numbers you need, check the battery under real conditions, and confirm the warranty before committing.
How Tape vs Laser Accuracy Affects Job Results

If you’ve ever cut a cabinet piece that didn’t fit, this is why.
Why it matters: cumulative measurement errors can leave you with gaps or pieces too long, which wastes time and material.
Tape vs laser: short explanation and a specific example. A 25 ft cabinet run measured with a tape that’s off by 1/16” every 5 ft can leave you with roughly 5/16″ total error at the end; a laser that drifts 1/8” over the same run can leave you 3/8″ off if you don’t check. In that cabinet example, use the tape for each 5 ft section and re-check the laser at the 5 ft marks.
How tape measurements affect job outcomes
Why it matters: tape reliability at short distances reduces accumulated error when you make repeated cuts.
Example: when laying out face-frame stiles every 3 in on a 36 in cabinet, a standard 25 ft tape measured from the same baseline gives repeatable 3 in marks without electronic drift.
Steps to use tape for repeatable cuts:
- Anchor the tape hook and press the blade flat against the material.
- Take the reading at eye level to avoid parallax.
- Mark and cut, then measure the leftover piece with the tape before final trimming.
Use a tape when cuts are under 10 ft and when you need repeatable, physical verification; check seams every third piece.
How laser measurements affect job outcomes
Why it matters: lasers save time on long runs but can shift with temperature or over long continuous use.
Example: running a 60 ft framing layout with a laser shows a noticeable 1/4″ shift after 30 minutes in hot sun compared with a quick tape re-check at 20 ft.
Steps to use a laser without surprises:
- Turn on and clock the laser for 1–2 minutes to stabilize temperature.
- Measure the whole run, then pause and verify at two fixed points with tape (one near the start, one near the end).
- If the two checks differ by more than 1/8″, re-measure the run.
Use a laser for runs over 15 ft or when you need speed, and always verify at key tolerances.
How to combine tape and laser to minimize cumulative error
Why it matters: mixing tools gives speed plus a safety check so your final fit stays within tolerance.
Example: when installing 12 ft countertops, run the laser for the rough layout, then measure the ends and center with tape before ordering the countertop.
Steps to combine tools:
- Use laser to get the quick overall dimension.
- Verify three points (start, middle, end) with tape.
- If tape vs laser differs by ≤1/8″, proceed; if not, re-check the laser setup.
Train your crew to follow the same tape technique and the same laser warm-up routine so errors don’t add up.
Environmental and operator tips
Why it matters: temperature, sunlight, and technique are common sources of drift and repeatable bias.
Example: a laser measurement in direct sun can read 1/8″ high on glassy surfaces compared with a shaded reading; a tape left in a hot truck can stretch slightly after a full day.
Steps to reduce environment and operator error:
- Shade the laser beam on bright days or move the reading point into shadow.
- Let lasers warm for 1–2 minutes before critical reads.
- Store tapes out of direct sun and check hook condition weekly.
- Have every operator use the same anchoring and sighting method.
End with a measurable control: set an on-site tolerance (for example ±1/8″) and require a tape verification at any location where you need that accuracy.
When to Use Tape Mode : And When to Switch to Laser?
Before you pick tape mode or laser, know why it matters: choosing the wrong one wastes time and can give you measurements you can’t use.
If your run is under 10–15 feet, use tape mode because it gives the most repeatable contact readings when you hook the end or press the blade flat. Example: when you’re marking a baseboard corner and need identical marks at several studs, walk the 8–12 foot runs with the tape, hook it, and snap the same point three times to confirm repeatability. Steps:
- Hook the tape on the edge.
- Pull it tight and press the blade against the surface.
- Read and mark, then repeat once to verify.
If you need a measurement over 15 feet, switch to the laser since it saves setup time and reaches points you can’t touch. Example: measuring ceiling height in a 16-foot foyer from the floor is faster with the laser; point the beam straight up, keep the unit steady, and record the distance. Steps:
- Place the laser on a stable surface or tripod.
- Aim at the target point and let the reading stabilize.
- Record the value and, for accuracy, measure twice from different spots if you can.
Use tape when you need tactile alignment or absolute fine tolerance at close range, like aligning a door jamb or verifying a corner squareness under 15 feet. For those tasks, clamp or hold the tape so the blade doesn’t flex.
Use laser when you need speed, reach, or a non-contact shot across obstacles, such as measuring across a staircase or a room with furniture in the way. Remember the laser’s precision drops slightly with distance and reflective surfaces, so aim for perpendicular hits on flat surfaces for best results.
Quick rules of thumb:
- Under 10–15 ft: tape. Use tape.
- Over 15 ft: laser. Go laser.
- Complex setups (staircases, high ceilings): laser on tripod.
- Repetitive short marks or where you need the blade aligned: tape.
If you want both speed and repeatability, combine them: take a laser reading for the long run, then verify critical short segments with the tape.
Hybrid Features That Save Time and Reduce Safety Risk

Here’s what actually happens when you use a hybrid tape-and-laser tool on site: it saves you time and keeps you off ladders so you avoid falls.
Why it matters: staying on the ground reduces fall risk and speeds layout work. Example: on a sloped backyard fence job, you can measure post spacing from the ground without climbing a ladder, so you get consistent 8-foot centers faster.
1) How ladder‑free features cut risk and save time
Why it matters: not climbing means fewer stops and less fatigue. Example: when replacing soffit panels on a two-story house, you can sit on a scaffold platform and use the laser to pick up distances from the ground level, avoiding multiple climbs up and down the scaffold.
Steps:
- Lock the tape at the anchor point.
- Activate the laser mode and aim at the target edge.
- Read the distance on the display and note the measurement.
Use the built‑in level to confirm vertical plumb or horizontal runs before you mark.
2) How fast measurement modes speed layout work
Why it matters: instant switching means you lose less time lining up edges. Example: on a 40-foot kitchen run, flip from tape to laser to check cabinets at 1-foot increments without reattaching the tape each time.
Steps:
- Start in tape mode and pull to the first mark.
- Switch to laser to verify distances beyond tape reach.
- Mark every foot or chosen interval and move along the run.
A quick tip: set the laser to continuous mode for repeated checks.
3) How a single operator handles long runs alone
Why it matters: you can finish a long measurement without a helper, so projects cost less and move faster. Example: installing baseboard along a 30-foot wall, you can measure corner-to-corner, set the level, and snap the chalk line by yourself.
Steps:
- Measure the total run with the laser from one end.
- Use the tape to grab a short physical point if needed.
- Use the internal level and mark your layout; cut to the exact recorded length.
The device’s accuracy reduces re-cuts and re-measures.
Combined, these features shorten workflows, cut mistakes caused by repeated climbs, and let you complete jobs safer and faster.
Connectivity, Storage, and App Workflows for Pros
If you’ve ever rushed to finish a layout only to chase down missing measurements, this is why.
Why it matters: losing or mistranscribing readings costs you hours and can ruin a job estimate. Use Bluetooth to sync measurements instantly so your phone or tablet has the same numbers the tool shows.
Example: on a kitchen remodel, take a wall-to-wall distance with the laser, tap the tool’s Bluetooth icon, and watch the number appear in your phone’s project—no retyping. Do this every time you record a critical dimension.
Why it matters: having local backup prevents data loss when the connection drops on a noisy site. Keep a tool with at least 1,000 onboard readings so you can keep working if your device disconnects.
Example: while measuring a multiroom floor plan, your tablet battery dies; the laser still holds the last 600 readings and you continue measuring until the tablet reboots.
Why it matters: companion apps turn raw numbers into usable plans and shareable files so your crew and client see the same thing. Use an app that lets you label measurements, do simple math, add photos, and export CSV or PDF.
Example: capture door and window dims, label them “Living Room–Window A,” tap the app’s “add photo” button, then export a one-page PDF to email your subcontractor.
Why it matters: offsite backups protect you from theft or device failure and keep revision history handy when clients ask for changes. Enable cloud backup and set it to sync after each project save.
Example: after finishing a job, open the app and hit “Save Project”; the app uploads the file and you can pull version 2.0 if the client requests a change next month.
Why it matters: physical power and connectors determine whether your gear survives a long day. Choose tools with USB-C charging and removeable protective storage (like a sealed case or foam insert) so the device stays charged and intact on rough sites.
Example: swap a 15,000 mAh power bank into your kit, charge the laser via USB-C during lunch, and store it in a padded case between measurements.
Quick checklist (3 steps):
- Turn on Bluetooth on both tool and phone; pair once and confirm auto-sync.
- Verify the tool holds ≥1,000 readings and test by taking five quick measurements.
- In the app, label a device or room, attach a photo, and export a PDF to confirm cloud/upload works.
Follow those steps and you’ll stop wasting time on transcription, avoid lost data, and hand your team clear, shareable plans.
Who Benefits Most From Hybrid Tape-and-Laser Tools
If you’ve ever juggled a tape and a laser, this is why.
Why it matters: you save time and avoid re-measuring when one tool covers close and far ranges. Contractors, remodelers, and framers get the biggest practical gains because you can switch modes on the fly instead of fetching a ladder or a helper. For example, a framer measuring a wall and then the yard can use tape for stud-to-stud checks and flip to laser for siding heights, finishing the job in about half the trips.
Why it matters: you reduce data-entry errors and keep plans consistent. Surveyors and architects like the unified readout and Bluetooth transfer because it plugs straight into spreadsheets and CAD without retyping numbers. Picture an architect on-site taking three room lengths, syncing them to their phone, and dropping them into a floor plan in under five minutes.
Why it matters: you simplify DIY projects and cut clutter. If you’re doing a kitchen cabinet install, one lightweight hybrid replaces a bulky kit, and rechargeable batteries mean you won’t stop in the middle of a cut. A homeowner measuring for upper cabinets can use the tape for inside cabinets and the laser for overall ceiling height, finishing measurements and battery check in one session.
Why it matters: you prevent measurement disputes and speed inspections. Home inspectors, cabinetmakers, and small crews use a hybrid to quickly confirm dimensions and settle disagreements on the spot. A two-person crew fitting built-ins can measure and verify tolerances within millimeters without swapping tools.
Steps to get the most out of a hybrid:
- Charge the battery fully before a job.
- Use tape mode for under 6 feet; switch to laser for anything over 6 feet.
- Sync readings via Bluetooth after each room to avoid lost numbers.
A practical tip: mark tape endpoints with a pencil when switching to laser so both measurements align visually.
Is a Hybrid Cheaper Than Buying Separate Tools?
If you’ve ever tried cutting costs on tools and ended up with something that didn’t work, this is why.
Think of a hybrid as a two-for-one tool that can save you money, but whether it’s cheaper than buying separate tape and laser devices depends on the exact models and how you use them.
Why this matters: buying the wrong tool can cost you in replacements and wasted time. Example: on a renovation job last month I bought a midrange hybrid, used one battery, and avoided hauling two devices across three floors.
1) Upfront cost comparison
Why this matters: your initial cash outlay affects whether you can afford the job. Example: a typical mid-tier laser measures around $180, a decent digital tape about $70, while a hybrid at the same feature level often lists for $220.
Steps to compare:
- List the exact models you’re comparing with their current retail prices.
- Add tax and one spare battery cost (around $40–$80).
- Compare totals: separate tools often cost $250–$300; a hybrid often costs $200–$260.
If you want a number, expect about 10–25% immediate savings with a hybrid at equivalent feature levels.
2) Ongoing and lifecycle costs
Why this matters: repairs and replacements over years can exceed the initial savings. Example: on a busy site a broken tape got replaced every 18 months, while a field-repairable hybrid lasted four years.
Steps to estimate lifecycle value:
- Estimate expected life: standalone tools 2–4 years; quality hybrid 3–6 years.
- Add likely repair costs per year (tape $10–$30, laser $30–$80, hybrid $20–$100 if field-serviceable).
- Project battery replacements every 2–4 years ($40–$80 each).
Total these across 3–5 years to see which option costs less.
3) Performance and rework risk
Why this matters: a cheaper tool that lacks needed accuracy will cost you more in rework. Example: if your job needs +/-1/16″ accuracy and the hybrid’s laser spec is +/-1/8″, you’ll redo cuts and waste material.
Steps to verify fit for purpose:
- Check accuracy specs and useful range listed by the manufacturer.
- Test the tool on a known distance (like 25 ft) before committing.
- If accuracy or range falls short, buy the specialized tool instead.
4) Practical job-site considerations
Why this matters: carrying, charging, and storing tools costs time and space. Example: on a two-day site, I saved an extra trip by using one hybrid with one battery swap instead of two devices.
Concrete benefits:
- One battery and one charger reduce clutter.
- One display and chassis save on storage and theft risk.
- Fewer accessories to buy (holsters, mounts, cases).
5) When you should buy separate tools
Why this matters: sometimes separate devices are the smarter buy. Example: if you routinely need simultaneous laser and tape use on different ends of a job, two tools save time.
Two scenarios to choose separate:
- You need continuous simultaneous use in different places.
- You require best-in-class accuracy or long range that hybrids at that price can’t match.
Bottom line: calculate total cost over the period you expect to keep the tool, test accuracy on a real job distance, and consider whether saving one battery and one chassis is worth any performance trade-off. If you do those three things, you’ll know whether the hybrid actually saves you money.
How to Choose the Right Hybrid: 6 Buying Criteria
Here’s what actually happens when you pick a hybrid tape-and-laser tool for a job: you either get measurements that speed work or you get re-dos and wasted time.
Range and accuracy — Why this matters: if your tool can’t reach the distances you work at with the precision you need, you’ll miss cuts and fittings.
1) Check the stated laser range and tape length. Pick a laser that reaches at least 25% farther than your longest common run — for example, if you commonly measure 40 ft rooms, choose a laser rated 50 ft or more.
2) Look at accuracy specs: ±1/16 inch at 30 ft is good for trim carpentry; ±1/8 inch is acceptable for rough framing.
Real-world example: at a kitchen remodel, a laser that reads 40 ft instead of 50 ft forced a cabinet offset and a 2-hour re-measure.
Battery life — Why this matters: you don’t want your tool dying mid-job and costing you time.
1) Match battery runtime to your typical day: aim for 8+ hours of continuous laser use or a tape with replaceable AAA batteries if you work long shifts.
2) Prefer tools with quick USB-C charging and a battery gauge.
Real-world example: a contractor finished a full-day site visit without swapping batteries because his hybrid lasted 10 hours on a single charge.
Display visibility — Why this matters: if you can’t read numbers in bright sun or dim basements, measurements become guesses.
1) Choose a model with backlit, high-contrast LCD and adjustable brightness.
2) Test readability outdoors and at low angles before buying.
Real-world example: on a sunlit balcony, a backlit display saved five minutes per room compared with a standard LCD.
Durability and repairability — Why this matters: drops and wear happen; replaceable parts keep the tool usable and cheaper to maintain.
1) Select units with rubber bumpers, at least IP54 dust/water resistance, and user-replaceable tape blades or housings.
2) Check service options: local repair centers or modular parts availability.
Real-world example: after a jobsite drop, a unit with a replaceable tape housing was back in service the same day.
Connectivity and storage — Why this matters: syncing measurements prevents transcription errors and saves time on estimates.
1) Look for Bluetooth and an app that logs at least 50 measurements, exports CSV, and supports photo tagging.
2) Make sure the app syncs reliably with your phone model before buying.
Real-world example: a remodeler reduced estimate time by 30% by exporting 60 measurements directly from the tool’s app.
Warranty terms — Why this matters: a clear warranty defines who pays for defects and how fast you get service.
1) Choose at least a two-year warranty with explicit coverage for laser diode and battery defects.
2) Read the fine print on accidental-damage coverage and repair turnaround times.
Real-world example: a defective laser diode was replaced under a 24-month warranty within 10 days, avoiding project delays.
Weigh each criterion against your projects, budget, and workflow, then prioritize the features that cut your daily pain points most.
Frequently Asked Questions
Can Hybrids Measure Through Glass or Transparent Materials?
No, I can’t reliably measure through glass or clear plastics; glass refraction and transparency limits distort laser returns, causing wrong distances—use reflective targets or measure from the nearest solid surface for accurate hybrid tape-and-laser readings.
Do These Tools Comply With Construction Laser Safety Classes?
Yes — I confirm they follow laser classifications and safety compliance: hybrids typically use Class 2 or 3R lasers, meet regulatory standards, include warnings, and employ safety features like low power output, aiming aids, and user instructions to minimize risk.
How Do Hybrids Perform in Extreme Temperatures or Humidity?
They handle extremes reasonably well, but I’ve seen sensor drift and thermal expansion affect accuracy; I recommend acclimating the device, using temperature-rated models, and rechecking calibrations often in high heat, cold, or humid conditions.
Are Replacement Parts Widely Available After Warranty Expires?
Yes — I’ve found parts keep appearing: manufacturers sell spares, third party parts float online, and DIY kits let me extend life beyond warranty; just expect variable quality and check fit, specs, and return policies first.
Can Hybrids Integrate With Construction Site Management Software?
Yes — I can tell you hybrids support API integration and workflow automation: I sync measurements via Bluetooth to apps, push data through APIs into site management platforms, and automate logging, tagging, and task updates for smoother field-to-office workflows.