You just slid a cabinet into the alcove and the door won’t close — is your measurement off or the cabinet? That exact moment of confusion — deciding whether to re-cut trim, shim the unit, or return it — is maddening.
Most people blame the cabinet or the wall instead of their measuring workflow and tool choices. This piece shows you which compact tools to trust, when to use a laser versus a tape, and simple checks that prevent costly rework so your built-ins fit the first time.
Follow these steps and you’ll cut less, adjust less, and finish faster. It’s easier than it looks.
Key Takeaways
If you’ve ever tried to squeeze a new cabinet into a tiny kitchen, this is why precise small tools matter.
– Why it matters: tight fits leave no room for error, so you need tools that give exact readings.
Example: when fitting a 600 mm-wide cabinet between two studs, measure to 0.5 mm to avoid sanding or shimming.
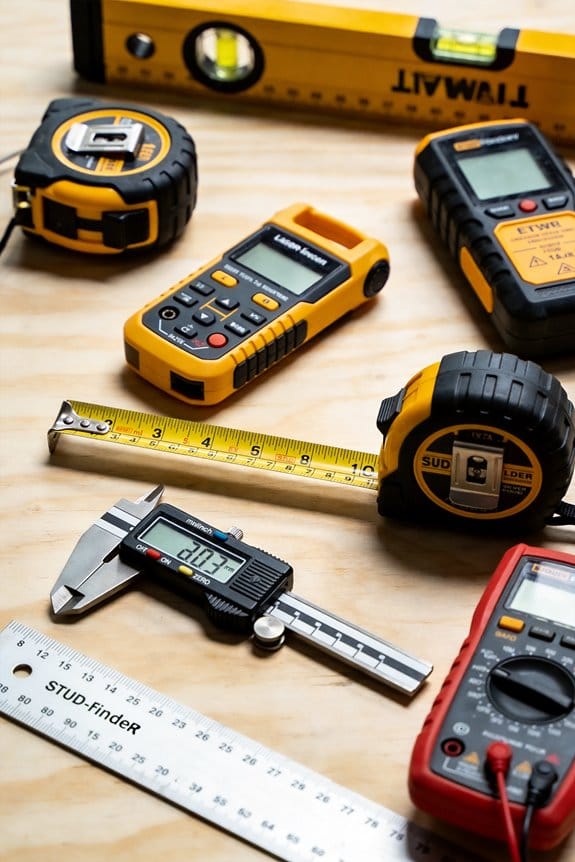
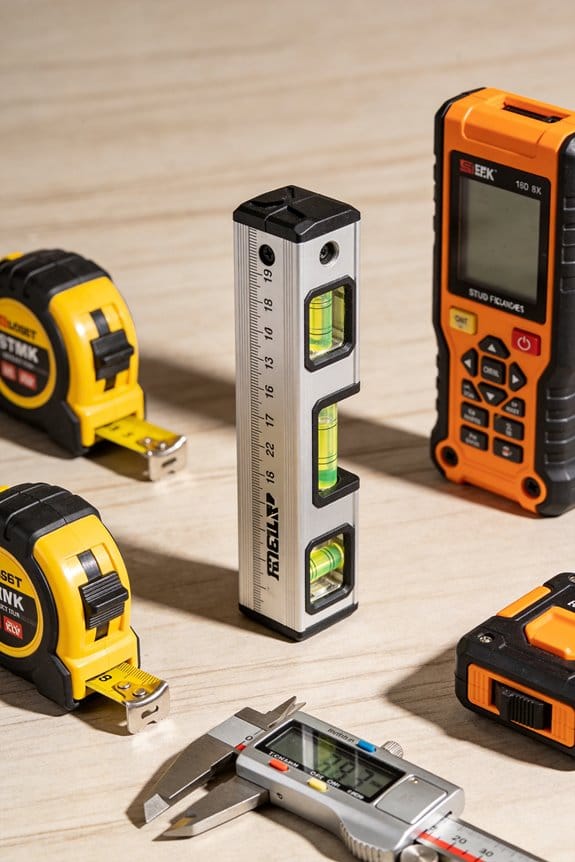
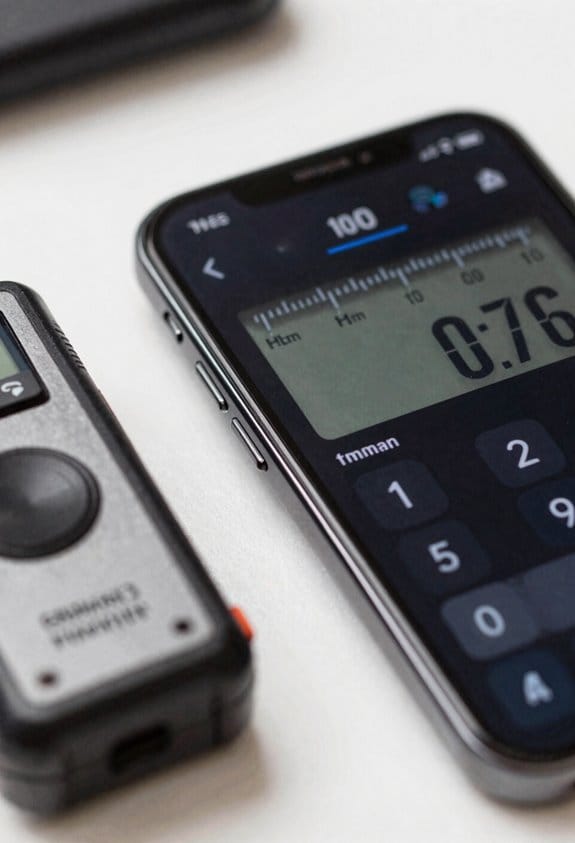
1) Use compact digital calipers for trim gaps under 10 mm; they read to 0.01 mm and fit in your pocket.
2) Use a digital angle finder when cutting cabinet filler pieces; set it to the measured angle and transfer that reading to your saw.
Before you start measuring long runs alone, you should know how to keep accuracy without an extra pair of hands.
– Why it matters: one-person jobs waste time when measuring a long span by yourself and getting it wrong means extra cuts.
Example: measuring a 4.2 m wall for drywall on a metal stud frame.
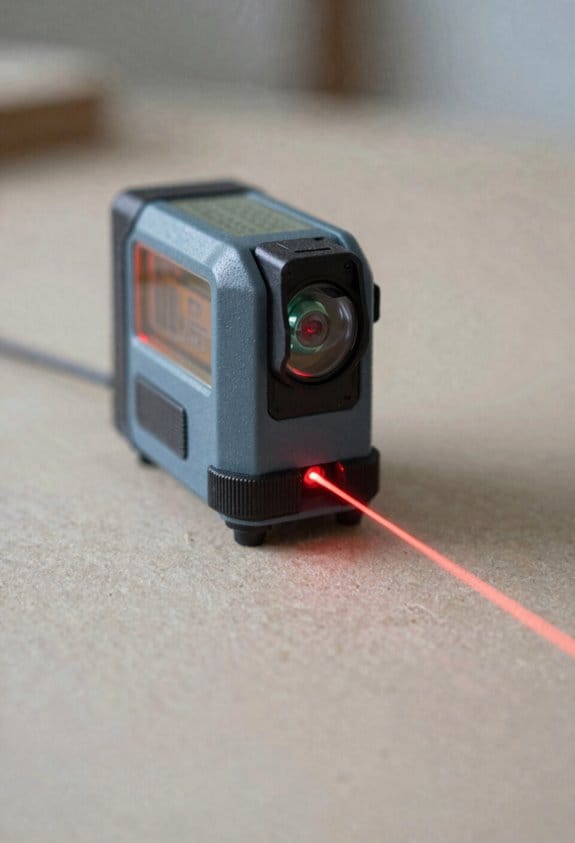
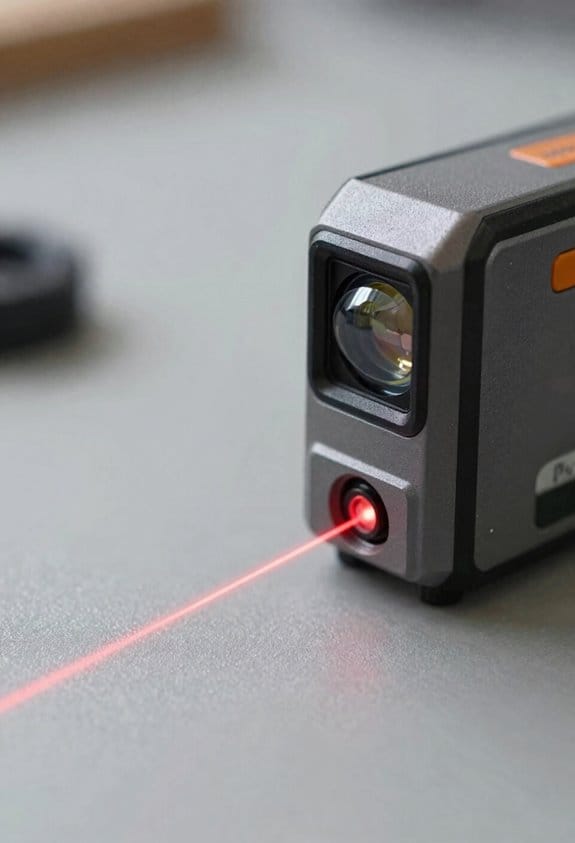
1) Use a laser distance meter for the gross dimension — aim it, press measure, and note the number.
2) Use a magnetic tape (5–8 m length) to verify across metal studs; magnets hold to the metal so you can lock one end and read solo.
Think of your tool kit like a travel-sized first-aid pack: carry the essentials, nothing bulky.
– Why it matters: hauling big toolsets into a cramped apartment wastes time and space.
Example: renovating a 2 m-wide bathroom where tools must fit on a small towel shelf.
1) Put a 5 m tape, folding rule, a 200 mm torpedo level, and a carpenter pencil into a small pouch.
2) Pack those into a compact multifunction kit so you can move between rooms without unloading heavy boxes.
The difference between a costly re-cut and a smooth install comes down to cross-checking.
– Why it matters: relying on one measurement type increases the risk of millimeter-level mistakes.
Example: installing a vanity with a stone top that tolerates only ±1 mm for sink openings.
1) Use the laser meter for the rough span, then confirm critical edges with a folding rule or steel tape.
2) Re-check diagonals with a corner gauge to ensure squareness before final fastening.
You don’t need expensive software if your phone can handle basic mapping and sharing.
– Why it matters: quick visual records and exports speed approvals and reduce back-and-forth.
Example: creating a floorplan for a 12 m² studio to show a client layout options.
1) Photograph each wall with your phone, note one measured baseline with a laser, then trace measurements into a simple floorplan app.
2) Export a PDF and send it to the client for sign-off; keep versioned filenames like “Studio_A_plan_v2_2026-03-21.pdf”.
Quick Buying Guide: Must-Have Measuring Tools
Before you start measuring, know this: accurate measurements save you time and money because every cut depends on them.
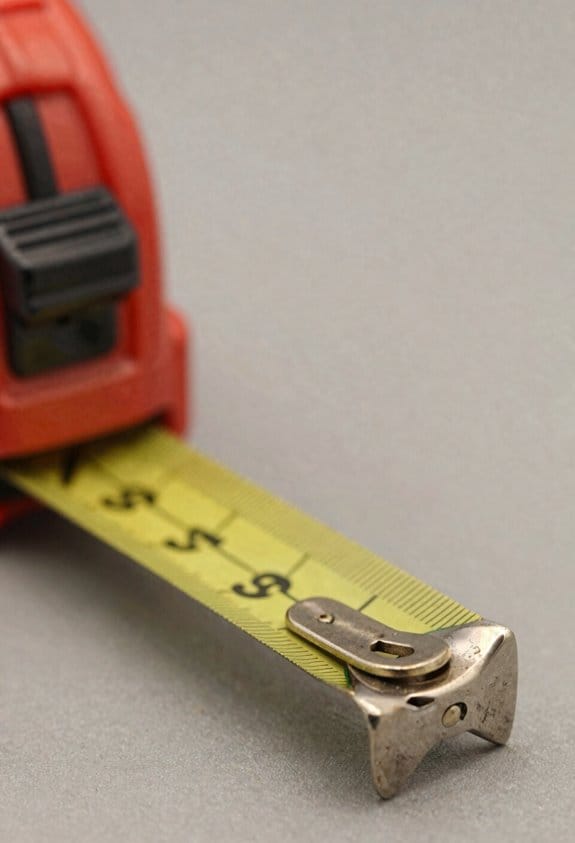
Start with the right tape measure. Why it matters: a clear, stiff tape prevents sagging on long runs so your numbers are true. Buy a 25-foot tape with 1/16-inch markings and a magnetic hook if you’ll measure metal studs; for example, I used one to measure a 20-foot living-room wall without remeasuring. 1) Extend the tape, 2) lock it, 3) read at eye level. Use a small clamp to hold the hook when you work alone.
If you need longer distances, use a laser distance meter. Why it matters: lasers give one-person accuracy over long runs. Pick one with ±1/8-inch accuracy and a range of at least 165 feet; for instance, I measured a 40-foot garage with a $120 meter and saved an extra trip. 1) Aim at a flat target, 2) keep the meter steady, 3) take three readings and use the median.
A folding rule helps in tight corners. Why it matters: it fits where tapes fold or bend and keeps straight edges against surfaces. Get a 2-meter wooden or aluminum folding rule; I used one to measure the depth of narrow attic joists. 1) Unfold fully, 2) press flat against the surface, 3) read at the joint nearest your eye.
Use precision markers to mark cut lines and reference points. Why it matters: clear marks stop you from remeasuring and reduce mistakes. Use a sharp mechanical pencil for wood and a fine-tip permanent marker for metal, and always label marks with the final dimension; for example, I marked “Cabinet face: 24.25” on plywood before cutting. 1) Measure, 2) mark both ends, 3) write the final size next to the line.
Notch gauges help transfer thicknesses or locate studs. Why it matters: they lock onto a profile so repeated measurements match exactly. Choose a gauge that locks and reads in 1/32-inch increments; once I used one to transfer a 3/8-inch plywood thickness to dozens of shelf dados. 1) Set the gauge, 2) lock it, 3) scribe the line.
Carry a combination square for right angles and a small level for plumb checks. Why it matters: squareness and level affect how parts fit and how doors hang. Use a 12-inch combination square and a 24-inch level with two vials; when I installed a new door frame, those two tools ensured a 90-degree corner and a plumb jamb. 1) Square the corner, 2) check level vertically, 3) recheck after shimming.
Check batteries and calibration before work. Why it matters: dead batteries or an uncalibrated laser produce wrong numbers. Replace batteries at the start of a job and test your laser against a known distance; I keep a spare AA pack and test at 10 feet. 1) Power on, 2) verify against a tape, 3) swap batteries if off.
Practice on scrap materials to build confidence. Why it matters: you learn tool quirks without wasting good material. Cut and fit one scrap piece for every new tool or technique; for example, I cut a 1×4 scrap to test a miter angle before working on the trim. 1) Measure on scrap, 2) cut, 3) adjust.
Store and care for your tools to keep them accurate. Why it matters: corrosion and dents change readings. Wipe metal tapes dry, retract tapes slowly, and keep lasers in their case; I store my tape and laser in a padded bag labeled “MEASURE” on the shelf. 1) Clean, 2) protect, 3) store upright.
Which Measurements Matter in 1,000–1,999 Ft² Homes
Before you measure rooms in a 1,000–1,999 ft² home, know why it matters: accurate measurements tell you whether your furniture fits and whether spaces will feel open or cramped.
I start with room dimensions because they control furniture layout and circulation. Measure length and width to the nearest inch; for example, note a living room as 14’6″ x 12’3″. That tells you a 84″ sofa and two 24″ side tables will fit with a 30″ walkway. A visual: picture a 14’6″ living room with the sofa against the long wall and a 3′ path to the kitchen door.
You need to check window sizes and placement because daylight affects how big rooms feel. Measure window rough opening width and height in inches, plus sill height from the finished floor; for instance, a 48″ x 36″ window with a 30″ sill lights a reading nook without glare. Try standing where a chair would go to see how light falls at 9 a.m. and 3 p.m.
Ceiling height changes perception and storage options, so record it for each room. Write down clear ceiling height (e.g., 8’0″ or 9’4″) and note low beams or dropped soffits. If you have 9′ ceilings, you can add a lofted storage shelf about 6’6″ high. Measure vertically at several points.
Map door swings and clearances to avoid collisions and pinch points because doors steal usable space. Draw each door arc and measure the clearance behind a door; for example, a 36″ door swinging into a hallway needs at least 36″ of approach space. Mark any doors that conflict with cabinets or appliance doors.
Check alcoves, built-ins, and niche depths since they create functional spots for storage or seating. Measure depth, width, and height in inches; a 24″ deep niche works for a standard closet rod or shelving. Example: a 30″ x 24″ alcove beside the kitchen makes a tidy pantry cabinet.
Finally, verify continuous measurements for flow between rooms because connected dimensions determine furniture placement and zoned uses. Measure clear openings between rooms—doorways and open arches—in inches and note floor level changes. If the kitchen opening is 5’0″, you can place an island up to 4’0″ wide and keep a 36″ circulation path.
Follow these concrete steps when you measure:
- Walk each room and measure length, width, and ceiling height in inches.
- Measure windows (width x height) and sill height from floor.
- Sketch door swings and measure clearances.
- Note alcove and built-in dimensions.
- Measure openings between rooms and any level changes.
Keep your tape, a notebook, and your phone camera.
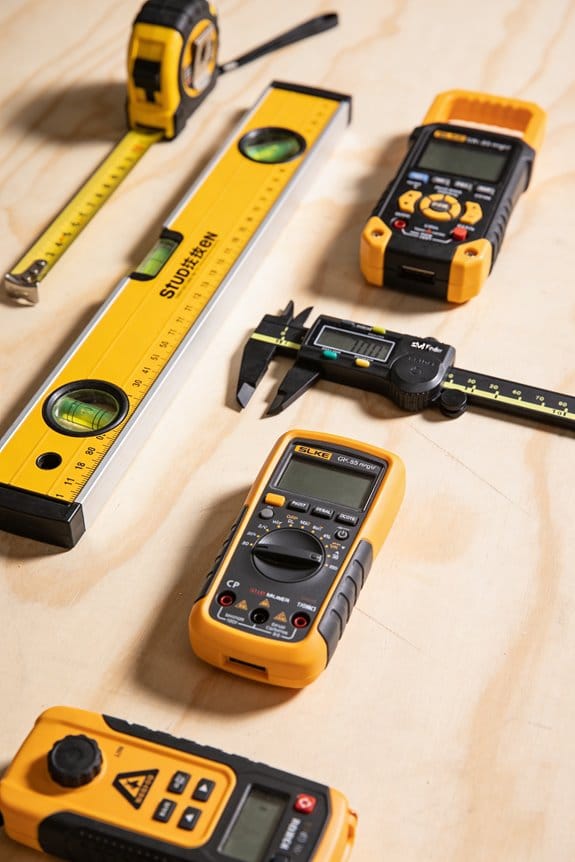
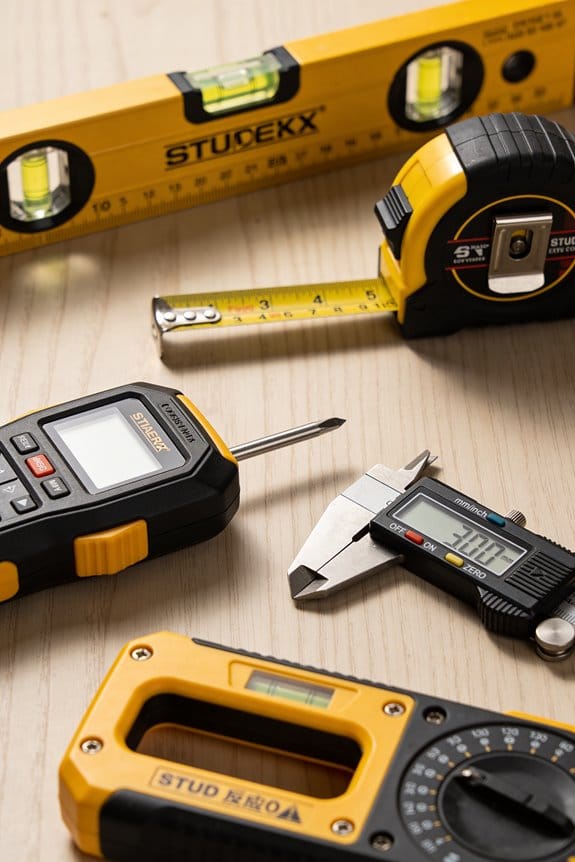
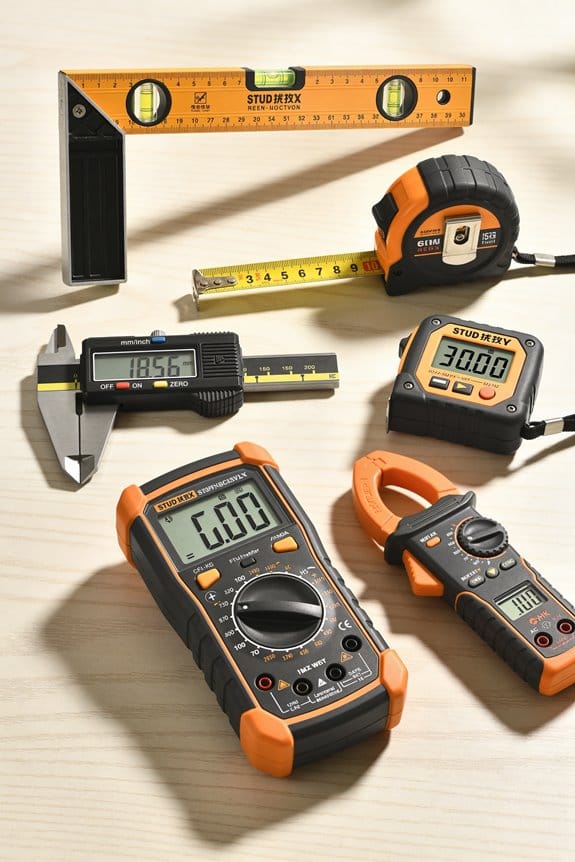
Essential Handheld Tools for Tight, Flexible Layouts
If you’ve ever worked in a cramped kitchen or a narrow built-in, this is why: tight, flexible layouts force you to measure and adjust on the fly so you don’t order the wrong part or cause a visible gap.
Why it matters: getting a fit right the first time saves you a day of rework and a costly return trip.
What to carry and how to use it:
- Tape measure (3–5 m / 10–16 ft). Use it for quick runs across counters and from wall to fixture; lock it and mark with a pencil where needed. Example: I measured a 14 1/2″ gap for an undercounter fridge with a 3 m tape, marked the center, and avoided cutting the cabinet face.
- Folding ruler (1 m / 3 ft, wooden or aluminum). Use it as a straight edge for scribing and for longer, rigid measurements when the tape sags. Example: I laid a 1 m folding ruler along a backsplash to scribe a straight trim line.
- Compact calipers (0–150 mm / 0–6 in digital or vernier). Measure internal clearances like drawer slides and trim overlap; read both inside and outside jaws. Example: I checked a 5 mm gap behind a molding with calipers to confirm the trim wouldn’t rub.
- Corner gauge (adjustable, metal or plastic). Use it to check squareness in alcoves and built-ins; clamp it into the corner and read the angle or use the fixed 90° face. Example: I used a corner gauge to confirm a laundry alcove was within 2 mm of true square before installing the cabinet.
- Small magnetic level (24–60 cm / 9–24 in). Use it to level appliance faces and short runs of trim; the magnet holds to metal quickly. Example: I leveled a 24″ range hood with a 24 cm magnetic level so the seam sat flush.
- Digital angle finder (0–360°, hold/lock feature). Use it for cabinet crown, miters, and odd angles; lock the reading and transfer it to your pencil. Example: I copied a 47.5° soffit angle with an angle finder and cut crown molding to match.
- Soft pouch or compact roll. Keep each tool in its pocket so you can move through tight areas without fumbling. Example: I keep everything in a 9-pocket pouch and can grab just the calipers and level in one motion.
How to organize the kit:
- Pack by frequency: tape, calipers, and pencil go in the front. Everything else sits behind. This saves seconds for dozens of checks.
- Replenish: check batteries for digital tools weekly and wipe blades after use to prevent rust.
Quick checklist before you start:
- Batteries charged for digital tools.
- Tape locked and folding ruler unfolded cleanly.
- Pouch zipped and in a work pocket or apron.
A small, focused kit like this keeps you fast and precise in tight jobs.
Laser vs Tape: When to Use Each
Here’s what actually happens when you decide between a tape and a laser for measuring.
Why this matters: choosing the right tool saves time and cuts measurement errors. If you’re measuring a short wall for baseboard or checking a doorway, grab your tape. For example, when you measure a 10-foot wall to buy baseboard, a 25-foot tape held at hip height gives a stable, readable number quickly.
Use a tape when:
- You’re measuring under about 15 feet because your arm and tape can brace against surfaces for accuracy.
- You need to get into awkward corners or behind fixtures where a laser won’t sit flat.
- You want quick checks—measure a door opening (typically 30–36 inches) with one hand on the doorjamb and the other reading the tape.
Tip: lock the tape, pinch the blade at the zero end, and read at eye level to avoid parallax.
Why this matters: lasers let you work faster and solo on long runs. If you need to measure a 30-foot room height or mark ceiling joists, a laser saves you steps. Picture standing on the floor and getting a ceiling height instantly without climbing a ladder.
Use a laser when:
- Distances exceed about 15 feet or the surface is high (ceilings over 10 feet).
- You want one-person operation—place the laser on a tripod or against a wall and point.
- You need point-to-point measurements or to record numbers digitally.
Tip: aim at a wall target or a matte surface for consistent returns; reflective glass can give false readings.
Why this matters: safety and accuracy habits prevent wasted time and bad data. When I worked alone installing kitchen cabinets, I paused to confirm clear lines of sight before every laser shot.
Laser etiquette and setup (steps):
- Check line of sight—remove obstacles between device and target.
- Avoid aiming at people or reflective surfaces.
- Use a stable target: a sheet of white paper or a matte sticker about 3×5 inches works well.
Example: to measure across a 40-foot warehouse bay, I taped a white index card to the far wall at waist height and used the laser on a tripod to record three shots, then averaged them.
Why this matters: combining tools reduces rework. When installing trim, you want both the gross dimension and the finish fit to match. I measure room length with a laser, then confirm the final 8–10 feet of fit with a tape for exact cuts.
Combine both tools with these steps:
- Measure gross dimensions with the laser and note them.
- Use the tape for final, short-run checks and cut confirmations.
- Cross-check one overlapping measurement (for example, a 10-foot section) to confirm consistency.
Example: for a run of crown molding, I laser the overall wall length, then tape the last 8 feet where the cabinets meet the wall before cutting the final piece.
Final practical rules:
- If it’s under 15 feet and awkward, pick the tape. Keep it locked and read at eye height.
- If it’s over 15 feet or you need solo operation, use the laser with a tripod and a paper target.
- Always cross-check one overlap measurement with the other tool to catch errors.
Floorplan and Measurement Apps for Open Concepts
If you’ve ever tried to picture an open-plan room from a vague sketch, this is why.
Why it matters: without walls, it’s easy to misjudge flow, sightlines, and usable square footage, and that leads to awkward furniture layouts and wasted money.
1) How to map spatial flow with apps
Why it matters: seeing movement paths helps you avoid blocking walkways and keeps zones usable.
Steps:
- Open a floorplan app and trace your perimeter using the phone camera or a laser-measure tool; aim for ±1% accuracy by measuring each wall at least twice.
- Add virtual walls and openings where current partitions used to be, then draw 3–5 typical walk paths (kitchen to fridge, entry to couch, dining to slider).
- Walk the paths in the app’s 3D view to check for 30–36 inch clearances around high-traffic routes.
Example: I mapped a 20-by-15 ft living/kitchen and found a planned island would leave only 28 inches to the sofa; moving the island 12 inches fixed it.
2) How measurement tools cut errors
Why it matters: manual re-measuring after changes wastes time and introduces mistakes.
Steps:
- Use an app that links dimensions to editable walls so numbers update automatically when you drag a wall.
- Lock critical dimensions (like window heights or fixed plumbing) so edits don’t shift them.
- Export a PDF or DXF and compare three key dimensions on-site: room length, room width, and diagonal.
Example: On one job I saved a second trip by exporting updated plans and confirming the kitchen sink stayed 59 inches from the corner, matching the plumbing stub-out.
3) How to use virtual staging to test layouts
Why it matters: virtual furniture shows scale so you don’t buy pieces that crowd the room.
Steps:
- Place a 6-ft sofa, 30-in armchair, and 48-in diameter table to match your intended pieces.
- Check sightlines from main seats to the TV and windows; ensure at least 24 inches between coffee table and sofa.
- Try three layouts: anchored to a rug, floating with 36-inch pathways, and sofa against a wall; compare circulation and light access.
Example: For a client with a 14-by-18 ft great room, virtual staging revealed a 72-in sectional blocked morning light, so we switched to two 36-in loveseats and kept a 4-ft walkway.
4) How collaboration tools keep everyone aligned
Why it matters: edit conflicts and miscommunication cause delays and change orders.
Steps:
- Invite contractors, designers, and the homeowner to the project with edit/comment permissions.
- Use version history and pin comments to exact wall locations when you request changes.
- Agree on final sign-off criteria—e.g., “dimensions locked, MEP notes resolved”—before demolition.
Example: A contractor left a pinned comment showing a column location; because we all saw it in the app, the column stayed in the plan and avoided a costly onsite redesign.
Practical tips you can use right away:
- Measure twice: take two readings per wall and average them. Do this for the four longest walls first.
- Use a laser device for long spans over 12 ft; phones work fine for shorter runs.
- Export a single PDF set for trades and label each drawing with a date and version number.
If you follow these steps, you’ll reduce surprises, make better layout decisions, and save time and money during an open-concept renovation.
Measuring for Multifunctional Furniture and Zones
Before you start measuring, know this matters because wrong sizes ruin multifunctional furniture.
Here’s what to measure and how, step by step:
- Measure the usable footprint of the zone: measure the clear floor area that furniture can occupy, not wall-to-wall. Use a tape measure and write down length and width in feet and inches (for example, 7’6″ x 5’0″). A real-world example: in a 9′ x 10′ studio with a radiator and a closet, the true usable rectangle might be 7’6″ x 8’0″ because of obstructions.
- Take modular measurements for pieces that convert or stack. Measure each configuration: folded, half-open, and fully deployed. Note exact lengths and widths for each state (for example, sofa: 6’0″ wide folded, 6’0″ x 7’0″ when bed pulled out). Measure how pieces fit together when deployed.
- Check vertical clearance. Measure floor to lowest obstruction (shelves, beams, ductwork) and any extra swing space above. For lofted beds and fold-down desks, leave at least 36 inches of headroom above the mattress or chair when in use. In one apartment I measured, a murphy desk needed 14″ more clearance than the manufacturer listed because of an overhead pipe.
- Measure doorways, circulation paths, and storage envelopes. Measure door width and swing arc, and a 30″ minimum clear path for walking beside furniture. For storage, measure internal shelf depths and door-opening radii so drawers and doors don’t collide.
- Map measurements onto a simple grid. Draw your room to scale using a 1/4″ = 1′ grid or use 1-square-foot graph paper; sketch furniture in each configuration so components align and clearances are visible.
- Allow tolerances for movement. Add a minimum of 2–3 inches clearance on each side for ease of use and 6–12 inches behind sliding elements. This prevents tight fits and rubbing.
- Test with cardboard templates. Cut templates to the exact deployed sizes and tape them down on the floor. Walk around them, sit where you’ll sit, and open any doors or drawers to confirm functionality.
Why this matters: these steps reduce surprises and help you pick correctly sized pieces.
One real example: I taped a 6′ x 7′ cardboard rectangle where a sofa bed would go and discovered the bed would’ve blocked the hallway; changing to a 5’6″ model kept a 32″ walkway.
Fast Techniques for Bathroom and Kitchen Refreshes
Think of careful measuring like setting a foundation for a quick refresh: it prevents awkward gaps and rubbing parts that you’ll notice during installation.
Why this matters: a 1/8-inch error can make a drawer stick or a new faucet look crooked. For example, when I replaced a sink faucet last spring, the old escutcheon was off-center by 3/16 inch and the new faucet needed shims to sit plumb.
1) How do you measure clearances and openings accurately?
Why this matters: accurate measurements save you trips to the hardware store.
Steps:
- Use a metal tape measure and record three numbers: width, depth, and height to the nearest 1/16 inch.
- Measure at three points (left, center, right) for widths and average them; do the same front-to-back for depths.
- Mark plumbing locations from fixed reference points (e.g., center of cabinet front or nearest wall) and write down distances to the floor and side walls.
Example: for a vanity cabinet, I measured 24 1/8″, 24 1/4″, and 24″ and ordered a sink sized for 24 1/8″.
Here’s what actually happens when you plan fixture swaps without moving pipes: you end up replacing cosmetic pieces only and avoid costly plumbing work.
Why this matters: swapping fixtures that fit existing plumbing keeps costs low and saves time. If you want a modern faucet but the supply lines are in the old locations, pick a faucet with flexible 3/8-inch connections and a 1 1/4-inch deck hole requirement. Example: I replaced a 1980s two-handle faucet with a single-handle mixer that matched the 4-inch centers, so I didn’t touch the copper.
2) How do you test fit and clearance before cutting or fastening?
Why this matters: testing prevents irreversible mistakes.
Steps:
- Dry-fit the new piece and check door swings and drawer travel with a piece of cardboard clamped where the hardware will go.
- Use a level and a carpenter’s square: place the level across the top and diagonally check for racking; if level spans 24 inches, use its bubble to get within 1/8 inch.
- Leave a 1/8–3/16-inch gap between cabinet face and new hardware if the design needs clearance.
Example: before trimming a cabinet toe kick, I clamped the new hinge and opened the door fully to ensure it cleared the pull-out trash, then removed 3/16 inch from the toe kick.
It sounds obvious, but caulking done poorly sticks out more than the seam you’re hiding.
Why this matters: a smooth bead seals better and looks cleaner. Practice makes a visible difference.
3) How do you get neat, continuous caulk beads?
Why this matters: proper sealing keeps water out and makes joints look professional.
Steps:
- Cut the caulk tip at a 30-degree angle to a 1/8-inch opening for narrow joints and 3/16–1/4 inch for wider gaps.
- Apply steady pressure and move at about 12 inches per second for a continuous bead. Keep your wrist steady.
- Finish by smoothing with a wet finger or a silicone tool in one pass; wipe the tool after each stroke.
Example: sealing a sink rim, I cut the nozzle to 3/16 inch, ran a 36-inch bead in about three seconds, and smoothed it with a wet plastic spreader to a uniform 1/8-inch concave joint.
Before you call the job done, test every operation you changed.
Why this matters: function can fail even when things look right.
4) How do you perform final checks?
Why this matters: testing reveals hidden issues before sealants cure.
Steps:
- Run water and check for leaks for at least five minutes while operating nearby drawers and doors.
- Cycle hinges and drawers five times and re-check clearances after tightening screws.
- Inspect caulk joints after 30 minutes and again after 24 hours; remove any excess before it skins over.
Example: after installing a new sink trap, I ran water for five minutes and found a hand-tightened compression nut that needed an extra quarter turn.
Quick recap: measure three times, dry-fit parts, use a level, master a steady caulk bead, and test everything under real use. Each step saves time and prevents frustrating callbacks.
Measuring for Aging-in-Place and Accessibility
If you’ve ever tried to move around a tight house with a walker, this is why measuring matters: you want real space where you need it so daily tasks stay doable.
Why this matters: clear floor space and door widths let you move safely with mobility aids. Example: when my neighbor remodeled, widening a hallway to 48 inches let her roll a wheelchair through without angling the frame. How to measure:
- Measure clear floor space by measuring the unobstructed path at the floor from wall to wall in inches.
- Confirm door widths by measuring the narrowest part of the door opening; aim for at least 32 inches clear passage, 36–48 inches for easier turns.
- Note thresholds and trims in the same measurement so they don’t reduce clear width.
Before you change counter heights, you need to know reach zones so everyday items sit within comfortable range.
Why this matters: measuring reach ranges prevents you from putting essentials out of reach when seated. Example: a client kept a microwave at 36 inches high so he could reach it from a seated position. How to measure:
- Measure reach height standing and seated: seated eye level and shoulder height, and standing shoulder height, in inches.
- Set counter heights: 28–34 inches for seated work, 34–36 inches for standard standing counters.
- Measure switch and outlet heights: 36–44 inches for switches reachable from a wheelchair, 15–48 inches for outlets that are easy to access.
Think of a bathroom like a small room that must allow turning, transferring, and caregiver access.
Why this matters: toilets and showers need transfer spaces so you or a helper can move safely. Example: I measured an existing bathroom and added a 60-inch turning circle so my client could pivot a rollator. How to measure:
- Measure transfer clearance next to the toilet and shower: at least 60 inches from the wall for a full turn, 36 inches minimum lateral clear space beside the toilet for transfer.
- Measure shower dimensions: a 36×36-inch roll-in shower minimum, 60×30 inches for some transfer configurations.
- Measure grab bar placement by height and distance from fixtures: typically 33–36 inches above the floor for seating transfers.
You don’t need expensive materials if you plan visual contrast and finishes correctly.
Why this matters: contrast and finish choices help people with low vision spot edges and controls. Example: my brother painted a 2-inch contrasting strip on a step edge and it cut missteps in half. How to measure and plan:
- Measure threshold widths and note color changes in inches so contrast strips cover full edge lengths.
- Check and record finish reflectance: test finishes under your lighting and note which create glare versus matte, writing measurements like strip width and placement.
- Measure control locations and label them visually with high-contrast markers about 1–2 inches wide.
Final practical tip: carry a tape measure, a level, and a notebook. Measure door jambs, clearances, and heights in inches, write each measurement down, and photograph each spot so your contractor can replicate the numbers exactly.
Budgeting Tools Under Tariff and Material Pressure
Before you start budgeting, know why it matters: unexpected tariff shifts and material spikes can eat 10–30% off your renovation budget overnight.
Here’s what actually happens when you build your budget in layers: you start with a baseline, then add targeted buffers so you can still finish if prices jump. I use a clear, repeatable method you can copy.
1) Create a baseline estimate.
Why this matters: the baseline anchors every decision and shows where your money goes.
Steps:
- List every line item (labor, demo, drywall, lumber, steel, appliances).
- Put a unit price, quantity, and supplier next to each line.
- Total the line items to get your baseline. Example: a kitchen demo + cabinets + install might total $18,500.
You should log at least three suppliers per major material and note whether they’re local or imported. Real example: I compared a local millwork shop charging $2,400 for cabinets to an imported option at $1,700 plus $300 shipping and a 14-day lead time.
2) Add contingency buffers tied to tariff forecasts.
Why this matters: tariffs and trade policy create predictable ranges for certain goods.
Steps:
- Identify volatile categories (lumber, steel, imported appliances).
- Assign a contingency percentage: 5% for stable items, 12–20% for volatile imports.
- Create three price scenarios: best (-5%), mid (baseline), worst (+20%). Example: if steel fittings are $1,000 baseline, model $950, $1,000, and $1,200.
Keep one column that shows the contingency dollar amount so you can see the buffer at a glance.
3) Track sourcing, lead times, and minimum orders in a simple spreadsheet.
Why this matters: long lead times and MOQs force schedule slips and added costs.
Steps:
- Make columns for supplier, country of origin, unit cost, MOQ, lead time (days), and contact.
- Update prices monthly and flag any lead time over 30 days.
- Add notes for shipping surcharges or customs delays. Real example: a contractor logged a 56-day lead time on imported windows and switched to a local supplier with a 14-day lead time, saving $600 and two weeks.
4) Use scenario tabs for best-, mid-, and worst-case budgets.
Why this matters: you’ll see how profit margins and cash needs shift before you sign contracts.
Steps:
- Create three spreadsheet tabs named Best, Mid, Worst.
- Copy your baseline into each and apply the percentage adjustments from step 2.
- Compare total budgets side-by-side. Example: your mid-case kitchen is $25,000, worst-case jumps to $29,500 — a $4,500 gap you can plan for.
5) Update and revise regularly.
Why this matters: prices and policies change; stale numbers breed surprises.
Steps:
- Set a monthly review date and update at least price and lead-time columns.
- Track actual vs. estimated costs and record the variance percentage.
- If a volatile item overruns its contingency twice, increase its buffer by 5 percentage points. Real example: plywood ran 18% over estimate two months in a row, so the owner raised plywood contingency from 12% to 17%.
Practical spreadsheet tips you can implement today:
- Use one bold field per paragraph: make the total budget cell bold so it stands out.
- Color-code suppliers: green for local, yellow for domestic import risk, red for high-tariff origins.
- Automate scenario math with formulas so the worst tab always reflects the percentage bump.
Follow these steps and you’ll plan with margins that reflect real trade risk, not wishful thinking.
Buyer’s Checklist: Pick Tools by Project and Frequency
Before you start buying tools, know that how often you use a tool changes whether you should buy, rent, or borrow it. Start by listing the projects you expect to do this year—painting a room, replacing a bathroom vanity, building a backyard deck—and write down an estimated number of uses or hours for each project (for example: painting one 12×12 room = ~8 hours; replacing a vanity = 2–4 hours; deck framing = 20–40 hours).
Why frequency matters: it changes the cost-per-use math. A $300 circular saw you use 30 hours a year for five years costs about $2 per hour; a $30 rentable specialty jig that you use twice costs $15 per use. Example: I borrowed a rotary tool for two hours to cut grout and saved $60 vs. buying.
1) Ask three specific questions for every tool.
- How often will I use it per year? (0–5, 6–30, 30+ hours)
- Can I borrow or rent it for a one-off job? (yes/no)
- What are storage and maintenance needs? (batteries, calibration, blades)
2) Match tool choices to frequency categories.
– Use this rule: buy if you’ll use it 30+ hours per year, rent/borrow if under 5 hours, consider a shared or lower-cost model for 6–30 hours. Example: a measuring tape and a laser measure are worth owning if you’re doing layout work every month; they cost $15–$150 and pay off fast. Short sentence. A specialty jig or large table saw often makes sense to rent for a single project—rental is usually $40–$100/day.
3) Consider longevity and cost per use.
Why longevity matters: durable tools keep calibration and cut replacement costs. A $200 drill from a reputable brand that lasts 10 years and stays true reduces yearly expense and frustration. Example: a worn blade will make cuts rough and force extra sanding, adding hours to the job.
4) Plan for seasonal storage and maintenance.
Why storage matters: moisture and cold ruin batteries and blades, raising long-term costs. Store batteries indoors at room temperature and remove blades for winter; keep power tools on shelves off concrete to avoid moisture. Example: I lost a set of drill batteries after leaving them in a damp garage; replacing them cost me $120.
5) Make the final buy/borrow decision with a simple matrix (3 steps).
- Estimate hours per year for the tool.
- Check rental cost for the expected days and compare to purchase price divided by expected years of use.
- Account for storage and maintenance (add $10–$50/year as a rough estimate).
Concrete example: You need a tile saw for a bathroom floor that will take two days. Rental is $60/day = $120; a new small tile saw costs $250 and would sit unused for years. Rent it.
Choose tools based on how often you use them, what each project requires, and whether upkeep or storage will eat into any savings.
Frequently Asked Questions
How Do Climate and Humidity Affect Measuring Tool Accuracy Indoors?
I’ll tell you: temperature drift and moisture expansion both skew indoor measuring tools—laser and tape can shorten or lengthen readings; I compensate by stabilizing conditions, letting tools acclimate, and using humidity-aware calibration routines.
Can Landlords Require Tenants to Use Professional Measurement Services?
Yes — I can say landlords can require professional measurements if lease clauses specify it; tenants’ refusal may trigger legal recourse per the lease and local law, but I’d advise confirming jurisdictional rules first.
Are There Insurance Implications for DIY Measurement Errors?
Yes — I worry DIY measurement errors can create liability concerns and spark claim disputes; I’d document measurements, notify my insurer, and consider professional re-measurement or endorsements to reduce coverage gaps and dispute risk.
How to Calibrate Laser Tools Without Manufacturer Instructions?
Like tuning a violin, I check battery maintenance, level against a known tape measure, mark distances, use DIY adapters to mount the laser, verify repeatability at multiple ranges, and adjust per observed offset until accurate.
Do Smart Home Sensors Replace Traditional Measuring Tools?
No — I don’t think smart sensors replace manual tape; I use smart sensors for quick, continuous data and remote checks, but I still rely on manual tape for precise, verified dimensions and tight renovations where accuracy matters.