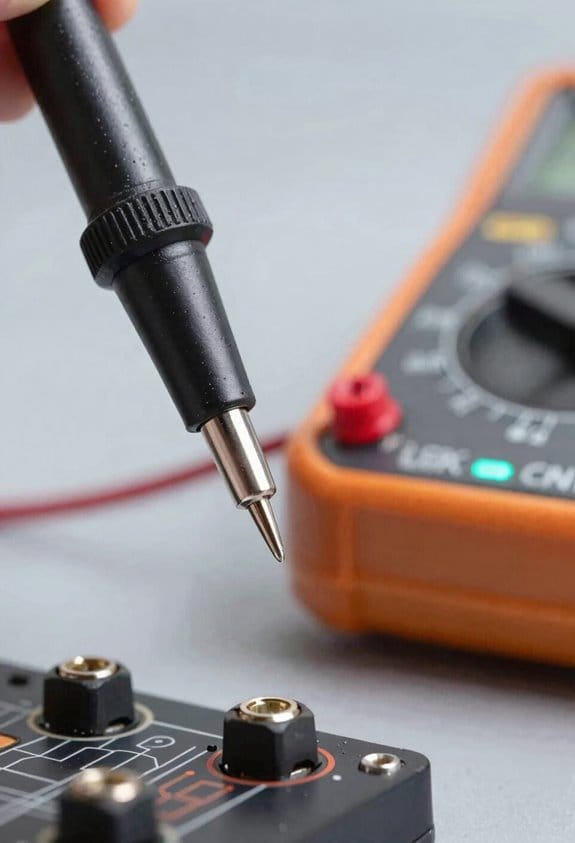
You’re standing in front of a live electrical panel on a rooftop, clipboard in hand, wondering how to safely read voltage and current without opening the enclosure.
The exact question is: how can I get accurate true‑RMS voltage, current, and frequency readings from meters mounted inside panels or on rooftops without touching live parts?
Most people assume wired leads or direct contact are the only reliable options and accept the risk or delay.
This piece will show you how Bluetooth and wireless multimeters stream live data to phones or tablets, log timestamped records, and trigger alerts for spikes so you can troubleshoot faster and keep technicians safer.
You’ll also get practical setup and workflow tips for balancing battery life, sampling rate, and latency.
It’s easier than it sounds.
Key Takeaways
If you’ve ever stood on a ladder trying to read a tiny screen while a panel is live, this is why Bluetooth matters: it keeps you on the ground and out of harm’s way. With a Bluetooth range of about 3–10 meters, you can read values from a safe distance, avoiding direct contact with energized parts and reducing shock and fall risk.
Before you set up logging, know why it helps: you can capture trends without stopping equipment. Wireless logging streams real-time data to your phone or tablet so you can record baselines and catch transients without interrupting the machine. Example: while a compressor runs, you tap “start log” on your phone and capture a minute of voltage spikes during startup for later analysis.
Think of a remote module like a walkie-talkie for meters. Remote modules with companion apps let you monitor rooftop combiners or cramped panels from ground level, so you skip climbing and save time. Example: you stay on the ground and watch combiner outputs on your tablet while a colleague shuts down a string one at a time.
Before you archive anything, remember timestamps matter: time-synced Bluetooth logs use ISO 8601 timestamps so records integrate with CMMS or servers for traceability and automated alerts. Example: your maintenance system pulls a log file stamped 2026-03-21T14:05:30Z so managers can see exactly when a fault first appeared.
Here’s what actually happens when you need long surveys: low-power wireless modules let the meter run for hours on battery or auxiliary power and sync on schedule. That means scheduled syncs every 15 minutes or hourly uploads, supporting extended field workflows without constant battery swaps. Example: you leave a meter logging a full shift and retrieve a complete dataset at the end of the day.
Why Bluetooth and Wireless Multimeters Matter for Modern Technicians
If you’ve ever had to stand next to a live panel and felt the hair on your neck rise, this is why Bluetooth and wireless multimeters matter to your work. They let you take readings from a safe distance—usually 3 to 10 meters for most devices—so you avoid touching energized parts while still getting accurate numbers sent to your phone.
Why this matters: you reduce risk without losing data.
Real-world example: at a production line, I measured motor current from 6 meters away while the line ran at 60 Hz and captured steady values without disrupting the operator.
How you use them, step by step:
- Put your multimeter in wireless mode and pair it with your phone or tablet following the device prompts (usually a button hold for 3–5 seconds).
- Position yourself at the recommended safe distance—check the manual; typical Bluetooth range is 3–10 m.
- Clip probes or clamp the meter to the conductor, then start the app to stream readings in real time.
- Save or export the logged data as CSV for analysis or upload to maintenance software.
Wireless links also let you log and timestamp entries automatically, which speeds troubleshooting by showing trends over minutes or hours. Real-world example: I tracked a pump motor’s inrush current over a 30-minute startup sequence and flagged three spikes that matched a soft-start fault.
Why this matters: automation cuts manual work.
Practical steps to automate:
- Enable logging in the app and set the sample rate (try 1 sample/sec for dynamic loads, 1 sample/min for long-term trending).
- Configure alerts for thresholds—e.g., current > 15 A for more than 10 seconds.
- Connect the app output to your CMMS or send CSV via email.
For training, wireless meters let trainees practice remotely without crowding a panel, which speeds learning by letting each person see the same live data on their tablet. Real-world example: I ran a class where five trainees used tablets to view one meter’s voltage waveform simultaneously while I demonstrated probe placement.
Why this matters: they improve safety, efficiency, and record-keeping.
Quick practical tips:
- Check battery levels before you start; low battery can drop Bluetooth range.
- Use the device’s clamp meter for live conductors to avoid breaking circuits.
- Keep firmware and app versions matched to prevent pairing failures.
If you follow those steps, you’ll keep yourself safer, capture better data, and spend less time on paperwork.
How to Choose a Bluetooth Multimeter: A Simple Buying Checklist
If you’ve ever bought a tool that didn’t suit the job, this will help you avoid that mistake.
Before explaining how to pick the right Bluetooth multimeter, know why it matters: a wrong meter can give bad readings or be unsafe around high voltage.
How to check measurement range and accuracy
Why this matters: accurate readings stop misdiagnosis of circuits and prevent wasted troubleshooting time.
1) Look for these specs: true‑RMS, resolution (digits or counts), and accuracy percentage (e.g., ±0.5% for DC volts).
2) Match range to your work: for household electrics, a 600 V and 10 A range is usually enough; for automotive, ensure mA and microamp ranges; for shop equipment, look for 1000 V and 20 A ranges.
Example: if you test a home’s AC outlet, a meter with 600 V range and true‑RMS lets you see noisy waveform peaks that a basic meter would miss.
Safety ratings and maximum voltage
Why this matters: safety categories and max voltage protect you from dangerous transients.
1) Check the CAT rating printed on the meter: choose CAT III 600 V for building wiring and CAT IV 600 V for service panels or outdoor lines.
2) Confirm the maximum input voltage for each jack and function.
Example: when measuring a service disconnect, a CAT IV 600 V meter protects against spikes you might encounter.
Battery life and charging
Why this matters: long runtimes reduce interruptions during jobs.
1) Check run time in hours and the charging method—replaceable AA/AAA, rechargeable Li‑ion, or USB‑C charging.
2) Prefer USB‑C or swappable batteries if you work away from a bench for long days.
Example: on a day of three service calls, a meter with 8+ hours and USB‑C charging keeps you working between truck stops.
Accessory compatibility
Why this matters: compatible probes and clamps let you measure more situations without extra adapters.
1) Verify probe jack type (banana, shrouded) and whether the meter supports external clamps or temperature probes.
2) Confirm the clamp’s jaw size and current rating (e.g., 300 A or 1000 A) match the conductors you’ll measure.
Example: if you often test 3‑phase panels, a 1000 A clamp with a 35 mm jaw fits large conductors safely.
Data logging and smartphone integration
Why this matters: logging saves you time writing notes and gives traceable records for later.
1) Check if the meter logs internally and whether it streams live data to an app via Bluetooth.
2) Look for apps that export CSV or PDF so you can attach reports to job tickets.
Example: logging startup current on a motor with timestamps lets you show a client the exact moment a stall occurred.
Budget vs required features
Why this matters: you want the best safety and accuracy for your money without overpaying.
1) List nonnegotiables (safety rating, true‑RMS, required ranges) and optional extras (thermal probe, high‑current clamp, fancy app).
2) Compare models in the same price band and pick the one that meets all your nonnegotiables first.
Example: if your priority is building wiring, spend on CAT III/IV and true‑RMS first, then get extra probes later.
Quick checklist before you buy
Why this matters: a final check stops impulse buys that don’t fit your needs.
1) Confirm true‑RMS, ranges, and accuracy.
2) Check CAT rating and max voltages.
3) Verify battery type and run time.
4) Ensure accessory compatibility and clamp ratings.
5) Test the app’s export options or read reviews for reliability.
Example: walk into a store and use this list to compare two models side‑by‑side.
Follow these practical steps, and you’ll end up with a Bluetooth multimeter that fits your work and keeps you safe.
Remote Monitoring: Safer Access to Hazardous and Hard‑to‑Reach Sites
Before you set up remote monitoring, know why it keeps you safe: it lets you collect accurate electrical readings without climbing, entering confined spaces, or touching live parts.
You can use wireless multimeters to monitor voltages and currents from a distance, which reduces fall and shock risk while keeping data reliable. For example, I put a Bluetooth current/voltage module on a rooftop solar combiner box, paired it to a tablet on the ground, and read string currents without stepping onto the roof.
How to set up remote monitoring so it actually works
Why this matters: you’ll avoid hazards and still get usable data.
- Pick mounting spots within 10–30 feet of the probes so Bluetooth stays stable.
- Attach the module to the conductors or bus using the clamp or test leads supplied — follow the device’s torque specs (usually 2–4 N·m for screw terminals).
- Power the module (battery or supply); a fresh CR123 battery or a 12 V auxiliary tap will run most modules for months.
- Pair to your handheld or tablet, confirm a signal strength above –70 dBm, and log at 1–60 second intervals depending on how fast the readings change.
- Record a baseline: log 1–2 minutes of normal operation and save the file to the device or cloud.
You’ll read values without touching live conductors when you trust the wireless link and sensor placement. A concrete example: in an industrial panel inspection, I leave a module clamped on an incoming phase at the bottom of a panel, then stand 20 feet away and verify startup current spikes from a tablet.
Tips for reliable, repeatable checks
Why this matters: small mistakes cause bad data or false alarms.
- Check Bluetooth RSSI; aim for better than –70 dBm to avoid dropouts.
- Use shielding or metal enclosures around the module if you see interference from motors (try relocating 6–12 inches).
- Time-sync your handheld and any cloud logs to the same NTP source so timestamps match across devices.
- Replace batteries on a schedule: every 6–12 months for typical use, or carry spares on site.
You’ll get faster inspections and permanent records when you combine remote modules with logging. For instance, on a rooftop array I saved 30 minutes per inspection and had downloadable CSVs for each string.
Safety and legal cautions
Why this matters: remote monitoring reduces exposure but doesn’t remove responsibility.
- Always follow lockout/tagout and site safety rules before placing or removing sensors.
- Don’t assume the module is isolated — treat conductors as live until verified by your meter.
- Wear required PPE when installing sensors (insulated gloves, eye protection, and a harness if working at height).
If you follow these steps, you’ll avoid unnecessary climbs and confined‑space entries while keeping measurement quality high.
Real‑Time Smartphone Integration and App Compatibility
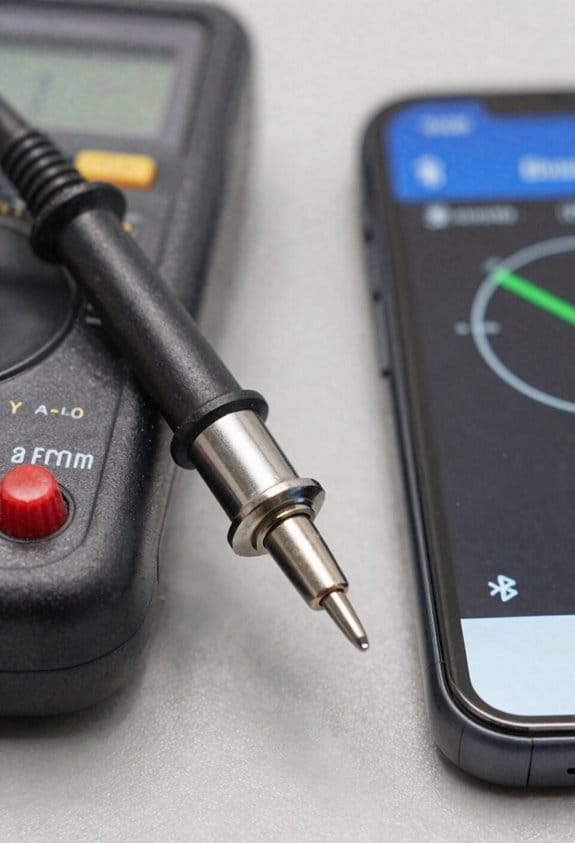
Here’s what actually happens when you pair your multimeter with a smartphone: the readings stop being just numbers and start being decisions you can act on. You care about this because quick interpretation saves time and prevents mistakes when measurements change fast. For example, when you’re troubleshooting a car’s intermittent electrical fault, being able to see a voltage dip that lasted 200 ms on your phone makes the culprit obvious.
1) Why use a paired app for live readings?
- It gives immediate visualization, configuration control, and easy sharing so you can fix things faster.
- Real example: you connect to a three-channel meter and see two channels holding steady while the third spikes to 14.8 V for 50 ms—now you know the alternator regulator is hunting.
2) How to set up the view so trends and anomalies jump out
Why this matters: seeing multiple channels together lets you spot cause and effect instead of guessing.
Steps:
- Open the app and enable multi-channel view (tap the channel icons until you see all three).
- Set each channel’s color and line thickness—use contrasting colors like red, blue, and green.
- Use a 10-second rolling window for live work, or a 60-second window when watching intermittent events.
Real example: on a bench test, set channel A to measure supply voltage with a 60 s window and channel B for load current with a 10 s window so short current surges stand out.
3) How to avoid latency problems for millisecond events
Why this matters: if the app updates slowly you’ll miss transients that matter.
Steps:
- Choose a wired or low-latency Bluetooth LE connection (BLE 5.0 or better).
- In the app settings, set the refresh rate to 50–200 Hz for transient capture; lower rates like 1–10 Hz will miss millisecond events.
- Turn off background syncing while you’re recording.
Real example: when you need to capture a 5 ms spike, set 200 Hz sampling and use a wired USB connection; that caught the spike during an ignition coil test.
4) How to customize the UI so it matches your task
Why this matters: a tailored layout keeps your focus on the signals that matter.
Steps:
- Drag and drop graphs to place the most critical channel top-left.
- Change units per channel (V, mV, A) so you don’t misread scales.
- Create and save two presets: “Fast Transient” and “Long Record.”
Real example: on a field job, you switched to the “Fast Transient” preset and immediately saw short ground faults you’d missed before.
5) How to log with correct timestamps and sampling rates
Why this matters: accurate timestamps and sampling rates make later comparisons valid.
Steps:
- Set sampling rate explicitly—e.g., 200 Hz for transients, 10 Hz for slow trends.
- Choose timestamp format (UTC or local) and stick with it for all files.
- Add metadata: operator, device serial, and test conditions in the file header.
Real example: you compared two logs from separate runs because both used UTC timestamps and 200 Hz sampling, and the correlation showed the vibration event aligned with the voltage dips.
6) How to share and back up reports from your phone
Why this matters: quick sharing speeds team troubleshooting and keeps records safe.
Steps:
- Export CSV or PDF directly from the app after finishing a session.
- Pick your cloud destination—Google Drive, Dropbox, or company S3 bucket—and enable automatic upload for completed sessions.
- Email the report link to your team with a one-line note describing the fault and the timestamp.
Real example: you exported a CSV, uploaded it to Drive, and sent the link; the engineer on call spotted a pattern within 10 minutes.
Follow these steps and you’ll turn raw meter readings into clear, shareable evidence that actually helps you fix things.
Measurements & Accuracy for Wireless Multimeters (Voltage, Current, Frequency)
Before you measure with a wireless multimeter, know that accuracy matters because a small error can mislead a whole diagnosis in the field.
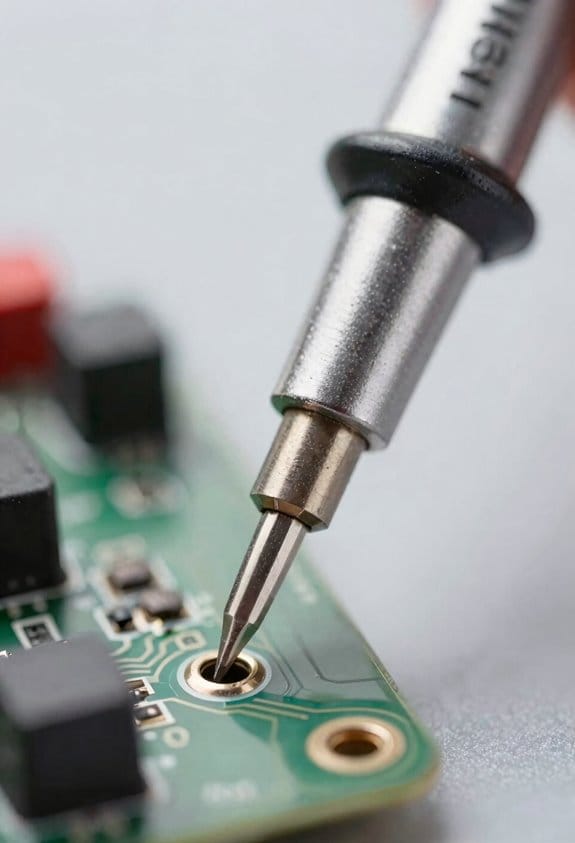
Because you want reliable readings, here’s how your multimeter actually measures voltage, current, and frequency, and what changes your numbers. I use sensors and ADCs to convert analog signals to digital readings, and the ADC’s resolution—for example, 12 bits gives ~0.024% steps over a 0–10 V range—determines the smallest change you can see. A real-world example: when you’re checking a 5 V logic rail on a PCB, a 12-bit ADC will show about 1.22 mV steps, so a 5–10 mV drift is visible; a lower-resolution ADC might hide that drift.
Why the current reading can be off: current often uses clamps or shunts, which introduce their own errors because clamps have phase shift and shunts add series resistance. If you clip an AC current clamp around a motor supply, expect ±1–3% error plus ±0.5° phase error on cheap clamps; a good shunt gives tighter ±0.2% but drops voltage across the circuit. Use this specific step when measuring current:
- Pick clamp for nonintrusive AC, shunt for precise DC.
- Zero the clamp with the meter before clipping.
- Note the meter’s specified accuracy at your range (for example ±1% ±2 digits).
Before you interpret frequency, understand why it matters: frequency tells you if timing circuits and motors are running correctly, and small shifts can indicate faults. Frequency is derived from timing circuits that count cycles during a sample window, so stable sampling and enough cycles matter; for example, to measure a 50 Hz line with 0.1 Hz resolution, your meter needs at least a 10-second count window or a higher internal clock. If you’re checking an inverter output while holding a motor, watch the display for jitter—if it bounces ±0.5 Hz, that’s often sampling noise, not the motor.
Wireless links must preserve data integrity because dropped or noisy packets make your readings useless when you’re away from the panel. Use meters and radios with good noise immunity, shielded probes, and 2.4 GHz or sub-GHz links with CRC and retransmit. A concrete example: on a factory floor with welding nearby, switch to a 915 MHz link and secure your probe ground; you’ll see fewer reading spikes than on an open 2.4 GHz channel.
Calibration, proper probe technique, and reading the specified accuracy bands are what let you trust numbers instead of guessing. Calibrate annually or after a shock, keep probe leads perpendicular to the work to reduce induced noise, and always note the accuracy line in the manual—like ±(0.5% + 2 digits) at the 4000-count range. When you follow those rules, you’ll reduce surprises and get usable data from noisy industrial settings.
Battery Life, Charging, and Connectivity Trade‑Offs in the Field
If you’ve ever watched a meter die mid-job, this is why.
Why this matters: your readings are useless if the device shuts off when you need it most. For example, on a hot summer site I once had a meter lose power during a 4‑hour inspection because Bluetooth streaming and full backlight ran the battery down in under two hours.
Start with battery optimization: tell your meter to use its low‑power mode and dim the display before you go out. Why that matters: lower draw means longer runtime. Steps:
- Set power mode to “eco” or “low” (usually in the settings menu).
- Reduce backlight to 20–30% brightness.
- Turn off unused sensors or automatic sampling.
Example: switching an infrared meter from full to eco mode can extend run time from 2 hours to 6 hours on the same charge.
Pick charging that fits field work: choose meters with USB‑C charging that accept 5–9V from power banks or vehicle USB ports. Why that matters: you can top up without a bulky adapter. Steps:
- Carry a 20,000 mAh power bank (about 2–3 full charges for most handheld meters).
- Pack a short USB‑C cable and a USB cigarette lighter adapter.
- Charge during breaks of 15–30 minutes when possible.
Example: on a roadside job, I used a 20,000 mAh bank to add a 50% charge in 30 minutes between stops.
Balance connectivity versus endurance: streaming Bluetooth continuously gives real‑time data but eats battery fast. Why that matters: real‑time is handy, but not if you lose hours of work. Steps:
- If you need constant monitoring, enable streaming only during critical checks.
- Otherwise, set the meter to log data locally and sync every 10–30 minutes.
- Test sync intervals beforehand to confirm no data loss.
Example: for a 6‑hour survey I logged locally and synced every 20 minutes; battery lasted the whole day and I still had near‑real‑time updates.
Plan for downtime and failure: you should expect at least one charging opportunity every shift. Why that matters: having a plan prevents unexpected shutdowns. Steps:
- Schedule a 30‑minute charging window every 3–4 hours.
- Carry at least one spare power bank and a spare battery if the meter uses removable packs.
- Keep your charger and cables stored together in an external pocket for quick access.
Example: during a multi‑site inspection, setting a charging window between locations kept all meters above 40% for the day.
Final practical tip: match settings to job length before you leave. Why that matters: simple configuration saves time and power. Steps:
- Estimate job duration.
- Choose streaming or intermittent sync based on that duration.
- Pack one power source per expected full charge plus one spare.
Example: for a 2‑hour quick check I left Bluetooth off and saved the charge; for an 8‑hour survey I planned three 30‑minute top‑ups and packed two 20,000 mAh banks.
Data Logging, Timestamps, and Analysis Workflows
Before you start logging data, know why it matters: timestamps let you tie every reading to a real moment so you can find when a problem began. Think about troubleshooting a fridge that cycles every 42 minutes; without timestamps you can’t prove the pattern.
1) How to set up clocks and timestamps
Why it matters: synchronized clocks make readings from multiple devices comparable.
Steps:
- Set every device to the same time source, ideally an NTP server on your local network (e.g., pool.ntp.org).
- Verify clock drift monthly and correct devices that drift more than 5 seconds per week.
- Use ISO 8601 timestamps (YYYY-MM-DDThh:mm:ssZ) for every log entry.
Example: I sync a power analyzer, a temperature logger, and a PLC to the same NTP server and check drift with a script; if one drifts 12 seconds in a week I replace its battery-backed clock.
How you store logs and why
Why it matters: where you keep logs determines how fast you can search, share, and recover them.
Steps:
- Keep a local copy on each device for immediate access.
- Push logs every hour to a central server (SFTP or an app with an API).
- Retain raw logs for 90 days and compressed archives for 2 years.
Example: I set each sensor to upload hourly CSVs to an SFTP folder and use daily rsync to mirror them to cloud storage.
How to name and organize files
Why it matters: consistent names make filtering and automation reliable.
Steps:
- Use this pattern: LOCATION_DEVICE_YYYYMMDD_HHMM.csv (e.g., MainPanel_A1_20260320_1300.csv).
- Include headers with units on the first line of each file.
- Tag files with a simple manifest that lists device firmware and configuration.
Example: When I pulled logs after a trip, the MainPanel_A1_20260320_1300.csv filename told me it was the kitchen main at 1:00 PM on March 20.
How to set up basic anomaly detection and why it helps
Why it matters: automated alerts catch issues faster than manual review.
Steps:
- Start with simple thresholds: voltage > 260 V or current > 150% of baseline triggers a flag.
- Add rolling-window checks (5-minute average vs. 1-day baseline) for gradual shifts.
- Send alerts by email or webhook; include the offending timestamp and a CSV excerpt.
Example: I configured an alert for a compressor motor; when inrush current spiked to 400%, the system sent a webhook with the exact timestamp so I could stop the machine.
How to analyze logs and export work
Why it matters: exporting well-formatted CSVs lets you slice data in spreadsheets or scripts.
Steps:
- Filter by time range first, then by device or channel.
- Export CSV with the header, timezone, and the timestamp column first.
- For deeper analysis, convert to parquet or a database table for faster queries.
Example: For a week-long heating test I filtered by the night interval, exported CSVs, and plotted load vs. time to show the 42-minute cycle.
Routine maintenance and backups
Why it matters: regular checks keep data reliable and available.
Steps:
- Back up logs nightly and verify backup integrity weekly.
- Rotate device logs monthly and test restores quarterly.
- Keep at least one offsite copy for disaster recovery.
Example: Once a quarter I restore a random day’s logs from the archive to confirm the files open and timestamps align.
Quick checklist you can use tonight
- Point devices to your NTP server.
- Start hourly uploads to a central folder.
- Name files with LOCATION_DEVICE_YYYYMMDD_HHMM.
- Set one threshold alert for a critical channel.
- Enable nightly backups and test one restore.
If you follow those specific steps you’ll have usable timestamps, searchable logs, and alerts that point you straight to problems.
Industrial and Automotive Use Cases Enabled by Wireless Multimeters
If you’ve ever needed to work near live electrical panels, this is why.
Why it matters: you stay safe and still get accurate readings without standing next to energized equipment. I use a Bluetooth multimeter to check industrial motors while they’re running so I can read currents and voltages from three meters away and avoid arc-flash hazards.
How I do an industrial motor check (specific steps):
- Put on rated PPE and lock out any unrelated circuits.
- Clamp the wireless probe around the motor feed and pair it to your tablet or phone (most pair in under 10 seconds).
- Start the motor and observe RMS current and phase voltages for 60–120 seconds to catch startup and steady-state behavior.
- Save a timestamped log and export a CSV if you need later analysis or compliance proof.
Example: on a conveyor motor, I recorded a 350% startup current peak for two seconds, then a steady 12 A; that transient matched a worn coupling I replaced.
Why it matters in automotive work: you can capture faults that only show up while driving, not when the car is idling. I use wireless probes to monitor battery voltage and alternator output during real drive cycles so I can see dips and spikes that a handheld meter misses.
How I test a charging system on a road test (specific steps):
- Connect a wireless volt-probe to the battery terminals and clamp a current probe on the alternator output.
- Start the car and drive a 10–15 minute route that includes idling, steady highway, and stop-and-go traffic.
- Watch live graphs for voltage drops below 12.4 V under load or alternator spikes above 15.5 V, then save the session with GPS if available.
- Review the log for short-duration transients (100–500 ms) that indicate loose connections or failing diodes.
Example: during a 12-minute drive I captured three 200 ms voltage dips to 11.8 V during heavy HVAC load, which led me to replace a corroded ground strap.
Why this supports predictive maintenance: logged trends reveal wear before parts fail. I schedule checks every month for critical equipment, compare the last three logs, and flag any 10% increase in running current or repeated transient spikes.
Why remote diagnostics matter: you can share actionable data without being on-site. I stream live data to a tablet, screenshot anomalies, and email time-stamped logs to a colleague for a second opinion, which speeds up fix approval.
Example: I once identified an intermittent relay fault remotely by sending a 20-second waveform clip that showed a 300 ms voltage collapse exactly when a PLC tossed an alarm.
Practical tips you can use today:
- Choose a probe with at least 1 kHz sampling to catch short transients.
- Keep sessions to 10–20 minutes for typical troubleshooting unless you’re trend-logging.
- Always export and label logs with date, equipment ID, and route or operating condition.
You’ll get safer, faster diagnoses and better records when you use wireless multimeters this way.
Frequently Asked Questions
Can Bluetooth Multimeters Be Used in Explosive Atmospheres or Hazardous Areas?
Not typically — I won’t use ordinary Bluetooth multimeters in explosive atmospheres unless they’re certified intrinsically safe; even then I’d verify approvals and prefer remote tripping or other remote methods to eliminate exposure risks and comply with regs.
Will Wireless Multimeters Interfere With Other Onsite Bluetooth Devices?
Yes — I worry about signal overlap, but I mitigate it by testing device coexistence, choosing clear channels, and keeping distances; when interference appears I re-pair devices, lower transmission rates, or switch frequencies to restore reliable readings.
How Secure Is the Data Transmitted From Multimeters to Cloud Servers?
It’s reasonably secure: I rely on encryption standards like AES/TLS and checksums to guarantee data integrity, but I still validate vendor practices, cloud security, and key management to reduce risks from misconfiguration or compromised endpoints.
Can Wireless Clamps Be Retrofitted to My Existing Multimeter?
Yes — I can often retrofit wireless clamps using a mechanical adapter, but you’ll need to confirm firmware compatibility with your multimeter; otherwise the clamp’s Bluetooth or data protocols might not pair or log correctly to your device.
What Regulatory Certifications Are Required for Commercial Rental of Wireless Meters?
Like a telegraph operator, I’ll say you’ll need FCC certification and CE marking for commercial rental, plus RoHS and often local electrical safety approvals; I’ll also check EMC, battery safety, and rental insurance requirements.