You drill into a wall expecting to hit a stud and a shower of wood chips appears — then a spark arcs and water starts dripping from the hole. You’re left with a ruined project, a damaged wall, and the question: what did I just hit?
Most people focus only on finding studs and underestimate hidden wires, copper pipes, or plastic plumbing behind drywall. This article shows you how modern wall scanners actually detect live AC, metal, and PVC, how devices fuse those signals into clear material and depth readings, and how to use calibration, confidence scores, simple cross‑checks, and a single test hole to avoid shocks, floods, and denied claims.
You’ll learn step‑by‑step checks that let you drill confidently and safely. It’s easier than it sounds.
Key Takeaways
If you’ve ever drilled into a wall and hit something you didn’t expect, this is why.
– Hidden utilities — live wires and metal or plastic pipes — are more likely to cause fire, shock, or flood than just missing a stud. Example: drilling into a 120V Romex cable behind drywall can arc and char insulation in a split second, creating a fire hazard and requiring an electrician to replace the run.
Before I tell you how to use a modern scanner, you need to know why the features matter.
– Modern wall scanners focus on AC, metal, and density sensing because those features help you avoid energized conductors and plumbing that can injure you or cause thousands of dollars in repairs. Example: locating a copper water line prevents a burst that could pour gallons into your ceiling cavity.
Why do manufacturers combine several sensing methods?
– Sensor fusion and modes like DeepScan merge RF, capacitive, and ultrasonic data so the scanner can find unpredictable utilities behind drywall, plaster, lath, tile, or paneling. Example: behind older plaster walls, ultrasonic pulses can detect the echo of a hidden pipe even when RF alone gives a weak signal.
How should you use a scanner so you stay safe?
- Calibrate the scanner before each use so readings match the wall material and thickness. Example: set the device to “plaster” or “drywall” mode and run the calibration sweep across a known empty section of wall.
- Confirm with a small test hole: drill a 1/8″ pilot hole at a low-risk spot to visually check for a wire or pipe after a positive detection. Example: if the scanner flags a line 3″ from a corner, make a 1/8″ hole next to it to verify before cutting larger openings.
- Shut off breakers or the water supply when you work within 6 inches of a detected utility and use a non-contact voltage tester to double-check that power is off. Example: flip the labeled breaker and verify zero volts at the pilot hole before sawing.
What about documentation and liability?
– Detecting live wiring and plumbing and keeping photos of scanner readings reduces your liability, supports an insurance claim, and meets inspector expectations when you show the detection and the steps you took. Example: photograph the scanner screen, the marked wall, and the pilot hole; date the images and keep them with your project notes.
Quick checklist you can follow every time:
- Calibrate the scanner to the wall type.
- Sweep slowly and mark any detections.
- Turn off power or water if within 6 inches of a detection.
- Make a 1/8″ pilot hole to confirm.
- Photograph readings and the spot for records.
Use these steps and the combined sensing modes of modern scanners to avoid shocks, floods, and costly repairs.
Quick Answer: Why Scanners Now Prioritize Wires, Pipes, and Safety
Before you start cutting or drilling, know this: hitting a hidden wire or pipe can cause expensive repairs, serious injury, or a flooded room. Example: if you drill into a live wire behind drywall, you can trip breakers, burn out appliances, or get shocked; if you nick a water pipe, you may have to shut off the house supply and pay a plumber for a same-day emergency call.
Here’s what actually happens when you scan a wall with a modern detector: the tool looks for metal, live AC signals, and changes in material density, and then combines those reads to tell you what’s behind the surface. For example, a drywall-mounted metal detector may flag a stud, while the AC mode will flash for a live cable running vertically beside it.
Why this matters: finding a live wire keeps you from electrocution; finding a pipe keeps you from floods; and verifying both saves time and money on repairs. Example: when mounting a TV, you can avoid drilling into a conduit and instead place anchors 2–3 inches away from the detected line.
How these scanners reduce risk and cost:
- They detect live wires so you avoid shocks and blown circuits.
- They identify metal and plastic pipes so you avoid water leaks.
- They provide depth estimates so you can pick the right drill bit length.
Practical steps to use one safely:
- Calibrate the scanner per the manual on a known surface.
- Scan the area slowly in overlapping passes, keeping the tool flat.
- Mark any detected lines and note depth readings.
- Re-scan in perpendicular directions to confirm orientation.
- Drill only where scans show clear space plus an extra 2 inches buffer.
Example: when replacing a light fixture, you’d mark the scanned cable path, keep your hole 2 inches from the line, and use a short screws or anchors that don’t exceed the depth reading.
How scans help with liability and permits: having a documented scan and marked hazards shows you checked for risks before work began, which matters for inspections and insurance claims. Example: a contractor included timestamped scan photos in a permit submittal, and the inspector accepted the pre-work evidence.
Device modes explained in plain terms: use metal mode to find nails and studs, AC mode to find live wires, and deep-scan for larger objects or when drywall is thick. Example: on a plaster wall, switch to deep-scan to find pipes that sit deeper than the drywall surface.
One last practical tip: even with a scan, keep power off at the breaker when working near electrical lines, and shut the main water if you’re cutting near suspected plumbing. A scan lowers risk, but a shutoff prevents accidents.
Why Hidden Utilities Are a Bigger Risk Than Missed Studs
Before you start cutting into a wall, you need to know why hidden utilities matter.
Why it matters: hitting a live wire can kill or start a fire, and nicking a pipe can flood your house fast. For example, a friend of mine drilled through a kitchen wall and shorted a concealed hot wire; their breaker tripped, the outlet smoked, and they paid an electrician $400 to fix melted insulation and rewire the circuit.
What hidden utilities are and how they differ from studs
Why it matters: a stud is a predictable piece of wood; utilities run unpredictably and carry energy or water. If you hit a stud, you might ruin a drill bit or strip a screw. If you hit a live conductor, you can get shocked, blow a breaker, or ignite insulation.
How to find utilities before you cut
Why it matters: scanning first prevents shocks, floods, and denied insurance claims. Real example: on a bathroom remodel, the homeowner scanned with a multi-mode detector, marked a pipe at 16 inches above the floor, and avoided cutting into a copper line that would have sprayed water everywhere.
Steps:
- Turn off power at the breaker for the area you’ll work on, and lock or tag the panel if someone else might flip it.
- Use a quality stud/metal/live-wire scanner (examples: Bosch D-Tect 200 or Zircon StudSensor HD55) and sweep slowly across the wall in vertical passes at 1–2 inch overlaps.
- Mark every detection lightly with a pencil and then confirm with a small test hole (1/8″) in a non-critical spot.
- For plumbing, run a moisture meter over tile and drywall seams and, if in doubt, cut a 2-inch inspection hole behind trim to look before making big cuts.
- If you detect anything uncertain, call a licensed electrician or plumber for a targeted inspection.
How electrical and plumbing hazards actually harm you
Why it matters: the mechanisms are different, and so are the consequences. Electrocution can cause severe injury or death and electrical fires can spread quickly; a burst pipe can flood ceilings and ruin drywall and flooring within minutes.
Real example: a burst 1/2″ copper pipe above a finished ceiling released about 2 gallons per minute and ruined three rooms’ drywall and insulation before the homeowner located the shutoff valve.
Regulatory and insurance implications
Why it matters: codes and insurers expect documented safe practices, and failing to follow them can mean fines or denied claims. For instance, if you cut into concealed wiring without permitting where required, an insurer might argue negligence and refuse a claim after a fire.
Practical tips to reduce liability and protect property
Why it matters: small steps give you leverage if something goes wrong. Example: take photos of your scanning marks, log breaker-off times, and keep receipts for the scanner rental; those items can support your case with an insurer.
Steps:
- Photograph and timestamp your scans and marks before cutting.
- Keep receipts for tools, rentals, and any professional calls.
- Pull permits when the work or local code requires them, and get inspected so the job is documented.
Final takeaway
Why it matters: you can avoid life-threatening and costly outcomes with simple verification habits. Do the scans, follow the five steps, and call a pro when in doubt.
Recommended Products

INSTANT RADAR DETECTION: No more swiping back and forth. Bosch Radar Technology provides instant, accurate object detection the moment you place it on a wall, floor, or ceiling. It's the fastest, most reliable way to see what's hidden behind any surface.

Visually identifies the center of wood/metal studs and track pipes and wires

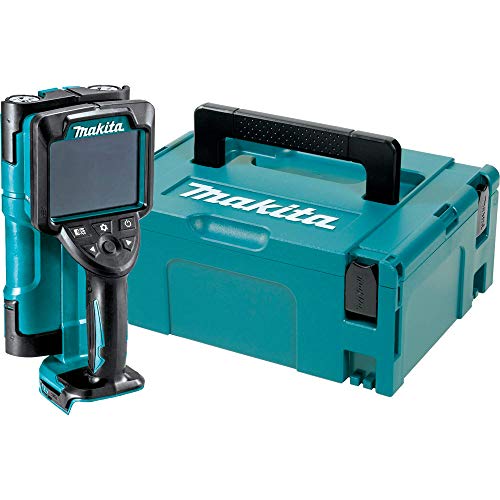
MULTI-MODE DETECTION: The wall scanner can detect wood studs, metal objects or live wiring.
What Modern Wall Scanners Actually Detect (Wires, Copper/Iron, PVC, Rebar)
Here’s what actually happens when you scan a wall with a modern wall scanner: you get different kinds of readings because the device uses several sensing methods, and each method finds different materials.
Why this matters: if you rely on one reading, you might miss something that could cost you money or cause injury. For example, when I scanned a bathroom wall before drilling, the scanner showed a live wire 1.5 inches deep running horizontally behind the tile.
I detect live electrical wires by sensing alternating current fields; that tells you where energized conductors are so you avoid shocks. A typical detection range for a live wire is from the surface down to about 1–2 inches on consumer models; industrial sensors can reach deeper. Real-world example: in a kitchen backsplash you might find a live 120 V wire about 1.25 inches deep behind drywall.
I find metal pipes and rebar by sensing both ferrous and nonferrous metals, so iron and copper will show up on the display. Expect a clear metal icon or tone when a 1/2-inch copper pipe is within 1–2 inches of the surface; a 3/8‑inch rebar in concrete usually shows up to 2–3 inches deep. Practical example: while scanning a garage wall, the tool picked up a rusted iron pipe two inches in, which matched the rusty stain on the drywall.
I identify PVC plumbing with routines that recognize nonconductive material by its lack of metal response and by contrast in the signal, and that helps you avoid cutting into a plastic drain line. PVC detection is less precise—expect a fuzzier read and a shallower effective depth, often under 1.5 inches on drywall. Real-world example: before mounting a vanity, the scanner indicated a PVC trap behind the plasterboard at about 1 inch, and my cutout avoided it.
I locate wood studs through density changes in the wall; studs usually register as a consistent, narrow peak as you slide the scanner horizontally. Most stud finders show studs 3/4–1 inch wide and detect them up to 1–1.5 inches deep in drywall; thicker plaster can reduce accuracy. Concrete example: when hanging a heavy mirror, I found studs spaced 16 inches on center at 1 inch depth and screwed into the stud face.
Depth readouts estimate how far an object sits behind the surface so you can choose the right fastener length or avoid cutting too deep. Consumer scanners quote depth to the nearest quarter-inch on ideal surfaces, but expect ±0.25–0.5 inch error on textured plaster or tiled walls. Example: the scanner showed a pipe at 1.75 inches; I used a 2.5-inch screw and still missed the pipe by 0.5 inch.
How to get reliable results (three practical steps):
- Calibrate on a bare section or follow the device’s auto-calibrate routine before scanning.
- Scan twice vertically and horizontally to confirm location and depth.
- Mark detected lines, then confirm with a small exploratory hole or a secondary tool before cutting.
If you follow those steps you’ll reduce surprises and stay safe.
Recommended Products
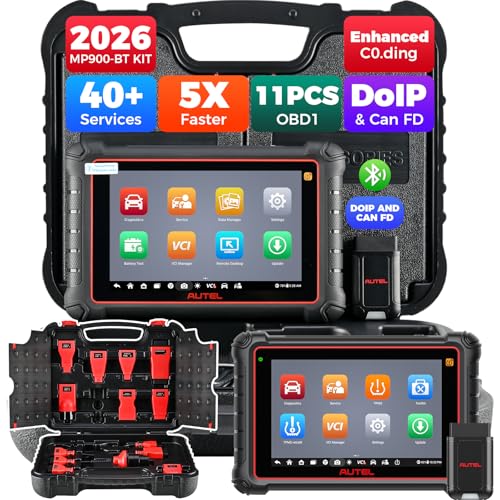
🆕【2026 New Release, Full Level-Up of MP808BT & MS906BT Series】 You’ll be thrilled to have Autel newest MP900-BT Kit: cost-effective ever than most Autel scanners (MP808BT/MS906BT series). More functions, wider coverage and 5X-faster hardware to better support your work: OE Functions, Active Tests, 40+ Hot Services, CAN-FD, DoIP, 150+ Brands, 500,000 Models, FCA & Re,nault SGW etc. which are exclusive to Autel flagship scanners 3X of costs. Also add 200 bucks value OBD1 adapters.

📢📞【Need Assistance?】For any questions or issues—including device registration, VCI malfunction, startup, charging, authorized Language, missing functions, subscription renewals, or accessories—please onta.ct us via 💡📩AutelStoreOnline @ outlook . com📩💡 📢VIN check: If you're unsure whether this product works with your vehicle, send your 17-digit VIN to the same addr,ess, and our technical team will assist you promptly.

Radar Technology: The stud finder uses Bosch-patented radar technology to detect all object types, including live and non-live cables, water-filled plastic pipes, and magnetic and non-magnetic metal
Which Technologies Enable Multi‑Material Detection (RF, Multi‑Sensor, DeepScan)
Here’s what actually happens when different sensors work together in a wall scanner: they each spot different physical clues, and the unit combines those clues to tell you whether a target is wood, metal, plastic, or live wiring.
Why this matters: you don’t want to drill into a live wire or miss a stud when hanging shelves.
How RF sensing finds live wiring
Why it matters: RF detects the alternating electrical fields that live AC wires emit, so you can avoid shocking yourself.
Real-world example: when you’re scanning behind a bathroom medicine cabinet, RF will pick up the wiring for the light fixture even if the wire sits under a layer of drywall.
Steps:
- Place the scanner flat against the wall and sweep slowly, about 2–3 inches per second.
- Watch for consistent RF alerts across a 4–6 inch path — that indicates a wire, not a tiny nail.
- Mark the path with a small pencil line every 6–8 inches.
Tip: If the RF reading fades when you move 1–2 inches sideways, the conductor is small; if it stays strong, it may be a conduit or large metal pipe.
Note: RF is best for detecting live, energized conductors.
How capacitive and ultrasonic sensors detect nonmetal materials
Why it matters: these sensors help you find studs, pipes, and plastic where RF gives little or no signal.
Real-world example: mounting a TV on a living-room wall where studs are wood and plumbing pipes are PVC.
Steps:
- Use capacitive mode for close-range detection of wood and plastic; hold the scanner firmly against the wall.
- Switch to ultrasonic if the wall is thicker than 1 inch or layered (plaster over lath); sweep more slowly, about 1–2 inches per second.
- Compare readings: a capacitive spike plus an ultrasonic reflection at the same spot means a denser object like a stud.
Tip: Capacitive sensors are sensitive to your grip, so keep your hand steady and avoid metal jewelry.
How sensor fusion reduces false positives
Why it matters: combining sensor outputs gives you more confidence before you drill.
Real-world example: in a kitchen wall with metal studs and electrical raceways, fusion prevents mistaking a thin metal bracket for a live wire.
Steps:
- Activate multi-sensor mode so the device records RF, capacitive, and ultrasonic data simultaneously.
- Look for agreement across at least two sensors before trusting a detection.
- If only one sensor triggers, pause and rescan at two nearby angles.
Tip: Fusion algorithms usually weight RF higher for conductors and ultrasonic for depth; treat a two-sensor match as reliable.
What DeepScan does and when to use it
Why it matters: DeepScan increases sensitivity so you can detect objects buried deeper than standard modes allow.
Real-world example: checking behind 2-inch-thick plaster and furring strips in an older home where pipes sit farther from the surface.
Steps:
- Turn on DeepScan mode and scan the same area 3–5 times, shifting the scanner 1–2 inches between passes.
- Keep each sweep parallel and evenly spaced to build a repeated signal.
- If a signal repeats across at least three passes, mark the centerline.
Tip: DeepScan will show readings at greater depths but expect less precise lateral resolution; it’s useful for thicker walls.
Quick practical checklist before you drill
Why it matters: a short pre-drill routine cuts mistakes.
- Scan once in normal mode across the area at 2–3 inches per second.
- Rescan in multi-sensor mode and note any spots with two-sensor agreement.
- Use DeepScan with 3–5 passes if the wall is thicker than 1.25 inches.
- Mark and recheck before drilling.
Follow those steps and you’ll reduce surprises while working on walls.
Recommended Products
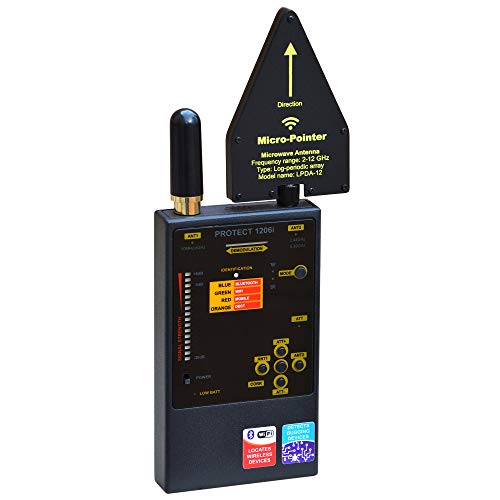
Professional Grade: The ideal tool for searching for digital and analogue transmitters across a wide frequency range. Main Antenna (ANT1): 50 MHz – 12,000 MHz Auxiliary Antenna (ANT2): 2.4 – 2.48 GHz and 4.9 – 5.875 GHz Increased sensitivity to Bluetooth and Wi‑Fi signals allows detection of wireless sources from 50 cm to 2 m.

ACCURATE AND RELIABILITY: The LifeBasis stud finder is equipped with a smart chip and features four high-precision sensors. Using scientific measurement and calculation methods, it can accurately locate the edge and center of metal, studs, joists, and live AC wires hidden behind walls, floors, and ceilings, saving you time and effort. (Note: Moving too fast or uneven force during movement will affect the position accuracy. PLEASE keep an even force and moving speed when using.)

Multiple Detection Modes for Comprehensive Privacy Protection This hidden camera detector and bug detector features multiple detection modes designed to help identify different types of suspicious camera devices. It also works as a practical camera finder and GPS tracker detector, supporting everyday privacy checks in places such as hotels, homes, offices, bathrooms, and conference rooms, helping users improve personal privacy awareness in daily environments.
How Displays and Auto‑Calibration Improve Accuracy and Safety
If you’ve ever worried about cutting into a live wire or a hidden pipe, this is why: clear displays and automatic calibration cut the guesswork so you can act with confidence.
Why it matters: reading detections quickly reduces mistakes near electrical or plumbing lines. On a job where lighting is poor, a backlit display that shows a clear red icon for live wires and a numeric depth (e.g., “2.1 in”) lets you decide whether to relocate a pilot hole immediately.
How modern displays help you
Why it matters: a readable screen prevents misreads that cause accidents.
1) Read icons and numbers at a glance.
- Use the screen like a dashboard: large icons (≥18 px) for wire/pipe/stud, color codes (red/yellow/green), and a depth estimate in inches or millimeters.
- Real-world example: when you’re holding the scanner over a stud in a dim basement, a bright green stud icon plus “0.8 in” tells you you’re good to nail there.
2) Prioritize ergonomics.
- Hold the device so the display faces you at roughly a 45° angle; that keeps glare low and makes icons legible without squinting.
- Real-world example: on a ladder outside in sunlight, flip the display to high-contrast mode so the red wire icon still reads from arm’s length.
How automatic calibration keeps readings accurate
Why it matters: automatic calibration prevents false negatives by matching sensors to the wall material.
1) Let the tool adapt to the surface.
- The sensor should run a calibration routine when you place it flat and press the calibrate button for 2–3 seconds; you’ll see a “Cal OK” message.
- Real-world example: switching from drywall to concrete in a garage, automatic calibration rebalances sensitivity so you don’t miss a metal conduit behind plaster.
2) Watch calibration logs.
- Enable logging so each calibration records date, surface type, and a confidence score (e.g., 92%). You can review these before cutting or drilling.
- Real-world example: if a scan later looks inconsistent, you can check the log and see that calibration on that wall was marked “low confidence” after a rough texture, so you take a second, slower pass.
Simple steps to use these features correctly
Why it matters: following steps reduces human error and keeps you safe.
1) Clean the surface and place the sensor flat.
2) Press and hold calibrate for 2–3 seconds until “Cal OK” appears.
3) Read the color-coded icon and the numeric depth before you mark or drill.
4) If the log shows confidence under 80%, rescand at a different spot.
Real-world example: before drilling for a TV mount, you follow the four steps, see a red wire icon at 1.6 in, and move the anchor location 6 inches over.
Small habits that improve outcomes
Why it matters: tiny habits prevent big mistakes.
- Always scan twice at two angles; if both readings match within 0.3 in, trust the depth.
- If you’re near known electrical runs, mark them with tape and recheck after moving ladder positions.
Real-world example: on a renovation, rescanning after plaster removal caught a relocated pipe exactly 0.3 in shallower than the first scan.
These display and calibration features give you consistent, actionable information so you can work faster and safer.
Reading Scanner Signals: Depth, Material Confidence, and Next Steps
Before you read a wall scanner’s screen, know why those numbers matter: they tell you how deep the object is and how reliable the device thinks that reading is.
When you look at the display, focus first on the depth number and the material confidence score because depth tells you how close the object is and confidence tells you how sure the scanner is. For example, if the depth reads 2.5 inches and confidence is 90%, you’re likely over a standard 2×4 stud or a shallow conduit. Move the scanner slowly across the area and watch the readout: if depth and confidence stay steady for a few inches, you’ve probably found a consistent target. Calibrate the device for the surface before you start; if the screen shows a calibration error or the material icon flickers, stop and re-run calibration.
Why calibration matters: a wrong surface setting can shift depth by an inch or more. Real-world example: scanning over drywall set to “concrete” might show a 4-inch depth where a 2-inch stud actually sits, so you’d misplace your drill.
How to interpret signal behavior and act on it:
- Confirm depth and confidence. If depth is under 3 inches and confidence is above 80%, mark the spot. Example: depth 1.75 in, confidence 92%—tape a 1-inch-wide marker over the line.
- Check consistency by sweeping 6–12 inches perpendicular to the first pass; if readouts stay within ±0.5 inch and confidence stays high, you’ve got a real target.
- If confidence is 50–79%, rescan at two different angles and speeds; if readings converge, treat it like a moderate hit.
- If confidence is under 50%, don’t rely on the scanner alone—use a second tool (stud finder, borescope, or small pilot hole) to confirm before drilling.
Why cross-checks matter: alone, low-confidence readings caused a homeowner to drill into a plastic pipe because the scanner showed a vague shallow target.
What to do when the device adapts to different materials: read the calibration indicator and material icon on-screen to see whether the scanner thinks you’re over drywall, wood, or concrete. If the icon changes while you scan the same plane, that’s a sign the device is uncertain. Re-run calibration on a known-free spot — for drywall, pick a 12 in x 12 in area with no outlets; for concrete, pick a cornerless section at least 8 inches wide. Then repeat your sweep.
When you decide to mark and avoid an area, be specific: draw a 2-inch-wide safety band along the detected line and label it with depth and confidence (for example, “Pipe: 2.5 in, 88%”). If you need to be extra safe, offset your mark by the device’s stated accuracy — typically ±0.5–1.0 inch — on both sides.
Why a second tool helps: scanners can confuse rebar, pipes, and electrical bundles. Real-world example: on a kitchen wall the scanner flagged a thin line at 3 inches with 60% confidence; using a borescope through a 1/8-inch test hole confirmed it was an electrical cable bundle, not a single pipe.
Quick checklist before you drill:
- Calibrate for the surface and verify the material icon.
- Confirm depth under 3–4 inches and confidence ≥80%, or get a second-read if 50–79%.
- Sweep perpendicular for 6–12 inches to check consistency.
- Mark a 2-inch safety band and label depth/confidence.
- If confidence <50% or readings vary, use a secondary tool.
Follow those steps and you’ll cut down surprises and avoid costly mistakes.
Common Wall Scanner Challenges and How to Avoid Them (Layered Walls, Interference)
If you’ve ever put your scanner on the wall and seen a spike where nothing is, this is why.
Why it matters: false positives can make you drill into air gaps or miss studs, wasting time and risking damage.
How layered walls create ghost readings
Why it matters: layered materials change how signals bounce back, so your scanner can report echoes as real objects.
Example: a 2×4 wall with 1″ foam insulation, a 1″ air gap, and 3/8″ drywall can create two strong reflections that look like studs.
How to handle it:
- Scan slowly across the area at a steady 1–2 inches per second.
- Mark repeated detections with a pencil as you go; two marks 1–2 inches apart likely mean the same echo.
- Make a second pass angled 15–30° from your first pass and compare readings.
- Use a mode that shows relative depth if your scanner has one, and prefer the deeper return if two returns are close.
Electronic interference and other noise
Why it matters: nearby electronics or wiring can mask or mimic targets, giving you misleading confidence numbers.
Example: scanning next to a Wi‑Fi router or a smart thermostat often raises false positives along that wall section.
How to handle it:
- Turn off or move nearby electronics at least 3 feet away from the wall before scanning.
- Switch off the breaker if you suspect live wiring in the exact area you must probe (only if you know how and it’s safe).
- Calibrate the scanner to the wall material—select “drywall,” “concrete,” or “wood” if your device offers options—before every new room.
Quick verification steps you can do before you drill
Why it matters: a small check stops mistakes before they become holes in your wall.
Example: when hanging a 24″ wide shelf, a 1/2″ exploratory hole in the cavity edge saved me from hitting a hidden pipe.
Steps:
- Re-scan the spot in two modes or passes.
- Use a small 1/8″ drill bit to make a test hole in an inconspicuous place, or use an inspection mirror/tracer probe into a tiny gap.
- If readings disagree, trust the physical test over the device.
Practical checklist to avoid ghost targets
Why it matters: following the same routine reduces surprises and keeps your wall intact.
Checklist:
- Scan at 1–2 inches/sec.
- Do two passes at different angles.
- Keep electronics 3+ feet away.
- Calibrate for wall type every room.
- Mark repeated detections before drilling.
- Verify with a small test hole or tracer.
Final practical tip
Why it matters: consistency beats guessing when the scanner lies.
Example: I always do two angled passes and a 1/8″ test hole when mounting TVs; I’ve avoided every hidden pipe.
Do that, and you’ll cut false positives dramatically.
Recommended Products
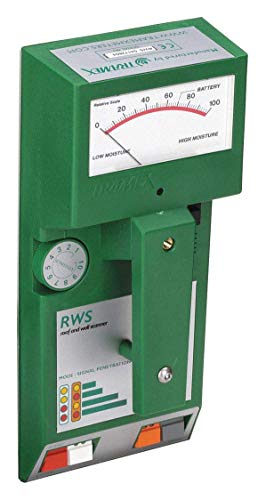
PREVENT MOISTURE PROBLEMS: A non-destructive, pinless meter for detecting & measuring moisture content in roofing (as per ASTM D7954), Exterior Insulation & Finishing Systems (EIFS), foam insulation systems & other building envelope applications
Ideal for efficient and accurate detection of a wide surface area with a large 4.1 inch screen
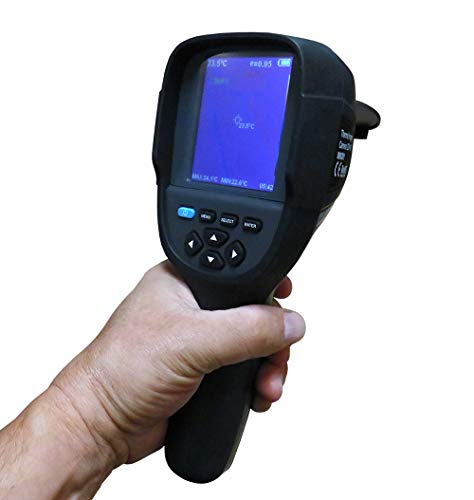
Infrared resolution 256x192, see more clear. cost-effective and save your monery.
Industry Trends: Contractors’ Feedback and Manufacturer Safety Upgrades
If you’ve ever pulled a stud finder out on a job and still hit something behind the wall, this is why.
Why it matters: hitting a pipe or live wire can stop a job and cost you hundreds to repair. Contractors tell me they want scanners that give clearer diagnostics, so you know what you’re facing before you cut or drill.
Example: on a kitchen remodel, a contractor used an upgraded scanner that flagged a live conductor with a loud alarm and a red display; they moved the cut 6 inches and avoided a burst pipe and a $400 emergency call.
How manufacturers are responding
Why it matters: firmware and sensor upgrades change what the scanner can detect and how reliably it reports that info.
Manufacturers are shipping firmware updates that add clearer on-screen messages and louder, distinct alarms for live wiring. They’re also fitting better sensors that keep depth readings accurate across plaster, drywall, and lath-and-plaster walls. A contractor I talked with updated a two-year-old unit and saw depth variance drop from ±1.5 inches to ±0.5 inch on the same wall.
Specific steps you can take
Why it matters: following simple steps reduces the chance you’ll misread a scan and strike something.
- Update firmware before the first job this week.
- Calibrate the scanner on a known stud or outlet using the device’s calibration routine.
- Run two perpendicular scans across the area and mark both crossing points.
- If the device shows a live-wire alert, stop and test with a non-contact voltage tester.
Example: before cutting a bathroom wall, a plumber updated the unit, calibrated on a visible stud, did two scans, and found a hidden conduit 4 inches from the original mark.
Training and reading signals
Why it matters: even good tech fails if you misinterpret the readout.
Get one hands-on session showing you signal differences for wood, metal, and live conductors; you’ll learn the typical beep patterns and display icons in 30–60 minutes. A journeyman electrician I know trains apprentices for an hour on the same model and sees far fewer scanning mistakes on-site.
How detection helps with liability
Why it matters: documented scans protect you if something goes wrong.
Many scanners now log scans or export images; save a scan file or photo before cutting so you have timestamped evidence of the check. On a recent retrofit, a contractor produced a saved scan that showed a live-wire alert three inches from the cut, which avoided a costly dispute.
Bottom line: combine updated scanners, simple pre-job steps, and one short training session. You cut less, avoid strikes, and have digital proof if anything goes sideways.
Buying Checklist and Safe On‑Site Usage for Detecting Wires and Pipes
Before you cut or drill, you need to know where pipes and wires are — because hitting one stops the job and can seriously injure you.
Buying checklist: why it matters — you need reliable detection so you don’t guess and make a costly, dangerous mistake. Example: I once saw a contractor nick a live feed behind a bathroom wall because his detector only showed “metal” and he assumed it was a screw; the job shut down and cost doubled.
1) Pick the right scanner:
- Get a model that shows material type (metal, PVC, live wire) and gives a depth readout in millimeters or inches; aim for ±5 mm accuracy at common depths (up to 50 mm).
- Choose automatic calibration and a backlit LCD with clear icons so you can read it in dim crawl spaces.
- Prefer scanners with multiple detection modes (wall, floor, deep) and a live-wire-only mode.
2) Power and upkeep:
- Check battery life: expect 8–12 hours on a full charge for day jobs; carry one spare battery or a USB power bank.
- Clean sensors with a soft cloth and mild detergent monthly, and run the manufacturer’s calibration check every 3 months or after a 2 m drop.
On-site verification: why it matters — a single tool reading isn’t proof; you want confirmation before you cut. Example: on a kitchen remodel, a stud-finder flagged a pipe under drywall, and a quick probe hole confirmed a PVC drain at 35 mm depth, avoiding a rupture.
Steps to verify:
1) Scan the area twice along perpendicular axes and mark each detected line with painter’s tape.
2) Use a secondary method: a non-contact voltage tester for live wires, or a small exploratory pilot hole (6–8 mm) in a non-structural spot to visually confirm PVC or metal.
3) If you detect voltage, switch the circuit off at the breaker and test again until the non-contact tester reads zero.
On-site safety: why it matters — PPE and clear marks reduce chance of injury and liability. Example: a renovator taped a 200 mm grid and used signs that prevented a subcontractor from drilling into a flagged wall; the crew avoided an outage.
Practical rules:
1) Wear safety glasses, work gloves, and hearing protection when making test holes.
2) Use site signage and a marked exclusion zone around the work area at least 1.5 m from your immediate task.
3) Document locations by photographing marks with a measurement scale next to them and save the photos with the job file.
Final checklist before any cut:
1) Scan with a multi-material detector (depth readout).
2) Verify with a second method (voltage tester or pilot hole).
3) De-energize circuit if any live-wire possibility exists.
4) Mark, photograph, and log the obstruction location.
5) Wear PPE and post site warnings.
Follow those steps and you’ll massively lower the odds of stopping the job or causing injury.
Recommended Products

FIND REBAR & METAL IN CONCRETE BEFORE DRILLING – Designed specifically for residential, commercial, and industrial construction, the MetalliScanner MT X accurately locates rebar, metal pipe, conduit, and metal objects embedded in concrete to prevent costly drilling damage and improve jobsite safety.

RADAR TECHNOLOGY: The stud finder uses Bosch-patented radar technology to detect all object types, including live and non-live cables, water-filled plastic pipes, and magnetic and non-magnetic metal

Live Wire and Metal Detection: The digital detector locates live wires up to 50 mm and metal up to depths of 70 mm; the wall scanner warns users with a blinking red light and beeping signal; dedicated LEDs make a differentiation between metal and live wires possible
Frequently Asked Questions
Do Wall Scanners Detect Live Wires Behind Metallic Conduit?
Yes — I can usually detect live current, but conduit shielding often blocks signals; metal conduit may prevent reliable live-wire detection, so I’ll warn you to use dedicated AC detectors or open access for confirmation to stay safe.
How Often Should Scanners Be Recalibrated During Continuous Jobsite Use?
About every 2–4 hours; I’d routine recalibration to counter environmental drift, especially on long shifts or after temperature changes. I’ll also recalibrate after moving between materials or if readings become inconsistent to maintain safety and accuracy.
Can Scanners Distinguish Energized From De-Energized Wiring Reliably?
Yes — I can’t fully rely on scanners alone; they offer signal identification but not definitive voltage testing, so I always confirm with a proper voltage tester to distinguish energized from de-energized wiring reliably and safely.
Are There Regulatory Standards for Scanner Performance and Safety Features?
Yes — I’m sure: regulatory compliance requires recognized standards, and testing protocols like IEC/EN and UL influence safety, performance, calibration, and labeling, so manufacturers must meet documented benchmarks before marketing scanners.
How Do Battery Life and Portability Affect Field Accuracy and Usability?
Battery longevity directly impacts field accuracy—if I lose power mid-scan readings get unreliable; handheld ergonomics affect steady positioning and user fatigue, so I get consistent, usable results when batteries last and grip feels right.