You just stood back from a newly hung picture and noticed a tiny gap at the top corner where the frame meets the mantel, and you can’t tell whether the wall, the hanger or your level is to blame.
You remember using the level, but the bubble sat slightly off-center and now the frame looks crooked by a few millimetres. Most people assume a level’s bubble is either “right” or “wrong” and don’t account for vial sensitivity or bias.
This article will show you how to test for vial bias with quick flip and plumb checks, measure the bubble shift in millimetres, convert that to the angular error, and predict the resulting gap so you can decide whether to shim, reframe, or recalibrate.
You’ll get step‑by‑step actions and simple conversions to fix the problem. It’s easier than it sounds.
Key Takeaways
If you’ve ever hung long trim or ran a level down a long wall, this is why.
Why it matters: small angular errors on a level multiply over distance and you can end up with visible gaps or crooked trim. For example, a 0.5° tilt over a 2.4 m (8 ft) run shifts the edge by about 21 mm — roughly the height of a standard door threshold — which is unacceptable for finish trim.

1) How vial sensitivity changes your results
Why it matters: more sensitive vials give you less angular error so your lines stay truer over long runs. Use engineer‑grade levels (look for specs in mm/°) when you’re installing finish trim or aligning cabinets; these often read in low millimeters per degree and keep displacement under a few millimeters on a typical 2.4 m run. For rough framing where a few millimeters won’t be noticed, a pocket level is fine. Example: hanging crown molding around a room you want tight joints — grab an engineer level.
2) How to check and catch bias
Why it matters: levels can develop a repeatable tilt that shifts every layout the same way, and that creates bad cuts. Steps:
- Lay the level on a flat surface and mark the bubble center.
- Flip the level 180° in the same spot and mark the bubble center again.
- Measure the offset between marks; divide by two to get the vial error in mm over the level length.
If that offset gives you more than your job tolerance — say more than 3 mm over 2.4 m for finish work — replace or recalibrate. Example: you mark a 6 mm offset on a 600 mm level; that means a 12 mm error over 2.4 m unless you fix it.
3) How to use measured offsets when you can’t replace the level
Why it matters: if you know your level’s bias, you can correct your layout instead of wasting material. Steps:
- Measure the vial offset as above and convert it into mm per meter (or degrees).
- When you snap a chalk line or mark a plumb, shift the line by that amount in the opposite direction of the bias.
- Re‑check at multiple points along the run to ensure the correction worked.

Example: a level shows a 5 mm high bias at 1.2 m; when you mark a chair rail across a 3 m wall, offset each transfer mark by 12.5 mm toward the low side before cutting the rail.
4) Daily habits that save cuts and time
Why it matters: simple, regular checks prevent small errors from becoming big problems on a project. Do these every morning and whenever you drop the tool:
- Quick flip/plumb check (takes 30 seconds).
- Recalibrate or remeasure vial offset weekly on long jobs.
- Use a known‑good straight edge or a machinist square to confirm critical points.
Example: before you start laying out a whole run of baseboard, do the flip check and save a day of re‑cuts.
Final practical tip: if your measured, repeatable error exceeds your job tolerance, replace the level rather than compensating forever. You’ll save wood and time.
Quick On‑Job Checks and What to Do If Your Level Is Off
Before you start a job, you need to know whether your level is actually true; if it’s off, your whole run of framing or trim will show it. For example, I once set a door frame using a level that read 1/2 mm high on one end and didn’t notice until the hinge side stuck.
1) How to check your level on site
Why: a small bubble error produces visible tilt over long runs.
Steps:
- Lay the level on the surface you’ll use and note the bubble position against the vial lines.
- Flip the level 180° and place it back in the same spot; compare the bubble positions.
- If the bubble is centered both ways, the level reads true; if it shifts, record the offset in millimeters or divisions from the vial mark.
Short example: on a 10 ft stud wall, a 0.5 mm bubble shift can create nearly 1/8″ lean at the top.
2) What to do when readings differ
Why: knowing the size and direction of the error tells you whether to calibrate, adjust, or replace the tool.
Steps:
- Repeat the flip test at 3 spots along the surface—left, center, right—and write each offset down.
- Average the three consistent errors (add them and divide by 3) to get a correction to apply for temporary work.
- If offsets vary more than 0.3 mm between spots, mark the level as unreliable and swap it out.
Example: you test three spots and get +0.4 mm, +0.5 mm, +0.3 mm; average = +0.4 mm, so set your layout 0.4 mm lower.
3) Quick fixes and calibration
Why: a fast fix keeps you moving and prevents rework later.
Steps:
- For temporary use, apply the average correction to your layout lines and note the adjustment on the project sheet.
- To recalibrate a vial-type level, loosen the vial screws, nudge the vial until the flip test reads the same, then retighten—only if you know the manufacturer’s limits.
- If a factory calibration isn’t possible or the vial is cracked, replace the vial or the level.
Example: I once nudged a vial 0.2 mm and saved half a day on trim, but I replaced the level after the job because the vial felt loose.
4) Rules of thumb and tolerances
Why: you should know what error is acceptable so you don’t waste time chasing imperceptible shifts.
- For rough framing: up to 3 mm over 10 ft is usually acceptable.
- For finish trim: aim for 0.5 mm or better across the same span.
Example: for a 12 ft mantel, a 1 mm error will be visible, so you’d swap tools or recalibrate before installing.
Final tip: always mark the correction on the level with tape and the date; you’ll save time when you return to the same tool.
Recommended Products

Digi-Pas 2-AXIS MASTER Precision Level replaces Old-fashioned Spirit Vial Levels. Tedious repetition of checking 'bubble' position between tiny graduation lines is NOW THINGS OF THE PAST
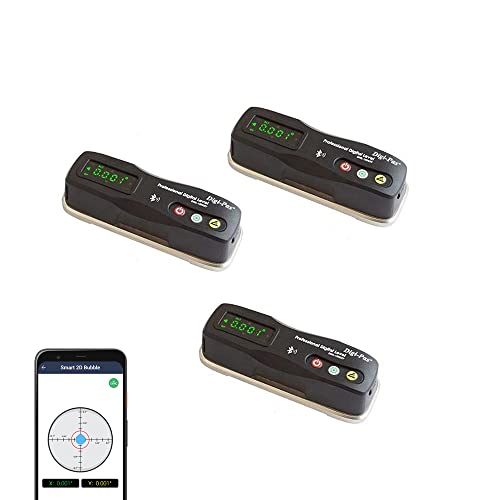
Digi-Pas pioneers Smart 2-AXIS MASTER Machinist Precision Level & Digital Inclinometer replaces 2 pieces of Old-fashioned Spirit Vial Level in one go. Tedious repetition on going ‘back-and-forth’ checking 'bubble' position in-between tiny graduation lines is NOW THINGS OF THE PAST. This task is replaced by WIRELESSLY looking at leveling status simultaneously on your smartphone screen while leveling. It enables ONE-MAN OPERATION to align a machine instead of conventionally done by TWO MEN.

Digi-Pas 2-AXIS WIRELESS Machinist Level replaces Old-fashioned Spirit Vial Levels. Tedious repetition of checking 'bubble' position between tiny graduation lines is NOW THINGS OF THE PAST
How Vial Accuracy Affects Framing and Finish Carpentry
Before you start cutting studs, know this matters because small vial errors become big alignment problems later. I check my level every morning and before each run of cuts; flip the level end-to-end five times and mark the bubble center with a pencil — if the bubble shifts more than one tick (about 1/16 inch on a 48-inch level), I don’t trust it for layout. Example: on a 10-foot wall, a 1/8-inch tilt per stud can create a 1-inch offset at the top plate across the run.
If you’ve ever tried to hang a door that wouldn’t square, this is why. When framing is out of plumb by 1/4 inch over 8 feet, doors will bind or leave 3/8-inch gaps at the latch side; I measure plumb at each stud and shim the hinge side by 1/16–1/8 inch increments to correct it. For instance, on a bedroom door install, I mark the rough opening, set a level on the king stud, and drive a 1/16-inch shim behind the hinge plate where needed.
Think of trim fitting like laying tile: the plane has to be true or the joints show. You need the face of the wall flat to within 1/16 inch over 4 feet for tight trim joins, so check with a 4-foot level or 4-foot straightedge and a feeler gauge. Example: when installing baseboard in a hallway, I run the straightedge along the wall, note any 3/32-inch high spots, and plan to scribe the baseboard or add backer shims where the wall bows.
Here’s what actually happens when you use mismatched materials or fasteners without accounting for level error: small cumulative deviations will create visible gaps or misaligned returns. Match your material to tolerance: use kiln-dried pine for millwork where you need 1/32–1/16-inch stability, and choose screws with finer threads when you need to pull pieces tight without splitting; for example, use #6 x 2-inch trim screws on painted casings and finish nails for delicate profiles.
Before you cut or install, follow these steps to keep vial errors from ruining the finish:
- Test the level: flip it end-for-end five times and pencil-mark the bubble center; reject if shift > one tick (about 1/16 inch on a 48-inch level).
- Verify planes: run a 4-foot straightedge and measure gaps with a feeler gauge; note any spots >1/16 inch.
- Adjust framing: shim or plane studs that create more than 1/8-inch deviation over 8 feet; mark adjustments on the bottom plate.
- Choose fasteners and material: pick screw type and wood species to match the tolerance you need (see examples above).
- Recheck before finish: do one final flip test and straightedge check after blocking and before nailing trim.
I recommend doing the flip test and straightedge check at these milestones: before rough framing, after sheathing, and before trim. Those checks take five minutes each and prevent hours of sanding or rework.
Recommended Products

Heavy-duty 60,000 PSI ductile iron body is built for rugged use and extended life

MASTER AND PERFECT YOUR SKATEBOARDING GAME WITH A PRO-LEVEL QUARTER PIPE DESIGNED BY ACTUAL SKATERS - Practice makes perfect and having your own skateboard obstacle means no longer having to wait at the crowded skatepark to use your favorite ramps. Professional quality that fits in your home, backyard or driveway setup.
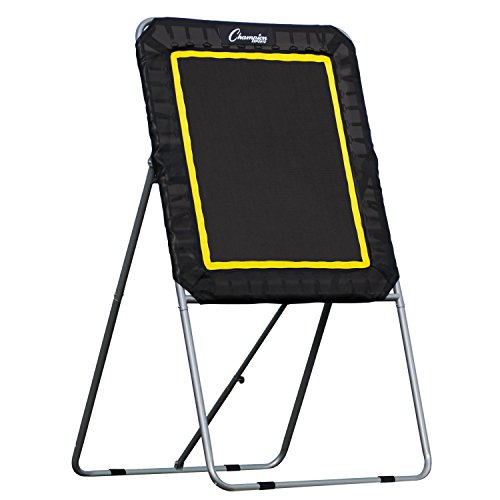
DAMPENED REBOUND: The shock absorbing surface provides the perfect return for practice receiving passes or scooping up a stray ball during play; Rebound target area is 3'W x 4'H
Vial Sensitivity: mm/Degree and On‑Site Distance Errors

Here’s what actually happens when you check a level before you cut or hang trim: you’re testing how the vial reacts to tiny angle changes because that reaction tells you how many millimetres the bubble will move per degree of tilt. Why this matters: a small angle error can turn into a noticeable placement shift over the length of your board. For example, if you’re hanging a 2.4 m (8 ft) shelf and the level is off by 0.5°, the edge can be nearly 21 mm out of true.
How vial radius links to bubble movement
Why this matters: vial shape controls bubble travel for a given angle, so it controls how precise your work will be. A larger-radius vial curves more gently, so the bubble moves less for the same tilt; a smaller radius makes the bubble travel faster. For example, an engineer-grade level with a large-radius vial might move 1 mm per 0.1° of tilt, while a cheap pocket level could move 3 mm for the same 0.1°.
How to convert degrees to millimetres over a span (step-by-step)
Why this matters: converting to mm tells you the actual placement error on the job, not just an abstract angle. Use these steps:
- Measure the span you care about in millimetres (for instance, 2400 mm for an 8 ft shelf).
- Find the level’s sensitivity in mm per degree (or measure it—see below).
- Multiply sensitivity (mm/°) by the angle error (°) and by any proportion if sensitivity is given per 0.1°.
Example: if your level is 5 mm/° and your tilt is 0.5°, the shift over the span is 5 × 0.5 = 2.5 mm. If the sensitivity is listed per 0.1°, convert first: 5 mm/0.1° = 50 mm/°.
How to measure your level’s sensitivity (practical test)
Why this matters: you can get a real number for your specific tool instead of guessing. Do this test on a bench:
- Clamp the level horizontally on one end so it cantilevers over the edge, marking the far end.
- Tilt the clamped end up by a known small angle—use a protractor or stack shim thickness to approximate 0.5° or 1°.
- Mark where the bubble sits before and after the tilt, then measure that bubble movement along the vial in millimetres.
- Divide the measured movement by the angle you used to get mm/°.
Real example: clamp a 300 mm length, raise the free end by 5 mm (about 1° for that span), and measure the bubble shift; if the bubble moved 2 mm, sensitivity is 2 mm/° for that setup.
Quick trig check so you can foresee long-span error
Why this matters: trig shows how small angles amplify with length so you don’t surprise a finished job. For small angles you can approximate linear error as:
error (mm) ≈ span (mm) × sin(angle)
For very small angles (under ~3°), sin(angle) ≈ angle in radians, so:
angle (rad) = angle (°) × π/180
Example: 0.5° on a 2400 mm span → angle in radians ≈ 0.00873, error ≈ 2400 × 0.00873 ≈ 21 mm.
Practical choices on the job
Why this matters: knowing mm/° helps you pick the right level for the task and set realistic tolerances. If you’re doing finish trim where you want ≤2 mm over 2.4 m, you need total angle error under about 0.08°, so use a high-sensitivity level and double-check with a straightedge. For framing where ±6 mm is acceptable, a mid-range level is fine.
Final checklist before you cut or hang
Why this matters: a quick routine reduces rework and waste.
- Measure the span you care about.
- Confirm your level’s sensitivity (use the test above if unknown).
- Calculate acceptable angle error from your tolerance.
- Re-check edges with a straightedge after installation.
Example: for a 1200 mm cabinet install with a 3 mm tolerance, your allowable angle is about 0.14°.
That’s the practical path from vial curvature to real-world placement errors, with numbers you can use on-site.
Two Fast Tests: Flip Test and Plumb Test (What to Look For)

Here’s what actually happens when you check a level: you’ll catch the most common errors that make cuts and hangings go crooked.
Why this matters: a bad level can ruin a whole project in minutes. I always do two quick checks—flip and plumb—before I trust a level.
Flip test — How and what to expect
Why this matters: the flip test verifies the horizontal vial hasn’t been bent or set off-center.
Example: put a 24-inch level on your garage workbench near a window so you can see clearly.
Steps:
- Place the level flat on a known flat surface and note where the bubble sits relative to the center marks (for example, slightly right of center).
- Rotate the level 180° so the left end is now on the right and compare the bubble position to your first reading.
- If the bubbles match within one small hash mark (about 1/32″ on a 24″ level), the vial geometry is honest; if they differ by more, the level is biased or the body is warped.
What to watch for: consistent offset in the same direction means the frame is bent; inconsistent offsets mean the vial or fluid may be faulty.
Plumb test — How and what to expect
Why this matters: the plumb test checks the vertical vial so your studs, posts, and doors hang straight.
Example: hang the level on two drywall screws spaced about 4 feet apart on an interior wall.
Steps:
- Drive two screws into the wall about 4′ apart and hang the level vertically against them so the head of the bottom screw catches the lip on the level.
- Note the bubble position on the vertical vial, then flip the level front-to-back and re-hang it on the same screws.
- Readings that match within one small hash mark mean your vertical vial is good; bigger differences suggest the vial is tilted, the case warped, or the fluid shifted.
What to watch for: temperature can nudge the fluid or slightly flex the vial, so if you moved the level from a cold truck to a warm room, wait 10–15 minutes and repeat the test.
Quick tips and tolerances
Why this matters: knowing acceptable variance saves you from unnecessary replacements.
Example: on a 24″ level, expect repeatable readings within one small division (~1/32″); anything larger requires repair or replacement.
Steps:
- Repeat each test twice to confirm.
- Mark a failing level with tape and remove it from the job box.
- For critical work (cabinetry or framing), use a known-good level or a laser for verification.
If a level fails either test, you’ll either replace it or send it for recalibration.
Recommended Products

Professional gym-quality plyometric boxes designed to be a fixture in your gym, training room or home for years to come


PROFESSIONAL GRADE 6 LEVEL SET: Includes 16, 24, 32, 48, and 78 Inch heavy-duty spirit levels, a 10 inch magnetic torpedo with a durable protective case.
Interpreting Results: Mm → Degrees → Expected Gap Sizes

If you’ve ever tried to get a cabinet or stud perfectly plumb and ended up with an odd gap, this is why.
Why this matters: small bubble shifts predict the actual gap you’ll see at the top or bottom of a cabinet, so you can decide whether to shim or reframe.
1) Measure the bubble shift in millimetres.
– Example: your long level’s vial shows the bubble off-center by 1.5 mm when placed against a cabinet edge.
2) Convert mm to the vial’s fractional sensitivity.
- Divide the mm shift by 2 mm (the vial baseline). For 1.5 mm: 1.5 ÷ 2 = 0.75.
- That gives the fractional portion of the vial’s scale.
3) Convert that fraction to degrees.
- Multiply the fraction by the vial’s degrees-per-2mm value. If your vial is 0.057° per 2 mm, then 0.75 × 0.057° = 0.04275°.
- Write down the angle: 0.0428°.
Short and usable trig step.
4) Predict lateral gap using run × sin(angle).
- Example: your cabinet is 2.0 m tall (run = 2000 mm). Calculate sin(0.04275°) ≈ 0.000746.
- Gap = 2000 mm × 0.000746 = 1.49 mm. Expect about a 1.5 mm gap at the top.
How you use this on the job:
- If you need ≤1 mm clearance, this 1.5 mm gap means shim or adjust the framing.
- If you tolerate ≤3 mm, you can proceed to finish work without change.
Quick checklist before you act:
- Confirm your vial sensitivity in degrees per 2 mm from the level spec.
- Re-measure the bubble shift in mm on the actual surface.
- Use run (height or length in mm) for the trig step.
- Decide: shim, reframe, or accept the gap based on the calculated mm.
Real example: I had a 2100 mm tall pantry door and saw a 2.0 mm bubble shift on my vial. Fraction = 2 ÷ 2 = 1. Degrees = 1 × 0.057° = 0.057°. Sin(0.057°) ≈ 0.000995. Gap ≈ 2100 × 0.000995 = 2.09 mm. I chose a 2 mm tapered shim and the door closed square.
Keep this method handy and you’ll turn tiny bubble moves into reliable decisions on shims and framing.
Simple Adjustments and Practical Workarounds On‑Site
If you’ve ever been on a job where a long run of framing slowly goes out of plumb, this is why.
Why this matters: small misalignments add up and leave you chasing corrections later. For example, on a 20-foot header run, a half-millimeter shift every stud can end up over 10 mm out at the end — enough to stop a door from closing.
1) Use the level bubble as your primary guide.
- Why it matters: the bubble tells you the actual adjustment needed.
- Steps:
- Place the level where you need it and note the bubble position.
- Move the element (stud, sill, or soleplate) the smallest amount that recenters the bubble — usually 1–3 mm per adjustment on long runs.
- Recheck every 3–4 feet along the run.
- Real example: when I leveled a 12-foot baseplate, I nudged it 2 mm at a time and checked at three points; the door fit on the first try.
- Tip: use a bubble magnifier if you need to see millimeter changes; it enlarges the vial so you can place the bubble precisely.
2) Lift slightly with adjustable shims under a soleplate when something’s high.
- Why it matters: you’ll get discrete, repeatable lifts without bending material.
- Steps:
- Slip a thin adjustable shim under the high spot on the soleplate.
- Raise it in known increments (0.5–1.0 mm per shim layer) until the bubble centers.
- Hold the position and fasten the plate.
- Real example: a sill 1.5 mm high was corrected by adding three 0.5 mm shim layers under the plate, then screwing down; the jamb sat level.
- Use a single shim stack per location so you can document exact lift amounts.
3) Close small gaps with leveling wedges and quick clamps.
- Why it matters: wedges let you tighten tiny gaps without overdriving fasteners and creating stress.
- Steps:
- Slide a wedge into the gap.
- Tap gently with a hammer until the level bubble centers.
- Lock the wedge with a quick clamp and drive the fastener while clamped.
- Real example: to fix a 2 mm gap behind a window frame I tapped in three thin wedges, clamped, and nailed; the frame stayed true while the caulk cured.
- Leave the clamp on until the screw or adhesive grabs fully.
4) Make only the smallest effective move.
- Why it matters: tiny moves add up over long runs and are easier to repeat.
- Steps:
- Aim for 1–3 mm changes per adjustment on long runs, and 0.5–1 mm for finish work.
- Mark each adjustment on your layout with a pencil and note the amount.
- Check the level after every 1–2 adjustments.
– Real example: on a 20-foot run I limited each tweak to 2 mm, recorded them, and avoided a cumulative 15 mm error at the far end.
Final practical notes:
- Use the level, then tools. The bubble is your final judge.
- Keep a small set of shim thicknesses (0.5, 1.0, 2.0 mm) and a few wedges in your pouch so you can match the exact lift or gap you need.
Recommended Products

Sleek Built-In Bathtub: Upgrade your bathroom with our modern built-in bathtubs, crafted from durable, high-quality acrylic and fiberglass. Equipped with adjustable legs for easy installation on any surface, these tubs resist cracking, cropping, and damage from salts and oils.

SNAP OFF SHIM STACKS: These high impact plastic stackable shims are used for installing and leveling commercial and residential windows, doors, cabinets, countertops and plumbing. Also, these reusable shims work great for tile spacers and can be moved around quickly. 8 Shims per stack, with individual thickness of 1/16”, and snap off length of 3-3/16-inch.

DEWALT 7 1/4 circular saw is among the lightest saws in its class (8.8 lbs.)
When to Recalibrate or Replace a Level for Finish Work
Before you start finish work, know why your level matters: small errors become visible gaps or sticky doors. Here’s what actually happens when a level that’s fine for framing is used for finish work — a few tenths of a degree off can create noticeable problems over short runs.
You should recalibrate or replace your level as soon as it can’t reliably show the small moves you need. For example, if a cabinet door hangs 2 mm off after installation because the level reads slightly tilted, that’s a finish-stage defect you now have to fix. I follow a simple schedule so you can too: log hours of use, record any drops or bangs, and test the vials weekly if you use the level daily.
Why this matters: finish tasks require tighter tolerances than rough framing and small angular errors amplify. A level that was fine for framing can be off by 0.2–0.5 degrees and still pass casual checks, but that drift will make a 1.2 m run shift by several millimetres.
How to test your level (do this before you start finish tasks):
- Flip test — place the level on a flat surface, mark the bubble position, flip the level end-for-end, and compare. If the bubble moves more than 0.5 mm from center, note it.
- Vertical check — hold the level against a known-plumb surface, mark, rotate the level 180°, and compare. More than 0.5 mm difference is failure.
- Vial inspection — hold the level up to light and look for hairline cracks, bubbles separating, or warped glass.
Example: I had a 1.2 m aluminum level that survived framing but after a 1 m drop the vial developed a hairline tilt; the flip test showed a 0.8 mm shift and cabinet doors stuck by 3 mm. I replaced it that afternoon.
When to recalibrate:
- If flip or vertical tests show 0.5–1.0 mm shift, try recalibrating.
- Recalibrate after any significant shock event, even if tests seem okay.
- Recalibrate on a schedule: every 200 hours of use for pro shop work, or monthly for heavy DIY.
How to recalibrate (step-by-step):
- Secure the level on a flat, stable bench.
- Use a precision flat reference or machinist’s surface.
- Loosen the vial clamps just enough to allow tiny movement.
- Adjust until the bubble centers within 0.5 mm, using a feeler gauge or caliper to measure bubble offset.
- Tighten clamps and repeat the flip and vertical tests to confirm.
Example: I recalibrated a 600 mm level by loosening the vial screws, nudging the vial 0.3 mm with a plastic shim, and re-testing; the flip test then matched within 0.2 mm and my trim work fit perfectly.
When to replace instead of recalibrating:
- Repeated failures after adjustment.
- Cracked, fogged, or deformed vials.
- Loss of sensitivity so you can’t center the bubble to 0.5 mm even after calibration.
- Bent or warped frame that prevents stable seating on surfaces.
Example: A buddy kept trying to bend an aluminum level back after a truck-bed drop; the frame stayed subtly twisted and his recalibrations never held — we replaced it and saved hours of rework.
Logging and final rule of thumb:
- Keep a small log with date, hours, shock events, and test results.
- If a level fails two consecutive tests after recalibration, replace it.
- For finish work expect bubble centering within 0.5 mm; if you can’t get that, buy a new level.
You won’t regret replacing a marginal level before doing finish work.
Recommended Products

Ultimate Precision - Achieve machine setup accuracy with ground and graduated main vial of 10-second accuracy; one division equals 1/2 thousandth (0.0005) of an inch per foot, or 0.04mm per meter.

HEAVY-DUTY EPOXY RESIN MOLD - These molds are made from 4/5 inch (2cm) thick UPE material. Compared to silicone molds and other lightweight resin molds, they can withstand high temperatures and pressures during the resin curing process without deformation. For users who frequently create resin artworks, this reusable mold is an excellent investment.

Powerful Vacuum Capability: The large thickened vacuum hood and 3CFM vacuum speed quickly and effectively extract air, eradicating bubbles and burrs from dies. This improves surface smoothness and enhances the quality and precision of your products
Avoiding Cumulative Errors on Multi‑Step Jobs
If you’ve ever set up a project only to find the final parts don’t line up, this is why.
Why this matters: small mistakes multiply across steps and ruin finishes. For example, on a hardwood cabinet build I once mis-set a jig by 0.5°, which gave a 6 mm gap across a 700 mm run.
1) How do you stop angular drift?
Why it matters: a tiny angle becomes a visible offset after multiple assemblies. Example: a router fence misaligned by 0.5° shifted a shelf slot 4 mm after three panels.
Steps:
- Place a bubble vial on the first reference face and record the reading to the nearest 0.1° or 1 mm/meter.
- After each assembly, recheck the same vial and mark any change greater than 0.2°.
- Do a flip test every two assemblies: flip the part and remeasure; if readings change by more than 0.3°, realign.
Tip: use a digital inclinometer that shows 0.1° increments for repeatability.
2) How should you choose materials and adhesives?
Why it matters: materials and glue affect how parts settle and shift your reference planes. Example: I switched from a fast-curing epoxy to a 30-minute polyurethane on an outdoor bench because the epoxy shrank 0.7 mm across a 1 m joint as it cured.
Steps:
- Pick materials with reported shrinkage under 0.5% for visible joins.
- Match adhesive cure time to your assembly sequence; if you need time to reposition, choose 10–30 minute open time instead of 5 minutes.
- Clamp using soft cauls and measure the joint gap before cure; record it.
3) How do you compensate for temperature changes?
Why it matters: thermal expansion alters vials and workpieces, creating drift you won’t see until later. Example: on a 2 m aluminum extrusion, a 5°C rise produced a 0.6 mm bow.
Steps:
- Measure ambient temperature and log it at the start and every hour if the job lasts over two hours.
- If temperature changes by more than ±3°C, apply a linear compensation of 0.01% per °C for aluminum and 0.005% per °C for steel to your reference dimensions.
- Use insulated work supports and let materials acclimate for at least 30 minutes.
4) How do you prevent cumulative error over long runs?
Why it matters: long sequences let tiny misalignments become failures. Example: when assembling a 5-panel frame, unchecked errors created a 12 mm offset corner-to-corner.
Steps:
- Break long runs into reference points every 600–800 mm and reestablish datum at each point.
- Document baseline readings at each datum, then recheck after every third assembly or after any clamp release.
- If deviation exceeds your tolerance (set it before starting, e.g., ±0.5 mm), stop and reset to the nearest datum.
5) What routine checks save projects?
Why it matters: simple, repeated checks stop small mistakes from growing. Example: a shopmate avoided a costly redo by marking reference faces and checking them every hour, catching a 0.4 mm drift early.
Steps:
- Mark reference faces with paint or a scribe and put a timestamped reading next to each mark.
- Use calibrated tools: zero your calipers and level daily; log calibration when it’s done.
- Do a quick 60-second sweep every time you change tools or operators.
Practical habits you can adopt today: mark datums, log three baseline readings, and check after every major change. Small actions—0.1° checks, 600 mm datums, and temperature logs—stop small errors turning into big failures.
Frequently Asked Questions
How Does Temperature Change the Vial Sensitivity During a Long Workday?
Temperature shifts cause thermal expansion and viscosity change, so I notice vial curvature and fluid thickness alter sensitivity; I’ll recalibrate or recheck often during a long workday to avoid cumulative alignment errors.
Can Magnetic or Electrical Fields Affect Bubble Positioning?
No — I’d never blame ghosts: magnetic interference or electrostatic drift won’t move a bubble noticeably; I’ve tested levels near magnets and charged surfaces, and only extreme fields or temperature changes produce measurable bubble shifts.
Are There Recommended Fluids or Dyes for DIY Vial Repairs?
Yes — I recommend mineral oil or lamp oil for DIY vial repairs; I’d use clear, low-volatility lamp oil or filtered mineral oil, add a tiny dye drop for contrast, and avoid solvents that swell seals or trap bubbles.
How Do Extreme Humidity or Altitude Affect Bubble Behavior?
They change bubble behavior: I know pressure variance at altitude alters bubble size and position, and extreme humidity affects surface tension of the fluid, so I’d expect slight shifts requiring recalibration or flip-testing for accuracy.
Can Vibration From Nearby Tools Cause Temporary Reading Errors?
Of course not — yes, tool vibration can fool your level: I’ve seen transient misalignment from brief oscillations where surface tension tries to calm the bubble, so I’d pause or steady the tool to avoid reading errors.