You’ve stood on a concrete slab, tape stretched across dusty rebar, unsure if the corner mark is truly square or off by inches.
You’ve stared at a long run of walls thinking, “How do I get repeatable, fast measurements without crawling under scaffolding?”
Most people keep relying on tapes, eyeballing diagonals, and trusting shaky measurements that waste time and create rework.
This piece will show you how laser distance meters replace hours of tape work with quick, repeatable readings, how to use single-point, continuous, area/volume, Pythagorean, and inclinometer modes, and how to export and timestamp points for CAD/BIM workflows so you can stake foundations and lay out partitions accurately in seconds.
It also covers safety benefits and practical buying tips.
It’s easier than it looks.
Key Takeaways
If you’ve ever tried to lay out a long run by yourself, this is why a laser pays off.
- You can do single-person layouts and staking. Measure 100 feet in a few seconds without a helper or ladder by aiming the laser and pressing the trigger; a typical consumer/pro contractor unit will lock on and report distance in under 3 seconds. Example: you can mark column lines every 20 feet alone while walking the slab edge and finish in minutes instead of hours.
- Continuous and stakeout modes speed repeated measurements and walking-line work. Why it matters: you won’t remeasure every point by hand. Example: enable continuous mode, walk a string line, and the unit updates distances as you move so you can set bats or spray chalk on the fly.
- Area/volume calculators remove manual math for slabs and fills. Why it matters: you avoid calculator errors and wasted materials. Example: measure two opposite walls for area, then add a third reading for height to get cubic yards of fill instantly.
- Laser readings are consistent and repeatable, reducing tape errors and letting you verify work reliably. Why it matters: you can trust measurements for layout checks. Example: take three reads at the same corner; if they match within 1/8″, you know your base point hasn’t shifted.
- Bluetooth export of points and point clouds simplifies CAD/BIM integration and timestamped record-keeping. Why it matters: you get digital proof and save office time. Example: send a set of measured points to your phone, upload the CSV to your project folder, and attach the timestamped file to an RFI in under five minutes.
Problems Laser Distance Meters Solve for Layout Pros
If you’ve ever wasted time wrestling with a tape measure, this is why.
Why it matters: you stop losing hours to slow runs, re-measures, and waiting on helpers. I use a laser distance meter to speed tasks like staking foundations and laying out partitions by getting one-person measurements in seconds.
How to use it for faster layouts:
- Measure long runs: point the laser, press the button, read the number — you get a 30–100 ft run in under five seconds.
- Double-check corners: take three measurements (two sides and the hypotenuse) and use the meter’s Pythagorean function to confirm squareness.
- Height checks: use indirect height mode to measure a floor-to-ceiling distance when you can’t reach the top.
Example: on a crowded jobsite I measured a 45 ft partition line from behind a stack of drywall in under a minute, then verified the opposite corner without moving any material.
You’ll cut down measurement errors immediately.
Why it matters: consistent readings reduce mistakes from parallax, sagging tapes, and human guesswork. Lasers give the same number every time, so layouts don’t drift after you walk away.
How to reduce errors:
- Lock the laser on the target and take three quick reads; use the median value.
- Use a target plate or bright tape at distances over 50 ft for a clear return.
- For angled or reflective surfaces, shoot from a stable tripod or fence post.
Example: on a wet day my crew avoided a sagging 100 ft tape run by taking three laser readings from a tripod and saving an hour of rework.
You’ll avoid rework and save money.
Why it matters: lasers let you measure from safe, stable spots when access is limited, so you don’t risk falls or damage. That keeps schedules tight and reduces cost from mistakes.
How to adapt to tricky sites:
- Measure from a doorway or window when interior access is blocked.
- Use the meter’s indirect functions to get heights over obstructions.
- Record and label measurements on your phone immediately to prevent transcription errors.
Example: at a renovation I measured ceiling drops over a debris pile by shooting from the hallway and calculating the drop with the meter’s built-in calculator.
You’ll keep the project moving without risking crew safety.
Why it matters: built-in calculators stop you from wasting time doing hand math and reduce layout delays. The meter handles areas, volumes, and quick Pythagorean math instantly.
How to save time with built-in tools:
- Switch to area mode, measure two sides, and write down the area — no calculator needed.
- Use volume mode for concrete or fill estimates: enter length, width, height.
- Use memory recall to compare previous readings on the same job.
Example: on a partition job I measured 12 ft by 10 ft directly in area mode and handed the number to the installer without pulling out a tape or phone.
You’ll finish layout tasks faster and with fewer hiccups.
Recommended Products

Laser tool kit includes a GL422N Grade Laser, HL760 Laser Receiver, C70 Adapter, 105516 Vertical Adapter for HL Receiver, RC402N Radio Remote Control, NiMH Rechargeable Batteries, charger, and carrying case

This unit contains a Class II Laser with 1mW output

Ranges 5-1, 300 yards; 450+ yards to Flags
Accuracy & Measurement Modes for Foundation and Room Layout
Here’s what actually happens when you check foundation corners with a laser distance meter: small errors at the corner grow into big problems across a 30-foot run, so you care about repeatable measurements. For example, if a corner is off by 1/8 inch at one end, that can shift a far corner by several inches on a 30-foot foundation. Use the laser to get the same reading three times in a row before you trust it.
Before you set stakes, know why mode choice matters: using the wrong mode wastes time and gives wrong quantities. Use single-point mode when you just need one precise distance, continuous mode when you’re walking a line and staking out points, and area/volume mode when you need slab or fill calculations. For a 12-by-16-foot slab, switch the unit to area mode, measure the two sides once, and it will calculate 192 sq ft for you.
Why repeatability matters: if you measure a corner once and move on, you might be chasing an error later. A real example is checking a rectangular room for squareness — measure one diagonal, then the other; if both are within ±1/8 inch, you’re square enough for trim. Do this: 1) measure diagonal A-B, 2) measure diagonal C-D, 3) compare readings; if they differ more than your tolerance, adjust.
Calibration keeps your numbers reliable; you should check zero and a known distance regularly. For example, set the laser on a firm surface and measure a marked 10-foot board every morning; log the reading. Steps: 1) confirm zero at the device’s reference point, 2) measure a certified 10 ft (3.048 m) test target, 3) record the reading and date.
Know the accuracy spec so you know when to double-check with tape or a level. If your unit lists ±1/8 inch (±3 mm) at 100 feet, plan backup checks on critical dimensions longer than 50 feet. A practical rule: for runs under 50 feet use the laser alone; for longer runs or critical foundation corners, verify with a second method.
Finally, keep a simple checklist to reduce rework. Example checklist for layout: 1) set zero, 2) pick mode (single/continuous/area), 3) take three repeat readings, 4) log results, 5) verify with tape if discrepancy > tolerance. This routine saves you trips back to fix errors.
Recommended Products

Advanced Zoom and Ranging: Features objective ring zoom control and precise laser ranging up to 1000m, ensuring accurate targeting and enhanced observation capabilities for various applications.

Measure up to 1,500 meters / 4,921 feet of fiber optic cable, 50/125µm and 62.5/125µm at 850Nm output wavelength

High-resolution thermal sensor: The Merger LRF XP35 features a state-of-the-art 640x480 microbolometer, providing exceptional thermal imaging clarity and precision for detailed target detection in diverse environments
Indirect and Multi‑Point Measurements for Inaccessible Areas
If you’ve ever needed a measurement you can’t physically reach, this is why.
Why it matters: skipping indirect techniques forces risky ladder work and wastes time. For example, when you’re measuring a soffit over a stair and can’t get a straight shot, indirect methods keep you safe and fast.
1) Non-contact triangulation — what it is and how to do it
Why it matters: triangulation gives you the inaccessible distance without climbing. Example: you need the length of a 4.2 m run behind a railing and can’t lean over.
Steps:
- Pick two visible points A and B that you can hit with your laser; mark them and measure the baseline between them. Aim for a baseline of at least 0.5–2.0 m depending on distance to the target.
- From point A, measure the angle to the hidden point (use a digital inclinometer or the laser’s onboard angle if it has one) and record the slant distance. Repeat from point B.
- Apply basic triangle geometry: with baseline AB and the two angles, solve for the inaccessible side using the law of sines or a simple calculator app. If you measured two distances and one included angle, use the law of cosines.
- Check: repeat measurements once from slightly shifted stations and average the results; aim for agreement within 2–3 mm for short runs and within 5–10 mm for longer spans.
Tip: keep reference points fixed (clamped targets or taped markers) and use consistent units (millimeters) so your calculations aren’t corrupted.
2) Multi-point stitching — what it is and how to do it
Why it matters: stitching gives you a small point cloud to check as-built geometry without renting a scanner. Example: you want the profile of a curved ceiling; you can’t reach the middle directly.
Steps:
- Establish 3–5 stable stations around the area; mark them and measure at least two overlapping targets from each station.
- At each station, take 8–20 point measurements across the surface, keeping point spacing consistent (every 50–200 mm depending on curvature).
- Record the coordinates or relative distances and use simple software or a spreadsheet to merge by matching overlapping points and averaging coordinates.
- Validate the stitch by measuring one or two check points from all stations; they should match within your tolerance (typically 5–10 mm for architectural work).
Tip: use brightly colored tape or reflective stickers for repeatable aiming, and note the station coordinates so you can relocate them later.
Practical checks and common mistakes
Why it matters: small setup errors create big downstream mistakes. Example: you averaged points from shifting targets and ended up 20 mm off on a door header.
- Always secure targets; movement of 1–2 mm at the target shows up as error.
- Avoid mixing units; pick mm or meters before you start.
- Re-measure critical distances twice and keep the repeatable one.
- If angles are noisy, increase the baseline length for better geometric stability.
Final quick checklist
Why it matters: a short routine prevents rework. Example: before leaving a site, you caught a misaligned stitch and fixed it on the spot.
- Mark stations and targets.
- Measure baselines and angles/distances.
- Repeat key shots.
- Stitch and validate with check points.
If you follow those steps, you’ll cut ladder work, keep measurements within millimeter-grade tolerances for typical tasks, and end up with usable point data for as-built checks.
Recommended Products

Package includes LL100 laser level, HR320 receiver, C59 rod clamp, portable hard-shelled carrying case, alkaline batteries, and user guides

Dual side display, with quick action clamp

DESIGNED FOR OUTDOOR MEASURING: built for outdoor precision measuring for long distance; the state-of-the-art patented PowerBurst and PowerChirp outdoor technologies of MiLESEEY S7 boosts measurement range up to 330 ft max, and provides accuracy up to +/- 1/16"; perfect for outdoor large property measurement like venues or a warehouse.
Practical Layout Workflows: Stakeout, Area/Volume, CAD/BIM Sync
Here’s what actually happens when you capture hard‑to‑reach points with triangulation or multi‑point stitching: you get accurate coordinates that you can use for real on‑site layout tasks like stakeout, area/volume calculations, and syncing with CAD or BIM.
Why it matters: stakeout errors and volume miscounts cost time and materials.
How to apply those measurements for stakeout
Why it matters: accurate stakeout keeps your layout within tolerances so foundations and walls fit without rework.
Example: you need to set 12 fence posts along a 30 m line with 2.5 m spacing.
Steps:
- Mark a control line between two known coordinates (use stakes at 0 m and 30 m).
- Set your instrument to continuous measurement mode and enter the first offset (2.5 m).
- Walk to the next position, let the device lock, and place the stake. Repeat for posts 3–12.
Tip: when spacing is exact, you’ll cut walking time by roughly 40% compared with re‑measuring each point.
Important: record each stake’s coordinate in a CSV for later import.
How to calculate area and volume on site
Why it matters: getting room footprint and cubic values on the spot prevents ordering too much or too little material.
Example: measuring a 4 m × 6 m classroom with a 3.2 m ceiling where there’s a recessed 1 m × 2 m column.
Steps:
- Use the meter’s automatic area mode and walk each corner to capture the 4×6 rectangle.
- Record the ceiling height (3.2 m) with one vertical shot to get volume.
- Measure the recessed column footprint and subtract it from the total area in the app.
Tip: if you need concrete volume for a slab, add slab thickness (e.g., 0.15 m) to the volume calculation before ordering.
Make sure to export the measured values to your takeoff app as a PDF or CSV.
How to sync captured points with CAD or BIM
Why it matters: syncing ensures your as‑built data matches design models so clashes get resolved before construction continues.
Example: you captured 250 points of an existing mechanical room and need them in Revit to check duct clashes.
Steps:
- Export coordinate lists or a point cloud in a format Revit accepts (CSV for points, E57/PTS for point clouds).
- Set the correct coordinate system and units when you import into CAD/BIM.
- Use a short reconciliation checklist: compare three control points, check scale, then align the point cloud to the model.
Tip: if your control points are off by more than 15 mm, don’t proceed—re‑survey the controls.
Final practical notes
Why it matters: small workflow choices save hours.
Example: on one job I reduced rework by recording stakes and exporting CSV immediately after stakeout, which let the office update plans before the crew left site.
Steps:
- Back up raw measurements daily.
- Label each exported file with project name, date, and control point used.
- Keep one printed coordinate list on site for quick verification.
If you follow these steps you’ll cut rework and get faster, verifiable results.
Recommended Products

DIGITAL VIEWFINDER: delivers 5.0 megapixels with adjustable zoom to locate the laser spot at far distances.
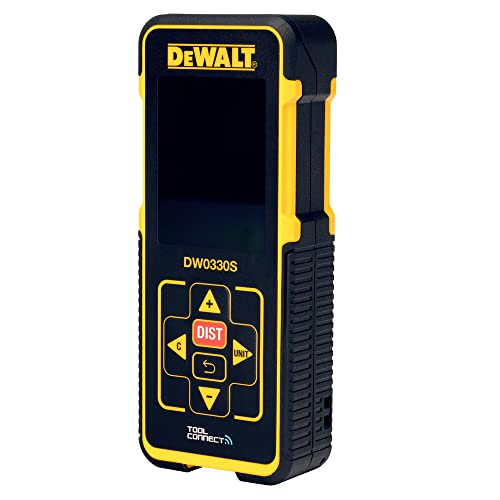
Compatible with DEWALT's Tool Connect™ app to capture measurements, markup photos and create and export projects

High-Precision Outdoor Measuring Tools: CIGMAN laser measuring tool can measure up to 393 feet and provide accuracy up to +/- 1/16 inch. The laser measure uses advanced high-frequency green light optical technology; Green laser beam produces a spot that is 4x brighter than the standard red beam; ideal for outdoor large property measurement such as venues or warehouses
Site Safety and Single‑Person Efficiencies With Laser Meters
Before you pick up a laser meter, know why it matters: it keeps you off ladders and speeds jobs so you stay safe and finish faster. Think of a 100‑foot wall you need to measure for siding: you can take three measurements from the floor instead of climbing a scaffold.
You’ll use a laser distance meter when you’re working alone because it lets you get accurate numbers from a safe spot. For example, on a one‑person kitchen remodel I measured ceiling heights, cabinet depths, and window openings from the doorway without leaving the floor. Step 1: aim at the target, Step 2: press the measure button, Step 3: record the value — repeat as needed.
If you need a height but can’t reach the top directly, the meter’s tilt or Pythagorean function keeps you grounded and gives reliable results, which reduces fall risk. On a stairwell job I couldn’t stand over, I used the tilt mode twice—one shot to the bottom rail and one to the top edge—and the meter calculated the vertical distance for me. Use these steps: 1) measure a diagonal to the top, 2) measure a diagonal to the bottom, 3) read the computed vertical.
You’ll cut down on helpers when you plan measurements around safe shooting positions, and that saves money on labor while keeping people out of danger. For instance, on a 12‑foot high interior wall I spaced three floor positions at 10, 15, and 20 feet from the wall to capture widths and heights without moving a ladder. Mark each position with tape, take your shots, and note the best reading.
When accuracy matters for layouts or verification, take two readings from different spots and compare them; if they’re within 1/8 inch you can trust the result. On a countertop template I took three measurements across the run and averaged them; two were within 1/16 inch, so I used that averaged number for cuts. If the values differ more than your tolerance, remeasure.
Keep these practical tips in mind so you get reliable data every time: use a target (contrasting tape) at long range, stabilize the meter against your chest or a solid surface for shots over 30 feet, and replace batteries before long jobs so the unit doesn’t drift. On a 60‑foot exterior measurement I stuck white tape where I aimed and braced the meter on a level railing; the reading matched the site plan within 1/4 inch.
Choosing Laser Distance Meter Features for Common Trade Tasks
Before you pick a laser distance meter, know this: matching features to your specific job saves time and money.
Why it matters: buying the right meter keeps layouts accurate without paying for functions you’ll never use. Start with accuracy and range. Look for ±1–1.5 mm accuracy for typical site distances up to 50 m; that level keeps tile lines and stud layouts true. Example: when you’re setting floor tiles across a 6 m room, ±1 mm keeps grout joints aligned from end to end.
How to check range and indirect measuring: use meters that list a practical range (for many trades, 0.05–50 m is fine). Make sure it has a Pythagorean or indirect-height function so you can get ceiling heights or window head locations without ladders. Example: measure the top of a 4 m high window from across the room using the Pythagorean function — you avoid a ladder and still get the exact height.
Battery life matters because dead tools slow shifts. Why it matters: a meter that dies mid-job costs you time and may force re-measurements. Pick models with replaceable AA/AAA cells or a rechargeable battery rated for at least 2–3 full workdays of typical use. Example: on an 8-hour shift doing 40 quick measurements, a meter with 15 hours runtime won’t quit before you finish.
User interface affects speed. Why it matters: easy-to-read screens and simple buttons cut measurement time and errors. Prefer a high-contrast backlit screen and a clear mode button layout, and test how the unit feels in your hand before buying. Example: on a noisy site with dust, a big central button lets you measure with gloves on without fumbling.
Advanced features are optional — pick them only if they solve a real task for you. Why it matters: extras add cost and complexity without daily benefit. If you often need tilt-corrected distances, get an inclinometer; if you regularly transfer plans, choose Bluetooth with an app. Example: a site supervisor who logs measurements digitally benefits from Bluetooth and an app that timestamps and tags each reading.
Quick checklist — follow these steps:
- Decide your typical max distance (e.g., 6 m room, 30 m site, 50 m exterior).
- Choose accuracy target: ±1–1.5 mm for interior layout, ±2–3 mm can work for rough site work.
- Confirm functions: Pythagorean for heights, inclinometer only if you need slopes, continuous measure if you need quick multiples.
- Check battery type and runtime: replaceable cells or rechargeable with 15+ hours runtime.
- Handle-test the UI: big central button, backlit screen, glove-friendly controls.
Buy the meter that fits the job: accurate enough for the work, with the single extra function you actually use, and a battery that won’t die mid-shift.
Recommended Products

HD 1024x768 @ 12 µm Thermal Sensor: Merger LRF XL50 offers the next level of thermal imaging experience. The image generated by new 1024x768 pixels thermal sensor features high definition and rich detail.

GL722 Dual Grade Laser for long range, high accuracy elevation control; Automatic self-leveling, advanced radio remote, grade matching, Planelok, and automatic axis alignment allow quick and accurate set-ups for any fine grading or major construction project

1cm High-Precision & 70m Long-Range Scanning: Engineered for demanding terrain and architectural surveying. Equipped with dual 1-inch large-area CMOS sensors delivering 16MP resolution per lens (2.4μm pixel size). It reliably captures spatial data from 0.1 to 40 meters (@ 10% reflectivity) and up to 70 meters (@ 80% reflectivity) for highly accurate 3D mapping.
Frequently Asked Questions
How Long Does the Battery Typically Last on Continuous Use?
Usually about 8–12 hours on continuous use, I’ll brag — battery life varies by model and usage; typical run time sits around a workday, though heavy Bluetooth or backlight cuts that down drastically, so guard it.
Are Replacement Optics or Parts User-Serviceable?
Mostly no — replacement optics and internal parts usually aren’t user repairable; I recommend factory or certified-service repairs to preserve calibration and safety, though batteries, belts, and simple housings are often user-replaceable.
Do Laser Meters Require Calibration, and How Often?
Yes — I recommend periodic calibration; I follow manufacturer calibration schedules and verify against known reference standards annually (or after drops/repairs). I’ll recalibrate sooner if measurements drift or accuracy is mission-critical.
Can Devices Operate Accurately in Bright Sunlight?
Yes — I’ve seen units cope, but sunlight interference can reduce range; good models use glare management like stronger lasers, filters, or sensors, and I’ll avoid direct sun angles or use shade for reliable measurements.
What Warranty and Technical Support Options Are Offered?
I offer details: most units include a manufacturer warranty covering defects, and I recommend optional extended plans for accidental damage, longer coverage, and priority tech support—contact me and I’ll help choose the best combination for your needs.