You set a new row of base cabinets and the countertop edges don’t line up, leaving uneven gaps and doors that stick. You ask why a tiny high spot at the first cabinet makes the whole run look crooked and forces tile seams to be ground down. Most people blame the cabinets or the installer instead of recognizing how a small angle multiplies across multiple units.
This article will show you how to identify a fixed high-point datum, use a laser and a 2 m level to find twists, and apply controlled shimming and clamping so each cabinet sits on the same plane. You’ll learn how to document shims and clamps to stop errors from cascading. It’s easier than you think.
Key Takeaways
If you’ve ever set a line of cabinets and seen the tops step down, this is why.
Why it matters: a small vertical mistake at the first cabinet becomes a visible step across the run. Example: if the first cabinet is 3 mm low, and each of the next five cabinets adds just 1 mm, you’ll end up with a 8 mm drop at the end—easy to spot next to a countertop seam.
– A tiny vertical error at the first cabinet multiplies down the run, creating visible step-offs between adjacent cabinet tops. Use a laser level or straightedge and mark a reference line every 1 m; that keeps errors under 1 mm per segment.
Think of a twist like a twisting ladder leaning against a wall.

Why it matters: an angular deviation in one unit tilts all the shelves and tile lines that follow. Example: a 0.5° twist over a 1.2 m cabinet causes about 10 mm of lateral displacement at the far edge, which wrecks tile grout lines.
– If an early unit is tilted or twisted, the angular error amplifies misalignment across shelves and tile lines over distance. Shim and clamp the first two cabinets square to the laser before you fasten.
Before you rely on eyeballing, you need to check frequently.
Why it matters: catching shifts early stops small errors from becoming big ones. Example: on a 4 m run, checking every metre with a laser revealed a 2 mm drift at the 2 m mark on my last job, and fixing that kept the countertop seam flush.
– Verify with a laser or a long straightedge every 1 m to prevent error accumulation by detecting shifts before they propagate. Do this step each time you add two units.
If you’ve ever tried to fix a gap at the end, you know shims can be the culprit.
Why it matters: incorrect or uneven shimming concentrates deviations at corners and edges. Example: over-shimming a corner by 2 mm created a 5 mm gap three cabinets later because the adjacent unit sat off-plane.
– Place shims in narrow stacked layers and trim them to a maximum of 3 mm per shim; avoid wedging multiple uneven shims at corners because they produce gaps or high spots that magnify across the run.
The fastest way to lock something in is to make sure it won’t move first.
Why it matters: loose clamping or premature fastening lets units shift during installation, turning small mistakes into big misalignment. Example: I once fastened a run with only one screw per cabinet and had to redo three units after the rest shifted 4–6 mm during countertop install.
– Tighten clamps, then screw two opposing fasteners through the cabinet rails while checking the laser; only remove clamps after the screws hold firmly so tiny shifts don’t become major cumulative misalignment.
Start at the Floor High Point: Shim to <1.6 Mm/M
Before you start a cabinet run, you need to know why the floor high point matters: it sets the shimming for every cabinet and prevents errors from stacking down the line.
Here’s how to find the floor crown and set your first cabinet so your run stays within tolerance.
- Find the high line:
- Roll a 6 ft (1.8 m) straight edge or long level across the floor in both directions and mark the highest contact points with a pencil.
- Example: on my last kitchen, the straight edge sat on a 5 mm peak near the sink run; marking that made the rest obvious.
- Your goal is less than 1.6 mm per meter (about 0.020 in/ft).
- Use a tape measure and a 1.0 mm feeler gauge to check gaps under the cabinet base at multiple points along the straight edge.
- Place the cabinet at the marked high line, then slip stacked polymer or cedar shims under each corner and mid-span until the cabinet top is within the 1.6 mm/m tolerance across its width.
- Short sentence.
- Measure shim stacks with a feeler gauge or calipers and write down each location’s total shim thickness on the cabinet back; record any remaining gap under the cabinet rail to the subfloor.
- Clamp the cabinet, re-check top level and reveal, then screw it to the floor or wall through the cabinet’s framing while keeping the shims in place; remove any excess shim material flush with the base.
- High line marked.
- Top within 1.6 mm/m.
- Shim thickness measured and written on the cabinet back.
- Cabinet clamped and re-checked.
- Place the first cabinet so one face sits against a clear mark on the floor and the adjacent face against a wall mark; use a pencil mark or a tape line 1″ off the finished wall.
- Use a 4-foot level and a 48″ straightedge; if the level shows more than 1/16″ over the cabinet width, adjust. Tighten the cabinet to the floor or wall once it’s within 1/16″.
Why this matters: if you ignore the floor crown and don’t record shim sizes, the misalignment carries and your drawer operation and countertop fit will suffer.

Real-world example: on a 3.6 m (12 ft) run with a 5 mm crown, adjusting the first cabinet to the high line and documenting shim stacks kept the final countertop seam within 1 mm instead of drifting to 6 mm.
Quick checklist before you fasten:
Follow those steps and your run will stay true.
Quick Fix: Stop a Crooked Run at the First Base Cabinet

If you’ve ever set a crooked cabinet and watched the error grow down the line, this is why.
Why this matters: a square, level first cabinet stops small alignment errors from becoming big gaps later. For example, on a 10-foot run in my cousin’s kitchen, a 1/16” twist in the first cabinet produced 1/4″ reveals three units later.
1) Set a fixed datum
2) Shim for level and twist
Why this matters: shimming the low corner prevents corner twist that ruins reveals. At my neighbor’s condo, a single 1/8” shim corrected a sag and kept the rest of the run true.
Steps:
- Measure the gap under each corner with a feeler or 1/32″ gauge; note which corner is low.
- Insert a temporary plastic shim under the low corner until the level reads true across the cabinet face.
- Stack no more than two shims (max combined 3/16″) to avoid compressing and creating a new twist.
- Mark shim placement with a pencil so you can replace them with permanent shims before final anchoring.
3) Use the first cabinet as the control point
Why this matters: anchoring the whole run to one fixed unit prevents cumulative measurement errors. For instance, on a 12′ run I installed, anchoring to the first cabinet kept reveals within 1/16″ for every door.
Steps:
- Screw a 2×2 scrap to the face frame of the first cabinet as a clamping block.
- Butt the next cabinet to that block, set it on the same floor and wall reference marks, and clamp it to the control cabinet.
- If the second cabinet sits skewed more than 1/8″, attach a catch-up bracket 2″ wide, drive a screw into the control cabinet, then pull the second cabinet tight before clamping.
- Re-check with the 4-foot level and a tape measure across the face heights; they should match within 1/16″.
4) Fasten and recheck reveals
Why this matters: final fastening locks in your alignment so it doesn’t shift during use. When I fastened a run without rechecking, one hinge later caught and revealed a 3/32″ gap.
Steps:
- With cabinets clamped and level, drive the first wall screw through the rear rail into a stud or use a 2-1/2″ cabinet mounting screw with a wall anchor.
- Fasten adjacent cabinets to each other through the face frames with 1-1/4″ pocket screws or 1-1/4″ self-tapping screws, countersunk behind the face frame so the doors sit flush.
- Remove temporary shims and replace them with thin hardwood shims glued and nailed if you need a permanent shim thicker than 1/16″.
- Re-measure reveals at door edges and across tops; keep adjustments until all reveals are within your target (I aim for 1/16″–1/8″).
Quick tips
- Use clamps with at least 6″ throat depth.
- Keep a spare box of 1/16″, 1/32″, and 1/8″ plastic shims on the job.
- Mark every reference line with a pencil and a straightedge so you can repeat the setup if a unit moves.
Do those steps and your first cabinet becomes the control point, not the weak link.
Recommended Products

HUGE HEIGHT RANGE - For kicks from 3 7/8" - 6" high
Support: The tall aluminum fence measuring 4 7/8 inch x 25 1/8 inch can handle tall stock with ease; The fence is complete with adjustable MDF face plates for smoother operation with taller work pieces and out feed can be offset for jointing

30-INCH UNDER-CABINET RANGE HOOD INSERT: Fits neatly underneath cabinets to offer a complete solution to your kitchen ventilation needs by providing both an exhaust fan and overhead light
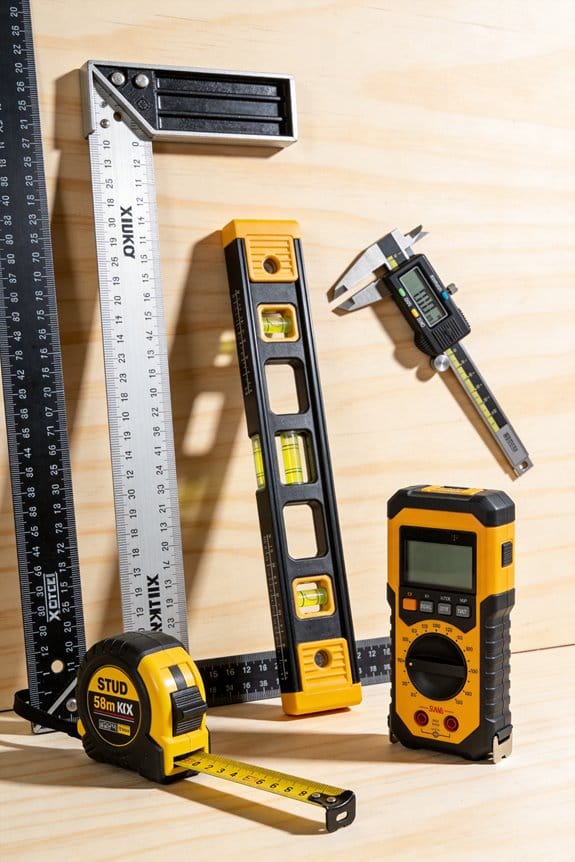
Cabinet Leveling Tools and Fast Checks (Laser, 2 M Level, Clamps)

Before you start, know why matching tools matters: a small misalignment at the top becomes a big gap at the bottom.
If you’ve ever struggled with cabinet runs that look straight but gap out at eye level, this will help. Use a laser for a quick long reference, but you’ll always verify it with a 2 m level and clamps so things don’t shift while you work. Example: on a 6.5 m run of kitchen uppers, I set the beam, then checked it at every cabinet end and the middle with a level—saved me from reinstalling two units later.
Why check the laser first? Because a dirt-covered or miscalibrated head gives you wrong readings and costs hours later. Clean the optics with a lint-free cloth and lens cleaner, then check calibration by sighting the beam at two wall points 10 m apart; the beam should be within 3 mm of the same mark at both ends. If it’s off, recalibrate per the laser’s manual or use the level instead until you fix it.
How to use the 2 m level for tactile confirmation: it shows plumb and twist that the beam can miss. Place the level vertically on the cabinet face and then diagonally across top and bottom corners to feel any twist; if you get a 2–3 mm gap under the vial, the face is twisted. Example: on a refrigerator cabinet I once installed, the laser looked perfect but the diagonal check showed a 4 mm twist—shimming the bottom corner fixed it instantly.
Steps to clamp and lock units without shifting:
- Position cabinets where they belong and clamp adjacent faces together about 50–100 mm below the top and again near the base.
- Tighten clamps just enough to hold alignment—about hand-tight plus a quarter turn.
- Recheck both laser line and 2 m level at the same points you first measured.
- If everything stays within 2 mm, tighten the final fasteners.
Clamp placement matters; clamp between units at the top and bottom so they pull together evenly. Example: when joining two 600 mm wide base cabinets, I placed clamps 150 mm from each outer edge and another pair centered; that kept the faces flush while I screwed them.
Where to shim and how much: shim from the floor high point so each cabinet bears evenly and stays level front-to-back. Use 1–2 mm plastic shims under adjustable feet or 3–5 mm tapered maple shims under fixed bases, then trim flush with a block plane. Make micro adjustments—turn the level 90 degrees and recheck after each shim change. Short sentence.
When to put in final fasteners: only after repeated checks. Check laser and level, clamp, check again, then drive screws. Use 30–40 mm pocket screws for face frames and 35–45 mm confirmat screws for frameless carcasses depending on panel thickness. Final fasteners hold the adjustments; they shouldn’t force changes.
One last practical tip: mark your reference points with a small pencil notch at every cabinet joint and at the wall. It takes 30 seconds and keeps you honest when you unclamp.
Recommended Products

42U HOME LAB SERVER RACK CABINET – Designed for home labs, NAS servers, routers, switches and AV equipment. Ideal for homelab setups, home networks, studios and small office installations.

ACTIVE COOLING SYSTEM WITH TEMPERATURE CONTROL – Preinstalled Air Controller and four roof-mounted fans maintain stable airflow, prevent equipment overheating, and support continuous 24/7 operation.

HOME LAB READY 42U RACK: 19-inch enclosed floor-standing rack cabinet ideal for home servers, NAS systems, routers, switches, backup units and AV components.
How Plumb Errors in Wall Cabinets Mess Up Shelves and Doors

If you’ve ever hung a cabinet that looked straight at the top but caused trouble later, this is why.
Why this matters: a tiny tilt at the top makes shelves and doors act up, wasting your time and wearing hardware.
When a wall cabinet isn’t plumb, the whole frame leans and the hinge plates and shelf grooves shift out of place. For example, I once installed a 36-inch kitchen wall cabinet that was off by just 1/4 inch at the top; the middle shelf sloped enough that spice jars rolled toward the front. Measure the vertical with a 48-inch level or a laser; if the bubble or line is off by 1/16–1/8 inch over the height of the cabinet, you’re already in trouble. Shim behind the high side with thin plastic or stacked hardwood shims until the level reads true, then mark the shim locations before you fasten.
Why this matters: tilted shelf bottoms will cause items to slide or bind and will shift mounting points, making repairs harder later.
Shelves set into a tilted box will slope or twist and make things roll, bind, or rub. I saw a bathroom cabinet where the bottom shelf twisted because the cabinet leaned 3/16 inch at the top; towels bunched and the cabinet door hit the shelf when closed. Check shelves with a body-level on the shelf edge and use 1/4-inch plywood or metal shelf supports to keep loaded shelves from sagging. If a built-in shelf is already cut, loosen the shelf, tilt it back into level, and re-secure the supports with a screw through the bracket into the cabinet side.
Why this matters: door gaps change, swings can catch, and hinges wear unevenly when the mounting face is tilted.
Doors attached to a tilted face will have changing gaps, they can rub on the frame, and hinges take uneven loads that loosen screws faster. For example, a 24-inch pantry door on a cabinet out of plumb by 5/32 inch showed a 1/8-inch gap at the top and pinched at the bottom, causing the latch to bind. After you shim and make the cabinet plumb, do these hinge checks:
- Open the door fully and use the hinge adjustment screws to center the door by shifting it left-right until gaps are even.
- Adjust the in-out screw so the door sits flush with the face frame.
- Finally, set the vertical position by loosening the mounting screws and nudging the hinge up or down, then retighten.
If screws are stripped, replace them with #8 x 1-1/4″ sheet-metal or wood screws and add a dab of wood glue in the hole for grip.
Why this matters: setting cabinets true up front saves you rework and prevents premature hardware failure.
How to prevent and fix plumb errors before they become headaches:
- Check plumb before fastening: place a 48-inch level vertically on the cabinet face and shim until it’s within 1/16 inch over the cabinet height. Example: for a 30-inch tall cabinet, aim for less than 1/16 inch deviation top to bottom.
- Shim to tolerance: use thin plastic shims (0.020–0.030 inch) or hardwood shims stacked as needed; taper them slightly so the cabinet sits tight against the wall.
- Clamp and align adjacent units: when you install multiple cabinets, clamp them together with cabinet clamps and drive screws through the end stiles to lock alignment.
- Final hinge adjustments: after cabinets are secured and caulked, adjust each door per the three-step hinge check above.
If you follow those steps—measure, shim, clamp, adjust—you’ll stop the small plumb errors from turning into crooked shelves and doors that don’t behave.
Recommended Products

Versatile Fit: With 72"*24" tabletop,this large fish tank stand is compatible with up to 180 gallon, even 200 gallon aquariums.Pls measure your aquarium size before purchase.(stand only)

SUPERIOR LOAD DISTRIBUTION AND DESIGN: The 3/4" x 2" square washers provide maximum bearing surface area to distribute fastener loads evenly, preventing damage and pull-through. These large washers work as metal shims for leveling and hardware spacers, with 0.125" thickness engineered as a steel plate specification, perfect for unistrut hardware and applications where standard fender washers lack sufficient bearing area for structural connections.
VERSATILE LEVELING SOLUTION – Ideal for leveling toilets, tables, doors, cabinets, appliances, joists, stairs, furniture, and uneven floors. Perfect for contractors, plumbers, carpenters, and DIY projects.
How Cabinet Leveling Errors Force Tile and Countertop Rework

If you’ve ever had a finished countertop or tile job come back for fixes, this is why.
Why it matters: fixing countertops or tiles doubles time on site and raises costs quickly.
When a cabinet run isn’t level, that error almost always shows up again when your countertop and tile go in. A cabinet that’s just 1/8″ high at one end can push the countertop out of plane enough to create visible gaps at seams or between countertop and wall, and those gaps often force you to grind tiles or replace them entirely. Example: I saw a kitchen where a single 1/8″ bump at the sink cabinet caused a 3/16″ gap under the quartz backsplash; the tile setter had to re-cut three tiles and grind two edges to make them sit flush.
Why it matters: using thicker adhesive or shims to hide unevenness can make the edge look wrong to anyone who notices.
Uneven cabinet tops force installers to use thicker adhesive beds or thin metal shims, which raises the visible edge where the countertop meets exposed cabinet faces; that thicker profile is obvious at an island where both sides are seen. Example: on an island job, installers used 3/16″ plywood shims under the cabinet front to level things, and the laminate countertop overhung 1/8″ more than the back, creating a stepped reveal that the homeowner noticed immediately.
Why it matters: small slopes change grout joints and can lead to water leaks or mismatched seams.
Even slight slopes over a 6-foot run change grout widths and make sealant selection tricky where countertop meets backsplash; a 1/8″ slope over 72″ changes grout gaps from uniform 1/16” to a taper that looks sloppy and can trap water. Example: one backsplash had grout joints varying from 1/16″ to 3/32″ across the span because the cabinets sloped slightly toward the range, and the sealant bead had to be custom-shaped to avoid pooling.
How to avoid paying for rework (step-by-step):
- Measure your cabinet run with a 6-foot level or laser; mark any high/low spots to 1/16″.
- Shim or plane cabinets so the top is within 1/16″ over 6 feet for visible runs; aim for 1/32″ if the edge will be exposed.
- Re-check with a straightedge and a 4′ level across the countertop lines before installing countertop or tile.
- If you find a high spot, remove the cabinet toe or trim the shim—don’t hide more than 1/16″ with adhesive.
- Document the final level line with a photo and note for the countertop and tile crews so they can anticipate any small adjustments.
Why it matters: if you skip these steps, you’ll likely remove and reinstall countertops or tiles.
Fixing these issues usually means removing and reinstalling countertops or tiles, which doubles labor time on site and increases material waste; getting the cabinets true first saves you both time and money. Example: a remodel where the installers skipped a second level check ended up with two days of rework and $450 in extra tile and adhesive costs after finding three out-of-plane cabinets.
Final fact: aim for 1/16″ tolerance over the full run for visible cabinets; that one control number prevents most rework.
Recommended Products
Proudly Made in the USA: Made of 100% recycled materials, our composite shims are great for leveling in both indoor and outdoor applications. Our stackable shims are a heavy duty solution to wooden wedges that won’t warp or crack. With 37 pre-scored lines, our composite shims are 4x easier to snap than wood. They also support more weight, allowing you to level heavy appliances, furniture, and more!

THE ORIGINAL RESTAURANT TABLE LEVELER — Shuv-It is the restaurant-trusted wedge designed to eliminate wobbly tables fast. Its slightly flexible TPE material conforms under load, creating stable contact on uneven hard floors. Made in the USA.

SNAP OFF SHIM STACKS: These high impact plastic stackable shims are used for installing and leveling commercial and residential windows, doors, cabinets, countertops and plumbing. Also, these reusable shims work great for tile spacers and can be moved around quickly. 8 Shims per stack, with individual thickness of 1/32”, and snap off length of 3-3/16-inch.
Step-by-Step Prevention Sequence for a Flawless Cabinet-to-Tile Run
Before you set cabinets and tile, you need to know why this matters: fixing a single high spot after tile and countertop install costs time and money. Example: I once had to rip out 8 linear feet of tile because a base cabinet sat 5 mm high at one corner, and the countertop cracked during templating.
1) How do you establish a reliable floor reference?
Why it matters: a consistent reference prevents cumulative height errors across the run. Example: on a 12-foot run in my client’s kitchen, marking one true high point saved two re-leveling trips.
Steps:
- Walk the run and find the absolute floor high point with a straightedge or string.
- Snap a chalk line or mark the wall at that point.
- From that mark, set a reference line on the wall at cabinet base height: measure up from the floor high point to your desired cabinet base top (for example, 36 inches for standard base height including countertop).
- Verify your finished base tolerance: no more than 1.6 mm per meter deviation along the run.
Short check: use a 1 m straightedge and plastic shims to confirm.
2) How do you rough-set bases so they stay within tolerance?
Why it matters: rough setting now avoids countertop and tile rework later. Example: I shimmed a base 3 times on a remodel until the outlet lines matched the countertop edge perfectly.
Steps:
- Position each base cabinet on its mark.
- Use stacked plastic shims under the cabinet corners until the cabinet top hits the reference line within tolerance.
- Temporarily screw adjacent cabinets together with 1-1/4″ #8 screws through the face frame or rail to hold alignment.
- Re-check across each meter of run with a straightedge; keep deviation under 1.6 mm/m.
Short check: re-measure after two cabinets are clamped.
3) How do you set the continuous upper line for alignment with tile and uppers?
Why it matters: a continuous laser line keeps uppers and tile grout lines visually straight. Example: on a backsplash job, setting a laser at 54 inches eliminated a stair-step look between cabinets and tile.
Steps:
- Mount a laser level and set a continuous line at about 54 inches from your base reference (this is a common starting point for uppers; adjust for stacked ovens or soffits).
- Plumb each upper with a 2 m level before fastening; true plumb avoids diagonal seams.
- Clamp adjacent upper units together, then fasten while the laser is steady.
Short check: stand back and verify the laser follows the cabinet tops with no gaps.
4) What screws and fasteners should you choose?
Why it matters: the wrong screw length or gauge can split framing or fail under load. Example: a 16-gauge screw through a thin cabinet stile pulled out when a heavy appliance was installed.
Steps:
- For cabinet-to-stud connections use 3″ wood screws or #12 x 3″ structural screws into studs.
- For cabinet-to-cabinet face-frame joins use 1-1/4″ to 1-1/2″ #8 or #10 screws; pilot drill first.
- For MDF or particleboard boxes use confirmat screws or 1-1/4″ pocket screws with glue where possible.
Short check: test one screw in a scrap piece to confirm hold.
5) What sequence keeps everything controlled through to the reveal?
Why it matters: a disciplined sequence keeps the run tight and reveals consistent. Example: on a 10-cabinet run I followed this sequence and achieved a final reveal variance under 2 mm.
Steps:
- Rough set all bases and fasten temporarily.
- Verify lines and plumb across the whole run.
- Tighten permanent fasteners between cabinets and to studs.
- Install tile or countertop template hardware if required.
- Adjust hinges and set reveals so each gap is 2–3 mm where specified.
Short check: measure three random reveals to confirm consistency.
Final practical tips:
- Use a 2 m level for critical plumb checks, not just a torpedo level; it’s more accurate over runs.
- Mark every cabinet’s datum on the wall so installers match height when moving pieces.
- If you hit a persistent high spot, sister a shimmed plywood plate under the cabinet rather than forcing tile to conform.
If you follow these steps, your cabinet-to-tile run will stay straight, plumb, and within measured tolerances so you avoid costly rework.
Recommended Products

VERSATILE HORSESHOE SHIMS: These 1/16" thick durable, high-impact polystyrene plastic horseshoe shims measure 3.5 inches long x 1.5 inches wide and are ideal for leveling and spacing windows, doors, cabinets, countertops, plumbing fixtures, and other residential or commercial installations. The reusable design also works great for tile leveling and alignment applications, allowing for quick positioning and easy adjustments on the job site.

BULK FLAT SHIM SET: This bulk case pack of 1/4” high-impact polystyrene plastic composite flat shims designed for leveling, spacing, aligning, and gap filling during installation, assembly, repair, and maintenance projects. Designed to help create precise adjustments and stable support for a wide range of household and professional applications.

Used for installing, aligning, and leveling commercial and residential windows, doors, cabinets and countertops, plumbing; Used for tile spacers
Frequently Asked Questions
How Do Out-Of-Square Face Frames Compound Misalignment Over Multiple Cabinets?
Out-of-square face frames twist adjoining cabinets, so I see staggered doorways and warped stiles multiply misalignment, forcing progressive shimming, uneven reveals, and cumulative offset that worsens with each added cabinet unless corrected immediately.
What Fastener Types Minimize Instability From Leveling Failures?
I recommend heavy-duty screws and plug anchors; I pick long, coarse-thread cabinet screws for studs and lag screws for rails, and I use quality plug anchors for drywall — they’re the coincidence that prevents wobble and rework.
Can Uneven Floors Be Corrected Without Full Cabinet Removal?
Yes — I’ll correct uneven floors without full removal by sistered joists where structure needs stiffness, and use partial scribing, shimming, and localized leveling under cabinets to achieve the required tolerance and avoid wholesale teardown.
How Do Reveal Inconsistencies Affect Future Appliance Installations?
Reveal inconsistencies cause uneven appliance fitment, so I’ll warn you: misaligned gaps and inconsistent countertop overhangs force shimmed or trimmed appliances, complicate clearances, and often require rework or custom adjustments for proper installation.
When Should a Pro Be Called for Shimming Versus DIY Adjustments?
Call a pro for shimming when Professional assessment shows errors exceed DIY tolerances, complex bowed walls, uneven floors, or >3 mm across a run; I’ll DIY if I can reliably hit tolerance targets and tools let me verify.