You’re on a rainy job site, knees muddy, trying to mark the same offset on a dozen boards, and your laser level flashes “low battery” midway through the run. You need consistent marks fast but your electronic tools keep failing or getting in the way in tight corners.
Most people assume high-tech gadgets are the only way to speed repetitive layout work. This piece shows a simple handheld kit and step-by-step setups to measure, mark, and verify repeatable offsets in seconds, so you can finish batch runs without stopping for charging or re-calibration.
You’ll learn exact jigs, quick clamp tricks, and the minimal maintenance that keeps tools working. It’s easier than it looks.
Key Takeaways
If you’ve ever needed quick marks on a job, this is why.
Why it matters: saving seconds over hundreds of repeats cuts hours from your day. Use a pencil or scribe to mark and go; you won’t wait for a boot-up or charge. Example: when fitting 200 shelf brackets, you can mark each mounting hole in 2–4 seconds with a center punch and ruler, so the whole run takes under 20 minutes.
The tool keeps working when electronics fail.
Why it matters: noise, water, or drops shouldn’t stop your progress. A carbide scribe and try square still let you mark a wet steel beam on a noisy jobsite while a phone is plugged in and dead. Example: in a rainy metalshop, you can punch layout lines and keep welding without drying equipment.
Simple, tough tools save time and money on upkeep.
Why it matters: predictable consumables mean fewer surprises in cost and downtime. Replace a pencil in seconds and expect a couple per week in heavy use, versus batteries or calibration service for electronics. Example: a machinist uses the same hardened layout knife for months and keeps two spares in the drawer.
Handhelds fit tight spots and let you brace for repeatable alignment.
Why it matters: being able to hold a tool steady gives you consistent marks without clamps. Use a 6″ machinist square and your non-dominant hand to brace against the workpiece while you score a line with your dominant hand. Example: installing a cabinet in a 24″ deep nook, you can sight, brace, and mark all four corner points in under a minute.
Use jigs, stops, and templates to eliminate re-measuring on repeats.
Why it matters: once you set a stop, you reuse that exact position over and over. Steps:
- Make a wooden or aluminum stop sized to your part.
- Clamp it in place and test on a scrap.
- Mark parts using the stop and a handheld punch or scribe.
Example: cut and mark 50 identical cleats by clamping a plywood template to each stock and scribing through the same holes; you finish the set in a single afternoon.
When Handheld Tools Beat Digital Systems (Quick Checklist)
If you’ve ever stood on a jobsite waiting for a battery to charge, this is why.
Why it matters: you avoid delays and keep work moving. For quick checks, grab a 6-inch combination square or a tape measure; they give you a reading in 2–5 seconds without powering up anything. Example: measuring a baseboard on a scaffolding plank — pull the tape, read at eye level, mark with a pencil.
The difference between noisy conditions and quiet ones comes down to whether you can hear or speak to a device.
Why it matters: you need feedback you can actually perceive. Choose handhelds when compressors run or people are talking loudly; a chalk line or a stud finder that uses visual LEDs works better than a voice-guided laser. Example: hanging drywall next to a running saw—flash the stud finder’s LED, mark the stud, and snap the chalk line.
Before you work in tight spaces, you need to know what will fit.
Why it matters: cramped areas block big tools and slow you down. Use a 12-inch folding rule or pocket torpedo level in narrow cavities where a 48-inch level or a bulky laser won’t fit. Example: leveling a window jamb inside a deep reveal—slide in the torpedo level, shim, and re-check.
You don’t need a digital device when you’re making the same simple mark over and over.
Why it matters: repetitive, low-complexity tasks are faster manually. Steps: 1) set a pencil stop on your tape or rule, 2) use a marking gauge for repeated offsets, 3) check three random marks with the square. Example: spacing fence pickets at 3 inches on a long run—use a scrap block as a spacer and mark each board.
If you go where drops and weather happen, choose durability.
Why it matters: manual tools survive knocks and rain. A steel try square and brass-bodied chalk box keep working after a 6-foot fall or when it gets wet; many pocket lasers won’t. Example: working a roof after a light drizzle—grab the hand level and square instead of risking a water-damaged laser.
Battery life is uncertain, so plan for no power.
Why it matters: you stay productive even when electronics fail. Keep a small kit: tape, pencil, combo square, marking gauge, torpedo level. Example: restoring trim in an older house with no convenient outlets—use that kit and finish the room in an afternoon.
Quick checklist — when to pick a manual tool:
- You need an answer in under 10 seconds.
- The site is noisy and voice or beep feedback fails.
- Space is under 2 feet wide or deep.
- You’re repeating simple marks across 20+ pieces.
- The job risks drops, mud, or rain.
- You can’t guarantee charged batteries.
Use this to decide fast on the job.
Make Repeatable, High‑Precision Layouts With Hand Tools
If you’ve ever struggled to make the same layout twice, this is why.
Why it matters: repeatable layouts save you time and reduce scrap when you need identical parts. Example: marking hole centers for a drawer slide on three identical carcase sides.
1) Set calibrated marking standards and record them.
Why it matters: consistent reference points stop offset drift. Example: I set a 1/2″ offset from the edge for slide holes and write it on my marking card.
Steps:
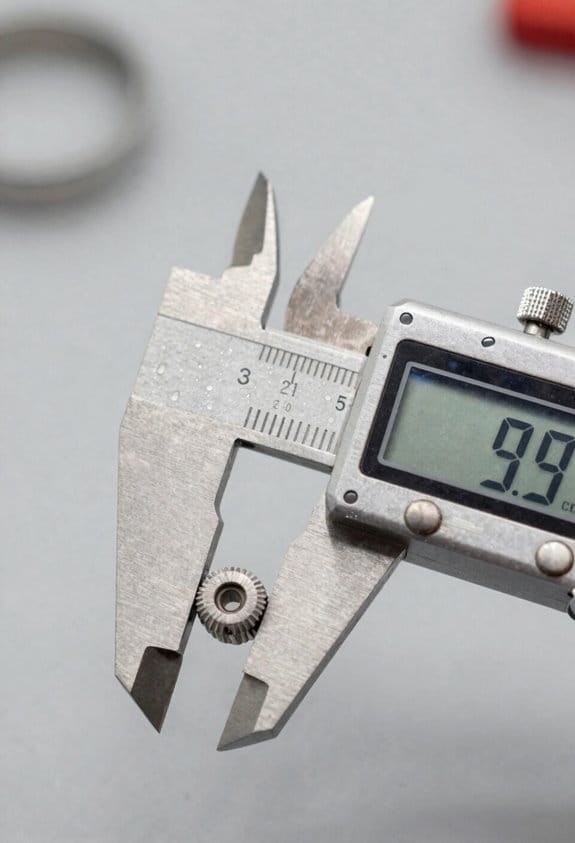
- Check your steel rule or caliper against a known reference (a machinist’s 1″ gauge block or a trusted micrometer) and note any error in millimeters or thousandths of an inch.
- Pick a standard—say, 12.70 mm (1/2″) from the edge—and scribe that on a small card or the tool handle.
- Use that card each time instead of remeasuring from scratch.
If you want tactile jigs, make simple feel-based fixtures.
Why it matters: tactile jigs cut visual guesswork and speed repeat marks. Example: a hardwood block with a rabbet that locates the board edge and a dowel that fits a predrilled hole.
Steps:
- Make a jig from scrap hardwood sized to sit flat on your workbench.
- Cut or rout a rabbet to seat the board edge and drill a dowel hole that matches a test piece.
- Use the jig to align each workpiece; hold it with the same clamp pressure every time.
Transfer points with punches and scribing, then verify.
Why it matters: transferring with contact methods keeps marks exactly where you set them. Example: marking bolt centers through a template into steel with a prick punch.
Steps:
- Scribe a line using a sharp marking knife or carbide scriber along your standard edge.
- Use a prick punch to indent center points—light, single taps.
- Verify positions with a 90° square or a 0.05 mm feeler gauge between the edge and the scribed mark.
Keep tools clean, sharp, and handle pressure consistent.
Why it matters: small wear and different pressure create cumulative error. Example: a dull awl makes wide marks so your drill bit walks.
Steps:
- Wipe rulers and squares free of oil and debris before each session.
- Sharpen scribers and punches until they leave a crisp line or point.
- Practice the same light hand pressure and the same sequence of operations on a scrap board until marks repeat within your tolerance.
Final practical tip: write your offsets and jig setup on a sticker stuck to the jig or in your shop notebook so you (or someone else) can reproduce the layout exactly.
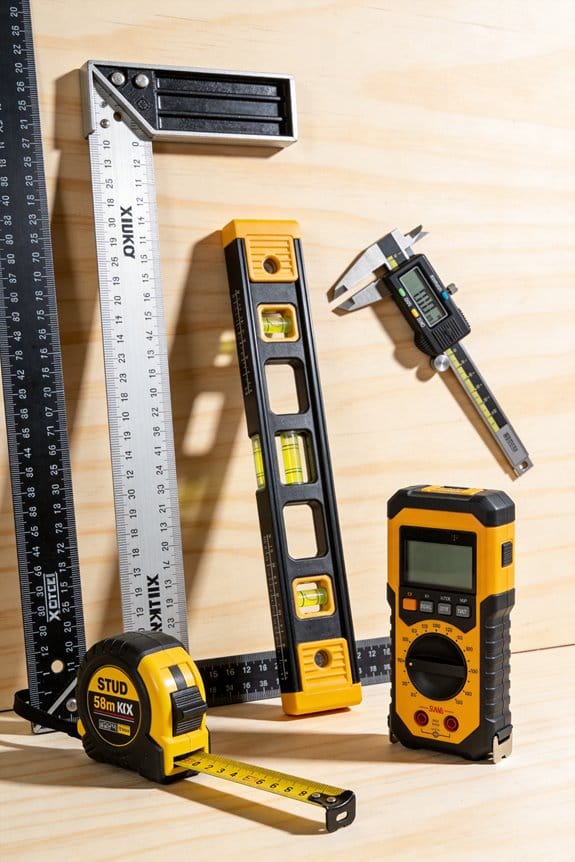
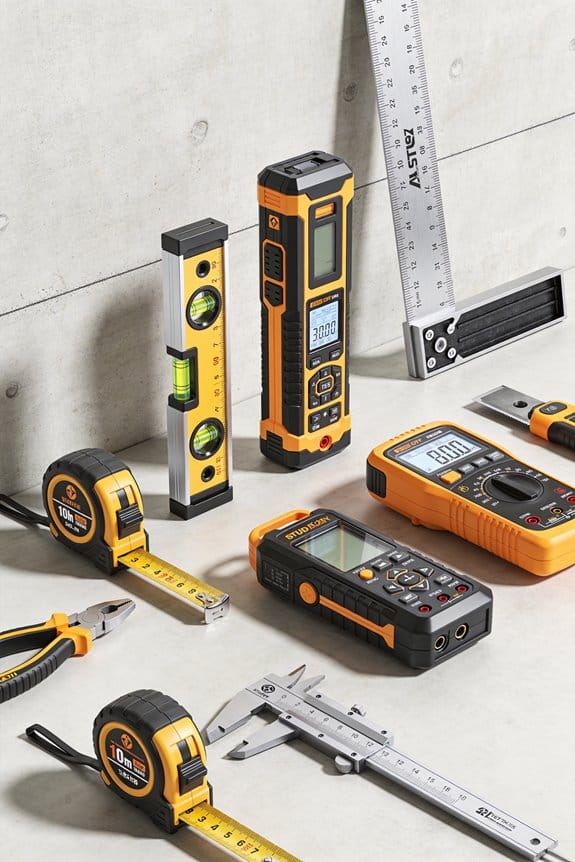
Recommended Products
0-25mm adjustment

Crafted from high-quality stainless steel and 6061 aluminum for exceptional durability.

Clear and precise scribes every time
Use Handheld Tools Efficiently in Tight or Awkward Spaces

If you’ve ever tried fitting a tool where your arm won’t, this is why.
Why it matters: cramped spaces increase mistakes and slow you down, so you want methods that keep marks accurate and movements controlled.
1) Which tools should you choose?
- Use slim, well-balanced tools so you can feel alignment with your hand. Example: swap a full-size 12″ straight ruler for a 6″ stainless steel rule that weighs under 4 ounces; you’ll feel whether the edge sits flat.
- Pick compact clamps that bite firmly but don’t block access, like 1″ deep throat C-clamps or 2″ spring clamps. Example: clamp a bracket with two 1″ spring clamps at opposite corners when you can’t reach across the piece.
- Carry one angled mirror (3″×5″) and a small LED pen light. Example: in a cabinet, hold the mirror to see the back edge and use the pen light from above to highlight your mark.
2) How do you position your body and tools?
Why it matters: your stance controls leverage and wrist angle, which prevents slips and fatigue.
Steps:
- Face the work so your dominant shoulder points at the target.
- Shift your feet so your wrist stays neutral; keep the elbow slightly bent.
- Brace your forearm on a solid surface — a cabinet lip, clamp bar, or your thigh — to steady fine movements.
Example: when marking a hinge mortise inside a door jamb, rest your forearm on the jamb edge and stand with your left foot slightly forward if you’re right-handed.
3) How do you make repeatable marks in stages?
Why it matters: marking in steps catches errors early and keeps alignment consistent.
Steps:
- Lay a primary reference: use the edge of the part or a centerline on the workpiece and clamp it.
- Make a light initial mark using a sharp mechanical pencil or scribe.
- Verify by touch: run a fingernail or small square along the mark to confirm alignment.
- Darken the mark or cut a shallow guide (1–2 mm deep) only after verification.
Example: when drilling shelf-pin holes in a tight cabinet, mark the first hole, use a spacer block to transfer positions, then lightly scribe before drilling.
4) How should you handle lighting and organization?
Why it matters: focused light and tidy tools reduce fumbling and keep rhythm.
Steps:
- Position a bright directional LED (500+ lumens) into the cavity so shadows fall away from your work.
- Use magnets or a small tray close to your reach to hold screws and small parts.
- Keep only three tools at the ready: marking tool, clamp, and the active driver.
Example: inside a closet frame, clip a headlamp to your cap, place screws in a magnetic dish on the floor beside your knee, and tuck the screwdriver into a holster.
Final practical tip: when visibility is zero, slow down to half speed, verify each reference twice, and use a shallow pilot cut or scratch as your final check.
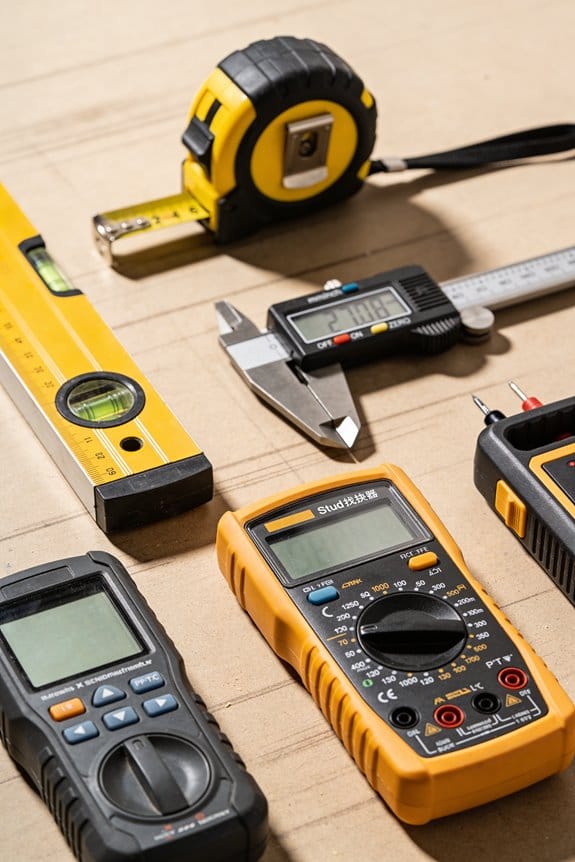
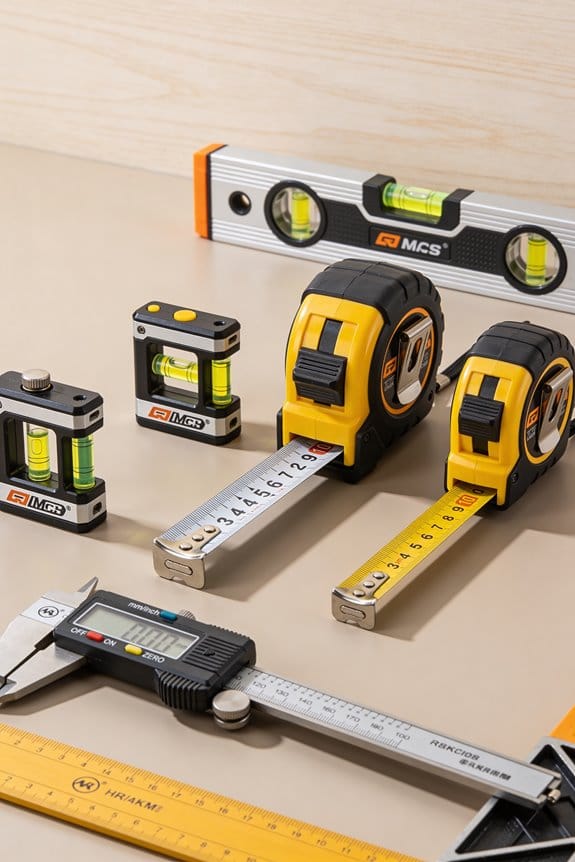
Recommended Products

MINI DELUXE SET - You will receive the Mini Deluxe inDexable set which includes 3 lengths of rules (4-inch, 6-inch and 8-inch) and 4 heads (combination square, double square, protractor, center finder) and 4 Rack-Its (wall-mountable storage) built for this set. All made in the USA.

THE DIFFERENCE - The 6-inch and 12-inch stainless steel precision squares are made out of a 1/16" thick stainless steel core. This allows our CNC milling and optical inspection systems to ensure precision, accurately square with .0085°.

SPECS - You will receive a 3.5 & 6 inch stainless steel DelVe square set from Woodpeckers. The squares includes its own Rack-It mounting kit for wall hanging.
Fast Workflows for Repetitive Marking and Layout
If you’ve ever stood over a pile of parts and felt time slip away, this will help.
Why it matters: speeding repetitive marking and layout keeps your projects on schedule and reduces scrap.
1) Set up a rhythm template you can reuse.
- Why it matters: templates stop you from re-measuring and cutting twice.
- How to do it:
- Pick a stable board or scrap sheet about the size of your workpiece (for example, 24″ x 48″).
- Mark all repeated dimensions on that board with a permanent marker and a centerline—write measurements like 3-1/2″, 7″, 10-1/2″ next to each mark.
- Clamp the template to your workpiece in the same orientation every time using two 4″ bar clamps.
– Example: I made a 24″ x 48″ template for stair treads; I clamped it, transferred three marks in under 90 seconds, and kept the same spacing for 12 treads.
2) Use predictable point order and rapid tools.
- Why it matters: a fixed sequence cuts hesitation and missed marks.
- How to do it:
- Choose a marking order (left-to-right, top-to-bottom) and stick to it.
- Keep a 25-foot tape and a chalk line in a designated pocket or hook at your bench so you grab the same tools every time.
- Mark points using the tape for distances and snap the chalk line for long straight runs; mark with a 0.5 mm mechanical pencil for repeatable dots.
– Example: When laying out cabinet face frames, I mark all left edges first, then bottoms, then centers; it took me 10 minutes to mark eight frames instead of 20.
3) Build and use simple jigs for repeated cuts.
- Why it matters: jigs remove decision time and keep parts identical.
- How to do it:
- Build a jig from a 1×6 scrap and two 2×4 stops; fasten with three 1/4″ bolts so stops are adjustable.
- Set the stops to the exact cut length, make a trial cut, then lock the bolts.
- Run each piece against the jig—don’t re-measure.
– Example: For 30 identical dowel-socket halves, my jig held each board the same way and reduced cycle time from 45 seconds per piece to 18 seconds.
4) Group similar tasks and check alignment early.
- Why it matters: batching catches systematic errors before they multiply.
- How to do it:
- Group all identical marks (edges, holes, centers) and do them in one pass.
- After grouping, check two control points with a square and a level; if those are off, correct before continuing.
- Re-check every 6–8 pieces or every hour on long runs.
– Example: When drilling hinge mortises for 20 doors, I marked all hinge centers first, drilled a test door, then checked two adjacent doors with a square; that found a 1/32″ shift I fixed immediately.
Final tips you can use right now: keep one dedicated clamp, one tape, one chalk line, and one jig in your kit, always mark in the same physical order, and stop to check two control points after every few pieces.
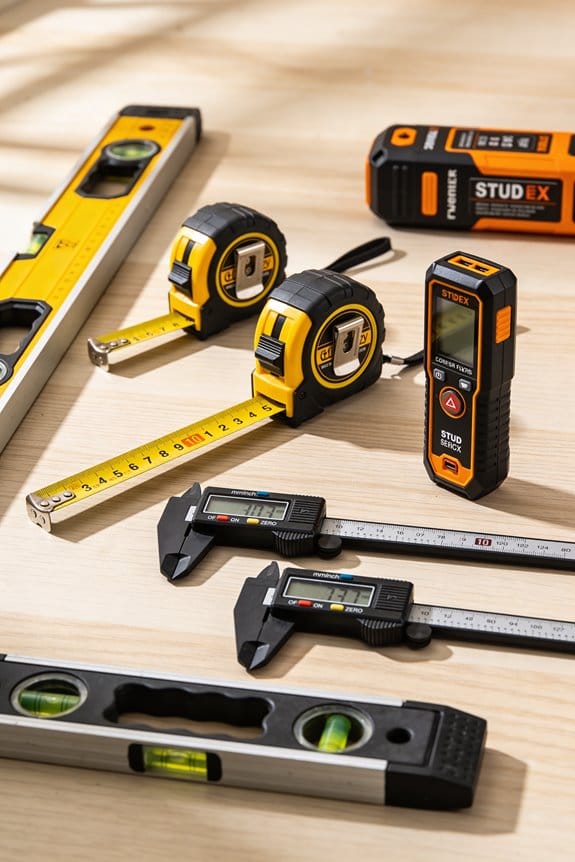
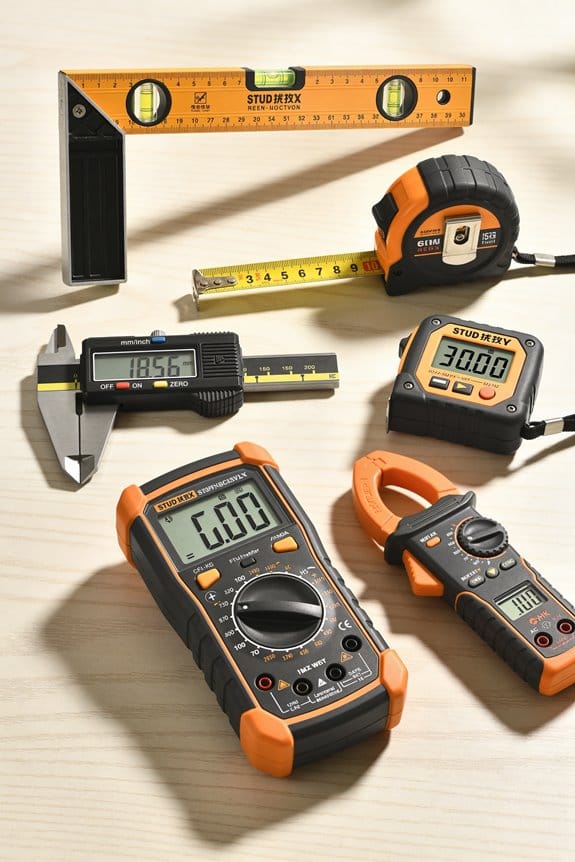
Recommended Products

Flutes run lengthwise (e.g., 24x36 board has a 36" flute) for strong, stable displays. Versatile and strong: Use as corrugated plastic board, large poster board, plastic cardboard, coroplast sheets, coroplast panels, plastic sign board, and chloroplast sheets for yard signs, protest signs, blank slate signs, school projects, crafts, and business advertising.

✔ 【Sleek, Frameless Glass Design】Our glass whiteboard brings a clean, modern look to any space. The frameless design makes it appear to float on the wall, adding a touch of sophistication to your office, home, or classroom.

All-Inclusive. Customizable Whiteboards. Interchangeable Templates. Snap-in Marker with Eraser Cap
Choose the Right Handheld Tools for Common Layout Tasks
Before you pick a handheld tool, know why it matters: the right tool saves time and prevents costly mistakes.
Here’s what actually happens when you match tools to layout tasks: your marks are repeatable and you don’t have to re-check everything.
– Use a magnetic square for quick 90° checks against metal edges. It locks to steel up to 1″ thick, so you can hold it with one hand while you scribe with the other. Example: when laying out hinge mortises on a steel-jigged workbench, the magnet keeps the square from sliding while you mark. Keep the magnet clean and test it on a scrap block before marking.
For straight runs, you need a stiff measuring tape and a reliable straightedge; here’s why: a flexible tape droops and gives inconsistent lines.
- Use a 12-ft stiff tape that has a steel tang and a reinforced case.
- Hook the tang, tension the blade, and lock it; that tension gives a straighter line over 6–8 feet.
Example: marking a 7-ft cabinet top for a sink cutout — tension the tape and snap a chalk line for a single, accurate scribe.
For precise lines that guide saws and resist tear-out, use a marking knife because it cuts fibers instead of crushing them; that matters when you plane or saw to the line.
- Score the face lightly with a single pass from the edge toward the center.
- Keep the blade angled about 45° and score just deep enough to see the groove.
Example: when cutting dovetails on a 3/4″ oak board, a single firm knife pass prevents splintering at the layout line.
When you need repeatable right angles away from clamping points, a small try square and a feeler gauge are handy because they check fit and small gaps quickly.
- Carry a 3″ machined try square for finish checks. It verifies squareness at corners and across small parts.
- Use a 0.002–0.020″ feeler gauge set to check tight joints and consistent gaps. Example: test a drawer front where a 0.008″ gap must match the rest of the cabinet.
Choose quality and maintain it because dull or dirty edges give false results.
- Sharpen knife blades with a 1,200–4,000 grit stone or replace them when they skip.
- Wipe metal squares and tape blades with a rag and light oil to prevent rust and sticky magnets.
Example: a cleaned square keeps its 90° even after monthly shop work; corrosion will throw off alignment.
Final quick checklist you can pin up at your bench:
- Magnetic square (locks to up to 1″ steel)
- 12-ft stiff tape with tang lock
- Marking knife, 45° angle, single pass
- 3″ machined try square
- Feeler gauge set (0.002–0.020″)
Follow those steps and your layout will be faster and more accurate.
Recommended Products

Self-centering jaw ensures a strong hold on all workpieces, no matter what the shape

Keep Your Indicators Close By - No more searching for your indicator! This magnetic base holder will keep it close at hand, making it easy to grab and use when you need it.

Fix Common Speed and Consistency Problems on the Job
If you’ve ever lost time redoing layouts, this is why.
Why it matters: wasted layout work costs you hours and materials each day. I start by checking tool calibration because a tape that reads 1/8″ off makes every cut wrong.
1) Calibrate your basic tools
Why it matters: small errors multiply across a job.
Steps:
- Check tapes against a steel rule once a week; mark tapes that differ by more than 1/16″.
- Square-check: place your framing square on a clean board, draw lines, flip the square, and measure the offset; replace squares with more than 1/32″ error.
- Mark a zero-check routine on the toolbox: confirm one tape, one square, and one level at the start of each shift.
Example: On a kitchen remodel I did, a single tape that read 1/8″ long caused three cabinet faces to gap; swapping the tape fixed the pattern immediately.
I standardize measurement routines because everyone following the same steps cuts variation.
2) Create and train on one measurement routine
Why it matters: different habits create repeated fixes.
Steps:
- Use the same reference edge for all measurements and write it on the job board (for example: “Measure from the finished wall face”).
- Always measure twice: once for layout, once for confirmation, and speak the dimension aloud when marking.
- Teach the routine in one 10-minute walk-through at the start of each job.
Example: On a deck job, we wrote “From ledger face” on the board; once everyone used that reference, stair stringers fit without trimming.
I teach quick checks so drift doesn’t ruin a shift.
3) Implement fast checks during the day
Why it matters: tools and settings shift as the day goes on.
Steps:
- Zero blades on saws at breakfast and after every blade change.
- Confirm scale on digital calipers or lasers with a known 12″ block every two hours.
- Keep a 1-minute checklist on each tool case: blade, fence, scale.
Example: A drywall crew avoided rework after lunch by confirming laser alignment with a 2×4 marked at 10’—they caught a 1/4″ drift before it mattered.
I reinforce team communication because caught mistakes stay small.
4) Make calling and confirming standard practice
Why it matters: spoken checks stop handoff errors quickly.
Steps:
- When handing off a part, the giver states the dimension and the receiver repeats it.
- On layout, have one person call the baseline and another mark it.
- Use short callouts like “Baseline 96 inches” and “Got 96”.
Example: On a trim day, calling “Corner to post 48″ prevented a repeated 1/2” offset that had happened twice before.
I favor simple, short tools because they’ll actually get used on long shifts.
5) Keep routines short and teachable
Why it matters: long, complex routines get skipped.
Steps:
- Make each routine under 2 minutes to perform.
- Put one checklist per station—no more than five items.
- Train each crew member once with a live demo and one supervised run.
Example: I made a two-item checklist for blade zeroing; every apprentice followed it and blade drift dropped to zero after the first week.
Final practical tip: tape and square checks cost you five minutes and a handful of replacement tools, but they save multiple lost hours per job.
Cost and Long‑Term Reliability of Handheld Layout Tools
Think of cost and long‑term reliability like a two‑year budget spreadsheet you can actually touch. Why this matters: if you buy once and keep using a tool for years, your shop spends less on replacements and surprises. For example, I bought a basic manual bevel gauge five years ago for $25; I’ve only replaced the pivot screw once with a $3 part.
Because handheld layout tools don’t use batteries or software, their longevity comes from simple construction, robust materials, and fewer moving electronic parts that can fail. You’ll spend less replacing sensors or updating firmware. A metal scriber with a carbide tip typically costs $10–$20 and the tip lasts a year of daily use; replacing the tip takes under five minutes.
Before you choose a tool, make a short maintenance plan so small steps prevent bigger failures—this is how you save money long term. How to do it:
- Monthly: clean visible grit and dry with a rag.
- Every 6 months: lubricate pivots with one drop of light machine oil and tighten screws to finger‑tight plus quarter turn.
- Yearly: replace consumables (blade, tip, sandpaper) and inspect for corrosion.
Example: a folding rule kept in a toolbox gets dust and dried paint. Clean each joint monthly, apply oil every six months, and you’ll avoid replacing the whole rule; a hinge kit costs about $8.
Parts like blades, pivots, and tips are easy to swap, so plan for consumable costs rather than full replacements. For budgeting, expect about 10–20% of the tool’s purchase price per year in consumables and small parts for tools you use daily.
Create a simple log—date, action, and cost—and keep it with your toolbox so you can track predictable upkeep and total ownership costs. For instance, logging $12 in parts and 10 minutes of maintenance per month shows handhelds pay off versus $200 electronic tools that require firmware updates and rare, costly repairs.
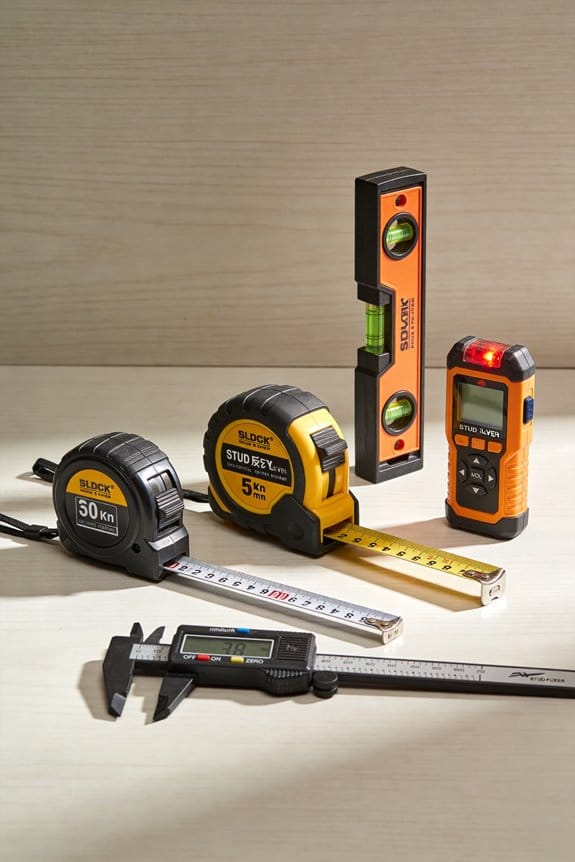
Recommended Products
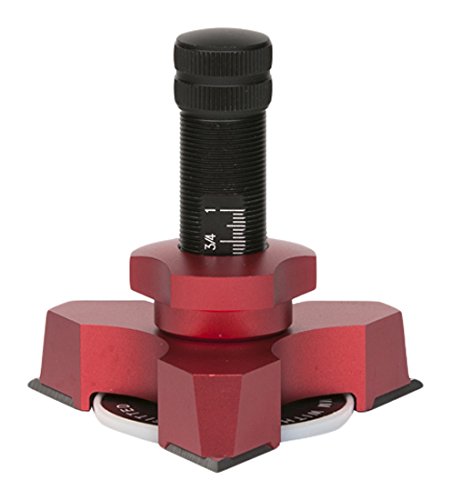
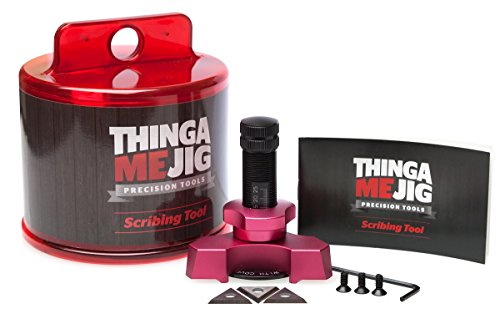
Our Scribing Tool utilises tungsten carbide blades to scribe laminates, painted Items, stone, soft metals, timber, veneers and much more.
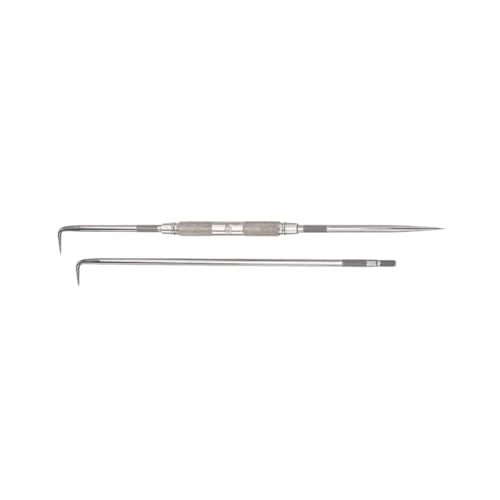
Finely Tapered Points - The scriber points are expertly tapered, making it easy to see the point's position on the work surface with precision and accuracy, enhancing the user's control over their markings.
Fowler Scriber: This Fowler carbide Super Scriber is an example of high-quality, long-lasting, durable, reliable, lightweight, and rugged craftsmanship perfectly suited to make markings for precise cutting, punching, or drilling
Frequently Asked Questions
How Do Handheld Tools Perform in Extreme Temperatures or Wet Conditions?
They laugh at blizzards and downpours—I’ll tell you: handhelds offer strong temperature resilience and moisture protection, especially simple metal or sealed models; I still prefer them for dependable, tactile performance in harsh conditions.
Can Hand Tools Integrate With Digital Layout Records or BIM Workflows?
Yes — I sync handheld notes to BIM syncing platforms by photographing marks and adding Mobile annotations on-site; I then export CSVs or photos to BIM, keeping tactile workflow while feeding digital records for coordination and traceability.
What Safety Risks Are Unique to Prolonged Hand-Tool Use?
“An ounce of prevention is worth a pound of cure.” I’ll tell you: prolonged hand-tool use risks repetitive strain injuries, grip fatigue, blisters, nerve compression, tendonitis, joint wear, and cumulative musculoskeletal damage unless you rest and use ergonomic techniques.
Are There Industry Standards or Certifications for Handheld Layout Accuracy?
Yes — I follow ISO tolerances and documented calibration protocols; I check handheld layout tools against national standards, keep traceable records, and schedule regular recalibration to ensure accuracy and compliance for site measurements.
How Do Apprentices Best Learn Hand-Tool Techniques Quickly On-Site?
I’d get apprentices learning fast on-site through paired mentoring, doing tactile repetition of basic cuts, measurements, and markings while I coach technique, correct grip, and explain why feel matters, accelerating muscle memory and confidence.