You’ve just set the first cabinet run and the tops don’t line up, or your tile pattern drifts midway across the room — now what? You can’t trust a single tape measure and eyeballing to keep cabinet tops, shims, and tile joints perfectly aligned across an entire room.
Most people try to level from the lowest point or constantly re-measure segments, which creates cumulative errors and wasted cuts. This article shows exactly how to use a multi-line, self-leveling laser to create one continuous reference plane, transfer precise heights from the highest reliable point, and shim cabinets to 1/16” so cabinet tops and tile courses align instantly.
You’ll also get practical setup steps and troubleshooting tips to reduce cuts and rework. It’s simpler than it looks.
Key Takeaways
If you’ve ever set a cabinet run that slowly drifted out of level, this is why.
Why it matters: a continuous laser line keeps every cabinet and tile on the same plane so you don’t have to re-measure every bay. Example: when you run a 12-foot base cabinet run on an older house, a single laser line prevents a 1/4″ cumulative drop over four cabinets.
1) Project a continuous room-wide datum line so all cabinets and tiles align without repeated measuring or re-leveling.
- Why it matters: you save time and avoid fit issues at the ends of runs.
- How to do it: mount the multi-line laser in the room center or on a tripod at about 36–42 inches high, turn on the horizontal plane, and rotate it until the line crosses both end walls. Set the laser so the line is visible across the full run, then mark a few reference points on the walls with a pencil. Example: in a 20-foot kitchen, you’ll mark at 0, 5, 10, 15, and 20 feet to keep alignment consistent.
If you’ve ever had cabinets end up with uneven top reveals, this is why.
Why it matters: identifying the highest reliable point prevents cumulative height errors that leave gaps or require excessive shimming. Example: on a sloped floor, starting from the highest reliable cabinet reduces total shim pack thickness from 3/4″ to 1/4″.
2) Identify the highest reliable point and transfer elevation across runs.
- Why it matters: it gives you a baseline that keeps every subsequent cabinet level.
- How to do it: use the laser to find the highest finished subfloor point or cabinet carcass top, note that elevation, and transfer it along the laser line at 4–6 foot intervals. Example: if the highest point is 40.75″ from the floor, snap that elevation at each reference mark so every cabinet lines up to 40.75″.
Think of the first cabinet like the keystone of an arch.
Why it matters: setting the first cabinet precisely to the laser line speeds shimming and reduces rework. Example: if you set the first base cabinet so the countertop top is exactly on the laser at 36″, you avoid having to reposition three adjacent cabinets later.
3) Set the first cabinet precisely to the laser line.
- Why it matters: everything else references that one, so accuracy here saves time.
- How to do it: clamp the cabinet to the wall, adjust shims until the cabinet top or face aligns with the laser, fasten temporarily, then recheck the laser at the next reference mark. Example: use a 1/8″ shim under the low corner and tighten the wall screws while the laser line sits on the cabinet top.
Before you align cabinet faces, use the laser for reveal consistency.
Why it matters: a steady reference line makes quick face-to-face alignment and consistent reveals repeatable. Example: aligning five upper cabinets to a 1/8″ reveal produces a uniform look across a 12-foot run.
4) Use the laser for face-to-face alignment and consistent reveals.
- Why it matters: it removes guesswork when setting face frames or doors.
- How to do it: clamp the cabinet faces together, adjust until the visible reveal matches the laser line, then screw the cabinets together. Example: place temporary stop blocks to hold a 1/8″ reveal while you drill the hinge screws.
It sounds obvious, but long runs still happen.
Why it matters: extending the laser’s range keeps one plane for cabinets and tile over long distances. Example: on a 40-foot corridor kitchen, a detector or snap marks prevent plane drift when the beam gets weak.
5) Extend range with a detector or snap marks for long runs.
- Why it matters: you maintain a single plane without re-leveling every section.
- How to do it: use a laser detector set to the horizontal plane and step along the run, or mark the laser height on the walls every 8–10 feet and re-establish the line from those marks with the laser set between points. Example: with a detector you can pick up the beam through paint or daylight up to 100 feet, keeping the tops of cabinets at the same elevation.
Final practical tip: carry a small level and 1/8″ feeler gauges for quick checks; they take seconds and prevent hours of rework.
Quick Laser Setup: Position Laser & Set Reference
Before you set the laser, know why this matters: a steady, level beam is what keeps every cabinet top aligned so your job looks professional.
Here’s what actually happens when you position the laser: if the tripod wobbles or the height is off, the line will kink or miss cabinets, and you’ll shim the wrong units. Set the tripod on a flat part of the floor and tighten all three legs until they can’t move; if the floor slopes, put a 1/2″ plywood block under the low leg to stabilize it. Place the laser so the projected horizontal line crosses every cabinet face in one pass — measure the distance from the laser to the far cabinet and aim for a height that sits 1″–2″ above the cabinet top if your cabinets are 34 1/2″ tall, or at the height specified by your plans.

Why you let it self-level before marking: the laser’s auto-level gives you the true horizontal that your cabinets will follow. Turn the unit on, wait for the leveling indicator to show it’s stable (usually 10–30 seconds), and watch the line until it’s sharp and steady; if the line wobbles, resecure the tripod or move the laser 6–12″ to a firmer spot. Make a small pencil tick at a cabinet corner where the line crosses the wall; this tick is your visible alignment cue.
Example: on a kitchen with a 12-foot run and uneven plaster under the sink cabinet, I put the laser 8′ from the far end, set it 1″ above the cabinet face, and marked the corner at eye level so I could sight across the run without stooping.
If walls or floors are uneven, you need a single reference point so every cabinet lines up to the same plane. Find the highest reliable point the beam hits — usually where the wall meets the ceiling or a solid stud — and mark that as the primary datum; write “datum” next to the tick so others know it’s the control point. You’ll shim lower cabinets up to this datum: measure down from the beam to the top of each cabinet opening and cut shims to match those heights in 1/16″ increments.
Example: on a bakery counter where the floor dropped 3/8″ near the middle, I marked the beam at the end stud, measured 3/8″ taller at the low point, and stacked two 1/8″ shims plus one 1/16″ shim under the base cabinet.
Before you fasten anything, reverify the line because bumps, knocks, or tripod settling will move it. Re-check the laser after tightening two or three cabinets and make a second tick if the first one has shifted; a 1/8″ shift over a 10′ run can mean warped doors and unhappy clients.
Recommended Products

Laser tool kit includes a GL422N Grade Laser, HL760 Laser Receiver, C70 Adapter, 105516 Vertical Adapter for HL Receiver, RC402N Radio Remote Control, NiMH Rechargeable Batteries, charger, and carrying case

COMPREHENSIVE KIT: The kit includes a rotary laser, laser reciever, tripod, grade rod, remote control, wall mount, CORE18V 4.0 Ah battery, 18V battery charger, 4 D-cell batteries, 2 AA batteries, alkaline battery adapter and hard carrying case.
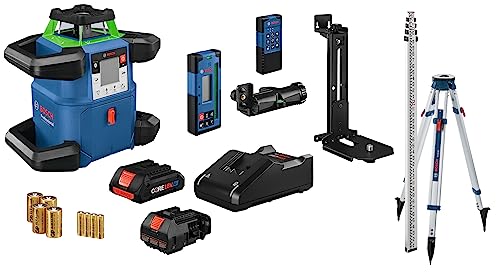
COMPREHENSIVE KIT: The kit includes the rotary laser, laser reciever, tripod, grade rod, remote control, wall mount, CORE18V 4.0 Ah battery, 18V battery charger, 4 D-cell batteries, 2 AA batteries, alkaline battery adapter and hard carrying case.
Step-By-Step: Aligning and Shim‑Leveling Cabinets
Here’s what actually happens when you set up a run of cabinets: if your reference is off by even 1/8″, the whole run looks crooked, so you need a single consistent line to work from.
Why this matters: a consistent top reference keeps cabinet faces aligned and doors closing properly. For example, on a 10-foot run I once leveled to a top-line 1/16″ low at one end and had to redo every cabinet, which cost two extra hours.
1) Set a consistent top reference.
– Steps:
- Mount your multi-line laser so the horizontal beam hits the wall at the planned top of the cabinet face frame (usually 34-1/2″ from finished floor for base cabinets without countertop).
- Mark that laser line across the run with pencil at each cabinet location and at any stud lines.
- Check the line with a 6-foot level as a sanity check; the laser can drift if it’s bumped.
– Real-world example: on a kitchen with an uneven floor, I drew the line and found the laser matched the level within 1/16″ over 8 feet — good enough to proceed.
Before you position the first cabinet, you need to confirm the edge alignment where cabinets meet because a small reveal mismatch multiplies down the run.
Why this matters: aligning edges prevents gaps and misaligned doors at joints. For instance, on a laundry room job, matching one edge within 1/16″ avoided a visible 1/4″ gap at the fourth cabinet.
2) Position and align the first cabinet.
– Steps:
- Place the first cabinet against the wall so its top edge aligns with your pencil laser line.
- Use a torpedo level across the face to check level; adjust with shims under low points until the level reads true.
- Shim to 1/16″ increments; once level, clamp it in place.
– Real-world example: I shimmed a 12″ base cabinet on a sloped concrete floor by stacking two 1/16″ plastic shims and one 1/8″ shim under the near corner to reach the laser line.
You don’t need to guess spacing between cabinets; you need a consistent reveal.
Why this matters: keeping equal spacing makes doors look intentional and prevents rubbing. On a recent galley kitchen I set spacing at 1/8″ between frames and avoided rubbing by maintaining that gap at every joint.
3) Join, clamp, and check spacing for the run.
– Steps:
- Bring the next cabinet tight to the first; use a clamp or two to hold them together and check that the faces are flush, using a straightedge across the joint.
- If the face is proud or recessed, adjust with thin shims between cabinets at the rear or front until flush.
- Maintain your chosen reveal (e.g., 1/8″) with a feeler gauge or a 1/8″ spacer while clamping.
– Real-world example: I used two 12″ cabinet clamps to pull three cabinets tight and then checked the straightedge across the tops — the third cabinet needed a 1/16″ front shim to line up.
Before you fasten, verify vertical supports align with studs because your screws need solid backing.
Why this matters: screwing into studs prevents sag and loosening over time. On a long wall I pre-marked studs every 16″ and only drilled where a stud hit the cabinet rail.
4) Fasten through the face frame into studs.
– Steps:
- Drill pilot holes through the face frame into the cabinet rail and into studs; use 3″ #10 drywall screws or 3-1/2″ structural screws depending on cabinet thickness.
- Tighten screws while another person holds the cabinet flush with the laser line; check that tightening doesn’t pull the cabinet off level.
- Countersink slightly if you’ll cover holes with plugs or filler.
– Real-world example: I used 3″ trim-head screws and backed them with 2″ pocket-hole screws when stud locations were off, preventing pull-out later.
It sounds obvious, but you should recheck the whole run after fastening because screws can shift things a hair.
Why this matters: small shifts create visible gaps or a wavy toe kick. After securing a 14-foot run I found one cabinet had dropped 1/16″, so I added a shim and re-torqued the screws.
5) Final check and finish shimming.
– Steps:
- Run your laser and a long straightedge across the entire run and note any spots off by more than 1/16″.
- Insert thin shims at the base or behind the frame where needed, trim shims flush with a sharp chisel or utility knife, and secure with glue and a small screw if necessary.
- Verify toe kick height with a tape measure from finished floor to the bottom of the rail; adjust to keep a straight reveal (typical toe kick is 4″ tall, 3-1/2″ finished).
– Real-world example: I trimmed shim tails flush and filled gaps with a thin bead of construction adhesive, which held a quarter-inch gap closed under heavy use.
Quick checklist before you walk away:
- Laser aligned and marked across run.
- First cabinet leveled and shimmed to 1/16″ increments.
- Cabinet faces flush with a consistent 1/8″ reveal.
- Fastened through frame into studs with proper-length screws.
- Final laser and straightedge check across full run; shim and adjust where off by more than 1/16″.
If you follow those steps, your cabinets will sit true and doors will line up without extra trimming.
Recommended Products

ACCURATE LEVELING: This Johnson Rotary Laser Tool is designed to complete both indoor and outdoor leveling jobs. The vertical self-leveling makes it equally suitable to aligning posts or footings; or indoors to layout walls or floors.

1150-FOOT RANGE: Powerful self-leveling Class 3R green laser (≤ 5mW) reaches up to 1150 feet when used with included detector, ideal for indoor and outdoor use

Horizontal self-leveling automatically aligns the DEWALT laser level to center
Why a Multi‑Line Laser Cuts Install Time
If you’ve ever stood on a job holding a level and thought this is taking forever, this fixes that.
Why it matters: a single room‑wide reference line cuts the repeated measuring and re‑leveling that slow you down. I set the multi‑line laser on a tripod at countertop height, project a continuous horizontal line across the room, and align all my cabinet faces to that one line instead of moving a bubble level between boxes. Example: on a 12‑foot run of base cabinets I align three cabinets at once to the laser, which saves about 30–45 minutes versus leveling each cabinet individually.
How to use it (step‑by‑step):
- Set the laser on a tripod at the height you want the cabinet top or tile edge to sit, then lock the head.
- Turn on the horizontal line and mark where it hits the wall studs or floor with a pencil every 2–3 feet.
- Place the first cabinet, shim to the line, and fasten it; then align the next two cabinets to that fixed line before screwing them in.
- Check the run by sighting down the laser; if the laser stays on the face of each cabinet, you’re good.
Real example: I installed 10 linear feet of 30‑inch base cabinets in a small kitchen and used the laser to get the faces within 1/16 inch across the run, instead of chasing 1/8–1/4‑inch differences with a bubble level.
Why it speeds tile work: the laser gives a straight guideline so your rows stay true from start to finish, which reduces cutting and re‑laying. Set the laser at the tile edge you want, snap reference marks every 18–24 inches, spread thinset, and lay tiles to the line; I kept a 20‑square‑foot backsplash straight this way and trimmed only two tiles instead of five.
Practical benefits you’ll feel:
- Hands‑free projection means you can work standing or kneeling without holding a level, so you’ll feel less fatigue.
- The beam gives a precise target for shims and adjustments, cutting the back‑and‑forth to a couple of quick moves.
- You turn iterative checks into one workflow, saving real clock time—expect 20–50% faster installs on typical jobs.
One quick tip: if the room is longer than the laser’s range, rotate the unit and realign off one fixed cabinet instead of re‑measuring the whole space.
Which Laser Features Matter (Planes, Range, Self‑Leveling)
If you’ve ever set a cabinet level and still had gaps, this is why.
How the laser’s planes affect your setup and accuracy: you need a three‑plane unit if you do cabinets and tile because it gives you one horizontal line for cabinet tops and two vertical lines for squaring corners. Why this matters: a horizontal line at the exact cabinet height keeps tops level across runs, and verticals let you align face frames and tile edges without re‑measuring. Real example: set the horizontal at 34 1/2” for a standard base cabinet height, then use the front vertical line to align the cabinet face frame and the back vertical on the wall line for plumb; you cut one setup and save 15–20 minutes. Steps to use it:
- Mount the laser at about waist height on a tripod.
- Set horizontal to 34 1/2″.
- Move cabinets into the horizontal and check each vertical at corners.
How range changes what jobs you can do: pick a laser with visible range to match the room size because the beam fades over distance without a receiver. Why this matters: if you work in open kitchens or large living areas, the beam needs to stay clear past the far wall so you don’t keep shifting the tool. Real example: in a 20′ × 30′ open kitchen you want at least a 50′ indoor range so the lines stay usable without constantly repositioning. Steps to match range:
- Measure the longest uninterrupted distance you’ll project across.
- Add 30–50% for flexibility.
- Choose a laser rated at or above that number.
Why self‑leveling prevents costly mistakes: you want an automatic pendulum so small tilt errors get corrected immediately, keeping lines true even on uneven floors or when the tripod slips. Why this matters: a 1° tilt at 20′ moves the line nearly 4.2″ off target, which ruins tile grout lines and cabinet fit. Real example: on a slightly uneven workshop floor, the pendulum re‑centers the beam so the cabinet face stays plumb while you shim the bases; you avoid refastening later. Steps to use self‑leveling:
- Place the laser roughly level within the unit’s specified range (usually ±4°).
- Wait for the pendulum to lock (most take 3–10 seconds).
- Verify a known plumb point with a 2′ level.
Battery life and mounting options that keep you working: you need at least 8–12 hours of runtime for a full day, or swap batteries on models that accept hot‑swap packs. Why this matters: losing power mid‑layout forces extra setups and slows you down. Real example: on an all‑day tile job, a laser with replaceable AA packs lets you swap in fresh cells between tile rows without recalibrating; you keep the horizontal line steady. Steps to manage runtime and mounts:
- Choose a laser with ≥8 hours runtime or quick‑swap batteries.
- Use a tripod plus a magnetic bracket for steel frames.
- Keep one charged spare battery or pack on the job.
Mounting flexibility for faster workflow: you want a unit with a standard tripod thread and at least one magnetic or clamp mount so you can place it on cabinets, steel studs, or a tripod fast. Why this matters: quick placement saves you the repeated measuring and re‑clamping that kills time. Real example: magnet on the back of a laser sticks to a metal stud to create a vertical reference while you tile a tall backsplash; you don’t need a ladder for every mark. Steps to use mounting options:
- Fit the laser to a tripod for long runs.
- Use the magnetic mount for metal surfaces.
- Clamp it to a board when you need an improvised stand.
Final quick checklist before you buy:
- Planes: get a three‑plane laser for cabinet tops and squaring.
- Range: match rated range to your longest room plus 30–50%.
- Self‑leveling: choose an automatic pendulum with ≤4° tolerance.
- Battery: aim for 8–12 hours or hot‑swap capability.
- Mounts: ensure tripod thread plus magnetic or clamp options.
Recommended Products

Remote-controlled operation - help maximize productivity on the job with remote control fine-tune adjustments horizontally up to 174 and vertically up to 3.5 in.

Increases Productivity With Faster Setups, Fewer Mechanical Parts, And Automatic Self-Leveling

PROFESSIONAL LASER 7-PIECE SET: Includes the LAX 600 G multi-line laser, 12V 2.0Ah Li-Power battery, SC 30 charger, SUB 10 base adapter, SWB 10 wall bracket, target plate, and protective carrying case.
Using Laser Lines for Backsplash and Tile Layout
Before you lay a backsplash, you need to know why a laser line matters: it keeps your tiles straight so you don’t waste time cutting and fixing mistakes. I used this on a 4 ft kitchen backsplash where the counter wasn’t level and it saved me two hours of trim work.
1) What laser to pick and why it matters
Why it matters: the right laser gives you stable, usable lines across the whole wall.
- Use a three‑plane laser with a self‑leveling pendulum and at least a 30‑foot range indoors. That gives you both a horizontal line and two vertical plumb lines so you can align cabinets and tiles at once. Example: on a 10 ft run I set the laser on the counter and the vertical line hit my corner perfectly, so my first tile course stayed true.
- Set the laser on a tripod or clamp 36–48 inches off the floor so the beam crosses the middle of standard 3×6 or 4×4 tile. This avoids aiming too high or too low.
2) How to establish your reference lines and why it matters
Why it matters: a consistent reference prevents crooked courses and misaligned grout joints. I once installed a subway tile backsplash behind a stove and using a laser kept the grout lines lined up with the kitchen hood trim.
Steps:
- Level the counter with the laser’s horizontal and mark a pencil line 1/8 inch above the counter for the bottom edge of the first tile.
- Turn on the vertical plane at your corner and mark its pencil line on the wall—this is your plumb reference.
- Snap additional pencil marks every 12–16 inches along the wall using the horizontal line so you can see it if the beam is faint.
3) How to follow grout lines and why it matters
Why it matters: following the laser keeps joint spacing consistent so grout looks professional. On a 6 ft backsplash I followed the laser through each course and avoided three awkward cuts.
Steps:
- Lay the first course along your bottom pencil line and use spacers for the joint width you want (3/16″ is common).
- Align the next course so the grout joint lines up with the laser; check at least every two tiles.
- If a tile drifts, remove it and re-seat it against the laser line immediately.
4) How to handle pattern repeats and why it matters
Why it matters: mapping repeats with multiple lines keeps motifs centered and prevents awkward partial patterns at edges. I installed a hex pattern with a 6‑inch repeat and used offset lines so the center motif stayed above the sink.
Steps:
- Measure the motif repeat (for example, 6 inches) and set one laser line at your centerline.
- Project additional lines offset by the repeat distance (6″, 12″, etc.) to the left and right.
- Dry‑lay a row using those lines to confirm the motif centers where you want it, then install.
Final tip: when you set your laser, double‑check two points—bottom and about 4 feet up—so you know the beam hasn’t shifted; a shifted line means re‑set.
Handling Uneven Walls/Floors With a Laser and Shims
If you’ve ever tried to hang cabinets on a bowed wall, this is why a laser and shims matter: they let you make every cabinet sit in the same plane so doors line up and countertops aren’t lopsided.
Why this matters: cabinets that follow a single reference plane stay square, doors close properly, and countertops don’t twist. Example: on my last kitchen job a 1/2-inch bow over 8 feet made the top row look crooked until I leveled to the laser, then used shims to correct the gap.
1) Set a horizontal laser reference and find the high point.
- Why this matters: the high point defines the plane you can’t raise, only match.
- Steps:
- Mount your laser on a tripod about 4–6 feet from the wall so the beam crosses the full run.
- Turn it on to a continuous horizontal line and mark where the beam hits studs or drywall every 16–24 inches.
- Look for places where the line breaks or dips; the highest mark is your reference plane.
– Real example: on an 8-foot wall I marked at 16-inch centers and found one stud 3/8 inch proud of the others.
2) Transfer that elevation to each cabinet or tile run.
- Why this matters: transferring the same elevation keeps every unit aligned to the same plane instead of following the wall.
- Steps:
- From the high-point mark, measure down to the cabinet top height you want and make a transfer mark on each cabinet location. Use a tape and a level to drop the mark vertically.
- Snap a chalk line or use the laser to connect those transfer marks across the run so every cabinet has a clear target.
– Real example: for 34-1/2 inch tall base cabinets I measured down from the laser line to place the cabinet-top marks so the countertop sits perfectly level.
3) Determine shim placement and sizes.
- Why this matters: shims close gaps so fasteners bite into solid backing and the cabinet sits flush to the plane.
- Steps:
- Set a cabinet in place and push it against the studs; note gaps at the back or bottom where the cabinet doesn’t meet the plane.
- Measure gap thickness with feeler gauges or a small ruler; then stack thin plastic or composite shims to match that measurement. Use increments like 1/32, 1/16, 1/8 inch for accuracy.
- Place shims at the top and bottom of the cabinet at stud locations and behind any drawer box supports before fastening.
– Real example: one cabinet needed three stacked 1/32 shims at the top to meet the laser, and a single 1/8 shim at the bottom by the toe kick.
4) Raise low spots to meet the laser and secure cabinets.
- Why this matters: raising low spots prevents twist and keeps consistent reveals between cabinets.
- Steps:
- With shims in place, recheck the cabinet top against the laser; adjust shim stacks until the laser hits the transfer mark across the cabinet.
- Temporarily screw cabinets together at the face frames to hold alignment, then fasten through the cabinet back into studs using 2-1/2 inch screws where possible. Trim shims flush after fastening.
- Use a tape to verify exact heights at a couple of points—measure from the floor to the cabinet top or from the laser line to the top.
– Real example: after shimming and screwing, I measured three points along a 10-foot run and had less than 1/16 inch variance.
Tips you can use:
- Use thin, noncompressing shims (plastic or composite) for final adjustment; wood shims can compress over time.
- Mark shim positions with a pencil so you can remove and re-seat if necessary.
- If the wall high spot is massive (over 3/8 inch), consider scribing or planing the cabinet or opening up the wall rather than trying to build up the rest.
Follow these steps and you’ll have cabinets or tile runs that follow one true plane, consistent reveals, and fewer alignment headaches down the road.
Recommended Products

Industry Leading 3 Year Parts Replacement (A $499 Value)

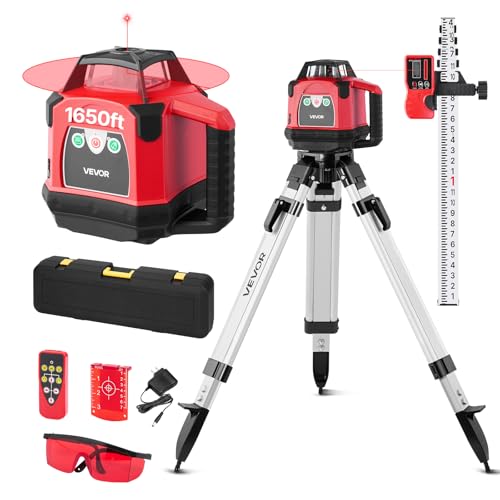
【High-Precision Red Laser Accuracy】 Achieve dependable measurements with ±1/8 inch accuracy at 100 feet. This Class II red laser (635 nm, <5 mW) delivers precise performance for tasks such as grading, foundation layout, and concrete alignment. A reliable choice for both indoor and outdoor professional applications.

SELF-LEVELING 3-PLANE LASERS: Laser Level X-, Y-, and Z-Plane Lasers project independently or together with accuracy of 1/8-Inch at 33-Foot (10m)
Troubleshooting On‑Site Problems (Visibility, Obstructions, Slope)
If you’ve ever worked a busy job site, this is why you need to check visibility, obstructions, and slope in that order. It keeps small issues from becoming big delays.
Why it matters: visibility problems make your layout unusable, which costs time and money.
1) Check visibility first.
1. See the beam clearly from the work point; if you can’t, move the laser closer by 10–15 feet or add a temporary shade like a $10 folding tarp over the receiver. Example: on a sunny flat roof I shaded the beam with a 3×5 tarp clipped to a tripod and restored a crisp line in under five minutes. If the beam still fades, lower the laser height so the receiver reading stays within the manufacturer’s listed range (usually 100–200 feet). Use matte gaffer tape on shiny receivers to cut glare and keep readings steady.
Why it matters: obstructions break lines and force rework.
2) Clear obstructions next.
- Walk the full beam path at ground level and at waist height so you spot items that interrupt the line.
- Remove or move doors, hand tools, stacked pallets, and loose fill; if you can’t move them, raise the laser by 6–12 inches or shift it laterally 1–3 feet until the line clears the blockage. Example: on a warehouse floor I found a 2-foot-high pallet rack lip blocking the beam; moving the laser 2 feet right solved it without relocating inventory. Mark any remaining spots with neon flagging tape so crew members avoid the path.
Why it matters: slope errors change elevations and ruin level references.
3) Fix slope and leveling issues last.
- Confirm the device is self-leveling within its spec (usually ±4°) by placing it on three known points and checking repeatability to 1/8 inch over 50 feet.
- If the unit won’t self-level, use a calibrated bubble vial or digital inclinometer to set the angle, then lock the head and record the offset on a sticker. Example: on a sloped driveway I verified the laser’s self-leveling failed, measured a 2° tilt with an inclinometer, and shimmed the tripod feet with 1/4-inch washers to stabilize the beam. Mark high points and plan shims in 1/8- or 1/4-inch increments where you expect final concrete or decking.
Glare and readability tips (quick list):
- Use matte tapes or polarizing screens on receivers.
- Lowering the beam height by 1–2 feet often improves contrast.
- For long runs, use a detector with a visible contrast mode.
Follow these steps in order—visibility, obstructions, slope—and you’ll avoid most on-site layout headaches.
Must‑Have Accessories: Tripods, Receivers, and Tape Checks
If you’ve ever started a layout only to redo it all afternoon, this is why.
You want a tripod that won’t let the laser wobble because any movement shifts your lines and costs you time. Pick a rigid tripod with a 5/8″-11 head or quick‑release plate and at least 48 inches of adjustable height so you can repeat setups. A concrete example: on a 60-foot hallway job I clamp the tripod at 42 inches for door headers, and I use the fine‑tuning crank to center the beam without guessing.
Before you set a long run, match a receiver to the laser so you can keep working in sunlight or over 150 feet. Why that matters: receivers sense a weak beam and give you a clear reference when your eye can’t. Use a receiver with adjustable sensitivity (high, medium, low) and LED plus audible output; for example, set it to high when you’re beyond 100 feet on an exterior grade.
You need a tape check routine to verify laser height against measured marks because lasers drift and batteries fail. Steps:
- Measure and mark two fixed points on a wall 20 feet apart at your target height.
- Set the tripod and laser at the midpoint, roughly 10 feet from each mark, and let the laser warm up 5 minutes.
- Use the receiver or the beam to read both marks; if readings differ by more than 1/8 inch, relevel or recalibrate.
- Record battery level and swap if below 50% to avoid mid‑job drift.
I always track batteries and store gear in cases to avoid downtime and damage. On one rainy framing job, a battery died and the spare was in a damp bag—cost me an hour; now I keep a labeled hard case with two charged batteries and silica packs. Use foam inserts to prevent shocks and close cases when you move between sites.
Quick checklist for your kit:
- Tripod: rigid, 5/8″-11 head, 48″+ height.
- Receiver: adjustable sensitivity, LED + buzzer.
- Tape check: two marks 20 ft apart, 5 min warm‑up, 1/8″ tolerance.
- Batteries: keep one spare at >50% charge, store in sealed case.
Follow those steps and you’ll cut rework and finish layouts faster.
Recommended Products

ROTARY LASER SET WITH TRIPOD: Includes LAR 300 rotary laser, REC 300 receiver with clamp, BST-S construction tripod, Hi/Lo elevation rod, hard case, and both D and AA batteries. for immediate use.

High-Precision Red Laser Accuracy:Achieve dependable measurements with ±1/8 inch accuracy at 100 feet using this Class II red lazer level (635 nm, <5 mW). This high-performance rotary laser level delivers precise results for grading, foundation layout, and concrete alignment. Also works as an outdoor laser level and a level laser alternative for both indoor and outdoor professional applications.
360-Degree Rotating Scan: Self-leveling rotary laser level for efficient site-wide leveling and alignment. ±5° self-leveling with manual mode. Variable speeds (0/60/120/300/600 rpm) and scan angles (0°,10°,45°,90°,180°) cover every task
Quick Checklist: Set, Verify, Secure (Final Alignment Steps)
If you’ve ever set a laser level and walked away to fix other things, this is why.
Why it matters: If you skip a strict order you can introduce errors that force rework, cost time, and ruin finish gaps. Example: I once reinstalled three cabinets after a neighbor bumped a loose level and shifted the beam by 1/8“, which created a visible 3/16” gap at one end.
1) Set the laser
Why this matters: a steady beam is your reference for everything else.
Steps:
- Place the tripod so the horizontal beam crosses the highest cabinet tops at about 60–72 inches off the floor—this keeps the beam above countertop clutter and out of typical lines of sight.
- Mount the laser and power it on. Wait 30–60 seconds for the unit to self-level.
- Fine‑tune by moving the tripod in 1–2 inch increments until the line is sharp and stable across the run.
Example: I set the tripod at the far left wall, moved it 2 inches right, and the beam tightened across five cabinets with no flicker.
Tip: If the beam wobbles more than 1/16“, re-level or check batteries.
2) Verify the reference
Why this matters: confirming the beam matches planned elevation prevents cumulative errors.
Steps:
- Use a tape measure to confirm the beam elevation at both ends of the run; measure from the finished floor to the beam to the nearest 1/16″.
- Check squareness by measuring diagonals between two opposite cabinet corners; they should match within 1/8″.
- Do a quick test: place a mark at the left end, rotate the laser 180° if possible, and re-check the mark—difference should be ≤1/16″.
Example: I measured 66 1/16″ at one end and 66 1/16″ at the other, confirming the beam matched my 66″ plan.
Tip: If you’re off more than 1/8″, recalibrate the laser or reposition the tripod.
3) Secure each cabinet in order
Why this matters: securing in the wrong order lets earlier units shift and ruins alignment.
Steps:
- Start at the highest, straightest cabinet and work outward—this gives you a stable datum.
- Shim low units to the beam, raising the cabinet until the top just kisses the laser line; use 1/16″ or 1/8″ shims and add only what’s needed—avoid overcompensating.
- Fasten in the sequence recommended by the manufacturer, tightening in stages: snug, then torque to spec. Use a calibrated torque wrench when a torque value is specified.
- After fastening each cabinet, re-check the beam alignment and diagonal measurements; adjust shims if a unit drops more than 1/16″.
Example: On a six-cabinet run I pulled the leftmost unit tight at 12 ft‑lbs, checked the beam, then tightened the next units in pairs, keeping each top within 1/16″ of the line.
Tip: If cabinets bow when tightened, add blocking behind the rail before final torque.
Final inspection and documentation
Why this matters: a final walk catches gaps before you leave and gives you a record if issues arise later.
Steps:
- Walk the run and look for gaps and misalignments greater than 1/16″; mark any corrective actions.
- Tighten hardware to final torque following the manufacturer’s sequence; re‑check tops against the laser after final torque.
- Record measurements: beam elevation, diagonal readings, shim thicknesses, and torque values on a single sheet or photo the notes.
Example: I photographed my notes showing 66″ beam, diagonals 120 3/8″ and 120 3/8″, and shim stack locations; the client signed the sheet.
Final fact: Leave one copy of the measurements on site and keep a digital copy for warranty or punchlist work.
Frequently Asked Questions
Can a Laser Damage Finished Cabinet Surfaces if Misused?
Yes — I’ve seen misuse cause scratch marks from abrasive mounts or dragging the unit, and certain cleaners or solvents used after exposure can trigger chemical reactions on finishes, so I’d handle lasers and cleaners cautiously.
How Do Laser Lines Perform Outdoors in Bright Sunlight?
They fade in bright sunspots and suffer reduced contrast, so I can’t rely on visible laser lines outdoors; I use high-output lasers, laser receivers, shaded positioning, or temporary covers to recover visibility and accuracy.
Can Multiple Lasers Be Synced for Very Long Runs?
Like a chain of lanterns, yes — I can sync multiple units using synchronization methods like Wi‑Fi, Bluetooth, or receivers to maintain alignment over very long runs, keeping beams coherent and expandable across distances.
What Maintenance Prolongs a Laser Level’s Calibration?
Keep it simple: I’ll store the laser in a clean storage case, avoid drops, wipe lenses after use, check mounts, and schedule periodic recalibration (manufacturer or certified service). I’ll record dates and test before big jobs.
Are Laser Safety Glasses Required for Commercial Jobs?
Yes — I require eye protection on commercial jobs; it’s about safety and regulatory compliance. I’ll wear laser safety glasses whenever beam power or site rules demand, and I’ll enforce their use for all crew members.