You hold two cut boards up to butt them together and the gap is either too tight or too loose by a hair—how do you get those edges to meet perfectly?
You stare at a tape measure and a square and wonder why your “close enough” still shows up as visible gaps or misaligned seams.
Most people trust worn tapes, flexible rules, or eyeballing and blame their skills instead of the tools and technique.
This piece will show simple checks and small changes that make your measuring repeatedly accurate to fractions of a millimeter, so joints close cleanly and finishes look professional.
You’ll learn quick calibration steps, which inexpensive tools actually help, and practical habits that stop common errors.
It’s easier than you think.
Key Takeaways
If you’ve ever tried to match a pro’s measurements at home, this is why it matters: getting measurements within a few millimeters prevents wasted materials and sloppy fits.
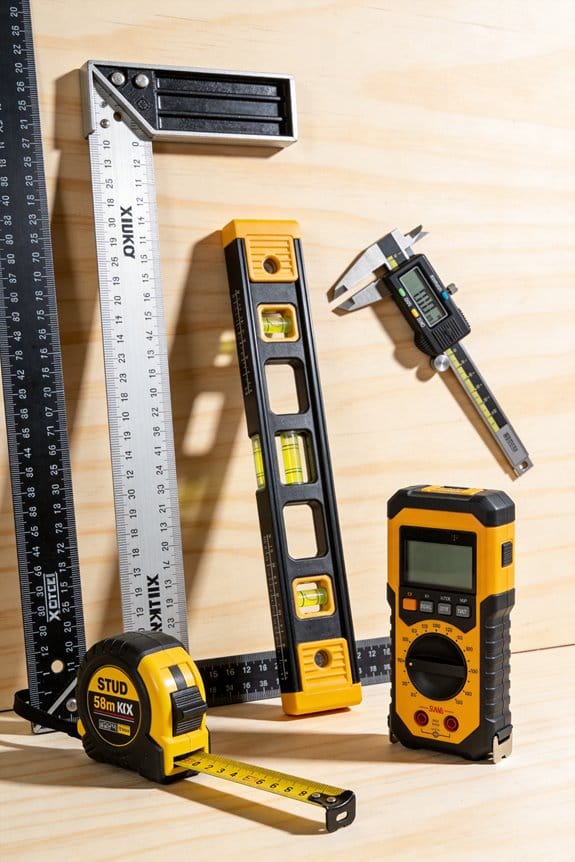
- Affordable, durable tape measures with reliable locks and laser-etched scales made professional accuracy accessible to DIYers.
- Why this matters: a worn, blurry scale loses you millimeters that add up to a ruined project.
- Example: a $15 5-meter tape with a metal hook and laser-etched markings keeps tenth-of-a-millimeter readability for months of garage use.
- How to use it:
- Lock the blade before you move it.
- Read at eye level so parallax error is under 1 mm.
- Measure twice, cut once.
Before you try to hit shop-level tolerances, standard references will save you hours and mistakes.
- Standardized reference tools and simple calibration routines let hobbyists match shop-level precision for repeatable results.
- Why this matters: a known reference shows whether your tool is off and by how much.
- Example: use a 1-meter steel rule and a 1 m × 20 mm aluminum reference bar kept in a dry box to check tapes and rulers every month.
- How to check:
- Place the steel rule on the bar.
- Align zero and read at the 500 mm and 1000 mm marks.
- Record any deviation; adjust your measurements or mark the tool.
Think of measurement technique like a muscle you train: consistent habits beat lucky guesses.
- Clear measurement techniques (eye-level reading, controlled tension, avoid snapback) reduce common DIY errors to professional tolerances.
- Why this matters: inconsistent tension and poor sightlines introduce several millimeters of error per measurement.
- Example: when measuring a 2.4 m door frame, hold the tape with 5 N of tension (about the force of holding a full coffee mug) and read at eye level to keep error under 2 mm.
- How to do it:
- Pull the tape until it’s straight with gentle tension.
- Lock the blade.
- Read and mark before releasing the lock.
If you want tools to stay accurate, basic upkeep is the answer.
- Practical checklists and maintenance (cleaning, inspecting, replacing stretched cloth tapes) preserve long-term accuracy across skill levels.
- Why this matters: neglect lets small errors grow into unusable tools.
- Example: clean your tapes with a rag and isopropyl alcohol after every dusty job; replace any cloth tape that stretches more than 2 mm over 1 m.
- Maintenance steps:
- Wipe blades and housings weekly.
- Inspect hooks and locks for play; tighten or replace if play exceeds 0.5 mm.
- Store tapes retracted in a dry place.
You don’t need expensive lab gear to prove your measurements are trustworthy.
- Traceable standards and shared practices (reference bars, certificates, periodic checks) created trust between DIY outcomes and professional work.
- Why this matters: documented checks let you show others that your parts meet a stated tolerance.
- Example: keep a one-sheet log with dates and measured deviations for your tools; show it when selling built furniture to back your fit claims.
- How to keep traceability:
- Check key tools monthly against your reference bar.
- Log date, tool, and deviation in millimeters.
- Keep the log with your project plans.
Why Early Measuring Tools Made DIY Inaccurate
If you’ve ever used an old cloth tape and then cursed a crooked cut, this explains why.
Why it matters: small measurement errors stack and can ruin a project. For example, I once built a bookshelf and three 1/8″ errors left a visible gap where the top should sit.
Cloth tapes stretch (material creep) and bias your measurements
Why it matters: a stretched tape gives consistent wrong lengths, so repeated cuts compound the error.
Example: a 6-foot cloth tape that stretches 0.5% becomes 6 ft 3/8 in, so three shelf cuts each off by that amount add almost 1-1/8 in total.
How to check and reduce it:
- Lay the tape next to a metal ruler or known 6 ft straight edge and note any difference in inches.
- If the tape reads longer by more than 1/16″, mark the true 6 ft on the tape with a permanent marker.
- When measuring, keep tension low — pull just enough to flatten the tape, about 1–2 lbf (roughly the weight of a small bag of sugar).
- Re-check the tape every 3 months if you use it weekly.
Cloth frays and absorbs moisture, changing dimensions
Why it matters: humidity and wear change the tape’s length and where the edge sits.
Example: you measure outdoors on a damp morning and later assemble indoors; the parts won’t match.
How to handle it:
- Never rely on threads at the tape edge; measure to a printed mark or a metal tab.
- Store the tape in a dry spot and wipe it before critical measurements.
- Replace tapes once fraying makes printed numbers hard to read.
Lack of rigid reference causes alignment and parallax errors
Why it matters: without a straight edge or fixed stop, your eye and placement shift, creating mistakes you can see.
Example: laying a cloth tape over a stair nose without a stop can move the tape and shift each step’s measurement by 1/8–1/4 inch.
How to avoid it:
- Use a square or rigid straightedge as a reference when marking cut lines.
- Clamp the tape or the workpiece to prevent movement.
- For repeat cuts, use a stop block set to the exact measurement and test the first piece.
Practical checklist for using old measuring tapes
Why it matters: a short routine quickly reduces cumulative error.
Example: before cutting trim for six windows, I saved time and rework by doing these three quick checks.
Steps:
- Calibrate: compare tape to a metal ruler at 1 ft and 6 ft; mark discrepancies.
- Measure: keep tension low and measure to a printed mark or metal tab.
- Verify: measure critical dimensions twice, and measure the cut piece after cutting.
- Use stops: for repeated cuts, always use a clamped stop block.
One last tip: for anything you can’t afford to be wrong on (cabinet faces, door openings), use a rigid steel tape or a metal ruler instead of the cloth tape.
Woven Metal and Retractable Tape Measures: A DIY Revolution

If you’ve ever pulled a tape that sagged and then re-measured, this is why.
You want accurate measurements because mistakes cost time and materials. I remember using cloth tapes that stretched after a few pulls; the woven-metal core fixes that by resisting elongation, so your scale markings stay true.
Here’s how the woven-metal weave helps your tape work better, and how to use it.
- Why it matters: the metal weave keeps length stable under tension.
- Real-world example: when you measure a 6-foot bookshelf, the woven core stops the tape from stretching and adding extra 1/8″ that ruins shelf alignment.
- How to use it:
- Pull the blade smoothly to the mark you need.
- Hook the end, take your reading, and hold steady for one extra second.
- Retract slowly until the blade clears a few inches, then let it snap the rest.
The retractable mechanism matters because it protects the blade and speeds work.
When you retract, the spring-driven spool winds the blade back without you folding it. For a real job: on a 10-foot ceiling run, retracting gently prevents kinks that would make you re-measure or replace the tape. To preserve the mechanism, follow these steps:
- Keep your thumb on the housing tab while retracting.
- Let the tape wind at about 2–3 feet per second; faster risks jamming.
- Stop if you hear a grinding sound and inspect.
Take care and you’ll keep the tape accurate longer.
For routine maintenance, one quick wipe and inspection saves headaches. Example: after cutting lumber outdoors, wipe the blade with a dry rag and spray a light silicone lubricant on the spool once a month if you use the tape daily. Specific maintenance steps:
- Wipe blade with a clean, dry cloth after each use.
- Inspect for kinks or frays; replace the tape if you find a kink deeper than 1/8″.
- Apply one quick spray of silicone to the spool every 30 days of heavy use.
Avoiding damage is simple and practical.
Don’t let the blade snap back uncontrolled or bend it around sharp corners. If you drag the tape over a rough edge while measuring a 4×4 post, you’ll nick the woven threads and get a permanent weak spot. When you must measure over edges, support the blade with your finger or a scrap board so it contacts smooth surfaces only.
Recommended Products

Retractable Screen Door:Nano PET high-strength mesh provides safety protection,without leaving a gap. Made of tightly woven,high light transmittance, ventilation and breathability. The metal frame is made of high-quality aluminum profiles, which have high strength, good toughness,and long service life.Please note: When the width of the screen door is greater than 55inch, we default the screen door is double-open door.

[25FT Retractable Tape] The maximum measuring length of the retractable measure ruler is 7.5m/25ft, long enough to meet almost all measuring needs. You can pull the tape to the proper length according to your measuring project, and it is also easy to shrink back into the shell

High Quality Assurance: The MulWark 26-foot tape measure is crafted from premium materials, featuring an 8m-long, 25mm-wide, 0.15mm-thick blade. It offers excellent impact resistance, rust prevention, and is free from chemical odors. It can extend horizontally up to 7 feet and vertically up to 13 feet without breaking or bending, ensuring long-lasting durability
Locking Blades and Curved Steel: Better Usability and Accuracy
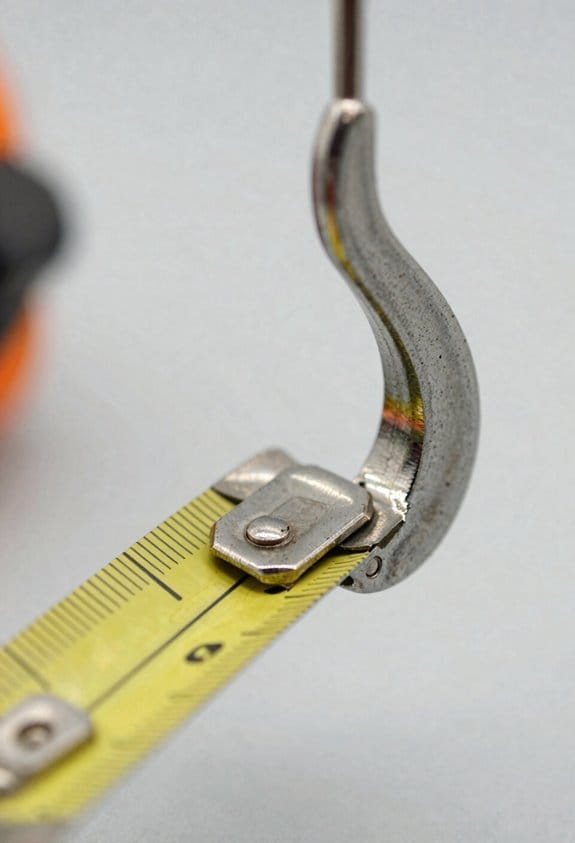
If you’ve ever stretched a tape measure across a room and tried to read the mark while holding the end, this is why a locking blade and a curved steel profile matter.
Why it matters: the lock keeps your reading steady and the curve prevents the blade from sagging under its own weight.
– Example: when you measure a 20-foot run for baseboard, lock the blade at 20.00 feet and you won’t chase a moving end while you mark the wall.
How the lock helps (WHY first): a locked blade stops recoil and movement so your single-handed reading is repeatable.
- Hook the tape on the far edge.
- Pull the blade out to the mark.
- Engage the lock firmly — you should feel a positive click.
- Read the measurement at eye level with the tape flat against the surface.
– Example: on a 12-foot ceiling joist, locking the tape lets you read the mark without a second person holding the hook.
How the curved steel helps (WHY first): the curve gives the blade stiffness so it can span distances without drooping or bending.
- Pull the blade out slowly until it spans the distance.
- Keep tension so the curve maintains a straight line.
- Avoid letting the blade twist; twist causes back-bow errors.
– Example: you can measure from one stair nose to another over a 10-foot span and let the curve hold the blade straight while you mark the far point.
Care and features that affect accuracy (WHY first): good tempering and coatings keep scale markings readable and dimensions stable over time.
- Inspect the tape: look for worn or faded marks and rust spots.
- Clean the blade after each wet job and dry it before retracting.
- Retract smoothly; don’t slam the blade back into the case.
- If the lock sticks, lubricate the mechanism with a drop of light oil and exercise it 10 times.
– Example: a chrome-coated 25-foot tape kept clean and retracted after each job held within 1/16 inch over a season, while a rusty tape drifted several 1/8 inches.
Practical numbers and expectations (WHY first): know the limits so you can trust your measurements.
- Expect a straight, curved tape to span reliably up to about 10–20 feet depending on thickness.
- For runs over 30 feet, use a rigid rod or have a helper — don’t rely on a single tape span.
- Aim to keep accuracy within 1/16 inch for carpentry layout; replace blades that show more than 1/8 inch drift.
– Example: for a 25-foot exterior trim run, measure in two overlapping 12-foot spans rather than trying to hold a single 25-foot extension.
Final quick checklist (WHY first): a short routine keeps you accurate every time.
- Check lock engages with a click.
- Verify blade curves and spans without sagging.
- Clean, dry, and retract gently after use.
– Example: before cutting trim, use this checklist and you’ll avoid re-cuts and wasted material.
Recommended Products

Our newest hand carry set, the 26” 5-drawer Motobox is here! Now featuring 53% more storage capacity to add your other favorite tools. This is the perfect portable bike tool box set up for the shop, garage, trailer or back of the truck to keep tools organized and with you when you need them. The tools selected in the 103-piece metric set were created to provide the most commonly used tools to keep your bike race ready to hit the track, trails and road. Tools are encased in three EVA foam tool storage trays designed to fit securely in the top compartment and two drawers to keep organized with no shifting during motion.
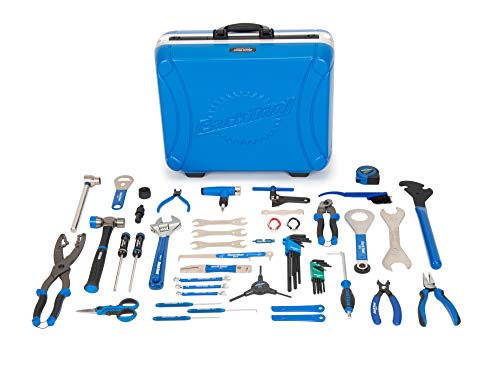
A professional level bicycle tool set selected and designed for portability

Whether you're planning to rip it up at the local motocross track or hit the trails with your family and friends this weekend, you need a quality set of tools you can depend on. Gone are the days of showing up with your rattle-box of mismatched, unorganized tools. The tools selected in this 103-piece metric moto tool box was created to provide everything you need to make sure your bike is dialed in. Designed for professionals and the weekend warriors in mind, it's the perfect set up to have in the pit or in the back of the truck.
19th‑Century Precision Tools and Why They Mattered
If you’ve ever handled a bent tape measure and missed a fit, this is why.
Why it matters: you need measurements you can trust so parts fit without trial and error. In the 1800s makers stopped guessing and started using tools that gave repeatable, tiny readings.
Micrometers turned rotations into precise linear motion by using fine screw threads. That matters because a 0.5 mm thread pitch on a micrometer spindle moves the anvil 0.5 mm per full revolution, so one-quarter turn equals 0.125 mm — a readable, predictable change. Example: a gunsmith in 1870 could use an artisan micrometer with a 0.5 mm pitch to make identical firing pins to within 0.05 mm, so cartridges fed reliably.
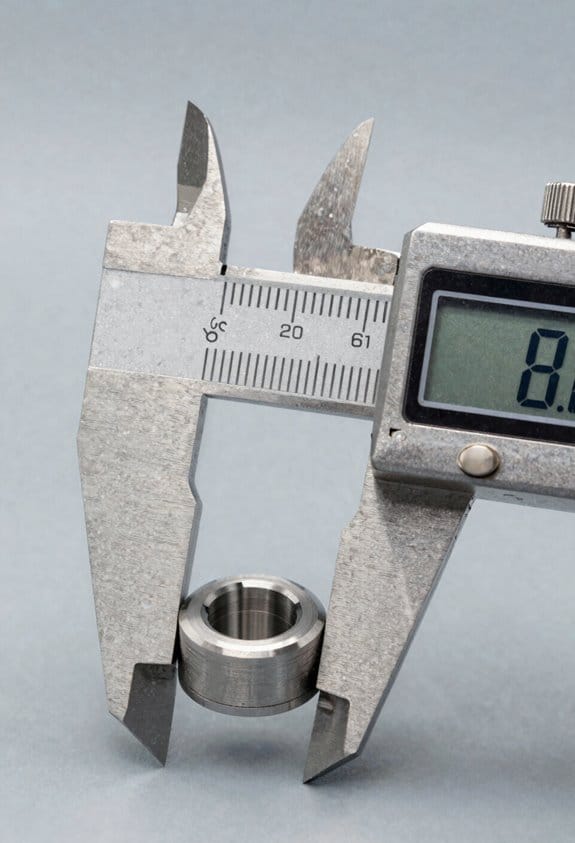
Clockmakers refined tiny gear teeth and vernier scales to make compact calipers and pocket instruments for field use. Why that matters: you could carry a measuring tool and compare a part directly to a gauge on the spot. Example: a watchmaker measuring a balance staff with a vernier caliper would align the jaws and read down to 0.02 mm, fixing a loose wobble quickly at a client’s home.
Before you pick up a micrometer or caliper, know this: calibration and technique control accuracy. Example: if you zero a micrometer against a certified gauge block and then measure three identical shafts, your variation should be under 0.02 mm if you use a light, consistent closing force.
How to use these tools reliably:
- Calibrate: close the micrometer on a gauge block rated to 0.01 mm and set zero.
- Measure: place the part between anvil and spindle, turn the ratchet until it clicks.
- Read: note the main scale and thimble; combine them for the final value.
- Repeat: measure the same spot three times and average the results.
Practical tip: use a light, repeatable force — about the same as turning a small screwdriver — and clean mating surfaces before measuring. A speck of grit can add 0.05 mm or more.
These 19th-century advances cut guesswork, let small shops meet factory tolerances, and made measurements you could share across collaborators. Example: a small carriage maker could send a part spec measured with a micrometer, and a distant shop could reproduce the part to the same 0.05 mm tolerance using the same gauge and steps.
Standardizing Yards, Inches, and Reference Bars
If you’ve ever struggled to make two tools read the same, this is why.
Why it matters: you need consistent lengths so parts fit and measurements repeat.
A standard yard let shops match measurements to the same number, so parts from different places fit together. For example, a machinist in 1910 compared a newly made steel rule to the national yard bar in a calibration lab, adjusted the graduations, and saved months of rework on engine parts. To do this you:
- Bring the rule and the reference bar into a temperature-controlled room at 20°C (68°F).
- Lay them flat on a calibration table with no clamps.
- Use a magnifier and feeler gauge to align marks; adjust or mark corrections.
- Record the differences at 0, 6, 12, 18, and 36 inches.
Follow those steps every year.
What a reference bar actually is and why you can trust it.
Why it matters: a good bar gives you a physical standard you can compare tools to, so your tapes and calipers read the same. A reference bar is a stable metal artifact — usually hardened steel or an alloy like Invar — made with straight edges and finely machined end faces, so it resists bending and thermal expansion when handled correctly. For example, a woodworker calibrating a set of shop calipers used an Invar bar to avoid a 0.005-inch error that a carbon-steel bar introduced on a hot afternoon. To use one:
- Keep it in a protective case when not in use.
- Clean it with alcohol and a lint-free cloth before comparing.
- Handle by the ends with gloves to avoid oil transfer.
How the yard became a reliable unit you can base tools on.
Why it matters: a defined yard eliminates guesswork so everyone measures the same length. The yard was successively tied to physical artifacts — metal bars — and later to scientific criteria such as the meter, giving the yard a reproducible value. For example, an early 20th-century tailor compared cloth measurements with a brass yardstick standardized to the national yard, preventing a batch of uniforms from being cut too short. If you want the same confidence:
- Prefer tools whose graduations are certified against national standards.
- Ask for calibration certificates showing the reference used and date.
- Recheck tools annually or after any drop.
How to pick, care for, and verify your measuring tools.
Why it matters: proper choice and care keep errors under control so your projects meet tolerances. Pick a tape with a sewn-end rivet set true to the zero, a steel rule hardened to resist wear, or a caliper with a digital readout that can be zeroed. For example, a contractor saved weeks by swapping a stretched cloth tape for a steel tape and verifying zero against a reference bar before layout. Follow these steps:
- Choose materials: stainless or hardened steel for rules and tapes, Invar for reference bars when you need thermal stability.
- Store at room temperature (18–22°C) and away from direct sunlight.
- Calibrate: compare zeros and three points along the length (start, mid, end) and log values.
- Clean after use, oil lightly if steel, and never drop precision tools.
Quick field checklist you can use before a job.
Why it matters: a short checklist avoids common errors so your first cut or assembly fits. Example: before installing window frames, a carpenter verified three measurements and avoided rework. Do this:
- Verify zero against a known reference or a certified tape.
- Check at least one mid-length point for drift.
- Note temperature and record readings.
- Replace or recalibrate any tool with errors over 0.005 inches per foot.
If you follow these steps you’ll reduce mistakes from stretched tapes and mismatched tools, and you’ll know when to trust a measurement or call for recertification.
Gauge Blocks and Spectroscopic Calibration for Mass Accuracy
Think of gauge blocks like Lego for precision parts; they let you build exact lengths by stacking polished metal blocks and wringing them together. Why this matters: you can create a known length to calibrate your micrometer to within 0.5 µm if you use Grade 0 or better blocks and control conditions. Example: when I set up a bench micrometer, I stack a 25.000 mm and a 10.000 mm block, clean both with lint-free cloth and alcohol, then wring them until they stick—your micrometer should read 35.000 mm; if it reads 35.002 mm, adjust or note a +2 µm error.
Before you rely on a spectroscopic method for mass accuracy, know why it matters: spectroscopy links measurements to physical constants so your scale doesn’t slowly drift. Example: a lab that verifies small balances measures the absorption line of an atomic gas cell with a known frequency and compares the frequency-derived mass standard to the balance reading, catching a 0.01% offset. Steps to do a basic spectroscopic check:
- Choose a stable reference line (for example, the R(7) line of acetylene at 1530 nm).
- Use a laser locked to that line and measure the frequency with a frequency counter traceable to a local standard.
- Convert that frequency to the mass equivalent via the calibration chain your lab uses and compare to the balance reading.
- Record the difference and apply correction factors if needed.
When you calibrate your handheld tools, document the environment because temperature and humidity change readings. Why that matters: a 1 °C change can move steel gauge blocks by about 11.6 µm per meter, which scales to measurable error on small stacks. Example: calibrating a caliper in a shop at 23.0 °C versus 20.0 °C produced a 0.035 mm shift on a 100 mm master; I adjusted the caliper and rechecked. Steps for environmental control:
- Measure air temperature with a calibrated thermometer to ±0.1 °C.
- Measure relative humidity with a hygrometer.
- Wait 30 minutes for your tools and standards to equilibrate to the room.
- Log the values on your calibration sheet.
Follow set calibration intervals and keep certificates so you can trace measurements back to primary standards. Why that matters: traceability lets an auditor or customer verify your measurement chain. Example: I keep a folder with calibration certificates for my gauge blocks showing the last ISO 3650 report and balance certificates showing the last two adjustments; when a part fails inspection, I can prove whether the issue was tooling or measurement drift. Steps to manage records:
- Create a folder (digital and physical) for each standard with certificate scans.
- Note next-calibration due date and the person responsible.
- Keep correction factors with the certificate, dated and signed.
Handle and maintain gauge blocks and balances with simple, repeatable routines to avoid damage and drift. Why that matters: small scrapes or oil can change a block’s effective length by micrometers. Example: after I accidentally touched a block with bare fingers, a smudge created a measurable 3 µm error on a stacked length until I cleaned and re-wrung it. Steps for handling and maintenance:
- Wear lint-free gloves when touching blocks.
- Clean blocks with low-lint wipes and isopropyl alcohol, then dry with filtered air.
- Wring blocks gently—never force a fit.
- For balances, perform regular internal calibration or use certified weights before critical runs.
If you want usable results in a DIY shop, pick realistic tolerances and tools. Why that matters: chasing sub-micron accuracy needs equipment and environment most shops don’t have. Example: for home machining, aiming for ±0.01 mm with a Grade 1 block set and a quality caliper is achievable; aiming for ±0.0001 mm is not. Steps to set practical goals:
- Define the part tolerance based on function.
- Choose standards and instruments that have stated uncertainty lower than half your tolerance.
- Schedule periodic checks and record outcomes.
Keep your process simple, repeatable, and documented so your measurements remain trustworthy. Why that matters: reproducible steps let you find whether a part or a tool caused a problem. Example: in one job, repeated measurements with the same documented routine showed the balance was drifting by 0.02% per month, so we swapped it before producing rejects. Steps to keep reproducibility:
- Write a one-page calibration checklist for each tool.
- Train anyone who will use the tools on that checklist.
- Review logs monthly and act on trends.
Bold the most critical word in each paragraph for quick scanning.
Affordable Tape Measures and the DIY–Pro Gap Closure
If you’ve ever measured a long board and gotten different lengths each time, this is why.
Why this matters: small errors add up on long runs and can ruin a project.
Pick the blade for stiffness and markings
Why this matters: a stiffer blade keeps the hook and scale aligned so your long measurements stay true.
- Look for a 25–30 mm (1–1.2 in) wide steel blade with a curvature (tape “bow”) rated to at least 3.5 m (11.5 ft) stand-out; that curvature resists sag when you measure across a room.
- Prefer blades with laser-etched or stamped markings rather than printed scales; laser-etched numbers stay readable after months of use.
Example: when you measure a 12 ft shelf across two studs, a 25 mm laser-etched blade with 3.5 m stand-out will give you the same reading every time instead of drooping 1/8 in and throwing off your cut.
How to account for temperature and traceability
Why this matters: metal expands and contracts with temperature, so your measured length changes.
- Measure at the job-site temperature or note the temperature and the tape’s coefficient (typically ~11–12 μm/m·K for steel).
- For a 3 m (10 ft) measurement, a 10°C change shifts length by about 0.33 mm (0.013 in); if you need +/-0.5 mm accuracy, work at the same temperature as calibration.
Example: if you calibrate a tape at 20°C but measure outside at 0°C across a 6 m run, expect roughly 0.8 mm difference and adjust the cut accordingly.
Choose a reliable lock and case
Why this matters: a bad lock or weak case means readings move while you work.
- Test the lock in-store: pull the blade out to 2–3 m and let go briefly; if it slips more than 1 mm, try another model.
- Pick a case with a rubber bumper and at least a 3:1 belt clip screw rating so it survives drops.
Example: on a framing day, a tape with a solid lock and rubberized case survived multiple ladder drops and kept its zero, while a cheap one lost its hook alignment after two falls.
Quick checklist before you buy
Why this matters: following a short checklist saves wasted money and time.
- Blade width: 25–30 mm.
- Stand-out: ≥3.5 m for long runs.
- Markings: laser-etched or stamped.
- Lock test: <1 mm slip at 2–3 m.
- Case: rubber bumper and sturdy clip.
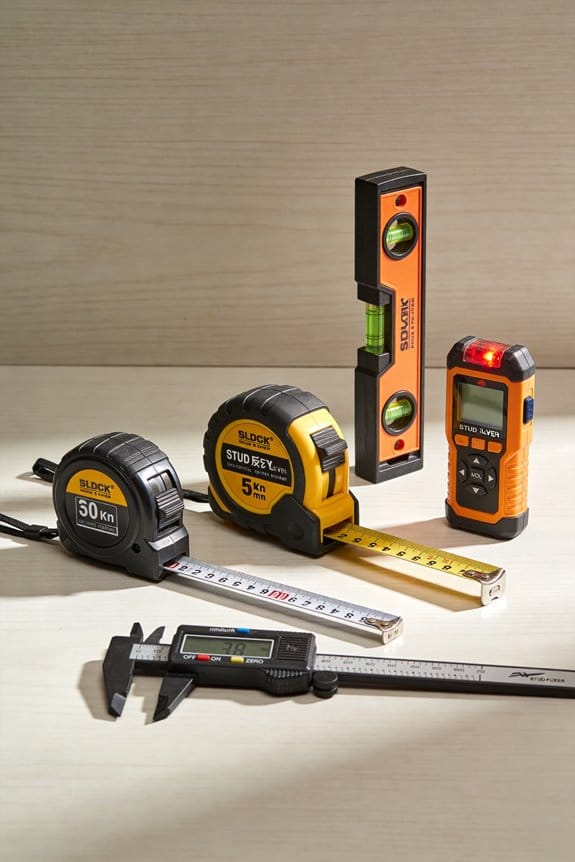
Example: I bought a $15 tape that met all five items and it matched my calibrated references within 0.5 mm on 4 m checks.
You don’t need an expensive pro tape if your needs are light-pro or serious DIY.
Why this matters: careful selection gives you professional-level accuracy without the pro price.
– Stick to the checklist and you’ll close the DIY–pro gap for most interior tasks.
Recommended Products

Crafted from Heavy Weight CNC Machined aluminum components - Assembled with 34 Swiss-turned stainless-steel parts - Guide Bar meticulously made of custom rolled steel

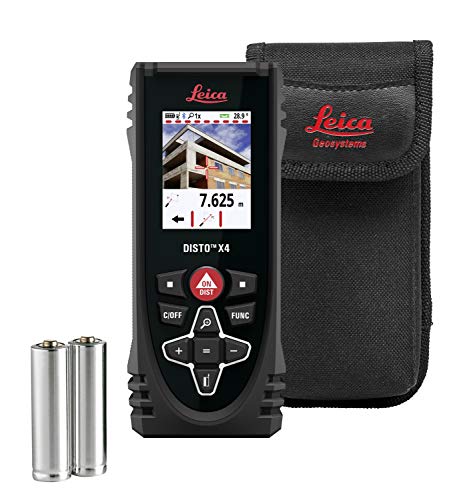
[Effortless Measuring, Near or Far] Combines a 12ft digital tape measure and a 330ft laser distance meter in one compact tool—no need to switch devices. Easily handle short, detailed measurements for woodworking or long-distance measuring for home renovation, construction, and DIY projects with speed and accuracy

DIGITAL VIEWFINDER: delivers 5.0 megapixels with adjustable zoom to locate the laser spot at far distances.
Digital Measurement Tools: Laser Meters and Modern CMMs
Think of distance measuring like using a tape measure that talks back to you.
Laser distance meters give you fast, contactless distance readings by timing light pulses or measuring phase shifts; this matters because you can measure rooms or sites in seconds without a ladder. For example, point a $100–200 laser meter at a far wall and you’ll get a 10–50 meter reading in under 2 seconds with ±1–3 mm accuracy on many consumer models. If you want a clear step: 1) aim at a painted wall, 2) hold steady for 1–2 seconds, 3) record the readout — repeat from a corner for a baseline. Use a tape or tripod if you need repeatability to the millimeter.
The difference between short-range sensors and long-range lasers is the tradeoff between resolution and reach.
Laser triangulation sensors are for short-range, high-resolution tasks because they measure angle and displacement across a small baseline; that matters when you need sub-0.1 mm detail on parts under 1 m. Example: mount a triangulation sensor 200 mm from a machined bracket and scan across five passes at 0.1 mm spacing to capture surface profile. Steps: 1) secure the part, 2) set sensor distance to the specified 200 mm, 3) sweep at the chosen spacing, 4) save the point cloud.
Before you send a part out for inspection, understand what CMMs actually deliver.
Modern coordinate measuring machines provide sub-micron positional data by probing parts mechanically or optically across multiple axes; that matters because manufacturers use CMM data to certify tolerances like ±0.01 mm on critical features. Real-world example: a production aerospace flange inspected on a bridge CMM will have its bolt-circle concentricity reported to 0.005 mm and a full report exported as a .csv. If you plan to use a CMM in your shop, do this: 1) fixture the part rigidly, 2) choose a probe strategy (touch probe for form, optical for delicate surfaces), 3) run a calibration sphere first, 4) execute the program.
You can bridge DIY and shop accuracy with portable metrology rigs.
Portable arms and laser trackers bring shop-grade measurements into the field; that matters when you must measure assemblies that won’t fit in the lab. Example: use a 6-axis portable arm to measure a welded frame on-site — capture key dimensions in 10–20 minutes and export to CAD. Practical steps: 1) mount the arm on a stable base, 2) warm up the device for its recommended time, 3) perform a quick self-check or calibration, 4) probe the defined 6–10 datums.
Use specific tools for the job and follow the simple routines above to get reliable results.
Recommended Products

This unit contains a Class II Laser with 1mW output

PROFESSIONAL PARTICLE COUNTER: CEM with 20 years of R&D experience in the particulate sensor. With the mie-scattering principle, it detects 6 different particles sizes simultaneously, including 0.3μm, 0.5μm, 1μm, 2.5μm, 5μm, and 10μm. With a variety of air quality monitoring functions, HCHO TVOC CO2,etc
Quality and precision at your fingertips
How to Choose the Right Precision Tool for Your Project
If you’ve ever picked the wrong measuring tool and had to redo a job, this will save you time and money.
Why this matters: choosing the right tool keeps your parts within tolerance and prevents rework.
1) What tolerance do you actually need?
Why this matters: the tolerance determines whether a cheap tool will do or if you need precision kit.
Steps:
- Measure the tolerance in millimeters or inches — write it down (for example, ±0.05 mm or ±0.002 in).
- Match tool resolution to that tolerance: use tape measures for ±3 mm or worse, calipers for ±0.1–0.5 mm, micrometers for ±0.01–0.05 mm, and CMMs for ±0.005 mm or better.
Example: when machining a shaft requiring ±0.01 mm, a micrometer or CMM is the right choice because a caliper (±0.1 mm) will let you miss the spec.
2) What does the material demand?
Why this matters: the wrong contact method will deform soft parts and give false readings.
Steps:
- Identify material stiffness: soft/flexible (rubber, thin sheet metal), medium (aluminum), or hard/stable (steel, ceramics).
- Pick contact vs. noncontact: use gentle-contact gauges or soft-tip calipers for flexible materials; choose laser scanners or CMMs with noncontact probes for hard, delicate finishes.
Example: measuring a silicone gasket? Use a soft-tip caliper or optical scanner so you don’t compress the part.
3) Will the environment affect readings?
Why this matters: temperature, dust, and vibration change measurements and ruin accuracy.
Steps:
- Check workshop temperature stability; if it varies more than ±2 °C, use temperature-compensated instruments or measure in a climate-controlled room.
- Assess dust and vibration: for dusty shops, protect electronic tools; for high-vibration setups, prefer robust mechanical gauges or isolated CMM tables.
Example: in a welding shop where ambient heat swings 10 °C, you should avoid relying on high-precision hand tools without compensation; a CMM in a controlled booth works better.
4) How portable and repeatable must the tool be?
Why this matters: a tool that’s accurate but immobile or inconsistent won’t fit field jobs.
Steps:
- Decide portability: handheld laser meters and calipers for field checks; benchtop CMMs or fixed gauges for shop floor repeatability.
- Check repeatability specs: look for quoted repeatability like ±0.01 mm; test by measuring the same feature 10 times and record variation.
Example: if you’re doing quality checks on an assembly line, use a go/no-go gauge or fixed-height comparator for fast, repeatable checks rather than dragging out a CMM.
5) What should you spend?
Why this matters: overspending wastes budget, underspending costs you with errors.
Steps:
- Set required accuracy first, then buy the cheapest tool that meets that spec.
- Factor in training and maintenance: a $50 caliper may be fine, while a $50,000 CMM needs trained operators and calibration.
Example: if you only need ±0.5 mm for wood furniture, spend under $100 on a decent digital caliper instead of a coordinate machine.
Quick checklist to decide right now:
- Write your tolerance in units (mm or in).
- Note the material and environment.
- Choose contact for soft parts, noncontact for hard/delicate parts.
- Test repeatability with 10 repeated measures.
- Buy to the required accuracy and budget for calibration/training.
A final tip: keep a small log with one line per job — tolerance, tool used, and measurement spread — and you’ll quickly see what works.
Recommended Products

Ergonomic - The Electronic Caliper is light, comfortable, easy to use, and constructed with features that have made Starrett slide calipers the machinist's first choice for many years.

Quality Made - The Starrett Solid Rod Inside Micrometer Set has adjustable insulated rods marked with length, hardened and ground advils along with quick-reading figures, and provides years of reliable service.

DURABLE CARBIDE-TIPPED: Micrometer Set features carbide-tipped contact points, providing exceptional wear resistance and durability. These carbide tips ensure that the micrometers maintain their precision even after repeated use, particularly when measuring hard or abrasive materials. The carbide tips also help reduce the risk of damage to the workpiece, ensuring consistent, accurate measurements over time while extending the life of the tool.
Simple Calibration and Care to Keep DIY Tools Professional‑Grade
Here’s what actually happens when you skip simple checks: your measurements slowly drift and projects don’t fit together. You want tight joints and repeatable cuts, so check tools regularly to avoid wasted material and time.
Why this matters: small errors add up quickly on a long project. Example: if a table leg is off by 1/16″ on each corner, the table top won’t sit flat; that gap multiplies across four legs.
1) How to verify mechanical tools against a standard
Why this matters: comparing to a reference tells you if a tool is worn or misaligned.
Steps:
- Use a certified gauge block or a calibrated steel ruler as your reference.
- Lay the ruler on a flat surface and hold the measuring vice or caliper to the ruler edge.
- Read at three positions: left, center, and right; record differences in millimeters or thousandths of an inch.
- If readings differ by more than 0.1 mm (0.004″), adjust or service the tool.
Example: I matched a worn vernier caliper to a 150 mm gauge block and found a 0.07 mm drift on the right jaw, so I cleaned and re-lapped the faces to restore accuracy.
2) How to keep digital tools reliable
Why this matters: electronic drift and dead batteries cause false readings that cost cuts and time.
Steps:
- Reset zero before each session by closing the jaws and pressing zero, then verify with the gauge block.
- Replace batteries every 6 months or when the low-battery icon appears; use fresh alkaline or recommended lithium.
- Keep contacts clean: wipe with isopropyl alcohol and a lint-free cloth.
Example: a digital caliper gave inconsistent readings on site until I replaced a weak battery and the error disappeared.
3) How to inspect tapes and hooks
Why this matters: bent hooks and slack change the effective length at the tape tip.
Steps:
- Pull the tape out 3 ft (1 m) and hold the hook against a square edge; measure that 1 m against a calibrated ruler.
- Check that the hook moves freely about 0.5 mm (0.02″) for the hook-compensation feature; if it’s stiff or bent, bend it back carefully or replace it.
- Test tape tension by letting 5 m (16 ft) extend and retract; if it snaps back sluggishly, the spring may be worn.
Example: I measured a 5 m tape against a known 5 m rod and found 2 mm slack caused by a bent hook, so I replaced the tape for layout work.
4) How to store and protect tools
Why this matters: humidity and shock shorten tool life and change accuracy.
Steps:
- Keep tools in padded cases or on foam-lined racks, not loose in a toolbox.
- Use silica gel packs in cases and aim for workshop humidity under 60%.
- Never drop precision tools; if a tool is dropped more than 1 m (3 ft), recheck calibration before use.
Example: I store micrometers in their case with a desiccant pack and check them monthly; last winter the pack prevented rust after a humid delivery day.
5) Daily habits that preserve precision
Why this matters: small routines prevent big repairs and maintain consistent results.
Steps:
- Wipe contact surfaces with a dry, lint-free cloth after each use.
- Log checks on a simple sheet with date, tool, and measured deviation; keep entries for 12 months.
- Schedule a full calibration every 6–12 months depending on tool usage.
Example: my shop log showed a caliper drifting over three months, so I sent it for professional calibration before it ruined a job.
Follow these concrete checks and you’ll keep your tools giving repeatable readings, which saves material, time, and frustration.
Frequently Asked Questions
Can Everyday Smartphones Replace Dedicated Digital Measuring Tools Reliably?
They can sometimes, but I wouldn’t trust them for critical work: smartphone accuracy varies widely, and app calibration is often rudimentary; for precise or repeatable measurements I prefer dedicated tools with traceable standards and better stability.
How Do Environmental Factors (Humidity, Magnetic Fields) Affect Household Measurements?
Honestly, it’s not dramatic: humidity effects can swell tapes and warp wooden rulers, shifting readings; magnetic interference can confuse digital sensors and compasses, so I’d keep instruments dry and away from strong magnets for reliable household measurements.
Can Nonprofessionals Legally Certify Measurements for Construction Permits?
No — I can’t usually certify measurements for permits; citizen metrology helps, but permit affidavits typically require licensed professionals’ signatures, though some jurisdictions accept homeowner statements or calibrated tools under specific local rules.
What Are Low-Cost Ways to Document Measurement Traceability for DIY Projects?
I’ll show you inexpensive ways: keep calibration logbooks, photograph reference artifacts next to tools, timestamp entries and receipts, use simple checklists, and store backups online — it’s like capturing proof with the force of a hurricane.
How Do Measurement Standards Differ Internationally for DIY Materials and Fasteners?
They differ mainly by metric vs imperial dimensions and tolerancing conventions: I tell readers metric parts use millimeters with ISO fits, imperial uses inches with ANSI/ASME limits, so you must check thread specs, fits, and tolerance classes.