You’ve just installed a floating shelf and it looks slightly off — one end sits a hair higher and you can’t tell if the shelf or the wall is to blame.
The question is: how do you quickly confirm true level in a cramped spot where a 48‑inch level won’t fit?
Most people reach for a long level or eyeball it, wasting time and risking a crooked install.
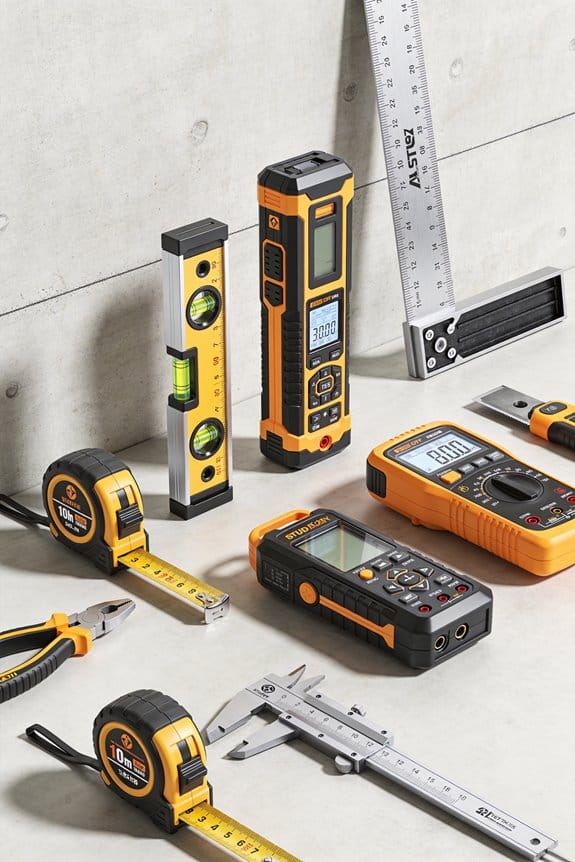
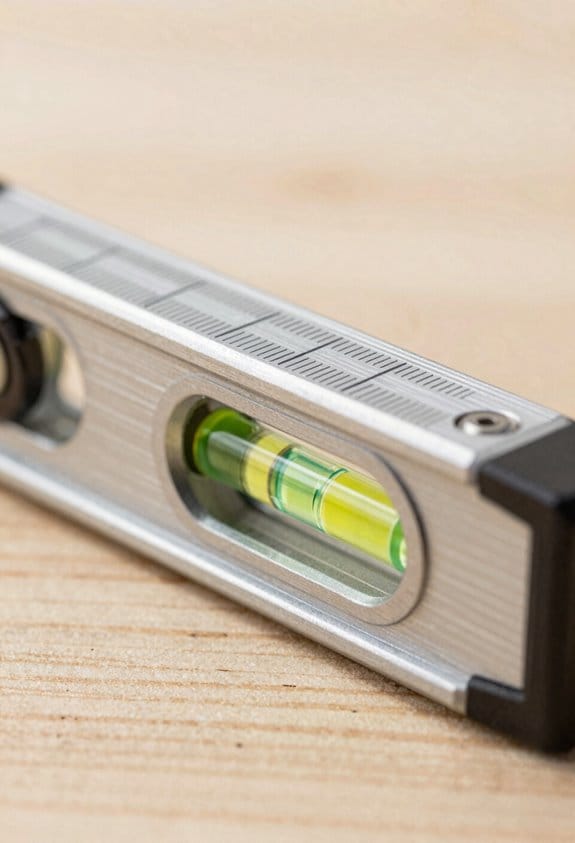
This piece shows how a compact pocket level gives fast, repeatable checks, holds itself with magnets for solo marking, and centers on pipes with a V‑groove so you can set precise angles.
You’ll learn practical ways to use one for cabinets, outlets, metalwork, and pipe slope so your next job is right the first time.
It’s easier than you think.
Key Takeaways
If you’ve ever needed a quick check on the job, this is why.
Why this matters: you avoid redoing work that costs time and money. A quick, under-10-second check tells you whether a mount or bracket is plumb and lets you keep moving.
Real example: you set a TV mount, tap the level on the bracket, read the vial, and tighten—no second trip. Do this in under 10 seconds.
You can keep a 4–6″ pocket level on your person so you don’t walk back to the truck during every install.
Why this matters: every toolbox trip eats into your schedule. Carrying the level saves minutes on each job.
Real example: on a multi-box run, carrying the pocket level saved me about 5–10 minutes per install because I didn’t have to return for a larger tool.
Strong magnets and a V-groove let you level by yourself, hands-free.
Why this matters: you won’t need a helper to hold things steady. Clip the level to a stud or pipe and line up the vial while you make adjustments.
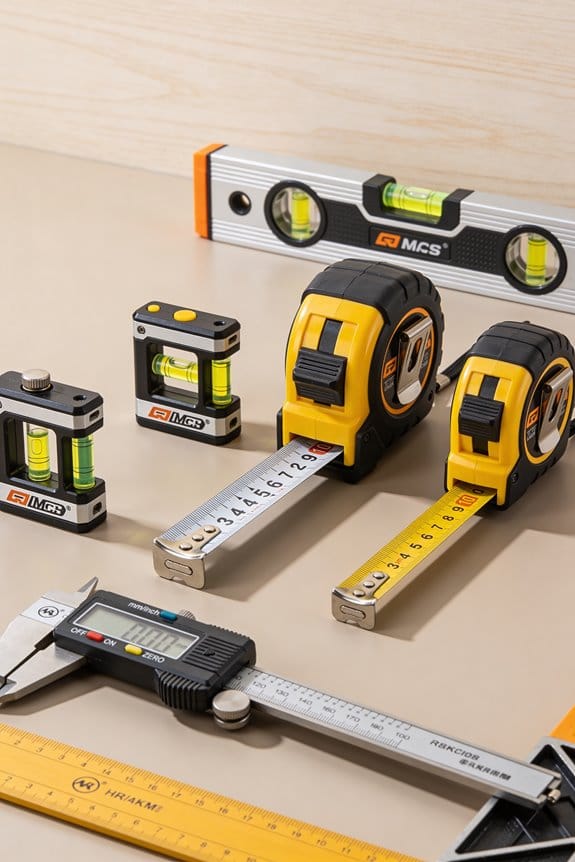
Real example: I leveled a 10-foot conduit run solo by letting the magnet hold the level on the pipe, then rotating fittings until the vial centered.
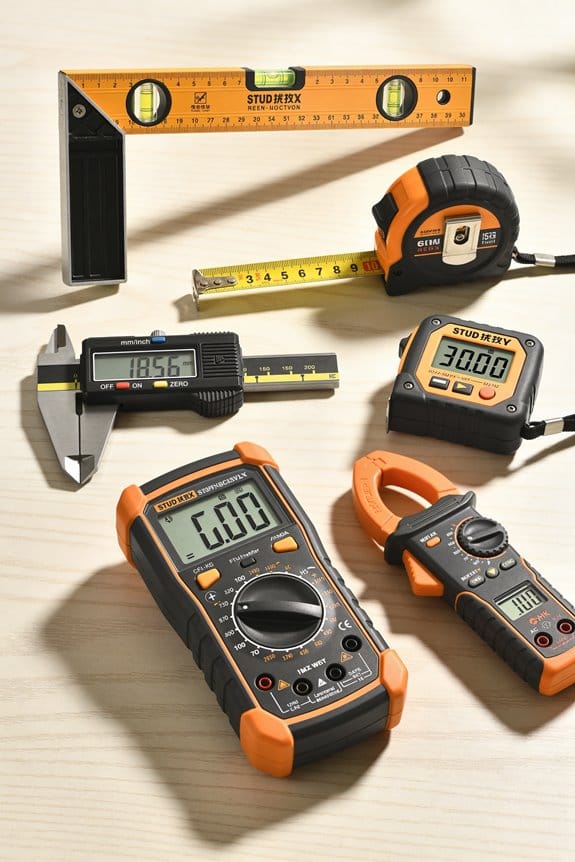
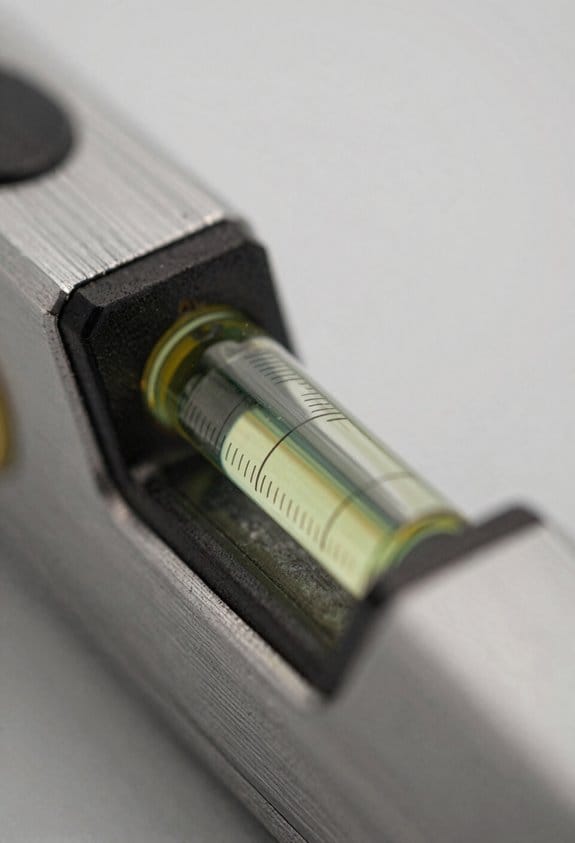
High-visibility vials with verified ±0.5° accuracy reduce how often you re-adjust over long runs.
Why this matters: small angle errors add up across multiple fixtures, creating a crooked run. The ±0.5° spec keeps cumulative error low.
Real example: when aligning five shelf brackets across 12 feet, using a ±0.5° pocket level kept the top edge within 1/8″ across the whole run.
Compact, reinforced ABS/aluminum construction fits tight spots and survives drops.
Why this matters: you use the tool more when it doesn’t break or get stuck in narrow areas. Durability keeps the level on-site for months rather than weeks.
Real example: a 4.5″ aluminum-reinforced pocket level slid into a 2″ cavity and still worked after a fall from a ladder.
How Pocket Levels Speed On-Site Installs
If you’ve ever rushed a site check and wished you hadn’t, this explains why a pocket level matters: it cuts trips to the toolbox and prevents rework.
Why it matters: you save minutes and avoid crooked installs.
1) How a pocket level speeds quick checks
- Bring it out and you can verify a run in under 10 seconds.
- I keep one on my belt, so you won’t waste 2–3 minutes walking back for a full-size level.
- Example: on a 12-foot stud wall, I set the pocket level at hip height and confirm plumb in one glance.
2) How the vials help you read angles fast
Why it matters: clearer readings mean fewer adjustments.
- The high-visibility vials give a bright reference so you read angles without squinting or moving the tool.
- Example: when setting a 5° slope for a drain, you watch the bubble sit between the marked lines and adjust the bracket until it lines up.
3) Using it in tight spaces
Why it matters: you can hold materials steady while checking alignment.
- The small form lets you steady the level with one hand while the other holds material.
- Example: in a closet with a 2-foot access gap, you brace the pocket level with your palm and tweak the stud with your knee.
4) Getting repeatable readings on pipes and studs
Why it matters: repeatable readings reduce errors across multiple pieces.
- Use the V-groove on rounded pipe or the flat base on studs to center the tool and take consistent readings.
- Steps:
- Place the level so the groove or base sits snugly.
- Read the vial and mark the material.
- Move 12 inches along and repeat to confirm uniformity.
– Example: when aligning five 3/4″ conduit runs, I check at the start, middle, and end (0″, 48″, 96″) to keep them parallel.
Practical tips you can use right away
- Keep one on your belt or in your pocket; you’ll save about 5–10 minutes per small install.
- Clean the vial window before each check for a crisp reading.
- If you need more precision than the pocket level offers, confirm with a torpedo level or digital gauge.
You’ll do fewer redo passes and finish installs with less effort.
What to Check: Portability, Accuracy, Durability, and Magnets

Before you pick a pocket level, you need to know what matters so you don’t buy the wrong one.
You want a level that actually fits on your person. Look for lengths between 4 and 8 inches so it slides into a back pocket or apron without sticking out; choose one under 6 ounces if you climb ladders often. I carry a 6-inch model that slips into my work pants and doesn’t throw me off balance.
Why accuracy matters: small errors grow over distance. Check the vial tolerance — aim for ±0.5 degrees or better — and read the markings at eye level. For example, when you transfer a line 20 feet, a 0.5° error shifts the line nearly 2 inches, which you’ll see on trim work.
How to verify accuracy: 1) Place the level on a flat surface and note the bubble position. 2) Rotate it 180° and check the bubble again. 3) If the bubble returns to the same mark, the vial is accurate. I do this quick test on a jobsite table before I trust a new tool.
Durability keeps the level working after drops and rain. Look for an aluminum or reinforced plastic frame and a lifetime warranty if you want long service life. I dropped a compact level from a scaffold and the hardened frame protected the vial; the tool still reads true.
What to expect from magnets: they should have focused holding power so the level grips steel without sliding, and they shouldn’t leave scuffs. Test by attaching the level to a painted steel post; if it slides with a light nudge, the magnet’s too weak. My go-to has small recessed magnets that grab tight and won’t mar surfaces.
Edge protection and ergonomics reduce damage and fatigue. Choose rounded corners and rubber end caps to protect both the level and the surface you rest it on. One of my coworkers prefers a profile with chamfered edges because it won’t catch on pockets while you climb.
Quick checklist before you buy: 1) Length 4–8 inches. 2) Weight under 6 ounces for ladder work. 3) Vial tolerance ±0.5° or better. 4) Aluminum or reinforced plastic frame. 5) Recessed magnets that hold without marking paint.
That checklist will help you pick a pocket level that actually performs on the job.
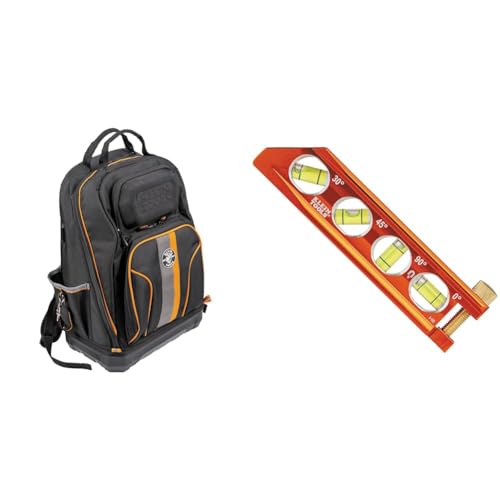
Recommended Products

RELIABLE 24/7 VISION - 160 × 120 VOx microbolometer thermal imager reveals humans, animals, and objects in complete darkness or glaring light, offering reliable detection at any time of day.
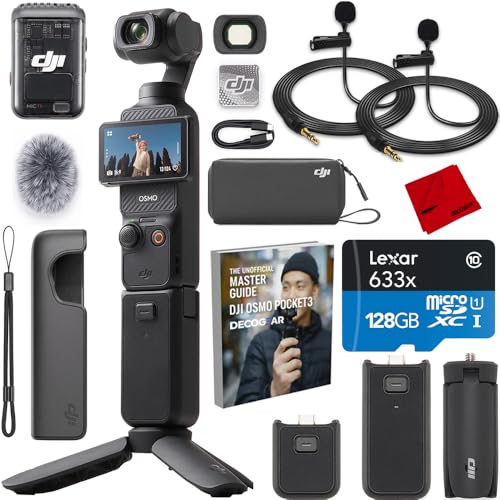
DJI USA Authorized - Full USA Protection | OSMO Pocket 3 - Capture Stunning Footage - This vlogging pocket gimbal camera features a 1-inch CMOS sensor and records in 4K resolution at an impressive 120fps. Capture breathtaking night views and sunsets with enhanced clarity. | Effortlessly Frame Your Shots - Get the ideal composition with Osmo Pocket 3's expansive 2-inch touch screen that rotates for both horizontal and vertical shooting.

41-PIECE TOOL KIT for the professional with 39 Pocket Tool Backpack, canvas zipper back and clear standard safety glasses
Pocket Level Hands-Free Tricks: Magnets & V‑Grooves

Here’s what actually happens when you pair the magnets with the V-groove: you get a hands-free level that stays put on flat and curved metal, which speeds up installs and keeps your hands free for the fasteners. For example, when you’re mounting a bracket to a 1/2″ steel stud and then checking a 2″ copper pipe, the same pocket level will hold steady so you can mark or screw without juggling the tool.
1) How do the magnets and V-groove work together?
Why it matters: if the level slips, your hole placement will be off and the whole job costs extra time.
- The magnets sit along the body and give a concentrated grip where the level contacts metal; the V-groove cradles round stock so the level centers itself on pipes.
- Real-world example: place the level on a 1/2″ steel stud and you’ll feel a definite pull; then set it on a 2″ copper pipe and the groove keeps it from rolling while the vial shows true.
2) How to mount the pocket level hands-free (step-by-step)
Why it matters: following exact steps keeps your measurements repeatable and fast.
Steps:
- Clean the contact area with a rag or a quick wipe of rubbing alcohol — painted or dirty surfaces cut magnetic pull by 30–60%.
- Align the V-groove to the pipe or flat face to center the level visually.
- Gently press the body until the magnets bite; you should feel a click or definite hold.
- Verify the vial reading before you mark or fasten — read it twice if the surface was rough.
Example: when you’re hanging a towel bar on a painted metal stud, wipe the paint, set the level, and then mark the screw holes while the level stays put.
3) Quick checks and common fixes
Why it matters: small issues are predictable and fixable, so you don’t waste time.
- If the level rocks on a pipe, rotate it 90 degrees and re-seat the V-groove; that usually fixes alignment on 1–3″ diameters.
- If the magnet feels weak, clean the surface and retry; if it still slips, use a temporary clamp or a small piece of magnetic tape to boost contact.
Real-world example: on a dusty HVAC duct, a quick alcohol wipe and a 5-second press got the level stable enough to drill pilot holes.
These simple habits — clean the surface, center the groove, press until the magnets bite, and then verify the vial — will shave minutes off repetitive installs and keep your work accurate.
Recommended Products


Country Of Origin: Thailand

DEWALT 78" MAGNETIC I-BEAM LEVEL
Fast Installs: When Pocket Levels Beat Full Levels
If you’ve ever had to work inside a cabinet or between joists, this is why.
Why it matters: being able to check level or plumb without wrestling a long tool saves you time and reduces mistakes. I keep a pocket level in my back pocket for tight spots where a full 48-inch level won’t fit, like when you’re installing a stub of pipe behind a vanity or squaring a bracket inside a shallow cabinet.
How to use one, step by step:
- Place the pocket level’s V-groove on the pipe or lay the magnetic side on the stud. Example: when you hang a towel bar in a bathroom, rest the V-groove over the 1/2-inch copper pipe behind the wall to verify pitch.
- Read the fixed bubble vial to check plumb or level; for angles use the rotating vial and set it to the specific degree you need (e.g., 3° slope for drainage).
- If it grabs metals let go and work hands-free while you mark or fasten. Example: when routing electrical conduit in a crawl space, stick the level to the conduit and mark mounting points without holding it.
- Re-check after fastening one screw and then again after the final screw to catch any shift.
What to look for when you buy one:
- Size: 4–9 inches is ideal for pockets and tight gaps.
- Magnet strength: strong enough to hold vertically on a 1-inch steel stud.
- V-groove: makes checking round pipe simple.
- Vials: at least one fixed high-visibility vial; a rotating vial is bonus for angle work. Example: a 6-inch pocket level with a 1/4-turn rotating vial saves time when you need a 2° fall across a short run of pipe.
Quick tips from my toolbox:
- Use a 6-inch model for general trades; use 4-inch for ultra-tight places.
- Clean the magnet and groove before use so dirt doesn’t give you a false reading.
- When you need span, switch to a 24- or 48-inch level; pocket levels are for clearance and speed. Example: I use a 6-inch pocket level for cabinet hinge alignment, then a 48-inch level for full-cabinet run checks.
You’ll work faster if you choose the right pocket level for the job and follow the four steps above.
Recommended Products

Sharper Action, Brighter Details - Osmo Nano's 1/1.3″ sensor captures more light for crisp, vivid shots. Ideal as a 4K POV camera or vlogging camera, even in low light or fast-action scenes.

PROFESSIONAL GRADE QUALITY: STABILA tools are factory tested and durable; built to handle real world job site conditions while providing craftsmen with the dependability and consistent accuracy they expect and deserve.gr

Made of 600D polyester canvas with double PU Coating,Marine grade
Quick Buying Checklist for On-the-Job Verification
Before you buy, know what really saves you time on-site: speed and accuracy. Why it matters: you’ll avoid rework and wasted trips. Example: on a ladder in a cramped attic, a pocket-sized tool stops you from fumbling and holding up the job.
1) Prioritize portability.
Why it matters: you’ll use the tool more when it’s easy to carry. Pick a tool about 4–6 inches long with rounded edges so it fits in your pocket and won’t jab you on ladders. Example: I keep a 5-inch aluminum level that slips into my back pocket and doesn’t catch on harnesses.
2) Check accuracy specs.
Why it matters: accuracy determines whether your install passes tolerance. Look for vial precision listed as ±0.5° or better and fixed-angle settings at exactly 0°, 45°, and 90°; those numbers tell you the usable tolerance. Example: a level labeled ±0.5° stayed within code on a kitchen cabinet run I installed.
3) Confirm durability.
Why it matters: the tool will get dropped and scratched. Choose impact-resistant frames (aluminum or reinforced ABS) and finishes that resist chipping; expect a tool to survive a 3–6 foot drop. Example: a coworker’s reinforced ABS level took a 5-foot fall off a scaffold and still read true.
4) Verify magnetic holding.
Why it matters: strong magnets keep the tool hands-free on steel studs and pipes. Test for rare-earth magnets (neodymium) and focused holding—look for specs like “holds 5–10 lbs shear force” or check reviews for real pull tests. Example: a magnetic torpedo level that claimed 8 lbs actually held my 3/4-inch conduit while I torqued the clamp.
5) Balance versatility and cost.
Why it matters: you want features you’ll actually use without overspending. Look for V-grooves for pipe work and rotating vials if you need multiple sightlines; aim to spend where reliability matters—usually $25–$75 for a solid pocket or torpedo level. Example: buying a $60 rotating-vial level replaced two older tools and saved drawer space.
Quick buying steps:
- Measure the size you want (pick 4–6 inches for pocket use).
- Check specs: vial precision ±0.5° and listed fixed angles.
- Confirm materials: aluminum or reinforced ABS; drop rating if listed.
- Verify magnet type and holding force or test it in-store.
- Compare price vs. reviews for reliability.
If you follow those concrete checks, you’ll pick a tool that stays accurate and actually helps on the job.
Recommended Products

A complete sharpening system for hand tools – this bundle combines the Tormek T-8 water-cooled sharpening system with the HTK-806 Hand Tool Sharpening Jig and Accessory Kit

[SAVES TIME & MONEY] Automatically reads mixed stack of bills as it passes to count and sorts based on denomination Unlike simple money counters. Cuts your time processing time in half! Easily divides large amount of mixed bills into bundles of $1, $2, $5, $20, $50, $100. Ideal for business bank deposit.

VSI Rifle Mode feature allows you to set your holdover/bullet-drop info for your rifle's zero for deadly accurate information at the push of a button
Pocket Levels in Cabinetry, Electrical, Metalwork & Pipework
If you’ve ever struggled to get cabinet doors to close smoothly, this is why.
Why it matters: a small misalignment can make doors rub and drawers stick, and correcting it later costs time. Use a pocket level to check plumb and run quickly: slide the level into the cabinet box, center it against the vertical stile, and read the vial; if the bubble is off by one graduation, shim the hinge side by 1–2 mm before tightening. Example: when I installed a 30″ wide base cabinet, a 1 mm shim at the top hinge cleared a door that otherwise rubbed along the middle edge.
If you’ve ever installed an outlet and had a crooked faceplate, this is why.
Why it matters: a tilted box looks amateur and can strain outlets over time. Set the box square by placing a small 6″ pocket level across the face of the box; adjust until the vial sits centered, then mark screw centers with the level’s edge so drill holes line up. Example: I used a 6″ magnetic pocket level when adding a duplex outlet behind a washer — keeping the vial centered saved a second drywall patch.
Think of metal fabrication like folding paper into repeatable shapes.
Why it matters: consistent angles make parts fit and weld faster. Clamp the work, hold the pocket level on the flat surface to confirm 0° or use the rotating vial to set 45°; lock your bending jig only after the bubble is centered. Example: I set a 45° bracket by rotating the pocket level’s vial and making three identical bends for a shelf support, which let the parts bolt together without rework.
Before you lay pipe, you need to check slope and center.
Why it matters: wrong slope changes flow and creates backups or standing water. For horizontal runs, use the V-groove and magnet: rest the level on top of the pipe, aim for a 1/4″ drop every 10 feet (that’s 2% slope) by tilting until the bubble shows the equivalent angle, then secure hangers at measured intervals (every 4–6 feet for copper). Example: on a 20-foot drain run I set 5/8″ drop total, measured and marked hangers at 5-foot spacing, and the flow stayed steady during testing.
How to use a pocket level—quick steps.
Why it matters: using the tool correctly avoids guesswork and rework.
- Place the level against the surface you’re checking (edge, face, or pipe).
- Read the vial—centered bubble means plumb/level.
- Adjust your workpiece by small amounts (1–2 mm shims, degree tweaks) and re-check.
- Lock fasteners while holding the level in place or re-check afterward.
Example: when squaring a wall cabinet, I tightened one screw, rechecked, then added a 1 mm shim and re-tightened.
A few practical tips you’ll use every day.
Why it matters: small habits keep results consistent.
- Keep the pocket level clean; grit changes readings.
- Use magnets for metal and pipe hands-free checks.
- Use a 6–9″ level for outlets and cabinets, 9–12″ for larger runs.
Example: swapping a 4″ keychain level for a 9″ pocket level cut my checking time in half on a kitchen install.
If you follow these steps, you’ll speed installs and cut rework.
Recommended Products
TOOL AND GEAR STORAGE: Extra-large 40-pocket electrician backpack with curved, molded bottom keeps tools safe and organized with 27 interior and 13 exterior pockets

SUPER BRIGHT PERFORMANCE – Produces up to 3000 lumens with a beam reaching 547 yards, a 23% improvement over the previous generation, making it ideal for law enforcement, inspection, and security.

STYLISH & SPACIOUS: The Sak 120 Crochet Hobo tote will become the everyday summer staple that pairs with everything. The roomy inside allows for plenty of room for your phone, wallet, keys, beach or pool read, and all other essentials
Frequently Asked Questions
Can Pocket Levels Withstand Chemical Exposures Like Solvents or Cleaners?
Yes — I can tolerate some cleaners, but material compatibility matters; I recommend avoiding harsh solvents. Protective coatings help resist spills, yet prolonged chemical exposure can degrade seals, vials, magnets, or finishes, so rinse and dry promptly.
Are Replacement Vials or Parts Available for Pocket Levels?
Yes — I can usually get replacement vials and spare clips for pocket levels; manufacturers or tool suppliers sell kits or individual parts, and I’ll source compatible components or suggest repair options if you want help tracking them down.
Do Pocket Levels Meet Any Industry Calibration Standards?
Yes — I verify pocket levels against accuracy standards and use calibration methods like optical checks, surface plate comparisons, or vial replacement to maintain 0.005″/1″ tolerances; I document results and adjust or replace parts as needed.
Can Pocket Levels Be Used Effectively in Extreme Temperatures?
Yes — 0.005″/1″ accuracy often holds within rated ranges. I’ll note temperature tolerance matters: thermal expansion can shift readings, so I avoid extremes, check specs, and recalibrate or warm the level before precision installs.
Are There Accessories to Clip Pocket Levels to Tool Belts or Bags?
Yes — I use belt clips and magnetic holsters to secure pocket levels; I clip them to my tool belt or bag, or magnetically attach them to metal surfaces for quick access without fumbling during installs.