You just finished a long day setting a laser level and later discovered a string of cabinets sit slightly out of line — now you’re stuck deciding whether to tear out work or live with the gap. You’re asking: was the laser misaligned, did we set it wrong, or did materials and installers cause the error?
Most people assume small laser deviations are negligible or chalk the fault up to installation technique. This article shows how tiny millimetre-per-metre errors compound across a run, how to check for repeatable offsets on-site, and how simple logkeeping and scheduled lab calibration stop rework and contractor disputes.
You’ll finish knowing exactly which quick checks to run, when to re-level, and when to send tools for calibration. It’s easier than it sounds.
Key Takeaways
If you’ve ever set a laser at one end of a room and walked to the other to check it, this is why.
- Tiny misalignments compound over distance: a 1 mm error per metre becomes 50 mm across a 50 m run, and that can mean cutting new drywall or redoing a slab. Use a tape and mark every 5 m to verify the line; if your marks shift by more than 5 mm at any point, recalibrate.
- A miscalibrated laser can stop your job and add days of labour; one contractor I know had to tear out and reinstall a suspended ceiling after a 30 mm drift over 10 m forced a full re-level. You can avoid that by checking the laser before each big layout: set it up, rotate 180°, and compare two back-to-back readings.
- Regular calibration is cheaper than repairs or lost production: paying $80–$150 for a certified calibration every 6–12 months typically saves hundreds or thousands in rework. Schedule a calibration reminder on your phone six months after purchase and then yearly.
- Documented calibration records resolve disputes and prove tool accuracy if a client questions your work; a written certificate with date, technician name, and before/after error numbers stops arguments fast. Keep a photo of the certificate with the project file and email it to the client when you start layout.
- Shocks, temperature swings, and battery issues cause drift, so routine checks catch hidden errors before a critical pour: for example, moving a laser in a cold truck from -5°C to a 20°C jobsite can change the internal alignment. Do this quick check: 1) warm the unit to jobsite temperature for 15 minutes, 2) level it, 3) run the 180° rotation test—if readings differ by more than 2 mm at 5 m, recalibrate.
Why Laser Level Calibration Matters More Than You Expect
If you’ve ever watched a crew regrade a slab because a beam was off, this is why.
Why it matters: calibration stops tiny misalignments from becoming big rework and lost time. I once watched a crew replace a whole row of siding after a laser was knocked and shifted by 3 mm over 20 m; that small error meant cutting and reinstalling 12 boards and adding two full days of labor.
How calibration prevents problems
- Step 1: check accuracy against a known reference. Use a calibrated benchmark or another verified laser at 10 m and note the offset in millimeters.
- Step 2: adjust the instrument per the manufacturer’s procedure until the offset is within the device tolerance (for many jobsite lasers that’s ±1–2 mm at 10 m).
- Step 3: document the reading, date, and who checked it on a simple log sheet or in your equipment app.
If you follow those steps, you’ll reduce rework and save material. A 3 mm error over a 20 m run can create offsets that waste cut pieces and require overtime to fix.
When to calibrate and what to expect
Why it matters: doing it on a schedule catches wear and hidden impacts before they cost you labor and credibility. For most jobsite laser levels, calibrate every 6–12 months and immediately after any drop, hard knock, or long trip in a tool bag. Example: a foreman had a laser fall off a truck tailgate; they recalibrated the next day and found a 4 mm shift, avoiding a bad survey that would have cost an extra day and $250 in wasted materials.
Practical tips for crews
Why it matters: simple habits keep your tools performing predictably and give you proof if disputes arise.
- Keep a calibration sticker with next-check date on the case.
- Train one person per crew to run the three steps above and sign the log.
- When renting, ask for the last calibration date and a printout if possible.
What calibration saves you
Why it matters: the upfront cost is small compared to avoided losses. A $75 calibration can prevent a $1,000-plus repair job, a full day of lost production, or a contract dispute over an incorrect survey. I saw a project manager avoid a claim by producing a calibration log showing the laser was checked the morning the crew started.
Final practical note
Why it matters: having predictable, documented accuracy keeps schedules tight and your crew confident. Keep the log, set the interval to every 6–12 months, and recheck after any impact — that routine will pay for itself in saved time and fewer callbacks.
How Often to Calibrate (Recommended Schedules by Use and Risk)
If you’ve ever relied on a tool that suddenly stopped lining up, this is why calibration matters: inaccurate readings cost time and money.
When you’re deciding how often to send your laser level for calibration, think about how often you use it and the risk of mistakes. For example, if you pour concrete every day for a month, a small angle error can ruin a whole slab. I recommend these concrete schedules:
- Annual baseline: Send your laser for calibration once a year if you use it a few times a month for general tasks like hanging cabinets or occasional leveling. A yearly check keeps errors under about ±2 mm at 10 m. Example: a handyman who does 10–20 small jobs monthly keeps a yearly log and avoids surprises.
- Every two years for very light use: If you use your laser less than 10 days a year and only for low-risk tasks (temporary layouts, basic alignment), you can extend to every two years. Example: a homeowner who uses the laser to set fence posts twice a season.
- Six-month checks for daily heavy work: If you use the level daily on jobs like concreting, drainage, or grading, schedule calibration every six months. That prevents drift before a costly pour. Example: a small concrete crew replacing garage floors schedules checks every spring and fall.
- Quarterly when many people handle it: If multiple crew members move, pack, and use the tool, calibrate every three months because handling increases shock risk. Example: a rental fleet rotated among teams checks levels quarterly.
- Stricter for high-precision or ISO jobs: For jobs with ISO requirements or millimeter tolerances, follow the client’s frequency—often yearly or more strict—and keep a record of every calibration and user sign-off. Example: an MEP contractor on a hospital fit-out keeps calibration certificates on file for audits.
Always plan seasonal checks when temperature or humidity swings are large; thermal stress can shift the optics. Also, check your laser immediately after a drop, after prolonged storage, or whenever you suspect an impact before you rely on measurements.
How to manage this in practice — quick steps you can follow:
- Track usage: Keep a simple log noting job type, days used, and handlers.
- Set reminders: Put calibration dates in your calendar—annual, semiannual, or quarterly.
- Inspect before work: Do a two-point level check on site; if it fails, stop and send it in.
- Keep certificates: File calibration reports with the tool’s serial number.
Example for a small crew: label each laser with its next calibration date, run a quick two-point check every morning, and send any unit that’s been dropped to the lab immediately.
If you follow these schedules and steps, you’ll catch most errors before they cost you.
Recommended Products

Increases Productivity With Faster Setups, Fewer Mechanical Parts, And Automatic Self-Leveling
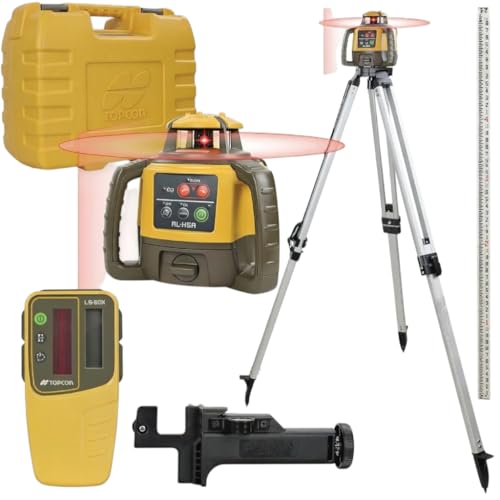
[Jobsite Laser Level Kit]: Keep cabinets straight and match roof slopes or road grades using the Topcon RL-H5A Laser Level 360 Self Leveling Kit with the LS-80X Receiver, Tripod, and Fiber Rod

[Jobsite Laser Level Kit]: Keep cabinets straight and match roof slopes or road grades using the Topcon RL-H5A Laser Level 360 Self Leveling Kit with the LS-80X Receiver, Tripod, and Fiber Rod
Common Causes of Laser-Level Drift You Can Prevent
If you’ve ever had a laser level drift on the job, this is why.
Why it matters: a small shift can ruin a layout and cost you hours fixing it. I’ll start with the main preventable causes so you can spot and avoid them before they cost time or money.
1) Rough transport and drops
Why it matters: sudden shocks jar internal optics and mounts, creating a persistent offset.
Example: I once watched a contractor carry a rotary laser in a half-open toolbox across a gravel driveway; after a single bump it was off by 3/8 inch at 30 feet.
How to prevent it:
- Use a padded hard case with foam cut to the tool’s shape.
- Wrap the unit in a microfiber cloth before closing the case.
- When moving between sites, put the case in the car trunk or lie it flat in the back seat—don’t stand it upright near doors.
End detail: secure mounts and foam should absorb 1–2 g shocks from typical drops.
2) Poor battery health
Why it matters: low or unstable power makes leveling motors and sensors behave erratically, which looks like a calibration fault.
Example: on a long day I saw a laser jump slightly every 10–15 minutes until the batteries were swapped; the readings went back to steady once fresh cells were installed.
How to prevent it:
- Test batteries with a multimeter—replace if voltage is below the manufacturer’s recommended level (often ~1.2–1.25 V per NiMH cell or 3.7 V for single Li-ion packs).
- Carry two full spare sets and swap before critical measurements.
- Keep contacts clean: wipe battery terminals with isopropyl alcohol once a month.
End detail: battery voltage sag under load is the usual culprit; test under load if possible.
3) Extreme temperature swings and humidity
Why it matters: materials expand/contract and refractive indices change, which shifts beam alignment.
Example: I left a laser in a van overnight in winter; morning readings were off by 5 mm at 10 m until the unit warmed up for 30 minutes.
How to prevent it:
- Let the device acclimate for 20–30 minutes when moving between environments that differ by more than 10°C (18°F).
- Use silica gel packs in the case if you work in humid climates; replace packs when they no longer clump (or use indicator packs).
- Avoid leaving the unit in vehicles exposed to direct sun or freezing conditions.
End detail: 10–30 minute acclimation stabilizes most consumer-grade lasers.
4) Dirty or scratched lenses
Why it matters: particles and scratches scatter the beam and change the apparent level line.
Example: a mason complained of a fuzzy beam; a lint ball on the lens had bent the projected line enough to misalign tiles by 2 mm.
How to prevent it:
- Inspect lenses before each job; use a soft brush to remove loose dust.
- Clean with a microfiber cloth and lens cleaner (or 70% isopropyl) using circular motions.
- Protect lenses with a clear cover or cap whenever the tool is idle.
End detail: replace a lens if scratches are visible—polishing won’t restore precise optics.
5) Incorrect storage conditions
Why it matters: prolonged moisture, pressure, or vibration in storage gradually shifts internal parts.
Example: a shop stored lasers on a crowded shelf; prolonged leaning and pressure from other tools bent the case and misaligned the internals.
How to prevent it:
- Store your laser in a dry, padded spot—shelf or cabinet where it won’t be stacked under weight.
- Keep humidity under 60% if possible; use a small dehumidifier or desiccant in the storage cabinet.
- Label the case and make it the designated spot so everyone returns it correctly.
End detail: stable storage cuts cumulative drift over months and years.
Quick checklist before critical layout work:
- Case and padding in place.
- Batteries tested and spares ready.
- Unit acclimated 20–30 minutes if temperature changed by >10°C.
- Lenses clean and covered.
- Stored flat, dry, and uncrowded.
Follow those steps and you’ll avoid the common, preventable causes of drift.
Recommended Products

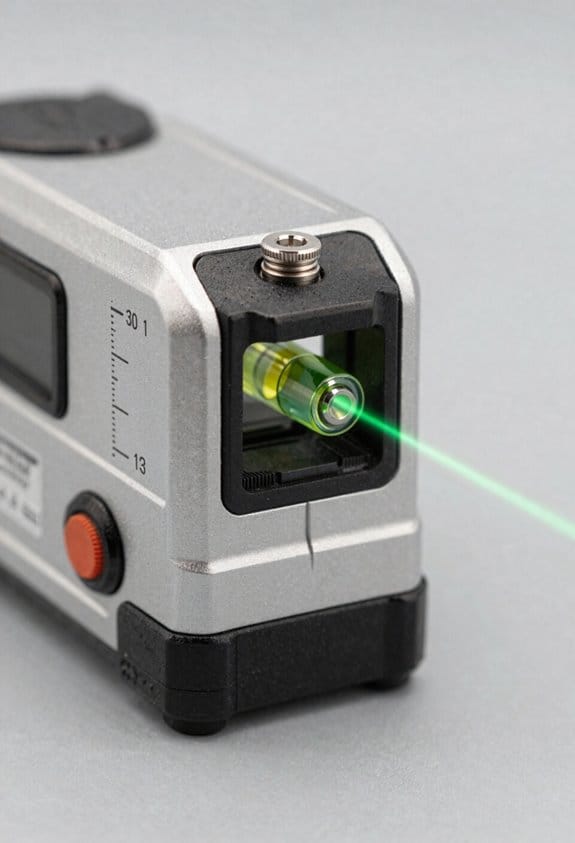
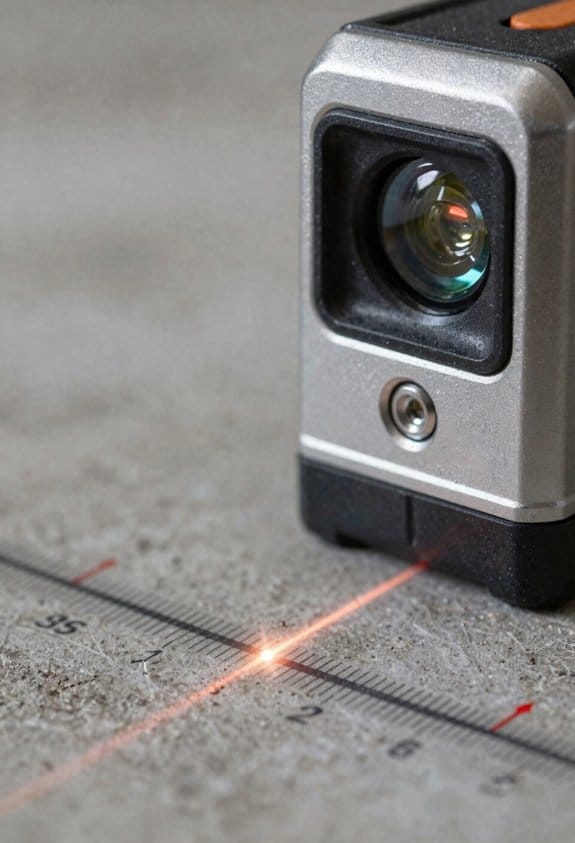
5-Point green laser level

Case has 5 pockets that can accommodate levels in a wide variety of sizes

STORE AND CARRY TOOLS: Holds 80in - 6, 78in, 59in, 32in, 4in, and 16in levels plus a torpedo
How Calibration Errors Actually Look on the Job
If you’ve ever set a laser and watched a line miss where you expected, this is why.
Why it matters: a repeatable offset ruins alignments and costs time and materials. I’ll show you how these errors look, give a real example, and list exact steps to diagnose and act.
How calibration errors show up
You’ll see small, repeatable offsets in the beam that don’t go away after you re-level the unit. One common pattern is a beam that reads consistently high on one side of a room, so tiles or cabinets end up a few millimeters off along that wall. For example, on a 10-foot run a 2 mm offset at the laser becomes about 3/32 inch of misalignment at the far end. Map the pattern, mark the deviations, then stop and recalibrate.
Real-world example: kitchen cabinets
I once installed a 12-foot run of upper cabinets where the laser was 1.5 mm high on the right side. The left cabinets sat fine, the right ones crept upward and the crown molding gap grew toward the end—visible from across the room. I marked the offsets every 3 feet and confirmed the laser behaved the same on repeat measurements, then sent the unit for service.
Steps to diagnose a repeatable offset
Why it matters: you’ll know quickly whether the tool or your setup is wrong.
- Set the laser on a tripod at a fixed height, 4 ft from a wall.
- Mark the beam position on the wall at eye level.
- Rotate the laser 180° and mark again without moving the tripod.
- Repeat at 90° increments (four marks total).
If the marks form a circle or shift more than 1 mm, you have a calibration error.
How offsets affect long runs
Why it matters: small errors add up over distance and become costly. A 1 mm offset at the laser can translate to roughly 1/8 inch over 10 meters, enough to ruin a long countertop or a string of tiles. In a hallway install I watched a 0.8 mm error produce a visible 6 mm step over 30 feet; the installer had to re-run the job after recalibrating.
When to stop work and send the unit for service
Why it matters: continuing while the laser is off wastes labor and materials.
- If offsets are repeatable and exceed your tolerance (set a number, e.g., 1 mm per 10 feet), stop.
- Re-level and run the 4-point test above; if it fails again, stop work.
- If the unit is under warranty, label it and send it to the manufacturer; if not, arrange calibrated service.
Quick tips to limit mistakes on site
Why it matters: simple checks save hours.
- Use a tripod and fixed height rather than hand-holding the unit.
- Mark reference points every 3–4 feet on long runs.
- Carry a bubble level and a tape measure; confirm visually and numerically.
If the beam reads uneven but not repeatable, you probably have setup error rather than calibration error.
What Laser-Level Accuracy Tolerances Mean (Mm/M and Over 20 M)
Before you check a laser’s accuracy, you need to know why it matters: a wrong tolerance makes your layout drift by centimeters on long runs and can cost time and money.
Here’s what actually happens when you compare mm/m to “over 20 m” ratings: manufacturers give mm per meter (like 1 mm/m), which means the beam can be off by 1 millimeter for every meter you measure. For example, if you’re setting a floor level across a 5 m room, 1 mm/m means up to 5 mm difference between one end and the other — you can actually see that gap against a finished floor. The simple math is: mm/m × distance in meters = total possible error in millimeters.
If you’ve ever tried to use a spec listed as “±20 mm over 20 m,” this is the same as 1 mm/m because 20 mm ÷ 20 m = 1 mm/m. A practical example: you’re running a chalk line for a 20 m long wall and your laser says 1 mm/m; expect up to about 20 mm deviation at the far end, which would show as a noticeable slope on trim work.
Before you buy or use a laser, follow these steps so you match tolerance to the job:
- Decide the maximum error you can accept (in mm). For example, finish carpentry might allow 5 mm over 10 m.
- Convert that to mm/m by dividing allowed error by distance (5 mm ÷ 10 m = 0.5 mm/m).
- Choose a laser with a rated accuracy equal or better than that number; ask for the calibration certificate to verify the spec.
- On the job, verify by measuring a known distance twice (one end to laser, then the other end back to the laser) to confirm the repeatable offset.
Think of cumulative error like stacking pennies: each meter adds one more penny of potential error when you use 1 mm/m, so over long distances the pile grows. A visual: mark zero at the laser, measure to 10 m, then check the mark at 10 m — with 1 mm/m you’ll see up to 10 mm discrepancy.
If you need an easy rule of thumb, use this:
- 0.5 mm/m is tight (good for precision trim over 10–20 m).
- 1 mm/m is standard for general layout.
- 2 mm/m or worse is only okay for rough framing or short distances.
Always request the calibration certificate before committing to a tool, and verify accuracy on-site with a quick two-point test.
Quick DIY Checks to Detect Misalignment Before a Job
If you’ve ever started a job only to find the laser was off, this is why.
Why it matters: a quick check stops wasted time and re-measurement.
1) Level the tripod and unit
- Why: a tilted base gives false readings even if the laser is fine.
- Steps:
- Set the tripod on firm ground.
- Put your unit on the tripod and adjust legs until the bubble is centered in the vial.
- Check the unit’s built-in bubble and the tripod bubble; both should be centered within the vial markings.
- Real example: on a windy rooftop I once saved an hour by noticing the front leg had sunken 10 mm — re-centering the bubble fixed a 5 mm offset at 10 m.
- Critical: make sure the bubble is centered before you trust any beam.
2) Do a mirror return test for internal alignment
- Why: it shows whether the laser optics are shifting when you rotate the head.
- Steps:
- Place a flat mirror or glass panel 5–10 meters away and mark the beam spot on the mirror with tape.
- Note the return spot on the unit or wall and mark it.
- Rotate the head 180° and check the return spot again; if the return point moves more than 2–3 mm at 10 m, you have internal misalignment.
- Real example: in a warehouse I found a 7 mm shift at 10 m, which tracked back to a loose mounting screw behind the laser window.
- Critical: consistent displacement when rotating = internal problem.
3) Check batteries and optics
- Why: low power or dirty/ scratched optics cause weak or distorted beams that mimic misalignment.
- Steps:
- Swap in fresh batteries or a fully charged pack.
- Inspect the lens for visible scratches, dust, or condensation; wipe with a lint-free cloth and isopropyl if dirty.
- Turn the laser on at a fixed distance and compare beam brightness to a known-good unit if possible.
- Real example: on a night job the beam looked “wavy” until I wiped a hairline oil film off the lens; the readings then matched control points.
- Critical: a clean, fully powered unit is a baseline.
4) Repeat tests at two heights to catch tilt or drift
- Why: some errors only show up over distance or at different elevations.
- Steps:
- Perform the mirror test and bubble checks at waist height (about 1 m).
- Repeat the same tests at eye height or the height you’ll actually work at (about 1.6–1.8 m).
- Compare displacements; differences greater than your job tolerance (for example, >3 mm at 10 m) indicate tilt or drift.
- Real example: on a bathroom remodel I found the unit true at 1 m but off 4 mm at 1.7 m, which would have ruined the tile layout.
- Critical: test at the heights you’ll use on the job.
Do these checks in about 10–15 minutes and you’ll avoid most surprises before you start.
Recommended Products

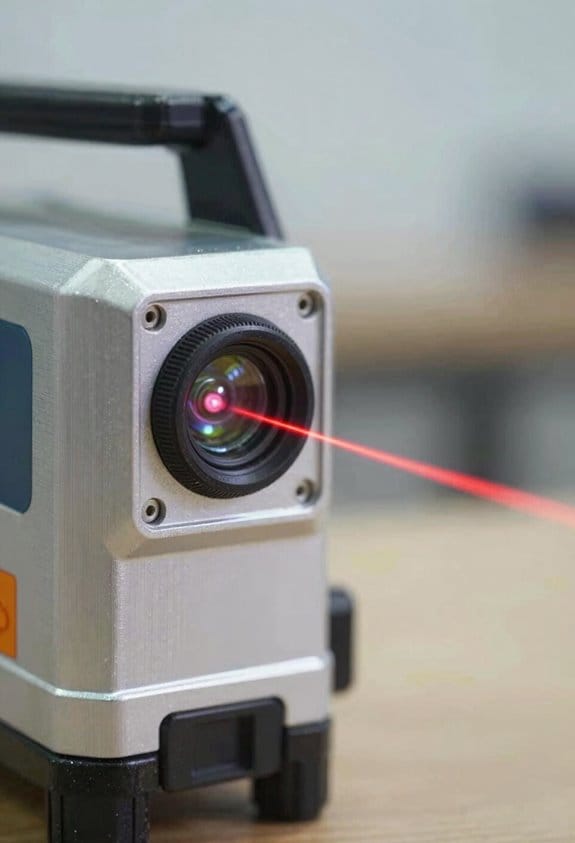
ROTARY LASER SET WITH TRIPOD: Includes LAR 300 rotary laser, REC 300 receiver with clamp, BST-S construction tripod, Hi/Lo elevation rod, hard case, and both D and AA batteries. for immediate use.

Increases productivity with faster setups, fewer mechanical parts, and automatic self-leveling

No line-of-sight and distance error
When to Send a Laser Level for Professional Recalibration
Before you send your laser level for recalibration, know why it matters: small angle errors can make walls, floors, and fixtures end up inches out over long runs.
If you’ve ever dropped a tool on a concrete slab, this is why you should send it in.
After a drop or hard impact, internal optics can shift by fractions of a degree; that can translate to 1/4″ or more at 10 feet.
Send the unit to the manufacturer or a certified lab within a week.
Example: I once saw a line laser dropped from a waist-high scaffold; the beam was off 0.5° and a shelf layout at 12 feet missed by 1.5″.
Here’s what actually happens when slow drift sneaks up on you.
Frequent transport and daily use cause bearings and mounts to wear, changing the level by small amounts over months.
Schedule recalibration by usage: if you use the level less than 5 days a month, recalibrate every 12–18 months; if you use it weekly, do it every 6–12 months; heavy daily use calls for recalibration every 3–6 months.
Example: A surveyor who travels weekly found a 0.2° drift after six months and fixed it with a recalibration certificate that restored accuracy.
Before you send it because readings disagree, verify with quick checks so you don’t waste time or money.
Check the laser against a known straight edge or a trusted builder’s level at two points 10–20 feet apart; if the error is greater than 1/8″ at 10 feet (about 0.06°), get professional service.
If calibration paperwork is required for warranty or ISO, don’t skip the certified lab step.
Example: On a commercial fit-out I did, the client required a signed calibration report; the manufacturer wouldn’t accept our in-field check, so we sent it to the certified center and got the documentation within 5 business days.
How to prepare and ship the unit so the recalibration goes smoothly.
Why this matters: careless packing can cause more damage and void warranties.
- Back up settings and note model/serial numbers.
- Clean external surfaces and remove batteries.
- Document the fault with photos and a short note describing when the issue started and any drops or impacts.
- Pack in the original hard case with foam, or use double-boxing and at least 2 inches of foam.
- Insure the shipment for the replacement value and get tracking.
Example: I once packaged a rotary level in its case, wrapped the case in foam, and insured it for $900; it arrived intact and calibration took 4 days.
When you need a report and how long it’ll take.
Why this matters: your schedule and compliance depend on turnaround time.
Ask the service center for a calibration certificate that lists pre- and post-adjustment tolerances and traceability to national standards.
Typical turnaround: 3–10 business days for routine service, or 1–3 days for expedited service at higher cost.
Example: For an ISO job I had, I paid rush fees and got a stamped certificate in 48 hours, which kept the project on schedule.
When you should skip professional recalibration and do a field fix instead.
Why this matters: you can save time and money on minor issues.
If the error is under 1/8″ at 10 feet and you only need rough alignment, do these quick steps:
- Re-level on a stable surface.
- Replace batteries and warm the unit for 15 minutes.
- Repeat a two-point check over 10–20 feet.
If the error persists above 1/8″, send it in.
Example: I had a job where a line laser showed 1/16″ error at 10 feet; a battery swap and five-minute warm-up fixed it.
Final practical tip: keep a simple log with dates of heavy drops, hours of use, and last calibration date so you can spot trends and avoid surprises.
Recommended Products

Remote-controlled operation - help maximize productivity on the job with remote control fine-tune adjustments horizontally up to 174 and vertically up to 3.5 in.

ACCURATE LEVELING: This Johnson Rotary Laser Tool is designed to complete both indoor and outdoor leveling jobs. The vertical self-leveling makes it equally suitable to aligning posts or footings; or indoors to layout walls or floors.

1150-FOOT RANGE: Powerful self-leveling Class 3R green laser (≤ 5mW) reaches up to 1150 feet when used with included detector, ideal for indoor and outdoor use
Choose Brands and Services That Make Calibration and Servicing Easy
Before you pick a brand or service, know that good calibration access saves you time and money.
I recommend choosing brands and service providers that make calibration and servicing straightforward because easy access to certified help prevents errors and reduces downtime. For example, pick manufacturers that publish clear calibration intervals—every 6 or 12 months—and include that schedule in the warranty paperwork so you can plan service without surprises.
Why this matters: a clear warranty and documented intervals cut unexpected costs. Choose warranty-friendly manufacturers that explicitly cover repairs for at least one year and list response times. A real-world example: a lab tech I worked with avoided a week-long shutdown because the vendor’s warranty promised next-business-day service.
1) Ask specific questions before buying.
- Ask whether the company has certified technicians and what certifications they hold (e.g., ISO 17025).
- Ask their typical turnaround time for calibration and repairs in your region (give them your ZIP code).
- Ask whether their calibration certificates state traceable standards and calibration uncertainty.
Why this matters: traceable certificates prove accuracy to regulators and customers. For example, when a food inspector asked for traceability, a calibration certificate showing NIST traceability cleared the facility’s audit.
2) Prefer onsite servicing when alignment matters.
Why this matters: technicians can verify alignment in the machine’s real environment, which transport tests may miss. If your instrument must be aligned in situ, choose vendors offering onsite visits within 48 hours. Example: a technician fixed a misalignment only reproducible under the shop’s vibration conditions during an onsite call.
Steps to verify onsite service:
- Confirm the vendor’s hourly rate and any travel fees.
- Confirm the maximum travel time to your site.
- Get the technician’s list of tools they bring and request a pre-visit checklist.
3) Choose modular designs and local service centers.
Why this matters: modular equipment lets you replace a single board or sensor instead of the whole unit, cutting repair costs and downtime. For example, a modular spectrometer allowed swapping the detector module in 2 hours, versus returning the whole unit for three weeks.
Steps to check modularity and support:
- Ask for a parts list showing replaceable modules and their lead times.
- Confirm local service centers exist within a two-hour drive.
- Ask whether the vendor sells spare modules or loaner units for critical uptime.
Why turnaround times and distance matter: longer distance raises service time and shipping risk. If a local center is more than 200 miles away, plan for at least one extra week for parts and shipping.
Final checklist before you commit:
- Warranty length and repair coverage (get it in writing).
- Calibration interval in months (6 or 12).
- ISO or equivalent certifications for technicians.
- Traceable calibration certificates (NIST or national lab).
- Onsite service availability and maximum response time (hours/days).
- List of modular parts and local service center proximity (miles/km).
If you follow these steps, you’ll protect measurement accuracy, meet ISO expectations, and lower long-term ownership costs.
Recommended Products

Horizontal self-leveling automatically aligns the DEWALT laser level to center

Complete leveling crew in a case includes the LL100 laser transmitter, HR320 receiver, C59 rod clamp, 15 ft grade rod in inches, adjustable tripod, system case, alkaline batteries and user guides

ROTARY LASER LEVEL: This Johnson Self Leveling Kit is ideal for one-person application in various indoor and outdoor jobs. Perfect for small jobsites; this rotary tool self-levels in the horizontal plane and levels manually in the vertical plane.
Frequently Asked Questions
Can I Get Calibration Coverage Under My Equipment Warranty?
Yes — but I’ll check: warranties often exclude calibration and list warranty exclusions, and they may have transferability limits. I’ll confirm your policy, request written proof, and recommend paid calibration if excluded.
How Long Do Calibration Certificates Remain Valid for Insurance Claims?
Short answer: I say certificate duration’s typically one year, but insurance requirements can demand six months or specific dates; I’ll keep mine current, renewing after impacts, heavy use, or per insurer specs to avoid claim disputes.
Will Aftermarket Repairs Affect Future Calibration Accuracy?
Yes — I’ll warn you: third party repairs and undocumented parts often change internal alignments, and I’ll need to recalibrate more often; they can degrade future calibration accuracy and void manufacturer guarantees unless documented professionally.
Can Software/Firmware Updates Change Calibration Needs?
Yes — I’ve seen firmware drift force recalibration: updates can change internal sensors or flags, trigger calibration flags, or alter behavior, so I’d check after updates and recalibrate if the device or service recommends it.
Do Rental Laser Levels Come Pre-Calibrated for Immediate Use?
Yes — often they’re pre-calibrated, but I treat them like a borrowed compass: rental variability means I always do quick user verification before trusting readings, since transport and prior use can still introduce drift.