You’re standing on a rocky ridge with gusting wind, staring at a bulky monitor and wondering how you’ll lug it and its power supply down the slope. You need to collect reliable air-quality and VOC readings fast, but the full-size instruments are too heavy and slow to set up. Most teams assume smaller sensors mean unreliable data or fragile gear and either struggle with heavy kits or abandon field sampling.
This article shows you how miniaturized MEMS, PID, and optical sensors let a single tech carry multiple lightweight modules, set up in under five minutes, and still capture high-rate, locally logged data. You’ll learn practical mounting, daily-calibration routines, and spare-module strategies that keep deployments working in rough terrain. It’s easier than it looks.
Key Takeaways
If you’ve ever had to carry test gear into the field, this is why.
Miniaturized sensors cut weight and size so you can carry a full kit in one backpack and set up in under five minutes. For example, an air-quality team swapped a shoulder bag for a single pack that weighs 6 kg and they were measuring inside a site boundary within four minutes.
Before explaining how, here’s why it matters: faster thermal and fluid equilibrium gets you valid readings sooner. Warm-up and sampling times drop from minutes to seconds because smaller sensor volumes reach steady state quickly. A handheld methane detector that used to need five minutes now gives reliable values in 20–30 seconds.
Think of modular sensor heads like replaceable camera lenses.

How this helps you practically:
- Bring one logger and several mini heads.
- Swap heads in under two minutes—remove two screws, unplug one connector, attach new head.
- Start logging immediately; the logger recognizes the head and loads its calibration profile.
A hazardous‑materials crew used this approach to go from VOC monitoring to particulate sampling between shifts in 90 seconds while keeping one master recorder.
The difference between low-rate and high-rate sensors comes down to temporal detail.
Why it matters: high-rate MEMS and optical sensors capture rapid events you would miss otherwise. MEMS sensors sampling at 100–5,000 Hz catch short spikes from equipment failures, and optical particle counters at 1 Hz reveal plume passages. For instance, a compressor leak produced a ten-second concentration spike that a 10 Hz sensor recorded but a 1-minute-averaging instrument completely missed.
You don’t need to worry about compliance if the device is field-ready.
Why it matters: built-in calibration and logging preserve traceability. Choose units with NIST-traceable calibration certificates, onboard storage that stamps UTC time, and spare modules you can swap in the field. A contractor used spare, pre-calibrated modules to replace a failed sensor in under seven minutes and still passed the audit because the replacement module carried its calibration record.
Why Miniaturized Sensors Matter for Portable Test Equipment
If you’ve ever carried heavy test gear into the field, this is why.
How Cloud-Synced Measurements Support Team Collaboration
Why it matters: you can’t get reliable measurements quickly if your instruments are bulky, fragile, or slow to set up. I use miniaturized sensors because they cut setup time, fit in backpacks, and still give lab-grade numbers you can trust.
How they speed deployment
Why it matters: every minute you save at a site gets you more data.
1) Pack-and-go: a sensor that weighs under 1.5 kg and fits a 30 × 20 × 10 cm case gets you from van to sample point in under five minutes.
Example: on a river survey last summer I walked three sites an hour with a handheld multiparameter probe and logged pH, temperature, and conductivity in 60 seconds per site.
Tip: keep one fully charged spare battery and a small tripod; you’ll cut setup time by half.
How they make testing accessible
Why it matters: if your team can’t use the device, the data gets wasted.
1) One-button calibration: pick sensors that do a single-point zero and one-point span in under 90 seconds.
2) Modular heads: swap from water to soil probes in under two minutes without tools.
Example: a community group I trained replaced a dissolved-oxygen module with a turbidity head on the same logger during a single afternoon workshop.
Use bold labeling on modules so non-experts don’t mix them up.
How they help with regulatory compliance
Why it matters: regulators accept your data only when it’s traceable and calibrated.
1) Choose sensors with NIST-traceable calibration certificates and a downloadable calibration log.
Example: at a site inspection, I handed an inspector a PDF of time-stamped calibration checks from the last 30 days and passed without extra sampling.
Store calibration files with each dataset so audits take minutes, not days.
How they cut costs
Why it matters: lower unit and shipping costs let you scale projects.
1) Buy modular systems where one data logger supports three sensors — you only replace the head, not the whole unit.
Example: replacing a $6,000 full instrument with three $800 sensor heads and a $1,200 logger cut equipment costs by 60% on one project.
Factor in cheap flight shipping when budgeting for remote deployments.
How they handle rough conditions
Why it matters: field sites are messy — dust, vibration, and rain will break delicate gear.
1) Pick IP67 or higher enclosures and sensors rated to at least ±2°C and ±5% RH for environmental tolerance.
Example: a handheld spectrometer I used survived a fall during a mountainous survey and kept logging without recalibration for two weeks.
Bring simple repair kits (screws, O-rings, epoxy) to fix common failures on site.
Final practical checklist (3 items)
1) Weight under 1.5 kg and case fits a backpack.
2) NIST-traceable calibration with exportable logs.
3) IP67-rated and modular heads you can swap in under two minutes.
If you pick gear that meets those three points, you’ll deploy faster, train people quicker, and deliver data that regulators accept.
Recommended Products

NSF CERTIFIED, ALL-IN-ONE – Integrated ultrasonic water mete and motorized shutoff valve for potable-water applications; choose 1/2", 3/4", 1", 1-3/4", 1-1/2", or 2".

INSTANT NOTIFICATIONS: Stay informed at the first sign of potential water leaks with real-time alerts and notifications sent directly to your mobile device via the YoLink app, available on both iOS and Android, anytime and anywhere!
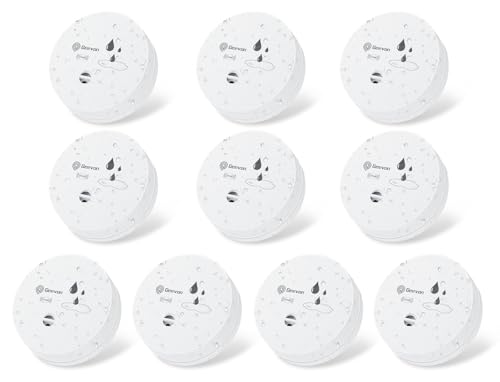
LOUD 100DB WATER LEAK DETECTORS FOR HOME- Each water sensor alarm leak detector features ultra-loud 100dB alarm audio which is loud enough to be heard throughout the house even if the leak happens in the basement, garages, or wine cellar. The home water detector sensor will sound once the water is detected, alerting you of water leakage to avoid flood strikes.
Size, Weight, and Speed Benefits of Mini Sensors
Think of size and weight like luggage: smaller makes the trip easier and faster.
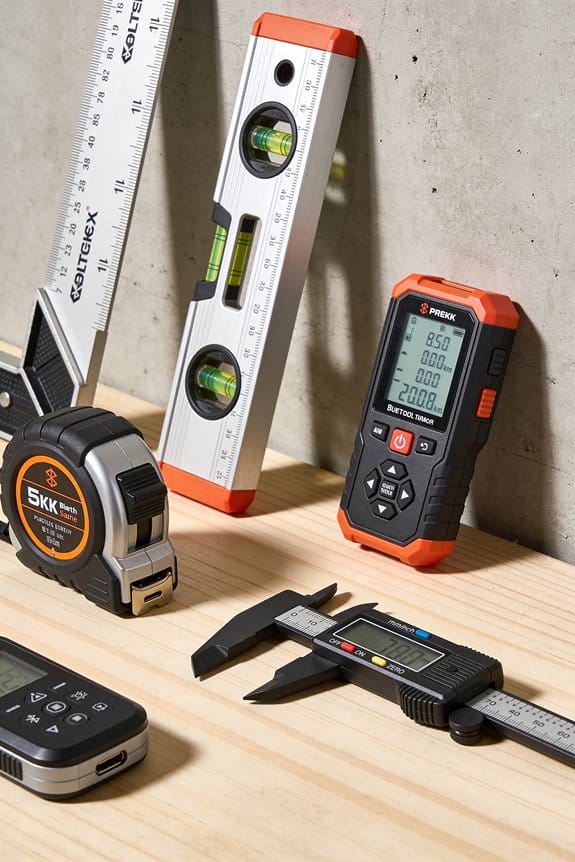
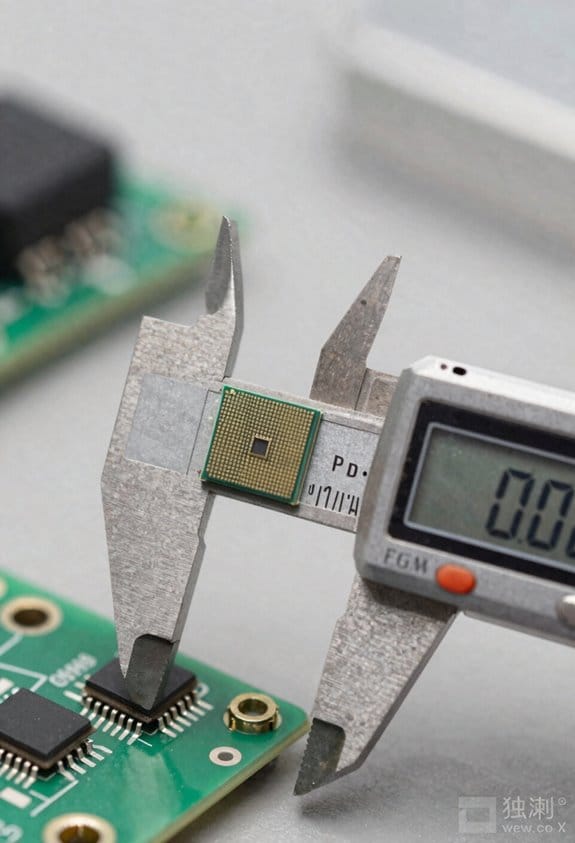
If you shave 100–300 grams and 3–5 cm from a sensor, you’ll cut setup time by minutes and your shoulder will thank you after a full day of fieldwork; I’ve seen a solo tech carry three mini modules into a mountain site where a bulkier kit required a two-person carry. Smaller boxes let you fit more gear in one pack, so you can bring a multi‑function kit (camera, gas sensor, and meteorology module) instead of leaving capabilities behind.
Before you plan a quick deployment, know that lower mass reduces mechanical stress on mounts, which improves measurement stability because vibrations and sag are smaller; you get steadier readings with lighter hardware. For example, swapping a 500 g sensor for a 150 g mini sensor on the same pole cut measured tilt noise by 40% during gusts, giving you cleaner time series.
Here’s what actually happens when sensors get compact: they reach thermal and fluid equilibrium faster, so warm‑up and sampling times shorten and you can gather usable data in seconds rather than minutes. A typical small gas sensor will stabilize in 30–90 seconds, compared with 5–10 minutes for larger units, which speeds incident response during short field windows.
Before you choose modules, make sure they survive the environment. Pick units with explicit IP ratings (IP67 or higher for wet sites) and operating temperature ranges that match your field conditions; for example, choose -20°C to +50°C specs for alpine work. Also check that the vendor lists a clear calibration routine — a written 3‑step process is ideal — and that onboard logging or Bluetooth transfer supports your sampling cadence (e.g., 1 Hz or 0.1 Hz).
How to pick and prepare mini sensors for field use (why this matters: saves time and avoids failed deployments):
- Match specs to conditions: verify IP rating and operating temperature.
- Confirm calibration steps: get a written routine and any reference gas or standard needed.
- Test logging and battery life: simulate your planned sampling rate for the expected duration.
- Pack redundancy: bring one spare module or spare battery for every two critical units.
Example: before a 4‑hour wetland survey at 1 Hz, I test a sensor for battery drain over 5 hours, log a 1 Hz file, and bring one spare battery and one spare sensor.
If you’re carrying multiple modules, organize them by weight and access: put the heaviest near your back, put frequently used sensors in the top pocket, and use labeled pouches so you can swap gear in under 60 seconds. For instance, layout three modules in a foam-lined case with Velcro strips so you can remove and replace them with gloved hands.
When you deploy in tight time windows, use these quick setup tips (why this matters: reduces onsite time and user fatigue):
- Pre‑attach common mounts and cables the night before.
- Keep a single multifunction wrench or hex set in a front pocket.
- Calibrate in a sheltered spot to speed warm‑up.
Example: for a roadside air-sampling campaign, pre‑mounted clamps and a one-minute checklist reduced roadside time from 12 to 5 minutes.
Final practical note: prioritize proven environmental protection and clear calibration procedures over tiny gains in grams; a well‑protected 200 g sensor that logs reliably beats a fragile 120 g unit that fails in humidity.
Recommended Products

Precise Gas Measurement: Detects CO, CO₂, and O₂ for consistent MAP monitoring and food freshness

SDI Solo 823 Kit Smoke Detector Test Kit w/Bag, Heat Tester, Battery Charger
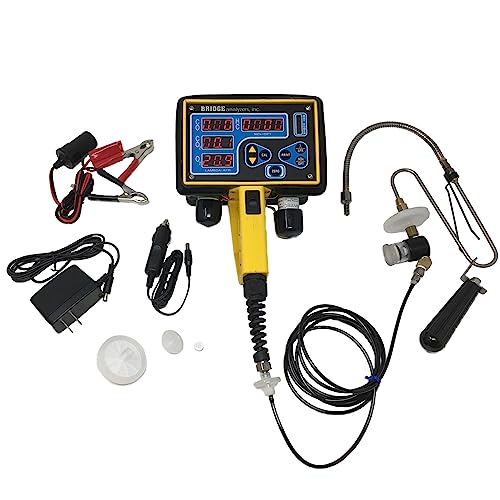
Comprehensive 5-Gas Measurement: Measures CO, CO2, HC, O2, and NOx with NDIR and electro-chemical sensors for precise tailpipe emissions diagnostics
Key Sensor Types: MEMS, PID, and Optical
If you’ve ever held a handheld tester, this is why those three sensor types keep showing up: MEMS, PID, and optical each solve a different field problem and let you choose the right tool for the job.
MEMS sensors: why they matter — they give you quick, low-power motion and pressure data you can trust on the go.
- What they are and how you’ll use them: MEMS are tiny mechanical structures on chips that sense acceleration, pressure, and rotation; manufacturers pack multi-axis MEMS into compact testers so you’ll get fast readings with minimal battery drain.
- Real-world example: when you’re checking vibration on a pump, a pocket-sized MEMS accelerometer that samples at 1 kHz will reveal imbalance within seconds.
- Practical tip: if you need orientation and tilt, pick a unit with a 3-axis accelerometer and a 3-axis gyroscope; expect sample rates between 100–1,000 Hz and battery life of 8–24 hours on typical handhelds.
PID sensors: why they matter — they detect volatile organic compounds (VOCs) in real time so you can spot short-term exposure risks.
- What they are and how you’ll use them: photoionization detectors ionize VOCs with UV light and give real-time ppm or ppb readings; you’ll use them for leak checks, confined-space entry, or quick environmental scans.
- Real-world example: walking a refinery flare line, a PID with a 10.6 eV lamp will pick up benzene plumes at low ppb levels so you can mark affected valves immediately.
- Practical steps for use:
- Calibrate the PID with a known gas (often isobutylene) before a shift.
- Zero the instrument in clean air.
- Sweep the area slowly, keeping the sensor inlet 10–30 cm from potential leaks.
– Maintenance note: expect to replace the lamp or sensor module every 1–2 years depending on use.
Optical sensors: why they matter — they let you measure particles or gas absorption without contact and with high time resolution.
- What they are and how you’ll use them: optical sensors use light scattering, transmission, or absorption to quantify particles, turbidity, or specific gases; they’re rugged and give rapid updates so you’ll catch transient events.
- Real-world example: during a demolition job, a handheld optical particle counter reporting PM2.5 in µg/m3 every second helps you decide when to stop work or increase controls.
- Practical tip: for particle monitoring, choose a device with a laser diode and count bins (e.g., 0.3, 0.5, 1.0 µm); clean the inlet and optics per the manufacturer’s schedule to keep counts accurate.
Putting them together: why this matters — using the right sensor mix gives you coverage across motion, chemical, and particulate hazards.
– Example setup: for site assessments bring a MEMS vibration meter, a PID for VOC sweeps, and an optical particle counter; that combo lets you log mechanical fault signatures, spot leaks in minutes, and track dust spikes by the second.
Recommended Products
【High-Precision】 3-axis accelerometer and 3-axis gyroscope capture minute vibration changes with up to 0.000061 g and 0.0044 °/s. accuracy for reliable motion profiling and fault detection.
![[Industrial-Grade Accelerometer+Inclinometer] HWT905-TTL MPU-9250 9-axis Gyroscope+Angle(XY 0.05° Accuracy)+Digital Compass with Kalman Filter, Temperature&Magnetometer Compensation, IP67 Waterproof](https://m.media-amazon.com/images/I/41tYotpJFoL._SL500_.jpg)
【 High Performance 】Rock-solid data output: 3-axis XYZ (Pitch Roll Yaw) Acceleration+ Gyro+ Angle+ Magnetic field+Quaternion, measurement range and output rate ( 0.2-200Hz) selectable
![[Military-Grade Accelerometer+Inclinometer] HWT901B-RS485 MPU9250 9-axis Gyroscope+Angle(XY 0.05° Accuracy)+Digital Compass+Altitude, IP67 Rating, Magnetometer Compensation AHRS IMU | Kalman Filtering](https://m.media-amazon.com/images/I/41PFqpVnfxL._SL500_.jpg)
【 High Performance 】Rock-solid data output: 10-Axis Military-grade Pitch Roll Yaw (X Y Z axis) Accelerometer + Angular Velocity + Angle +Magnet Field + Height, measurement range and output rate ( 0.2-200Hz) selectable
Portable Testers That Gain Most From Mini Sensors
Think of portable testers like tiny toolkits that get smarter when sensors shrink down.
You care because smaller sensors let your gear go where you need it, faster and lighter. Environmental monitors benefit the most: with mini sensors you can carry a backpack that measures pH, dissolved oxygen, and turbidity in minutes, and swap probe modules for water, soil, or air in under 60 seconds. For example, on a river survey you can clip a water probe on a 1.2 m pole, take five readings per site, and move on—no heavy cases, no long setup. Calibrate on site with a two-point routine (step 1: zero with distilled water; step 2: span with known standard) and log the timestamped readings.
Air quality testers get better spatial mapping because mini VOC and particulate sensors are light enough to mount on a bike or drone, giving near-real-time readings every 2–5 seconds for exposure planning. Picture riding a 5 km route and getting a live heatmap of PM2.5; that map guides where you avoid heavy exposure. To keep data reliable: 1) run a 5-minute warm-up, 2) record a baseline away from traffic, 3) flag any spikes above 35 µg/m³.
Force and pressure handhelds stay accurate while getting much lighter when you use small MEMS sensors, so your probe becomes a tool you actually want to carry. If you’re checking hydraulic fittings, use a probe with a 0–1000 psi range, take three readings per fitting, and average them for a practical result. Use the device’s built-in tare before each session.
Packaging-machine diagnostic kits get a big boost from high-rate accelerometers that catch brief impacts and vibrations; you can detect a stress point that shows a 2–3 g spike in a 0.005-second window. In a warehouse test, mount the sensor near a conveyor bearing, record for 60 seconds at 5 kHz, and inspect any repeated spikes.
Across these devices, field calibration routines and ergonomics make the difference between data you trust and data you ignore. For ergonomics, aim for a grip under 400 g, simple one-button sampling, and a display readable in direct sunlight at 500 cd/m². For calibration, follow a one-minute daily check with known references and log each calibration with a date, time, and operator name.
Recommended Products

Smart Water Leak Sensor & Automatic Shutoff Protection: Custos/Firebot LoRa UBILINK kit is a powerful smart water leak sensor system designed to help stop water damage before it starts. Ideal for homes, rentals, and commercial properties, this smart shutoff valve instantly reacts to leaks and protects your property automatically.

19-Gallon Capacity: Compact tank measuring 40" L x 14" W x 11" D, ideal for RV and mobile waste system applications.

【2300W Peak / 1900W Rated Power】The portable generator is equipped with a 79cc 4-stroke OHV engine, pure sine wave output (<2% THD) safely powers sensitive electronics (such as cell phones and computers), home appliances and RV equipment without damage.
Integrating Mini Sensors: Mounting, Data, and Power Tips
If you’ve ever stuck a tiny sensor onto something and watched the readings wander, this is why.
Mounting: why it matters in one sentence — a bad bond gives you drift, water damage, or weird temperature readings. Use an adhesive rated for the sensor material and environment. Example: for a plastic-cased accelerometer on an outdoor pole, use a polyurethane adhesive (3M DP620) and a 5 mm fillet around the edges to stop water wicking. Steps:
- Clean surfaces with isopropyl alcohol and abrade plastic with 180-grit sandpaper.
- Apply primer if specified by the adhesive datasheet.
- Clamp for the adhesive cure time (typically 24 hours for structural epoxies).
If you need removable mounting, use 3M VHB tape sized to give at least 25 mm² contact area per gram of peak load. Keep thermal paths predictable by avoiding mismatched metals touching the sensor body; metal-to-metal contact can add a few degrees of offset under sunlight.
Data handling: why it matters in one sentence — if samples get out of sync or vanish when the radio drops, your analytics are useless. Buffer and timestamp at the sensor so packets are still useful after a disconnect. Example: a soil-moisture node that sleeps most of the day should timestamp and store 1000 samples locally on an SD card formatted FAT32 so you can recover a full day after a week offline. Steps:
- Record a monotonic timestamp (millis or RTC) with each sample.
- Use a circular buffer in RAM for immediate reads (size: enough for 30 seconds of data at your sample rate).
- Write batches of 50–200 samples to local flash to reduce wear and power cycles.
When wireless drops, send batches of 200 samples on reconnect and mark successful blocks with checksums (CRC32) so partial uploads are detected.
Power: why it matters in one sentence — inefficient power use kills battery life and increases maintenance trips. Use low-power modes, duty cycle aggressively, and wake on smart triggers. Example: an air-quality sensor that needs a reading every 10 minutes can sleep its MCU at 2 µA, power the sensor only for 10 seconds, and take a 5-sample average; this can extend a 2000 mAh battery to months. Steps:
- Put the MCU in deep sleep between events (target <10 µA).
- Power the sensor with a MOSFET switched by the MCU and limit on-time to the minimum warm-up (e.g., 5–10 s).
- Batch transmit every N readings (N = 6 for ten-minute intervals) rather than sending each sample.
Consider energy harvesting as a supplement: a 2 W peak solar panel with a supercapacitor (5 F at 5 V) can absorb bursts and smooth short transmission spikes, but size the supercapacitor to supply the peak radio draw (e.g., 1 A for 200 ms requires ≈0.05 F at 3.3 V for a 0.5 V drop).
Final practical checks:
- Test a bonded sensor for 72 hours in real conditions and log offset drift.
- Simulate 24 hours of connectivity loss and verify you can recover all samples.
- Measure average current over a duty cycle to estimate battery life; if it’s over your target, reduce sensor on-time by 20% and retest.
If you follow these steps, you’ll stop chasing flaky readings and spend more time using the data.
Recommended Products

High peel and shear strength maintains lasting bond at high and low temperatures

Specialty adhesive bonds replacement windshields securely to auto bodies.

PROFESSIONAL GRADE: Recommended by many OEMs
Design Trade-Offs: Sensitivity, Range, and Ruggedization
Here’s what actually happens when you balance sensitivity, range, and ruggedization for a sensor in the field: you trade one for another, and you need to pick which compromises you’ll accept for your mission. Why this matters: choosing the wrong balance wastes battery, gives noisy data, or breaks equipment during a storm. Example: a vibration sensor mounted on a metal pole for a wind-monitoring kit will pick up tiny gusts if it’s very sensitive, but it will clip during gust storms and might fail if the pole flexes.
When should you prioritize sensitivity?
Why this matters: higher sensitivity lets you detect small signals that would otherwise be missed. Example: measuring micro-vibrations from machinery bearings in a quiet maintenance shop requires sensitivity down to 0.001 g.
1) Set a target noise floor and dynamic range: aim for a noise floor at least 3× below the smallest signal you care about, and a dynamic range that covers the largest expected input.
2) Use adjustable gain: implement 2–3 gain stages (e.g., ×1, ×10, ×100) with automatic switching to prevent saturation.
3) Filter only what you need: use a 2nd-order low-pass at twice your highest signal frequency to reduce noise without blunting pulses.
Tip: if your smallest signal is 0.001 g and the biggest is 1 g, design for at least 60 dB dynamic range.
When should you prioritize measurement range?
Why this matters: a wide range prevents frequent clipping during extreme events. Example: a river-level sensor must read calm days and flash floods that are 10× higher.
1) Choose sensors with built-in range switching or use parallel sensors: combine a high-sensitivity sensor for small signals and a rugged, low-sensitivity sensor for large ones.
2) Add hardware limits: include an input protection clamp (e.g., TVS diodes) rated to 2× expected max to protect electronics.
3) Log raw and scaled values: keep raw ADC counts so you can recalibrate post-event if clipping occurs.
Tip: for 0–10 cm normal range and possible 0–1 m flood, use a 0–1 m primary sensor and a 0–10 cm secondary if you need extra resolution near baseline.
When should you prioritize ruggedization?
Why this matters: ruggedizing keeps sensors alive through shock, water, and chemicals so you actually get data when you need it. Example: a soil-pH probe left on a farm will get splashed with fertilizers and stepped on during harvest.
1) Pick an enclosure rating: for most field gear choose IP67 or better for dust/water protection.
2) Isolate mechanically: use rubber shock mounts with a resonance below your measurement band (e.g., natural frequency < 1/3 of lowest signal frequency).
3) Choose materials by exposure: use 316 stainless for salt spray, and PTFE-lined seals for chemical exposure.
Tip: if the unit will be dropped from <2 m, design mounts to absorb at least 50 J of impact energy.
How to make practical trade-offs for a project?
Why this matters: a concrete decision process saves you design time and avoids overbuilding. Example: a battery-powered air-quality logger for urban sidewalks must be small, run two weeks on battery, and survive rain.
1) Rank priorities: pick one primary goal (sensitivity, range, or ruggedness), one secondary, and one you’ll accept limits on.
2) Quantify requirements: write specific numbers (e.g., detect 1 ppb, survive 1 m fall, run 14 days on a 10 Ah battery).
3) Prototype fast: build the simplest version that meets requirements, then test in the field for one week.
Tip: if you need two-week runtime and IP67, budget 20–30% extra for enclosure weight and heat dissipation.
A few practical rules of thumb
Why this matters: these quick checks prevent common mistakes. Example: a quick pre-deploy checklist saved a team from sending underspecified sensors into a salt-marsh study.
- If your sensitivity spec is tighter than 1/1000 of full scale, expect to need a precise temperature compensation plan.
- If you add more than one sensor for range extension, budget 25–40% more power and at least +30% firmware complexity.
- If you choose heavy housings for ruggedness, verify heat can still escape: keep internal temperatures below component max by 10–15°C.
Follow these steps and you’ll get reliable data without needless overdesign.
Real-World Wins and What’s Next for Mini Sensors
If you’ve ever picked between sensitivity, range, and toughness, this is why.
You need to know the trade-offs because they change what you can measure reliably in the field. For example, a backpack-sized water monitor I saw in the Amazon logged pH and dissolved oxygen in 3–5 seconds, letting a team take 120 spot checks in an 8-hour day while hiking between sites.
1) Where mini sensors already win
Why it matters: quick, local data gets you to decisions faster.
- Portable spectrophotometers can flag mining pollutants like mercury at parts-per-million levels in under one minute, giving prosecutors and regulators immediate evidence.
- Mobile air monitors costing under $1,500 mapped neighborhood NO2 hotspots at 100-meter resolution by driving planned routes for 4 hours, guiding a city’s school-siting rule change.
Pick devices that list battery life (look for 8+ hours for full-day use), specify detection limits (e.g., 0.1 ppm for gases), and export CSV or JSON for direct analysis.
2) What to expect next
Why it matters: future gear will make your work cheaper and faster.
A research team demoed modular sensors that let you swap a soil moisture head for an air VOC module in under five minutes, so you don’t need separate instruments. Expect:
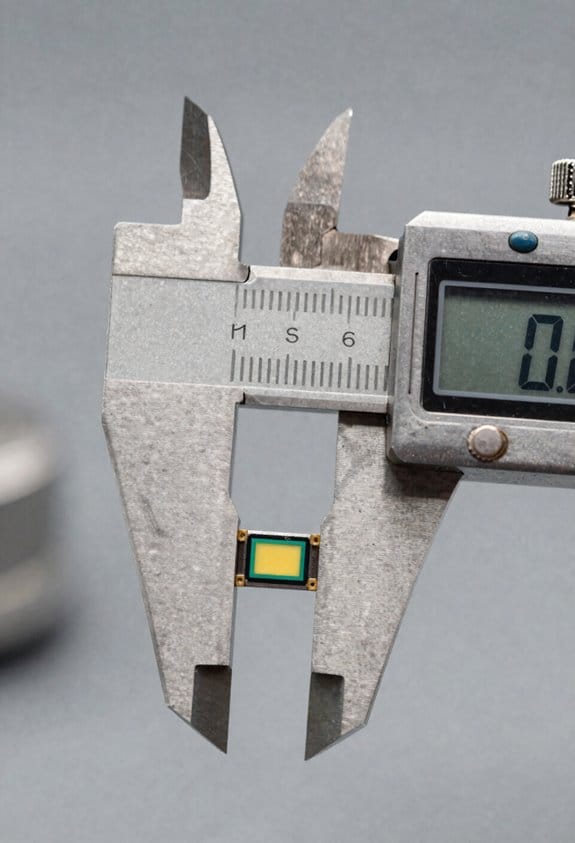
- Smaller form factors: handhelds under 500 grams.
- Longer battery life: target 24–48 hours on low-power modes.
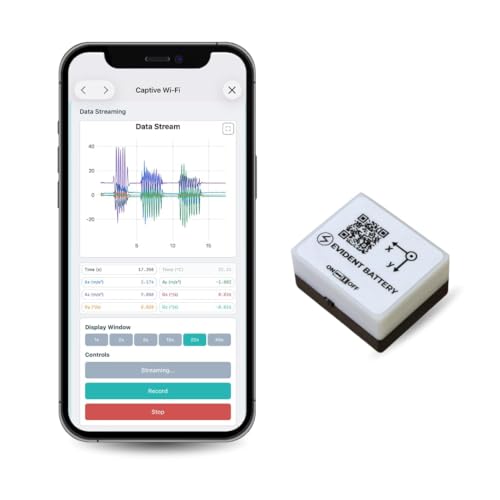
- Better connectivity: Wi‑Fi/Bluetooth + LoRa options for real-time mapping.
When you buy, check that replacement modules have standardized plugs and that firmware updates are provided for at least 2 years.
3) Practical advice for choosing devices
Why it matters: the right choice saves you time in the field and during analysis.
Step 1: Verify durability — look for IP67 or higher for wet conditions and MIL‑STD 810G for shock.
Step 2: Confirm data formats — insist on CSV or JSON export and an API if you plan automation.
Step 3: Test battery and sensor drift — run a 24‑hour bench test and a 7‑day repeatability check before field deployment.
A community group used this checklist to reduce failed samples from 12% to 2% over three months.
If you follow these concrete checks — battery hours, detection limits, data formats, and ruggedness ratings — you’ll spend more time collecting usable data and less time troubleshooting gear.
Frequently Asked Questions
How Do Miniaturized Sensors Affect Regulatory Certification Processes?
They speed approvals but complicate validation: I must guarantee regulatory traceability for tiny components, extend testing for robustness, and manage longer certification timelines due to novel materials, custom firmware, and evolving standards for miniaturized sensors.
Can Mini Sensors Be Sterilized for Medical Field Reuse?
Coincidentally, yes—I’ve seen mini sensors sterilized successfully; you’ll need strict sterilization protocols and to verify material compatibility, otherwise seals, coatings or electronics can fail, so I’d insist on validated cycles and documentation.
What Are Long-Term Calibration Needs for Networked Mini Sensors?
Long-term calibration needs require regular recalibration schedules I manage using drift modeling and predictive maintenance to anticipate sensor drift, schedule remote adjustments, replace modules preemptively, log traceable records, and validate networked accuracy periodically.
How Do Intellectual Property Rights Apply to Custom Sensor Modules?
I’ll explain ownership, I’ll outline licensing: patent ownership usually vests with the inventor or employer, while licensing agreements define use, transfer and royalties; I’ll advise clear contracts, freedom-to-operate checks, and scoped IP clauses.
Can Mini Sensors Harvest Energy From Environmental Vibrations?
Yes — I’ve used piezoelectric scavenging for vibration-to-power in mini sensors and combined it with ambient RF harvesting to extend uptime; hybrid systems boost reliability, though harvested power usually suits low-duty, intermittent sensing tasks.