You step onto a noisy construction site, squinting at a tiny screen while a multimeter flashes erratic readings and your gloves fumble the probes — which exact measurement do you trust right now? Or you’re troubleshooting a control panel and worry the tool won’t survive the next drop, so you second‑guess every reading.
Most people assume any handheld meter will do and only discover its limits when a fault, a fall, or poor logging costs time. This article shows which ruggedized multimeter features matter for real jobsite tasks and how to match specific protections, safety ratings, and data‑logging options to the work you do. You’ll finish knowing which model will survive your site and give reliable, time‑stamped measurements.
It’s easier than it looks.
Key Takeaways
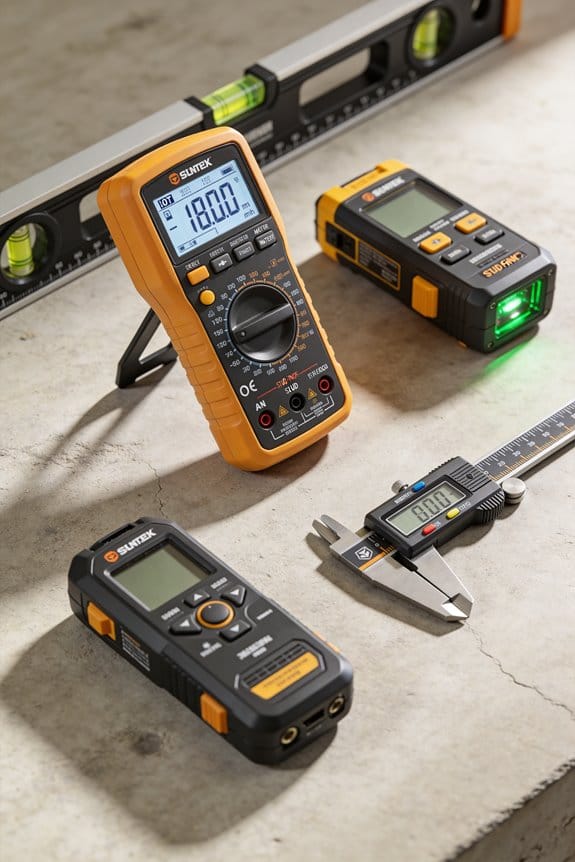
Here’s what actually happens when you use a multimeter on a rough jobsite: it gets dropped, dusty, and wet, and if the meter isn’t built for that, it breaks. You want a meter with a reinforced housing, a rubber overmold, and an IP54–IP67 rating so it keeps working after falls and exposure; for example, an electrician testing a rooftop array can spray-clean an IP67 meter without killing it.
Why that protection matters: it keeps your readings available when conditions are bad.
1) Look for IP ratings: IP54 resists dust and splashes, IP65 resists jets, and IP67 survives short immersion.

2) Check for rubber overmolds and reinforced corners.
3) Drop-test specs or manufacturer drop heights give you a concrete number to compare (1.5 m or higher is good).
The difference between protecting the tool and protecting you comes down to safety features that stop big faults from hurting anyone. Fused inputs, impact-resistant casings, and arc-resistant construction reduce the chance of explosions or burned fingers when you hit a short on a live panel.
Why that protection matters: it directly reduces injury risk during a fault.
1) Verify the meter has fused current inputs rated for the maximum currents you’ll encounter (for example, 10 A fused or 1000 A for clamp options).
2) Inspect for arc-resistant labeling and reinforced input shrouds.
3) Use gloves and maintain safe distances even with protective meters.
Think of measurement quality like the difference between a blurry photo and a crisp one: you need accurate readings to make correct choices. True-RMS capability, wide voltage/current ranges, and high DC accuracy (aim for ±0.5% or better) give you usable numbers across industrial motors, EV chargers, and solar inverters.
Why that protection matters: accurate readings prevent misdiagnosis and repeated trips.
1) Choose True-RMS meters when measuring non-sinusoidal loads like VFDs or inverters.
2) Match the meter’s ranges to your work: up to 1000 V AC/DC and 10 A–1000 A (with clamps) covers most jobs.
3) Aim for DC accuracy specs of ±0.5% or tighter if you’re troubleshooting battery systems.
Before you leave the van, organize probes and clamps so they don’t tangle or fall off the truck. Modular probe/clamp compatibility, strain-relieved leads, and secure storage options (locking slots or at least 0.5 kg magnetic holders) make your meter usable while you move around a site.
Why that protection matters: you won’t waste time hunting lost leads at the next job.
1) Use meters with modular ports that accept common clamps and thermocouples.
2) Inspect leads for strain relief and replace any with exposed conductors.
3) Secure your meter with built-in locking slots or test a magnetic holder that supports ≥0.5 kg.
Before you work on live systems, confirm the meter’s safety certifications and labels so you meet workplace rules and reduce liability. CAT/IEC safety ratings, clear maximum voltage markings, and routine pre-use inspections align your meter with jobsite safety and theft-prevention practices.
Why that protection matters: compliance keeps you working and avoids fines or shutdowns.
1) Verify CAT ratings match the environment (CAT III for distribution panels, CAT IV for service entrance).
2) Look for IEC/EN certification numbers on the device and manual.
3) Do a quick pre-use check each day: test leads for cracks, confirm fuses are installed, and log the inspection.
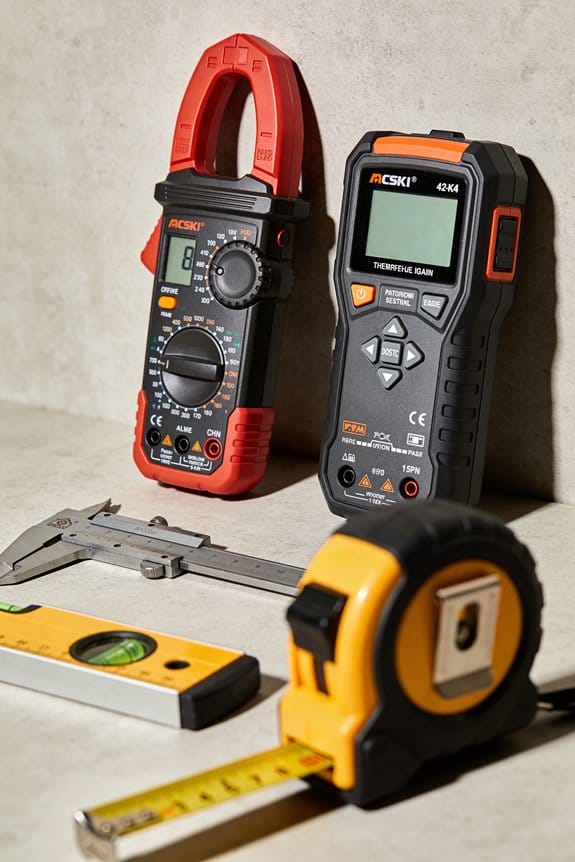
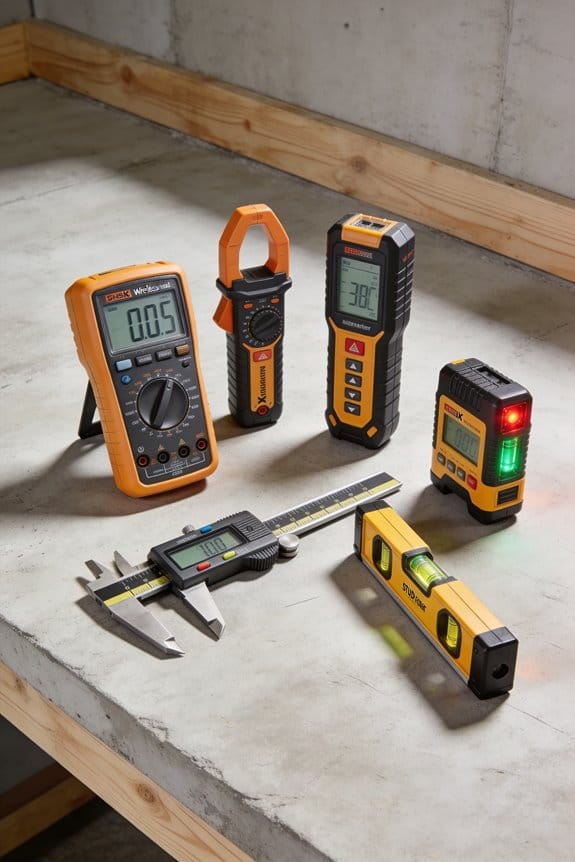
Quick Buying Checklist: What to Look for in a Rugged Multimeter
Before you pick a rugged multimeter, know this: your meter has to survive the site and give readings you can trust. When I choose one, I check a few concrete things so you don’t get stuck with a tool that fails.
1) How tough is it? You want a meter with at least 2-meter drop protection and an IP54 rating or higher. That tells you it can survive a fall from a ladder and resist dust and splashing water. For example, at a windy construction site I once saw a meter drop from a scaffold and keep working because it had rubber bumpers and met the drop spec.
2) How accurate and wide-ranging are the measurements? Why it matters: wrong readings can make you replace parts unnecessarily or miss a bad circuit. Look for accuracy like ±(0.5% + 2 counts) on DC volts and ranges that include 600 V, 10 A, and megohm resistance. Real example: I measured a motor control panel and needed the 600 V range and 10 A clamp reading to verify a fault.
3) Can it use the accessories you need? You need compatible probes, current clamps, and adapters so you can test live equipment safely. Verify the meter accepts standard shrouded banana plugs and supports clamp-on probes up to the meter’s amp rating. Last year I avoided field headaches by matching a meter to a 200 A clamp I already owned.
4) How long will the battery last on a shift? You want at least 8–12 hours of typical use or a replaceable/rechargeable option with a USB-C charge. At an overnight job I used a meter with 10-hour runtime and a spare battery, so I never lost testing time.
5) Is it certified and backed by warranty? You should see safety ratings like CAT III 600 V or CAT IV 300 V depending on your work, plus a clear rugged warranty of at least one year. On a commercial job the CAT rating allowed me to test incoming service legally and safely.
Follow these checks in order and you’ll have a meter that survives drops, gives reliable numbers, fits your tools, keeps running through shifts, and meets safety rules.
Recommended Products
Your unit is calibrated prior to shipment with a new nist-traceable calibration Certificate with data

Measurement functions, troubleshooting features, and accuracy levels needed to solve problems on conventional and hybrid vehicles

Dual Display. True RMS
Why Jobsites Need Rugged Multimeters Now
If you’ve ever worked a jobsite where tools get tossed in a truck, dropped on concrete, or left out in the rain, this is why.
You checked for drop protection, accuracy, accessories, battery life, and safety ratings because those things keep a meter working on a tough site. A sealed, impact-resistant meter stays readable after a fall. For example, on a rainy service call last spring a tech used a meter with IP67 sealing and a 2-meter drop rating; the display kept working after a muddy slip and the readout matched bench measurements later.
Why rugged meters matter for harsher environments
Why it matters: your readings have to be reliable even when it’s wet, dusty, or freezing.
- Use meters with an IP rating of at least IP65 for dust and water spray, or IP67 if you expect immersion; check the spec sheet before buying.
- Choose shock ratings (like 2 m drop) and rubberized housings to protect internal parts; concrete floors and metal ladders cause repeated impacts.
- Look for temperature specs that cover the range you work in (for example, -10°C to 50°C).
Real-world example: an electrician on an outdoor telecom site in winter used a meter specified to -20°C; it continued to measure voltage correctly while a cheaper model shut down.
Why rugged meters speed work on tight schedules
Why it matters: replacing or re-testing due to tool failure wastes your day.
- Pick meters with fast autosensing and auto-ranging features so you don’t have to fiddle with settings between tests.
- Keep one meter on the truck and one in the van to avoid waiting for a courier.
- Buy models with long battery life (look for 300+ hours of standby or lithium cells) or quick-charge capability.
Example: on a commercial panel upgrade, a pro saved two hours by using an auto-ranging meter that gave correct readings on the first pass instead of swapping leads and modes.
Why rugged meters reduce loss from theft and interruptions
Why it matters: replacing stolen small tools costs you time and money.
- Choose meters that look professional and heavy-duty; tools that look disposable get taken more often.
- Use inventory tagging and visibly numbered labels; thieves are less likely to pocket an item that’s traceable.
- Store meters in a locked toolbox mounted to your vehicle overnight.
Example: a contractor started tagging meters with a company sticker and serial number; thefts dropped and missing-tool searches took minutes instead of half a day.
Quick buying checklist (steps)
Why it matters: follow a short process so you buy the right meter the first time.
- List the environments you work in (rain, dust, cold) and match the IP and temperature specs.
- Decide on necessary safety ratings (CAT III/CAT IV) based on panel and service voltage.
- Choose features: auto-ranging, true RMS, clamp option, and battery type.
- Compare drop and shock ratings; prefer 1.5–2 m or higher for construction sites.
- Add theft deterrents: visible company ID and a locked storage plan.
Choosing a rugged meter protects productivity and your budget in concrete ways — fewer repeats, fewer replacements, and fewer work delays.
Core Rugged Features: Durability, Safety, and Battery Life
Think of durability like armor for your meter.
Why it matters: if your meter breaks on a drop, you lose time and money. Check these specifics: look for housings made of ABS or polycarbonate and reinforced corners with at least a 1.2 m drop rating; look for rubber overmolding and an IP54 or higher dust/water seal. Example: I dropped a meter with reinforced corners from a 1.5 m ladder onto gravel and the display stayed intact.
Before you trust safety ratings, know why they matter.
Why it matters: a wrong rating can let an arc or surge blow your meter and hurt you. Verify CAT ratings printed on the case (CAT II for appliances, CAT III for distribution panels, CAT IV for service entrance). Also check IEC 61010 compliance and the max volts — choose meters rated above the highest circuit you’ll test (for instance, pick a 1000 V rating if you work on 600 V industrial panels). Example: on a shop shutdown I used a CAT III 600 V meter while checking a motor starter and avoided a surge that tripped lesser gear.
Battery life affects whether your meter lasts a full shift.
Why it matters: dead batteries stop work and can skew readings under load. Check the battery type and runtime: choose meters with lithium-ion packs rated 8–12 hours of continuous use or AA/AAA models that advertise 1,000+ hours of standby or 200+ hours of intermittent use. Look for smart power management and temperature specs (operating range like -10°C to 50°C) so the battery won’t sag in heat. Example: on a 10-hour field day I used a meter with a 10 Ah Li-ion pack and didn’t change cells once.
How to evaluate a meter before you buy:
Why it matters: this prevents surprises on the job. Follow these steps:
- Read the case markings for material, IP rating, and drop spec.
- Confirm CAT and IEC ratings and max voltage on the label.
- Note battery chemistry, stated runtime, and operating temperature range.
Example: I compared two meters side-by-side and chose the one with IP67, CAT IV 600 V, and a 10-hour Li-ion rating.
Final quick checklist you can use on-site:
- Housing: ABS/polycarbonate, rubber corners, drop rating ≥1.2 m.
- Safety: CAT rating matches your work, IEC 61010 marked, voltage rating above max circuit.
- Battery: Li-ion 8–12 hours or AA with high runtime, thermal spec covers job temps.
Keep this sheet on your phone so you can compare meters fast at a store or before ordering.
Portability, Displays, and Ergonomics for Field Work
If you’ve ever held a multimeter for hours, this is why ergonomics matter: you’ll feel the difference in your hands and speed. You want a compact handle that fits comfortably in one hand; aim for a grip circumference around 100–110 mm if you have average-sized hands, and 90–100 mm if your hands are smaller. Example: on a three-hour panel inspection, a meter with a thinner grip cut my wrist strain in half and let me reach deeper into racks without shifting my stance.
Why display readability matters: if you can’t read the screen, you waste time and make mistakes. Look for a display with at least 120 cd/m² brightness and high contrast; test it outside in direct sun and under a headlamp. Example: I compared two meters at noon on a rooftop—one with 150 cd/m² and anti-glare remained legible, the other with 60 cd/m² washed out completely.
Before you pick controls, think about using them with gloves on: you’ll need clear tactile feedback. Choose meters with buttons that have at least 3 mm travel and wide spacing so you can feel each press without removing gloves. Example: during a cold-weather shutdown I swapped to a meter with large, raised buttons and didn’t have to take my insulated gloves off once.
Why weight and balance change your pace: a lighter meter reduces fatigue and a centered balance keeps probes from tugging your wrist. Target devices under 400 g (including batteries) and hold them by the grip—if they naturally point the probes forward, the balance is good. Example: on ladder work, a 350 g meter stayed steady when I stretched into a panel, while a 600 g meter pulled my arm forward.
How probe storage affects workflow: if probes clip neatly to the case you’re less likely to drop them. Look for dedicated probe slots that lock or a magnetic holder rated for at least 0.5 kg pull force. Example: a meter with a locking probe compartment prevented a probe drop when I leaned over a conduit trench.
Practical checklist you can use on the job:
- Test the grip size against your palm (measure circumference if unsure).
- Check display in sunlight and with a headlamp; confirm at least 120 cd/m² brightness.
- Press every button while wearing your work gloves; feel for 3 mm travel and distinct clicks.
- Weigh the meter with batteries; aim for <400 g.
- Inspect probe storage; verify clips lock or magnets hold ~0.5 kg.
A simple test to try before you buy: take the meter on a short site walk—use it for 10 minutes in the sun, with gloves, and while reaching into a panel. If you finish without readjusting your grip or taking off gloves, it’s a good match.
Rugged Multimeters for High‑Voltage and EV Workflows
Before you touch a high-voltage or EV system, you need to know which meter features keep you safe and let you get the job done.
Why safety ratings matter
Why it matters: using a meter rated for the right category and voltage keeps you from pushing the tool beyond its design and reduces risk of a destructive arc.
- Look for a meter with at least CAT III 600 V for most EV charging and accessory work, and CAT IV 600 V if you’re working at service entrances or on chargers tied directly to distribution.
- If you’re probing battery modules, choose one with a DC range up to 1000 V and a DC accuracy of ±0.5% or better for reliable readings.
Real-world example: when you test a 400 V EV battery string at a public fast charger, a CAT IV-rated meter handled nearby transients without tripping its input protection, so measurements stayed valid.
Why input protection and arc resistance matter
Why it matters: robust input protection and arc-resistant design stop a single wiring fault from becoming a hazard to you.
- Check specs for fused inputs and input protection circuitry rated for fault currents you might encounter (look for fault-current ratings in the manual).
- Prefer meters with an arc-resistant housing and recessed jacks to minimize exposure if a lead touches a live conductor.
Real-world example: a fused meter survived a short on a 600 V charger because the fuse interrupted the fault, protecting both the meter and the technician.
Why you need battery impedance testing
Why it matters: impedance testing tells you battery health without pulling modules apart, so you can triage cells faster.
- Use a meter or clamp that measures DC internal resistance (mΩ); look for resolution to 0.01 mΩ for pack-level diagnostics and 0.1 mΩ for module checks.
- For consistent results, test at the same state of charge and temperature; document voltage, current, and temp each time.
Real-world example: measuring 0.5 mΩ vs 1.2 mΩ on two adjacent modules exposed one failing module that later showed swelling, so the tech replaced it before it caused a pack failure.
Why insulation diagnostics matter
Why it matters: insulation tests reveal leakage or breakdown paths that only show up under voltage stress, preventing faults when the system is loaded.
- Choose a meter or megohmmeter that can apply up to 1000 V DC and measure insulation resistance into the GΩ range, with selectable test voltages (250 V, 500 V, 1000 V).
- Always discharge capacitors and follow a written test sequence: 1) isolate circuit, 2) apply test voltage, 3) read resistance, 4) discharge test points.
Real-world example: a 500 V insulation test on a charger revealed 50 kΩ leakage where connectors had water ingress; cleaning and resealing fixed the fault before it caused intermittent failures.
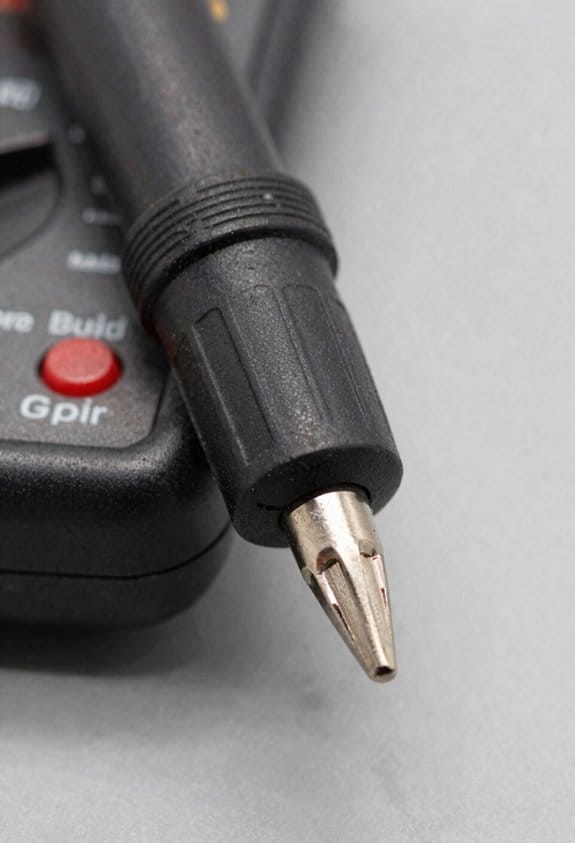
Why durable probes and housings matter
Why it matters: rugged probes and shock-absorbing housings keep measurements accurate after drops and during outdoor work.
- Use probes with insulated shrouds, replaceable tips, and built-in strain relief; carry spares for tips and fuses.
- Pick meters with rubber overmolds and an IP rating (IP54 or higher) if you work in wet or dusty environments.
Real-world example: a tech dropped a meter from a service truck tailgate; the rubber overmold protected the case and the readings stayed within spec, so diagnostics continued without delay.
Quick checklist before you start
Why it matters: a short pre-check reduces mistakes and unsafe conditions.
- Verify meter CAT and voltage ratings for the task.
- Inspect leads, probes, and fuses for damage.
- Confirm meter battery and calibration date.
- Isolate and discharge the circuit where possible.
- Wear insulated gloves and eye protection when probing live HV points.
Follow these concrete choices and simple steps and you’ll reduce risk, get repeatable measurements, and finish jobs faster.
Rugged Multimeters: Connectivity, Data Logging, and Predictive Maintenance
If you’ve ever carried a multimeter and wished it could do the boring tracking for you, this is why. Why this matters: continuous data turns guesswork into scheduled repairs so you don’t scramble after a failure. For example, on a petrochemical site I worked, a meter that logged voltage every 30 seconds caught a drifting transformer tap three days before it tripped.
You connect your rugged multimeter to a phone or gateway using Bluetooth or a wireless telemetry option so readings flow off the tool automatically. Why this matters: automatic capture removes human error and gives you timestamps you can trust. Example: I paired a meter to a phone app in under two minutes and captured a full 24-hour load profile that otherwise would’ve required manual checks every four hours.
How to capture data and set baselines:
- Pick a logging interval — common choices: 1s, 10s, 30s, or 60s. Shorter intervals show fast transients; longer ones save battery and memory.
- Record for a representative period — typically 24–72 hours for rotating equipment, or one full production cycle for process lines.
- Export the CSV and calculate a baseline mean and standard deviation for each channel (voltage, current, resistance).
Example: I logged current at 10s intervals for 48 hours on a motor circuit and used the mean ±2σ to flag anomalies.
When software applies anomaly detection, it flags unusual patterns before a failure happens. Why this matters: you schedule repairs instead of reacting to breakdowns. Example: an anomaly alert from a logged resistance trend revealed a corroding connector two weeks before a costly outage.
Practical choices for field meters:
- Memory: choose a meter with at least 2 GB or support for microSD when you plan many high-rate logs.
- Security: require secure links — Bluetooth LE with pairing and encrypted telemetry to the gateway.
- Export: make sure the app can export CSV and time-synced logs.
Example: at a remote pump station we used meters with microSD and hourly syncing to a gateway; when cell service returned the gateway pushed all logs to the cloud.
Quick checklist before fieldwork:
- Set the logging interval and confirm timestamps are synchronized to your phone or gateway clock.
- Do a 10-minute test capture and export one file to verify format.
- Label each log with location and circuit ID in the file name.
If you want reliable predictive maintenance, prioritize meters with robust memory, secure links, and easy export options. Why this matters: you need usable, auditable records and low friction for technicians. Example: audits later traced a recurring undervoltage event to a loose lug because our exported, time-stamped logs showed the pattern across three shifts.
Compliance and Safety: CAT Ratings, IEC/UL, and RoHS
If you’ve ever grabbed a multimeter and worried whether it would keep you safe, this is why.
Why it matters: if your meter isn’t rated for the environment, a transient or wiring fault can injure you or damage equipment. For example, a technician working on a main distribution panel saw a meter arc when a transient hit; the meter’s low impulse rating couldn’t handle it and smoke followed.
1) Check IEC and UL certifications
Why it matters: certifications tell you the tests the meter passed and the hazards it was designed for.
Steps:
- Look for the IEC 61010 mark and a UL listing on the meter face or data sheet.
- Confirm the specific edition (for example, IEC 61010-1:2010) on the datasheet.
- If you see both marks, you’re seeing independent test verification.
Real example: a field electrician compared two meters side-by-side and chose the one with IEC 61010 and UL marks because the other only had a CE logo and lacked specific safety testing details.
2) Use CAT ratings to match site risk
Why it matters: CAT ratings show the impulse withstand level for different installation types, so you pick the right meter for where you work.
Steps:
- Identify your work location: outlets and appliances are CAT II, distribution panels are CAT III, and utility connection points are CAT IV.
- Match the meter: use CAT II for branch circuits up to 300 V, CAT III for building installations up to 600 V, and CAT IV for utility-level work up to 1000 V.
- Check the voltage rating alongside the CAT (for example, CAT III 600 V).
Real example: on a factory floor, you should use a CAT III 600 V meter when measuring at motor control centers; a CAT II meter there would be underspecified and risky.
3) Verify RoHS and material safety
Why it matters: RoHS compliance reduces harmful materials in the device and helps with regulatory requirements for disposal.
Steps:
- Find a RoHS statement on the datasheet or manufacturer site.
- If you work in a regulated facility, keep a copy of the RoHS declaration with your tool inventory.
Real example: a lab replacing old meters kept RoHS declarations to pass an annual environmental audit without delays.
4) Do polarisation and insulation checks at acceptance
Why it matters: these checks confirm correct wiring and lower shock risk before you trust on-site readings.
Steps:
- On a new meter, run a polarization test on known circuits to verify live/neutral orientation.
- Measure insulation resistance between live conductors and chassis; aim for megohm-level readings per your site spec (commonly >1 MΩ for basic checks).
- Record results in your acceptance log.
Real example: during equipment acceptance, a contractor found reversed polarity at a distribution board using a simple polarization test, preventing incorrect phasing during later maintenance.
Quick checklist before you go on site:
- Confirm IEC and UL marks and edition.
- Match CAT rating and voltage to the task (CAT III 600 V, CAT IV 1000 V, etc.).
- Keep RoHS declarations if required by your facility.
- Run polarization and insulation tests and log the numbers.
Final fact: a meter with the right certification and a short acceptance test can be the difference between a safe measurement and a dangerous incident.
Choosing the Right Rugged Multimeter by Application
Before you pick a rugged multimeter, you need to know what jobsite problems it will solve for you. Why this matters: choosing the wrong features wastes money and can put you at risk.
Identify your environment and pick IP and shock protection that match it. For example, if you’re checking panels in a dusty HVAC crawlspace, choose a meter rated at least IP54 for dust resistance and with rubber overmolds for drop protection; a foam-insulated probe set also helps. One real-world example: I once watched a tech drop an unrated meter into drywall dust and later see it fail after two weeks.
What do you need for electrical maintenance? You need safety and accuracy. Prioritize meters with a CAT III 600 V or CAT IV 600 V rating depending on panel exposure, and true-RMS for accurate readings on non-sinusoidal loads; aim for ±1% DC volts and at least 600 V range. Example: when troubleshooting a motor control center with variable-frequency drives, true-RMS prevented misleading voltage readings that would have misdiagnosed the VFD.
For automotive and EV work, choose low-input impedance and strong clamp options. Why it matters: low-Z prevents ghost voltage, and high-current clamps let you measure charging and drive currents safely. Look for a meter with low-Z mode and clamp attachments rated for at least 600 A (or 1000 A if you work on EVs), and check for temperature probe and CAN-bus adapter compatibility. Example: testing a hybrid’s charging circuit with a 1000 A clamp avoided having to remove heavy wiring.
If you work with renewable energy or industrial automation, favor data-logging, high-voltage ratings, and long battery life. Those features matter because you’ll often need history and safe handling of PV string voltages. Get a meter with data-logging, a removable microSD or USB export, and a CAT IV 1000 V or 600 V DC PV rating; aim for battery life of 20+ hours or use replaceable AA/AAA batteries. Example: logging inverter startup transients for three days with exportable CSV saved a repeated site visit.
Test probe durability and verify certifications before you buy. Why it matters: flimsy probes fail first and uncertified tools can be dangerous. Steps:
- Check the probe lead strain relief and grab the insulation; flex it 10 times to feel for weakness.
- Inspect tip covers and ensure shrouded banana plugs are present.
- Confirm the meter is CE, UL, or IEC-tested and that the specific model number appears on the manufacturer’s certificate.
Quick buying checklist (3 items):
- Match the IP rating/CAT rating to your environment and panel exposure.
- Confirm true-RMS, voltage/current ranges, and low-Z if needed.
- Verify probe and clamp durability plus data-logging and battery specs.
Do this and you’ll cut risk and troubleshoot faster on the job.
How to Future‑Proof Your Meter: Automation and Energy‑Efficient Trends
Here’s what actually happens when you pick the wrong meter for automation: it sits on a shelf while you retool your system, or it forces expensive manual workarounds that never stop. You want a meter that talks to your control systems and keeps working as your setup changes, because that saves time and money over five years.
Choose meters with automation integration so they can push data automatically to your PLC or cloud platform. For example, a water plant I visited switched from hand-logged meters to units with Modbus TCP and cut weekly inspection time from eight hours to two; that’s a 75% time savings. Steps: 1) list the control systems you use, 2) verify protocol support (Modbus, BACnet, OPC UA), 3) test a sample unit on your network.
Look for Bluetooth or wired models that log measurements directly to a cloud service or PLC to avoid manual entry and reduce errors. Why this matters: manual logging adds human-error rates of 1–5% per reading and slows troubleshooting. Real-world example: a commercial building that added Bluetooth-enabled submeters caught a failing pump two weeks earlier because the meter pushed hourly data to the maintenance tablet. Steps: 1) choose Bluetooth for short-range mobile reads or Ethernet/RS-485 for fixed integration, 2) check sampling intervals (ideally 1–15 minutes), 3) confirm automatic timestamping.
Consider energy harvesting for low-power sensors because it extends battery life and lowers maintenance trips. I saw a remote temperature sensor using a tiny solar harvester that lasted five years without a battery change in a sunny roof installation. Steps: 1) determine average ambient energy (light, vibration, thermal) at the sensor location, 2) pick harvesters rated to generate at least 2–3× the sensor’s idle draw, 3) include a small supercapacitor or backup battery for low-energy periods.
Prioritize meters with efficient power management, modular firmware, and open data formats so your device adapts as networks and standards change without full replacement. Why this matters: firmware updates can add new protocols or security fixes, avoiding hardware swaps that cost thousands. Real example: an industrial site updated meter firmware to support OPC UA and avoided buying new meters during a control-system upgrade. Steps: 1) confirm the vendor supports secure OTA firmware updates, 2) ask for a firmware roadmap and update frequency, 3) require exports in CSV, JSON, or XML.
Practical checklist before you buy:
1) Match protocols: write down the protocols your systems require and test a demo with your PLC or cloud.
2) Verify logging and interval: ensure minimum 1–15 minute sampling and automatic timestamps.
3) Power plan: choose batteries, energy harvesting, or hardwired power based on site energy profile.
4) Update path: confirm OTA firmware and an open export format.
5) Field trial: install one or two units for 30 days in the actual environment and review the logs.
If you follow those steps, you’ll avoid frequent replacements and keep maintenance predictable.
Frequently Asked Questions
How Do Rugged Multimeters Perform in Extreme Cold or Heat Beyond Stated Specs?
Like a compass in a blizzard, I’ll be blunt: beyond stated specs they’ll suffer accuracy loss from thermal drift and reduced battery performance, so I’d avoid relying on readings without warm-up, insulation, or calibrated correction methods.
Can Rugged Multimeters Be Repaired On-Site or Require Factory Servicing?
Yes — I often see modular repairs done onsite for common failures, and I’ll arrange onsite calibration when needed; complex board or safety issues usually require factory servicing to preserve certifications and full functionality.
What Calibration Intervals Are Recommended for Field-Used Rugged Multimeters?
I’d say annual calibration is a must, but I’d also schedule usage-based checks after heavy field use or drops—like every 3–6 months—so you’re never caught with inaccurate, job‑critical readings again.
How Do Warranties Handle Damage From Jobsite Drops or Chemical Exposure?
Warranties usually exclude misuse, so I tell clients warranty exclusions often bar coverage for drops or chemical exposure; chemical claims need specific proof and usually require paid repair or a separate ruggedness/accidental-damage plan to cover.
Are There Trade-Offs Between Ruggedness and Measurement Accuracy?
Yes — I suspected trade-offs, and I was right: boosting mechanical robustness can add bulk and thermal stress, but careful electronic shielding and calibration preserve accuracy, so I balance rugged design with precision-focused components and testing.