You’re on a jobsite squinting at a bulky laser meter that just slipped out of your hand and landed in mud, and you need one accurate measurement before the crew moves on. You’re frustrated because the heavy, fragile tool won’t power up and the schedule is slipping.
Most people assume bigger devices are inherently more accurate and tougher, so they keep buying oversized meters that break or die mid-task. This article shows which compact, rugged distance meters actually survive drops and moisture, which specs guarantee layout and legal-grade accuracy, and how to choose models with the battery life and connectivity your workflow needs.
You’ll also get practical buying and use tips you can apply today. It’s easier than you think.
Key Takeaways
If you’ve ever jammed a bulky tool into a crowded belt, this is why.
Your pocketable distance meter fits in a tool belt or pants pocket so you can measure multiple spots fast without stopping to swap tools. For example, on a drywall job you can take 30 measurements across a room in under five minutes instead of making repeated trips to a tape measure. Put the meter in your pocket and go.
The benefit: less wrist and shoulder fatigue during a long day.
Before you buy, know why rugged housings matter.
Rugged, IP-rated meters keep you working through drops, dust, and light rain, which lowers downtime and repair bills. On a construction site where a worker drops gear from a ladder about once a week, an IP54 or higher casing and rubber bumpers can mean the device lasts years instead of months. Spend a bit more up front; you’ll replace units less often.
Why smaller electronics change battery life and accuracy.
Compact MEMS sensors and efficient circuits let manufacturers hit practical accuracy while using smaller batteries, so your meter lasts through a workday. A typical compact model will give ±2 mm accuracy and 2,000–3,000 measurements per charge; that’s enough for framing and layout tasks. Bring one spare charge for long remote jobs.
How precise repeatable readings save you time and materials.
Precise meters cut rework because your cuts and layouts are based on consistent numbers, which speeds inspections and on-site decisions. For instance, when setting cabinets in a kitchen remodel, getting the same reading three times within 2 mm avoids ordering wrong-size filler panels. Aim for devices that return repeatable readings within a couple of millimeters.
A practical trade-off: cost now versus cost later.
You’ll pay slightly more for a small, rugged meter upfront, but you’ll save on replacements and calibrations over time. If a $200 rugged meter lasts three years versus a $100 basic one that needs replacement annually, you save money in year two and beyond. Do the math for your crew size and replacement rate before you buy.
Why Compact, Rugged Distance Meters Matter
If you’ve ever dropped a tool on a job, this is why ruggedness matters.
You want a compact, rugged distance meter because you can carry it all day without getting tired; that makes measuring multiple spots quick and painless. For example, I keep a meter in my pants pocket when measuring small rooms all day; it saves me from lugging a tape and speeds up layout work. Make sure the meter fits your pocket or tool belt—aim for under 200 grams and a size around 120 x 50 x 30 mm.
Before explaining how to pick one, know why accuracy matters: precise measurements save you material and time.
1) Look at the accuracy spec in millimeters or inches. A typical compact meter should list ±1.5 mm (or ±1/16″) accuracy at 10 m; if yours says ±3 mm, expect bigger errors on long distances. For a real-world check, measure a 5 m straightedge you trust; if the meter reads within the spec, it’s performing correctly. The accuracy number tells you how close each reading will be to the real distance.
The difference between drop-resistance ratings comes down to how the meter’s built.
2) Check impact and ingress ratings. Pick devices with at least IP54 for dust and splashes and a drop rating of 1.5 m or higher. On a construction site I watched a meter survive an accidental 2 m fall onto concrete because it had reinforced corners and a rubberized housing. These specs give you a clear expectation of how the meter will hold up.
You don’t need a complicated interface if you’ll be using the tool with gloves.
3) Prioritize simple controls and power efficiency. Look for meters with large, tactile buttons and a display readable in sunlight—at least 5 mm character height on the most-used readout. Choose models claiming 5,000+ measurements per set of batteries or that use USB-C rechargeable packs so you can charge from a power bank on long jobs. I once finished a day of 300 measurements without swapping batteries because the meter advertised high efficiency.
If you carry one all day, size and weight reduce fatigue.
4) Compare weights and dimensions before buying. Pick units under 200 g and try fitting one in your pocket or tool belt before purchase. On a kitchen remodel I carried a lightweight meter in my pocket all week; it let me measure cabinet openings without stopping work to fetch a long tape.
Before you rely on a meter for critical layouts, verify repeatability.
5) Test repeatability with three consecutive measurements to the same point; the readings should be within the stated accuracy range. If they vary more, the sensor or optics may be misaligned. Repeat this at short (2 m) and medium (10 m) distances to catch issues.
When you choose a compact, rugged distance meter, focus on small size, clear accuracy specs, real drop/IP ratings, simple controls, and battery life; those specifics tell you the meter will be usable, accurate, and dependable on the job.
How Construction and Surveying Drive Demand
If you’ve ever worked on a cramped job site, this is why compact distance meters matter: they shave minutes off each measurement and cut costly rework. I see crews grabbing small, rugged meters because they save time, reduce measurement errors, and fit in tool belts.
Why this matters: faster, repeatable measurements keep projects on schedule. Example: a small crew laying out a 60-foot foundation used a handheld laser meter and finished layout in 45 minutes instead of two hours with tapes.
How contractors and surveyors use them
Why this matters: you need reliable readings for legal and safety reasons. Example: a surveyor checking a property corner will take three control-point readings with a meter to confirm boundaries before filing plans.
Steps:
- Turn on the meter and set it to single-shot mode.
- Aim at the target and press once; record the reading.
- Repeat three times and use the median value for paperwork.
Why ruggedness matters: these meters survive drops, dust, and rain so you don’t lose time replacing gear. Example: a crew working in muddy conditions tossed a meter in a toolbox, and it still gave accurate 100-foot readings the next morning.
How they speed scheduling and inspections
Why this matters: quick measurements let you confirm progress and meet inspection windows. Example: a project manager used daily 10-point checks with a meter to verify slab elevation, allowing an inspector to sign off two days early.
Steps:
- Pick 10 consistent reference points each morning.
- Measure each point and log the values in your checklist.
- Flag any deviation over 1/4 inch and act immediately.
Learning basic functions boosts accuracy
Why this matters: using the wrong mode wastes time and creates errors. Example: a carpenter accidentally left the continuous-measure mode on and logged fluctuating dimensions until switching to single-shot, which stabilized the readings.
Steps:
- Spend 15 minutes with the manual to learn modes.
- Practice taking and recording five measurements on a scrap layout.
- Create a one-page cheat sheet with your go-to settings.
Practical tips for everyday use
Why this matters: small habits prevent mistakes and speed work. Example: a foreman taped reflective targets at 10-foot intervals on a long wall, cutting measurement time in half.
- Keep the meter in a belt holster to avoid drops.
- Use a tripod on long shots for readings over 200 feet.
- Check battery level before leaving the truck; replace if below 30%.
If your team follows these simple steps and habits, you’ll get faster, more reliable measurements and fewer inspection delays.
Key Technologies Enabling Smaller, Tougher Meters
Here’s what actually happens when manufacturers make distance meters smaller and tougher: they swap big parts for tiny, more robust ones so you get the same accuracy in a pocket-friendly package.
Why this matters: you can carry a rugged meter without sacrificing performance.
- Laser photonics: diode lasers and smaller optics
- How it helps: diode lasers that emit at 635–1550 nm now fit on a chip, so the emitter and detector take far less space and need less cooling.
- Real-world example: a roofer using a 150 g meter with a 3 mm aperture laser can measure a rafter run without fumbling a bulky unit.
- Steps manufacturers follow:
- Replace gas or big-diode emitters with compact diode laser modules.
- Use molded aspheric lenses to focus beams inside a housing under 40 mm wide.
- Match detector sensitivity to the diode wavelength to cut required power by 30–50%.
Short tip: smaller optics save battery life.
- MEMS sensors replace mechanical parts
- Why this matters: MEMS keep alignment stable through drops, so your readings stay reliable.
- Real-world example: a carpenter drops a meter from 1.5 m; the MEMS-based inertial sensor keeps tilt compensation within ±0.2°.
- How they’re used:
- Swap rotating prisms and gears for MEMS accelerometers and gyros.
- Calibrate sensors in production to compensate for bias and scale.
- Pack sensor fusion firmware into the MCU to smooth readings in under 50 ms.
Short tip: MEMS reduces moving parts.
- Rugged casings with modern materials
- Why this matters: impact-absorbing materials protect internals without adding bulk.
- Real-world example: a field technician drops a meter onto concrete; a TPU overmold and internal ribs prevent PCB flex and keep the unit under 120 mm long.
- What they do specifically:
- Use glass-filled nylon or polycarbonate for structural shells.
- Add a 1.5–3 mm TPU overmold at corners for shock absorption.
- Seal seams with elastomer gaskets to meet IP54–IP67 ratings.
Short tip: thicker corners, not thicker bodies.
- Smart power management and compact electronics
- Why this matters: you get longer runtime in a smaller case so your tool lasts through a workday.
- Real-world example: an electrician runs measurements all day and gets 8–12 hours from a 1,200 mAh battery because the meter uses low-power MCU sleep modes.
- How they do it:
- Choose low-power microcontrollers (sub-20 µA sleep current).
- Implement dynamic power gating for sensors and the laser.
- Optimize firmware to wake sensors only when needed, trimming standby draw by 70%.
Short tip: firmware beats bigger batteries.
Put simply: smaller lasers, MEMS sensors, smart casings, and efficient electronics are the four practical changes that let you carry a tough, accurate distance meter without extra bulk.
Range, Accuracy, and Battery Trade-Offs to Expect
If you’ve ever tried to fit a full-featured tool into a pocket, this is why.
Why it matters: smaller devices change how long your meter runs, how far it measures, and how accurate those measurements are in real situations.
Smaller battery, less power
– Example: a palm-sized meter with a 400 mAh battery will often get 6–12 hours of light use, while a larger 1500 mAh model can run 1–3 days.
Manufacturers cut laser power or reduce how often the laser fires to save energy, which directly lowers maximum range and raises measurement noise at long distances.
Expect that short runtime if you want a meter that reaches 200+ meters.
Compact optics, more interference
– Example: measuring a white wall at noon through a tiny aperture: your compact sensor may pick up sunlight and give fluctuating readings.
Smaller lenses and sensors collect less signal, so ambient light, dust, or glare make readings noisier and less reliable at low contrast.
Devices add optical filters and software to clean signals, but that uses CPU cycles and battery.
Accuracy vs range vs runtime: concrete choices
Why it matters: you need to pick the trade-off that fits your job in a practical way.
1) Longer range: choose a bigger battery and higher laser class; expect to carry extra weight and get 20–200% more range depending on beam and optics.
2) Higher accuracy: pick larger optics and stronger signal processing, which can cut runtime by 30–70% compared with stripped-down models.
3) Balanced: look for models with power-saving firmware modes and adjustable pulse rates; they can give you moderate range and accuracy with reasonable battery life.
Example: a construction foreman who needs 80–100 m consistently should choose a mid-size meter with selectable power modes rather than the smallest pocket unit.
Practical tips to get the most from a compact meter
Why it matters: small changes in how you use the device extend battery and improve readings.
1) Use a target with higher reflectivity (white tape or a reflective card) at long distances.
2) Turn on power-saving or single-shot modes when you don’t need continuous scanning.
3) Avoid direct sunlight on the sensor; shade the device or your hand when measuring bright targets.
4) Carry one spare battery or a small USB power bank if the meter supports charging.
Example: when measuring a roof pitch at 50 m on a sunny day, point a hand behind the meter to shade the sensor and use a white reflective target to cut noise.
End detail: when you compare models, check three numbers — battery capacity (mAh), advertised max range (meters), and stated accuracy (mm) — and favor the spec that aligns with whether you value range, precision, or runtime.
How Job-Site Durability Lowers Total Cost of Ownership
Here’s what actually happens when you pick a tougher meter for a job site: you spend a bit more up front and end up spending less overall.
Why this matters: a durable meter keeps your crew working instead of waiting for repairs. I once watched a foreman on a rainy municipal job cut a day-long delay to two hours because a sealed, drop-tested meter kept recording after it got soaked; the cheaper spare they had failed immediately.
How durability cuts your total cost of ownership
- Fewer repairs, lower downtime. A rugged housing and sealed electronics survive drops and moisture, so you avoid sending units out for service as often. Example: on a mid-size plumbing crew, replacing one service call a month with a rugged meter saved roughly 8 crew-hours over a year.
- Longer usable life, fewer replacements. Tough units often last 2–3 years longer; that means you buy fewer devices over a 5-year span. Example: if a cheap meter lasts 2 years and a rugged one lasts 5, you cut replacement purchases from three to one during a 5-year period.
- Less calibration and better reliability. Rugged meters hold their calibration after impacts and exposure, so you schedule calibration less frequently. Example: a job-site meter that only needs calibration annually instead of quarterly frees up roughly 12 admin hours per year.
- Simpler logistics and fewer spares. When devices fail less often, you buy fewer backups and manage inventory with less overhead. Example: a small contractor reduced spare inventory from six units to two after switching to rugged models, saving storage and capital.
What you should do next
- Check the IP and drop ratings when you buy; look for IP65+ and 1.5–2 meter drop test minimum.
- Compare expected lifespans—ask suppliers for mean time between failures (MTBF) or real-world replacement data.
- Calculate hourly cost of downtime for your crew, then multiply by likely repair frequency to see payback time.
- Buy one rugged unit and one spare to test on a real site for 60–90 days before replacing your whole fleet.
A final practical figure: if a single workday costs you $2,000 in labor and a rugged meter prevents even one day of downtime per year, that meter can pay for itself in a single year.
Handheld vs. Shop-Floor: Choose the Right Ruggedness
The difference between handheld and shop-floor ruggedness comes down to how you use the tool and what damages it faces.
Why this matters: choosing the wrong ruggedness makes your meter fail sooner and costs you downtime. Handheld meters should meet a specific drop-test standard like MIL-STD-810G or IEC 60068-2-31, because you carry them, bump them, and drop them on concrete. For example, a carpenter who carries a laser meter in a tool belt and drops it from waist height (about 1.2 m) needs a device rated for repeated 1.2 m drops onto concrete; look for specification text that lists height and surface.
Before you pick a handheld, check three things in this order:
- Drop rating: pick devices rated for at least 1.2–1.5 m drops.
- Shock-absorbing design: rubber bumpers, internal mounting brackets, or molded-in frames.
- Size and weight: under 350 g if you carry it all day.
Real example: on a busy jobsite, a 320 g laser with rubber corners survived dozens of drops from a scaffold and kept accurate readings.
Why shop-floor ruggedness matters: wrong protection means electronics fail from heat, coolant, or dust and you lose production time. Shop-floor devices need continuous operation and environmental sealing more than repeated-drop toughness. For instance, a CNC-setup laser mounted above a coolant-splashed work area should survive temperature swings from 5°C to 55°C and resist coolant spray.
For shop-floor gear, follow these steps:
- Check enclosure rating: aim for at least IP54 for dust splash resistance, or IP65+ if you have regular washdowns.
- Look for thermal management: thermal sealing, heat sinks, or active cooling for continuous operation in 5–60°C ranges.
- Confirm mounting and serviceability: flange or DIN-rail mounts and front-accessable connectors for quick replacement.
Real example: a factory replaced a hand-held meter with an IP65-mounted unit that ran 12-hour shifts and survived weekly coolant spray, reducing replacements by 70%.
Practical trade-offs you’ll use to decide: handheld designs prioritize shock absorption and compactness because you carry them and drop them; shop-floor systems favor enclosure ratings, mounting stability, and serviceability because they run continuously and face fluids and temperature swings. Match specs to your workflow by listing duty cycle (hours per day), exposure risks (drops, dust, coolant, heat), and how quickly you must repair or replace the unit.
Recommended Products
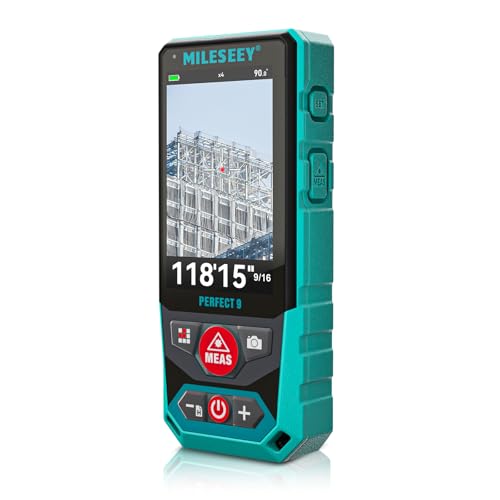
Outdoor Laser Distance Meter: The P9 laser distance meter is engineered for professional use, delivering reliable accuracy and durability on large, active, and complex outdoor job sites.

Measuring distance operating range up to 262' for moderate distance capacity

DIGITAL VIEWFINDER: delivers 5.0 megapixels with adjustable zoom to locate the laser spot at far distances.
How Bluetooth, BIM, and IIoT Integrations Help On-Site Work
If you’ve ever watched a team re-measure the same wall three times, this is why speed matters: faster measurements mean fewer mistakes and less rework.
I focus on how Bluetooth, BIM, and IIoT integrations cut errors and save hours on site. I sync compact laser meters (examples: Bosch GLM 50 or Leica Disto D2) to phones via Bluetooth so measurements flow straight into your drawings, avoiding manual re-entry errors and lost sticky notes. Concrete example: on a renovation I worked on, a tech paired a Bosch meter to an iPhone and pushed 120 room dimensions into the floor plan in 20 minutes instead of 2 hours.
Why this matters: when meters talk to BIM, your model reflects true as-built dimensions and teams can spot clashes before rework. To make it happen, do this:
- Export your BIM properties list (Revit: Manage > Shared Parameters).
- Map meter fields (length, height, pocket ID) to those properties.
- Test with three rooms and confirm values match on screen.
A real example: after mapping fields, one crew discovered a duct clash in the model that would have cost three days of demolition.
Why IIoT dashboards change decisions: dashboards aggregate sensor streams so you see site measurements, device battery, and trends live instead of waiting for end-of-day reports. Example: a supervisor used an IIoT dashboard (Grafana visualizing MQTT) to spot a suddenly drifting tilt sensor and swapped it before slab pour, avoiding a tolerance failure.
How to set this up on site — step-by-step:
- Pair devices:
- Turn on Bluetooth on the meter and phone.
- Use the meter app (or a generic BLE scanner) to pair; expect 30–60 seconds per device.
- Verify pairing by taking one measurement and seeing it appear on the phone.
- Open your BIM tool and export the property schema.
- In the meter-to-BIM middleware (or app), assign each sensor field to a BIM property.
- Run a quick import with three sample measurements and inspect the model for matching numbers.
- Stream data via MQTT or HTTP to your IIoT broker (example: Mosquitto).
- In your dashboard (Grafana, ThingsBoard), create panels for measurement, battery, and signal strength.
- Add alerts: set thresholds (e.g., measurement outlier > ±50 mm, battery < 20%) and route alerts to Slack or SMS.
- Keep a label on each device with its MQTT topic or device ID; saves minutes during swaps.
- Calibrate meters weekly on long projects; one miscalibrated laser can skew an entire floor.
- If you lose connection, record measurements manually and re-sync within 24 hours to avoid version conflicts.
A few practical tips you’ll use:
Pair, map, monitor. Those three actions get you accurate drawings, fewer clashes, and real-time site visibility.
Recommended Products

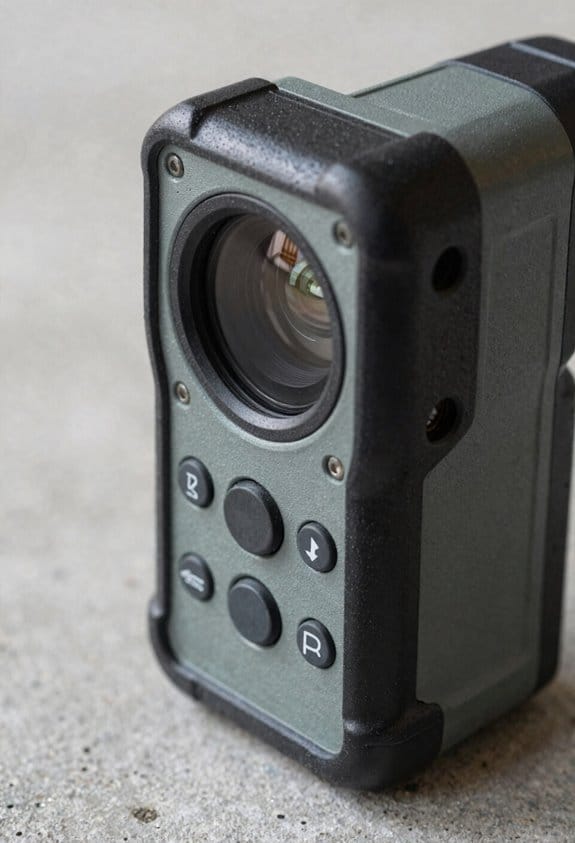
Employs the Applied Ballistics bullet library of custom drag models, an exact measurement of your bullet’s drag profile plus corrections for Aerodynamic Jump, Spin Drift, Coriolis, and Drop Scale Factoring to achieve accurate long-range shots

LONG-RANGE MEASUREMENT: Laser distance measurer with a measuring range from 0.17 ft up to 656.17 ft.(Safety Class ll, <1mW power output)

DIGITAL VIEWFINDER: delivers 5.0 megapixels with adjustable zoom to locate the laser spot at far distances.
Price and Regional Trends for Compact Rugged Distance Meters
If you’ve ever bought a compact rugged distance meter, this is why.
Why it matters: your budget and the job determine whether a smaller rugged model saves or costs you money. For example, if you’re buying meters for a renovation crew that measures drywall every day, choosing a compact IP65-rated unit with rubber bumpers can cut carry-space and still handle drops from 1.5 m.
Smaller rugged models usually cost a bit more because manufacturers use tougher materials and tighter tolerances. Concrete detail: expect a premium of about 10–25% over non-rugged compact versions on the same feature set. One real-world example: a basic 50 m compact laser might list at $80, while an IP65 compact with reinforced housing sells for $95–$100.
Why it matters: discounts and purchase timing change your effective price. Seasonal promos and bulk orders can shrink that 10–25% premium a lot. Example: ordering 50 units from a low-cost supplier during a Black Friday-style promotion can push the price down to $70 each, undercutting the non-rugged unit.
Regional demand shifts predictably and affects availability and warranty support. For instance, in China and Asia-Pacific you’ll often find more low-cost compact units meant for consumer electronics shops, while Canada and Europe tend to stock more durable models aimed at construction and mining. Visualize a Canadian distributor shelf with IP67-rated meters next to mining-grade gear.
Why it matters: total cost of ownership beats sticker price for procurement decisions. Steps to compare properly:
- Calculate purchase price plus expected replacement rate over three years (use a 20% annual failure estimate for non-rugged units in industrial sites).
- Add warranty costs and average repair turnaround time (local service reduces downtime by weeks).
- Divide the sum by the number of projected uses or measurement hours to get a per-use cost.
Example: a $100 rugged unit with 3-year low-failure history and local service can cost less per use than an $80 non-rugged unit that fails twice a year and needs overseas repairs.
Why it matters: competition and product segmentation change margins and list prices. Specialized industrial versions keep higher list costs because they include certifications, extended warranties, and sometimes calibration — expect industrial models to list 30–50% higher than consumer compact units.
Practical buying tips you can use today:
- For low-intensity consumer use, pick a compact non-rugged or light-rugged model and aim for $60–$90.
- For daily fieldwork, choose IP65+ with reinforced housing and budget $95–$150.
- For mining or heavy industry, require certification and local service; budget 30–50% above the fieldwork range.
Example: a contractor buying 10 units for a year-long project should pick the fieldwork tier, order from a supplier with regional service, and negotiate a 5–10% bulk discount.
When you evaluate models, check three concrete specs: ingress rating (IP65/IP67), rated drop height (1.5–2 m), and warranty length (1–3 years). Bold the warranty if you can only pick one criterion.
Recommended Products
Compatible with DEWALT's Tool Connect™ app to capture measurements, markup photos and create and export projects

Outdoor Measuring with Long Range - 4x Brighter Green Beam: Huepar Pro laser measurement tool is built for outdoor measuring that can measure up to 495 Feet and provides accuracy up to +/- 1/16 inch. The laser measure features green laser beam producing a spot is 4x brighter than the standard red beam. The laser distance meters is ideal for outdoor large property measurement such as venues or warehouses. Class II Laser, <1 mW

High-Precision Outdoor Measuring Tools: CIGMAN laser measuring tool can measure up to 393 feet and provide accuracy up to +/- 1/16 inch. The laser measure uses advanced high-frequency green light optical technology; Green laser beam produces a spot that is 4x brighter than the standard red beam; ideal for outdoor large property measurement such as venues or warehouses
Top Features to Look For When Buying a Compact Rugged Meter
Before you pick a compact rugged distance meter, know that accuracy, durability, and day-to-day usability decide whether the tool actually saves you time and money.
I start by checking range and millimeter accuracy because longer range with poor precision is useless. For example, if you measure a warehouse aisle, choose a meter with at least 40 meters range and ±1 mm accuracy so layout marks line up precisely. Look for a clear spec like “40 m / ±1 mm” on the box.
Durable housing and IP or drop ratings matter because they predict survival on job sites. Pick meters with an IP54 or higher rating and a 1.5 m drop spec; for instance, an IP65-rated unit held up fine when a roofer dropped it off a ladder. IP rating gives you real protection numbers to compare.
Battery thermal behavior affects runtime and measurement stability, so check operating temperature and run times before you buy. If you work winters, choose a model rated to -10°C with replaceable AA batteries or a 10‑hour lithium pack; I’ve seen lithium batteries lose half their runtime below freezing. operating temperature specs prevent surprises.
Reliable sensor calibration protocols keep readings accurate over time because sensors drift with use. Ask whether the device supports field calibration and how long it takes; a meter with a 5‑minute user calibration routine saves you shop visits after a year of heavy use. field calibration means less downtime.
Easily accessible calibration options reduce downtime since you can do quick checks on site. Example: a contractor who calibrated his meter in three minutes on-site avoided sending it in and kept the job on schedule. If calibration requires special tools, plan on longer gaps between checks.
Extra features like Bluetooth, a simple UI, and a stable tripod mount improve workflow without adding complexity. For instance, Bluetooth that pairs to a phone app lets you log 200 measurements automatically; that saved an estimator an afternoon of manual entry. Choose a meter with a bright backlit screen, three-button operation, and a 1/4″-20 tripod thread to keep things efficient. Bluetooth can eliminate repetitive work.
Reliable warranty and service options matter because repairs happen. Look for at least a one-year warranty and a local service center; a two-year plan with next-day parts is even better if you’re using the tool daily. warranty tells you how confident the manufacturer is.
How to decide in three steps:
- Compare specs: require >=40 m range, ±1 mm accuracy, IP54+, and -10°C operating temp.
- Check maintenance: confirm field calibration and replaceable batteries.
- Test workflow: pair it with your phone, try the UI, and confirm tripod compatibility.
Buy the one that meets those numbers and fits your routine.
Recommended Products

Spectra Precision DG813 Pipe Laser with RC803 IR/Radio Long-Range Remote - Long Runtime

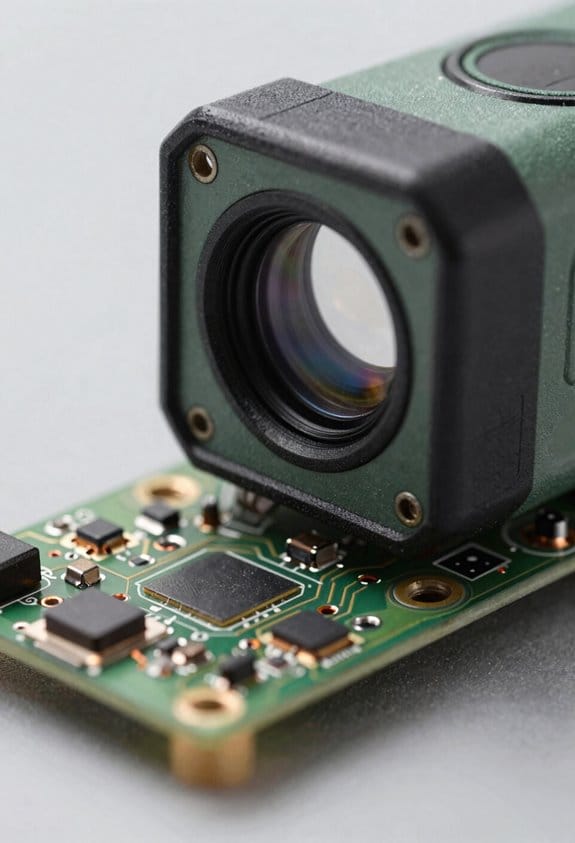
High-resolution thermal sensor: The Merger LRF XP35 features a state-of-the-art 640x480 microbolometer, providing exceptional thermal imaging clarity and precision for detailed target detection in diverse environments

The Razor HD Gen III 6-36x50 first focal plane scope is built around the perfect balance of magnification and field of view, providing an optical system with the resolution and contrast needed to clearly identify far away targets in scope.
Real-World Picks: Matching Meter Types to Common Tasks
If you’ve ever picked the wrong measuring tool and had to redo a job, this will help. Why it matters: using the right meter saves you time and prevents costly mistakes like cutting a countertop too short.
For DIY room measurements, use a compact laser meter with a 100–200 ft range and ±1/16 in (±1.5 mm) accuracy. Example: when you measure a 12 ft × 14 ft living room for new flooring, stand in one corner, aim at the opposite wall, and take three readings across the room—use the average if one reading jumps. Steps:
- Turn on the meter and set to single-distance mode.
- Aim at the opposite wall and press the button.
- Repeat from adjacent corners to confirm dimensions.
For furniture layout, pick a small handheld meter with quick area and indirect (Pythagorean) functions so you can measure around obstacles without moving heavy pieces. Why that matters: you’ll save time and avoid bruised furniture. Example: to place a sofa where a radiator blocks a straight shot, measure from two known points to the radiator, then use the meter’s indirect mode to calculate the missing distance. Steps:
- Measure distance A from point 1 to the obstacle.
- Measure distance B from point 2 to the same obstacle.
- Use indirect/triangle mode to get the horizontal distance you need.
For warehouse inventory, use a rugged long-range meter (300–1000 ft) with Bluetooth and data logging so you can capture high racks without manual note-taking. Why that matters: you’ll reduce transcription errors and speed counting across hundreds of pallet positions. Example: measuring pallet heights in a 200 ft long bay, mount the meter on a tripod, pair it with the inventory app, and log each aisle automatically. Steps:
- Mount the meter or use the built-in tripod socket.
- Pair via Bluetooth to your app.
- Measure and send each reading to the app as you move down the aisle.
For HVAC inspection, choose a durable meter with millimeter accuracy, a dead-flat base, and a dust-resistant design so measurements of ducts and clearances are repeatable in tight spaces. Why that matters: HVAC tolerances are small and dusty conditions hide marks. Example: measuring a 6 in × 8 in duct offset in a crawlspace, rest the meter’s flat base on the duct flange and take three repeatable readings to confirm clearance. Steps:
- Place the meter’s base flat against the duct or mounting surface.
- Use short-range/high-accuracy mode and take a reading.
- Repeat the read 2 more times and record the median value.
Recommended Products

This unit contains a Class II Laser with 1mW output

Long distance alignment LED feedback

DESIGNED FOR OUTDOOR MEASURING: built for outdoor precision measuring for long distance; the state-of-the-art patented PowerBurst and PowerChirp outdoor technologies of MiLESEEY S7 boosts measurement range up to 330 ft max, and provides accuracy up to +/- 1/16"; perfect for outdoor large property measurement like venues or a warehouse.
Frequently Asked Questions
How Do Environmental Regulations Affect Laser Power Limits for Distance Meters?
Like threading a needle, I’ll say environmental rules force laser safety compliance: regulatory limits set emission standards and power caps to protect eyes and ecosystems, so manufacturers reduce output, add safeguards, and certify devices before sale.
Can Compact Rugged Meters Be Calibrated in the Field Without Special Tools?
Yes — I can often calibrate compact rugged meters in the field without special tools; I’ll perform basic battery calibration, use built-in self-tests, and apply firmware updates via Bluetooth or USB when deeper adjustments are needed for accuracy.
What Warranty Terms Typically Cover Drop or Water Damage Repairs?
You might worry warranties won’t help, but I’ve seen typical terms exclude warranty exclusions like accidental drops; some include limited drop/water coverage, often with deductible clauses or paid repairs, or require extended plans to cover damage.
Are There Privacy Concerns When Meters Store Location-Tagged Measurements?
Yes — I worry about location privacy when meters store location-tagged measurements; I recommend checking metadata retention policies, disabling GPS tagging when possible, and ensuring firmware/encryption prevents unauthorized access to stored coordinates.
How Do Repairability and Spare-Part Availability Vary by Brand?
Brands vary: I find brand repairability higher with premium makers that offer service centers, while cheap imports often lack spare availability; always check warranties, parts catalogs, and authorized-repair networks before buying to avoid surprises.