You’re standing in the living room with a new TV and a drill, wrestling with how to find studs, pipes, or live wires before you cut into the wall. You’re not asking about definitions — you need to know exactly where it’s safe to anchor that mount or run a new cable. Most people trust a single cheap stud finder or poke blindly and assume nothing important is behind drywall.
This article shows clear, practical methods for locating studs, pipes, and electrical lines using affordable tools and simple techniques, plus how to interpret what each tool actually tells you. You’ll finish knowing which noninvasive scans to run, what results mean, and when to stop and call a pro. It’s easier than you think.
Key Takeaways
If you’ve ever started a weekend project and hit something behind the wall, this is why.
Why safer wall detection matters: you can seriously injure yourself or ruin wiring and plumbing when you cut into a wall. For example, a friend of mine drilled to hang a TV and nicked live wiring, which blew the breaker and cost $450 to repair. Use a detector before you cut so you avoid shocks and extra repair bills.
Before you start demolition, what changed to make detection common?
- Building rules and contractor habits now often require a scan before major work, so inspectors and pros document scans with photos and device logs.
- Example: a local contractor I know won’t open a wall on jobs over $1,000 without a photo of the scanner readout and a time-stamped permit note.
Why you’d notice the trend as a DIYer
- More people are renovating, so accidental hits on hidden pipes and wires rose, and that drove demand for simple detection tools.
- Example: a neighborhood Facebook page showed three homeowners the same month who found plumbing behind where they planned to drill, and they all switched to using scanners.
How technology made this easy for you
- Noninvasive sensors, smartphone apps, and scanners now cost from about $40 for a basic stud/wire detector to $300 for a multi-sensor unit that maps pipes and rebar.
- Example: I bought a $79 scanner that shows metal and live wiring; it saved me hours of cautious probing and stopped me from cutting into a water line.
Why privacy and records matter when you use detection tools
- Legal and privacy concerns mean you should document scans: take a photo, save the device log, and note the date on your permit or job sheet.
- Example: a homeowner who found undocumented wiring avoided liability because they had photos and a saved scan that showed they checked the wall before demolition.
What to do next — simple steps for your project:
- Buy or borrow a detector that fits your needs (budget $40–$300).
- Scan the area thoroughly, moving the device slowly and marking hazards with painter’s tape.
- Photograph or save the scan readout and add it to your permit or project folder.
- If the detector shows anything unclear, call a licensed pro before you cut.
- Keep records: date-stamped photos and any device logs for future reference.
If you follow those steps, you’ll cut risk and avoid surprise repairs.
What “Safer Wall Detection” Means : Quick Definition
If you’ve ever drilled into a wall and hit something you didn’t expect, this is why.
What “safer wall detection” means and why you’ll want it: it refers to methods and tools that help you find pipes, wires, studs, and hidden hazards behind walls while minimizing risk to people and property. For example, before hanging a heavy shelf in an older house, scan the wall to avoid hitting an unmarked live wire.
Why this matters: striking a live wire can cause electrical shock or a fire, and cutting a pipe can flood a room. Use tools so you avoid those repairs and injuries.
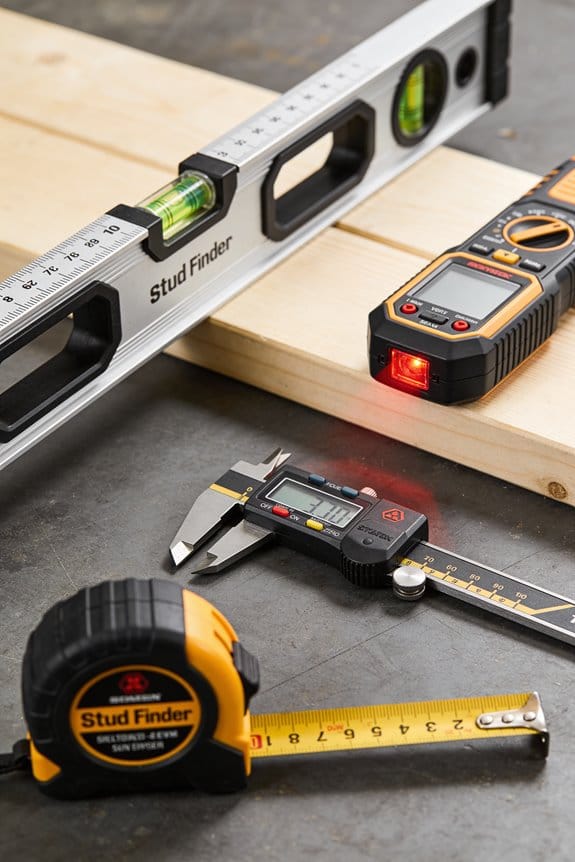
What tools to use and how to use them
Why this matters: choosing the right tool reduces accidental damage.
- Calibrated stud finder — run it along the wall slowly, mark edges where it beeps, then measure 16 inches over to find the stud center. Example: when mounting a 36-inch shelf, find two studs 16 inches apart and screw into the center of each.
- Multi-mode wall scanner — switch to live-wire mode, then slide the scanner vertically and horizontally until it flags a conductor; mark the outline. Example: scan around an outlet before cutting a plaster patch to avoid hidden wiring.
- Inspection camera (boroscope) — drill a 3/8-inch hole in the drywall, insert the camera, and look for pipes or framing. Example: use the camera to inspect behind a corner where a leak stain appears.
- Magnetic stud finder — tap along the wall to locate drywall screws and double-check with a scanner. Example: use magnets in metal-stud homes where electronic finders may fail.
Use certified tools and follow the manual. Test tools on a wall you know first.
Privacy and legal concerns
Why this matters: some devices can reveal images or signals beyond your property, which could create legal trouble.
- If your inspection camera or scanner can see into a neighbor’s window or pick up private signals, stop and check local laws before proceeding. Example: aiming a borescope into a party wall that shows a neighbor’s wiring could violate privacy rules.
- Check municipal ordinances or ask a local contractor if you aren’t sure.
Safety steps to follow before you cut or drill
Why this matters: these steps lower the chance of injury and costly fixes.
- Turn off power at the breaker for the area you’ll work in. Use a non-contact voltage tester to confirm the power is off.
- Shut the water supply if you’ll be near plumbing. Open a nearby faucet to relieve pressure.
- Mark locations you found with tape and measure twice before cutting.
- Wear safety glasses and gloves.
Example: before replacing an outlet, shut the breaker, confirm no voltage, then remove the cover.
Documentation and compliance
Why this matters: keeping records helps if a dispute or permit check arises.
- Photograph the scanned marks and tools’ readouts.
- Note date, device model, and what you found.
- Keep receipts for any certified equipment.
Example: when selling your home, provide the scan photos to show you avoided hidden hazards during recent renovations.
Quick checklist before you start
Why this matters: a short routine prevents common mistakes.
- Calibrate your scanner.
- Turn off relevant utilities.
- Mark studs, pipes, and wires.
- Record photos and notes.
- Use appropriate screws for stud mounts.
Follow these steps and you’ll reduce repairs, prevent injury, and stay within legal and neighborly expectations.
Why It Became a Topic: Timeline and Triggers
If you’ve ever started a home project and poked a hole in the wrong place, this is why safer wall detection became a bigger topic.
Why it matters: if you hit live wiring or a pipe, you can get shocked, flooded, or trigger expensive repairs.
1) DIY boom: More homeowners began tackling renovations themselves, so more people found hidden wiring or plumbing. Example: a homeowner in Denver drilled for a TV mount, hit a cable wire, and lost power to half the room until an electrician replaced a damaged junction. Concrete step: if you’re doing a wall project, scan the area with a studfinder that detects live wires and metal, and mark the scan lines before you cut.
2) Media and scary stories amplified risk: News reports about accidental cuts or gas leaks, plus viral posts showing horrifying discoveries, made people talk about safer detection even when details were exaggerated. Example: a viral video showed a nest of old knob-and-tube wiring behind drywall; the clip got 2 million views and drove local hardware stores to sell more detection tools the following week. Concrete step: when you see a dramatic story online, check the source and look for an official incident report or utility notice before assuming it applies to your home.
3) Better tools arrived: Manufacturers improved noninvasive sensors and smartphone apps, making it easy for you to check walls without tearing them open. Example: a new wall scanner model launched that combines radar and live-wire detection, and a tester reported locating a hidden pipe within two inches accuracy. Concrete step: buy or borrow a scanner that lists accuracy specs (look for ±2 in. or better) and practice scanning a known wall to learn its quirks.
4) Policy and professional shifts: Tighter building codes and updated contractor licensing pushed pros to adopt safer practices, which made safer detection a standard conversation during inspections and estimates. Example: a city updated its permit requirements to require documentation of concealed-work inspections; contractors started including a wall-scan report with bids. Concrete step: when hiring someone, ask for permit numbers and whether they include a pre-demolition scan in their quote.
Together, these triggers—more DIY activity, amplified stories, better consumer tools, and regulatory nudges—built steady momentum for safer wall detection and made it part of everyday project planning.
Five Home Risks Safer Wall Detection Solves (With Examples)
Before you start drilling, know what could be behind your wall.
Hidden wiring can be cut during drilling, causing shocks or outages, so locate it first. Why this matters: a struck wire can trip breakers or give you a shock. Example: in my neighbor’s kitchen, a DIYer drilled to hang a shelf and cut a live 120V cable, blowing the breaker and popping a faceplate. How to avoid it:
- Turn off the circuit at the breaker and test with a non-contact voltage tester.
- Scan the wall with a stud/wire detector along the planned drill line, marking detected live wiring with tape.
- Drill a small pilot hole and fish a coat hanger to confirm there’s no conduit before enlarging the hole.
If you’ve ever smelled gas after a renovation, this is why you find lines first.
Gas line damage risks leaks and fires, so locating pipes avoids dangerous punctures. Why this matters: a punctured gas pipe can leak invisible gas that ignites. Example: a friend replacing a towel rack hit a thin copper gas line behind plaster and later smelled gas, forcing an emergency plumber visit. How to avoid it:
- Shut off the gas at the main if you’ll be near a suspected line.
- Use a metal detector or call your utility for marking if the line is inside a wall.
- Drill test holes away from marked lines and use small-diameter drill bits when approaching unknown areas.
Think of moisture like a hidden bruise on your wall.
Moisture behind drywall can hide mold growth, which detection reveals early for remediation. Why this matters: mold spreads unseen and damages finishes and health. Example: in a bathroom remodel, moisture detection showed a wet spot behind tile where a shower flange leaked for months, and replacing the drywall stopped the mold from spreading. How to avoid surprises:
- Scan suspect areas with a moisture meter before cutting.
- If moisture reads above 16% relative, cut a 2×2 inch inspection hole to visually check for mold or rot.
- Dry and remediate any wet cavity with ventilation and a dehumidifier before finishing.
It sounds obvious, but pests live where you don’t look.
Pest nests inside cavities bring structural damage and health hazards, and detection guides targeted removal. Why this matters: removing nests early limits structural repair and contamination. Example: an attic-to-wall gap hid a wasp nest that expanded into the stud bay; targeted access and removal saved most of the drywall. How to find and fix it:
- Use a thermal imaging camera or borescope to inspect suspicious voids.
- If you see nests or droppings, wear PPE and remove the nest through a small cutout rather than tearing out a full wall.
- Seal entry points with expanding foam or mesh after treatment.
Before you cut into a wall, map the load paths first.
Unintended structural cuts into load paths weaken walls, and mapping internal framing prevents unsafe alterations during renovations. Why this matters: cutting a load-bearing member can cause sagging or collapse. Example: someone removed a short wall under a stair stringer not knowing it carried load; the stair ended up sagging and required a new beam. How to proceed safely:
- Identify load-bearing walls by checking floor joist directions in the basement or looking for beams that line up with walls above.
- Use a stud finder and scan every 16 inches to map studs; mark top plates and headers.
- If you plan to remove or alter a wall, consult a structural engineer and install temporary supports before cutting.
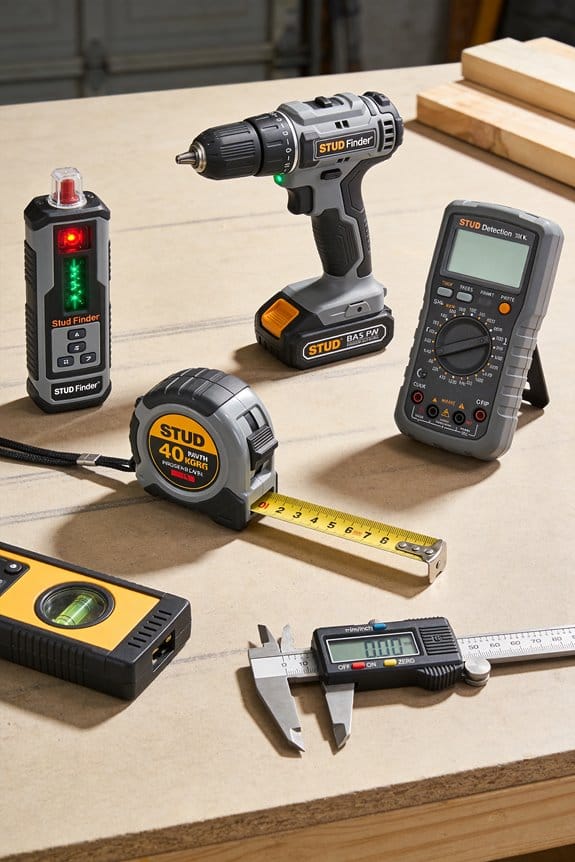
Recommended Products

Model E5-XT: Handheld IR camera measures temperatures from -20°C to 400°C (-4°F to 752°F)

INCLUDES - 300 Square Foot Electric Floor Warming CABLE 1200' Long (Consists of 2 cables that connect at thermostat) - WiFi LED Touch, Programmable, Radiant Floor Heating Thermostat with underfloor temperature sensor Model # UWG5-4999. This Thermostat is easy to operate, 120/240 Volts and rated for 16 Amps. - Installation Warning Monitor (alarm sounds if wire is damaged during installation)

INCLUDES - 150 Square Foot Electric Floor Warming Cable (consists of 2 spools totaling 600 feet long) - WiFi Touch Screen GFCI Protected Digital Programmable Thermostat UWG4-4999, Includes floor sensor. This Thermostat is easy to operate, 120 Volts and rated for 16 Amps. - Installation Warning Monitor (alarm sounds if wire is damaged during installation)
Core Technologies: Stud Finders, Radar, Thermal, Cameras

If you’ve ever poked a wall hoping not to hit a pipe, this is why.
Finding wiring, pipes, moisture, or pests matters because hitting any of those can cost you hundreds or ruin a project. Basic stud finders detect changes in density to mark framing; hold the finder flat, sweep slowly horizontally, and mark each edge where the indicator changes—typically two marks 1 to 1.5 inches apart show the stud center. Example: when you hang a 48-inch shelf, use a stud finder to mark three studs across that span, then screw 2.5-inch wood screws into the centers.
Think of radar like a flashlight that uses radio waves.
Why radar matters: it can see deeper than a handheld finder so you’ll avoid cutting into hidden pipes or rebar. Handheld mm-wave radar units send pulses and show echoes; sweep the panel area in a grid at 1-foot intervals and watch for consistent reflections that indicate metal or voids. Example: for a 6×4 ft plaster wall over lath, run four parallel sweeps at 12-inch spacing; consistent echoes 2–3 inches deep usually mean a stud or conduit.
Before you use thermal imaging, understand what it can show.
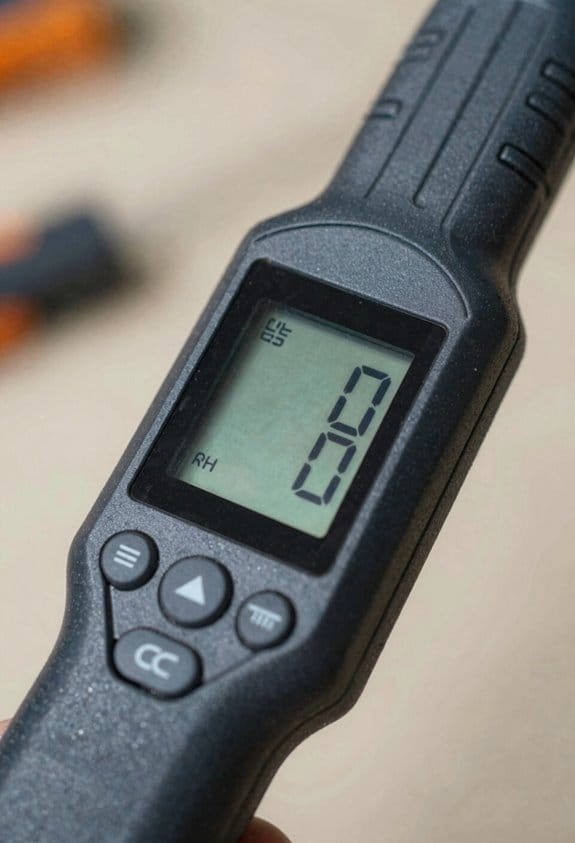
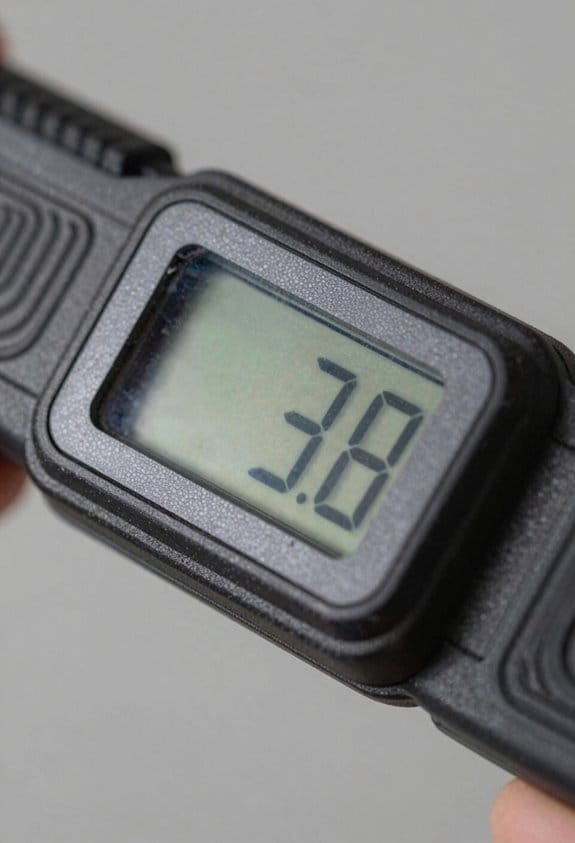
Thermal cameras matter because they reveal temperature differences that suggest leaks or missing insulation. To use one: scan the wall surface slowly, keep the camera at least 2 feet away, and compare hotspot or coldspot contrasts of 3°C (about 5°F) or more to surrounding areas. Example: after a heavy rain, scan a basement ceiling; a 3°C cold patch clustered in a 12-inch area often indicates moisture intrusion above.
The fastest way to confirm something behind a hole is a camera.
Why a borescope helps: it gives direct visuals so you won’t guess. Steps to use one:
- Drill a 3/8- to 1/2-inch hole at a marked spot.
- Insert a flexible borescope head and angle it toward the target area.
- Record or view images to identify wires, pipes, or pests.
Example: when you suspect a mouse nest in a 2×6 stud bay, drop a 6mm camera in and sweep the cavity—seeing nests or droppings tells you exactly what to remove.
Acoustic tomography can map voids using sound, and here’s why that helps: it shows internal anomalies without drilling many holes. Operate it by placing sensors in a grid on the surface, introduce sound pulses, and look for slower transit times that indicate cavities. Example: for a 10×6-foot drywall section, set sensors every 18 inches; a consistent slow band 3–6 inches wide suggests an internal gap or delamination.
Match tool choice to resolution, depth, and invasiveness because each method has limits.
- Resolution: use a borescope for millimeter detail, thermal for broad patterns, radar for medium detail, and acoustic tomography for larger void maps.
- Depth: stud finders work up to 1.5 inches typically, radar can reach several inches to feet depending on model, thermal is surface-limited, and borescopes go only where you can insert them.
- Invasiveness: start with noninvasive scans (stud finder, thermal, radar), then use a borescope or small hole if you need a visual.
One last concrete tip: if you plan to cut into a wall, always call 811 or check local utility maps first, then use a radar scan and a borescope confirmation before you cut.
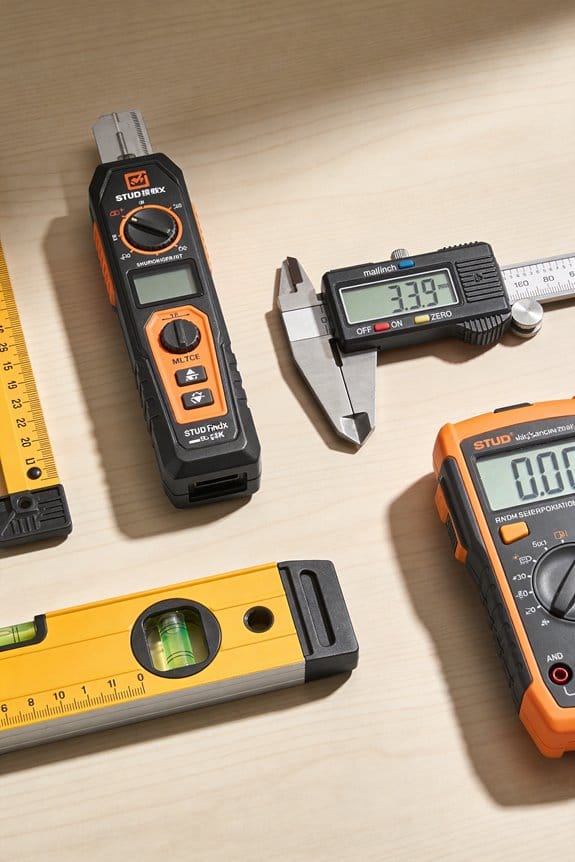
Recommended Products

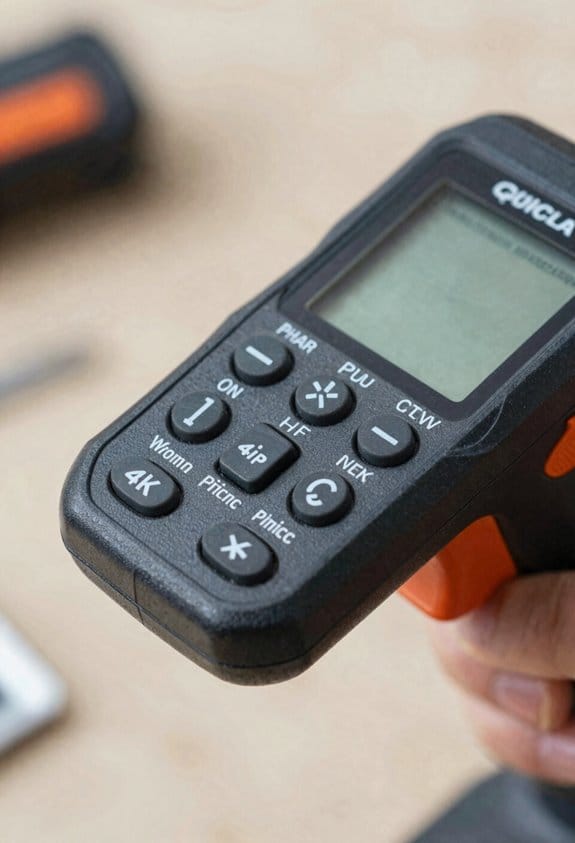
INSTANT RADAR DETECTION: No more swiping back and forth. Bosch Radar Technology provides instant, accurate object detection the moment you place it on a wall, floor, or ceiling. It's the fastest, most reliable way to see what's hidden behind any surface.

ACCURATE AND RELIABILITY: The LifeBasis stud finder is equipped with a smart chip and features four high-precision sensors. Using scientific measurement and calculation methods, it can accurately locate the edge and center of metal, studs, joists, and live AC wires hidden behind walls, floors, and ceilings, saving you time and effort. (Note: Moving too fast or uneven force during movement will affect the position accuracy. PLEASE keep an even force and moving speed when using.)

Two-In-One Accuracy - Two-In-One Line Laser And Stud Sensor Made For Hanging And Straightening Tasks At Home
Pros vs. DIY: How Safer Wall Detection Is Used
Before you start wall detection, you need to know why it matters: hitting a live wire or a pipe can cause injury, expensive repairs, or ruined drywall.
If you’ve ever drilled into the wrong spot, this is why you should inspect your tools first: check your stud finder or scanner for cracks, loose batteries, or a damaged probe, and test it on a known stud in another room to confirm it reads correctly. A real example: I once tested a $40 stud finder on an empty closet shelf and found it miscalibrated; replacing the batteries fixed the reading and saved me from cutting into a hidden junction box. Tip: replace batteries every 3–6 months during regular projects.
Here’s what actually happens when you use basic vs. advanced wall scanners, and why that matters: basic magnetic or capacitive stud finders show wood or metal studs but won’t detect pipes or live wiring reliably, while radar or thermal devices can reveal different materials but need skill to interpret. For example, a friend used a thermal camera to find a cold pipe behind a bathroom wall during winter, and the camera clearly showed the pipe as a narrow cool line. Basic devices are fine for hanging pictures; advanced scans are better for relocating plumbing or rewiring.
Why tool safety matters: misuse can damage wiring or pipes and cause shocks or floods, which is why you should follow these steps before drilling or cutting:
- Turn off power at the breaker for the circuit nearest your work area and test that outlets are dead with a non-contact tester.
- Shut off water to nearby fixtures when you suspect plumbing is behind the wall.
- Mark multiple detection points across the area and compare readings to confirm stud or pipe location.
Real-world example: a homeowner who shut off the water before cutting into a wall avoided a costly basement flood after finding an old copper elbow right where they planned a hole.
How to learn advanced scanning skills and when to call a pro: advanced radar and thermal imaging require practice to interpret reflections, density changes, and false positives, which is why community workshops or a single paid session with a pro can teach you the quirks quickly. One good example: join a weekend class at a local hardware store or hire a technician for a 1-hour scan and watch them explain why a radar blip meant conduit, not rebar. If your scan affects structural framing, electrical panels, or main plumbing, hire a licensed pro.
Liability and insurance basics you should know: damaging concealed systems can lead to repair bills and possible claims, so check your homeowner’s policy and any contractor liability rules before starting work. Example: a DIYer who hit a water line ended up paying the deductible plus a repair bill because their homeowner policy had a water damage exclusion for construction-related incidents.
Final quick checklist you can use right now:
- Inspect tool condition and change batteries.
- Test the tool on a known spot.
- Turn off power and, if needed, water.
- Mark and compare multiple readings.
- If you see ambiguous results or hit structural systems, call a pro.
If you follow those steps, you’ll cut the risk a lot.
Choosing the Right Tool for Your Task
Before you pick a wall scanner, you need to know what problem you’re solving and why accuracy matters: a missed pipe can mean a costly repair.
Start by matching the scanner to the task. If you need to find studs for shelving, use a basic stud finder with at least 1-inch depth and center detection; example: a handheld magnetic or single-sensor electronic model that marks studs at 0.75–1.5 inches deep. If you expect pipes or live wiring behind 2–3 inches of drywall or plaster, choose a multi-sensor or radar unit rated for 2–3 inch metal detection and live-AC detection. Real-world example: when I mounted a 40 lb shelf on 3/4-inch drywall over plaster, a single-sensor model gave inconsistent readings, while a radar-type unit showed a water pipe 2 inches back.
How do you weigh cost versus accuracy? You care because spending too little can cost you time or a repair. Higher-end units usually combine multiple sensors and better calibration, which improves accuracy but raises the price by $100–$500 compared with basic models. Example: a midrange radar scanner ($200–$350) detected both a copper pipe and a stud in my garage wall; a $30 basic finder only showed the stud. Steps to decide:
- Set a budget range.
- List what you must detect (studs, metal, live wires).
- Pick the lowest-priced model that meets those detection specs.
What about false positives and ease of use? You need reliable results so you don’t drill into the wrong spot. Simpler models cost $20–$50 and are easy to operate — point, sweep, mark — but they can miss thin pipes or give false positives on metal nail strips. Example: a rental basic unit flagged the drywall screws in a patch as a pipe. To reduce false positives:
- Scan the same spot horizontally and vertically.
- Compare readings across multiple passes.
- If unsure, confirm with a different sensor type.
Why battery life matters and how to handle it. You want the tool ready for long jobs; otherwise you’ll stop mid-task. For long runs or professional use, choose scanners with rechargeable batteries and run times of 8+ hours or swappable packs; for occasional home jobs, a unit using a cheap 9V or AA cells with 6–12 hours is fine. Example: I reused a unit with a 2-hour rechargeable battery and it died halfway through a fence-mount job; a replacement model with a 10-hour battery finished it. Tip: keep spare batteries or a portable charger.
What features should you check before buying? You want clear, usable feedback on-screen and easy controls. Look specifically for:
- Display clarity: backlit LCD or simple LED bars that remain visible in daylight.
- Detection depth: listed in inches for wood, metal, and live-AC.
- User controls: calibration button, mode switch (stud/metal/live), and sensitivity adjustment.
Real-world example: a unit with tiny LEDs confused me on a bright porch; swapping to an LCD model solved that.
How to verify real-world performance before you trust it. You should confirm detection before cutting or drilling. Steps:
- Read three recent user reviews that mention similar walls to yours.
- Test the scanner on a known wall section (like where a light switch or outlet sits).
- Cross-check suspect readings by drilling a small test hole in an unobtrusive spot or using a backup detection method (magnet or outlet location).
Example: before running wiring in an old house, I tested on the outlet wall and confirmed a scanner’s wire detection with a low-power stud finder.
Follow these practical checks and you’ll choose a scanner that fits your job without surprises.
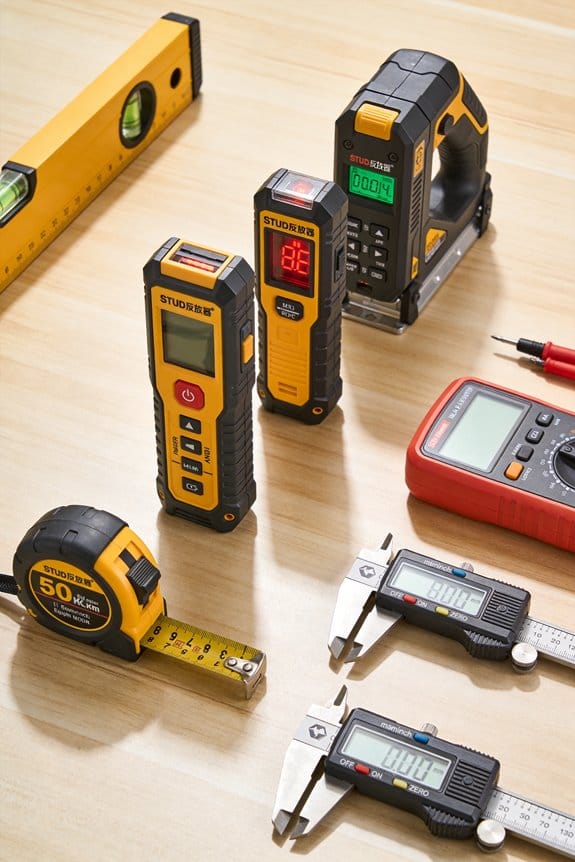
Recommended Products
Ideal for efficient and accurate detection of a wide surface area with a large 4.1 inch screen

Built in Wifi - The first of Radar Detectors for cars designed for the connected car. The MAX 360c updates through the on-board wifi connection, alerting you to the latest ticket threats in realtime (compatible with iphone and Android Devices).

UNSURPASSED RANGE & SENSITIVITY: Industry Leading Performance with Advanced False Alert Filtering is THE choice for drivers who demand the highest level of protection.
Cheap but Useful Detection Tools for Budget DIYers
Before you start hanging anything heavy on a wall, you need to know what’s behind it because hitting a pipe or live wire can ruin a project and cost hundreds to fix. If you’re on a tight budget you can still get reliable tools that tell you where studs, pipes, and live wiring might be.
Here’s what actually happens when you scan a wall with a basic electronic stud finder: it senses density changes and shows either edges or centers so you can mark stud locations. For example, if you scan above a baseboard in a living room and the finder indicates two edges 1.5 inches apart, you’ve located a 3.5-inch stud center; mark the center with a pencil. Electronic models run about $10–$30 and usually need a 9V battery.
Think of a magnetic stud finder like a paperclip on a fridge: it only finds metal fasteners, and nothing else. A magnetic finder costs under $10, needs no batteries, and will stick to a nail or screw in a stud — useful if you want a quick confirm after using an electronic finder. For instance, when mounting a picture in a hallway, slide the magnet along the wall until it snaps to a screw head; then mark that spot.
The difference between a cheap multi-mode detector and single-mode tools comes down to what each mode detects, so know which mode you’re using. Affordable multi-mode units (roughly $20–$50) usually have three settings: stud, metal, and live-wire. Example: switch to live-wire mode and move the unit slowly; if it beeps over a horizontal line at outlet height you’ve likely found wiring in a conduit.
You don’t need an expensive inspection camera if you only need a quick peek; small borescopes give visual access and confirm pipes through tiny holes. Borescopes with a 5–10 mm probe and 2–5 meter cable cost $20–$60 and let you see pipe runs behind drywall when you drill a 1/4-inch pilot hole; you’ll actually see the pipe’s color and fittings on your phone screen.
Before you buy a kit, know how you’ll use each tool so you don’t waste money on features you won’t need. For example, buy a $25 kit that bundles a basic stud finder, a small magnet, and a 2-meter borescope if you’re only doing picture hanging and occasional small shelf installs.
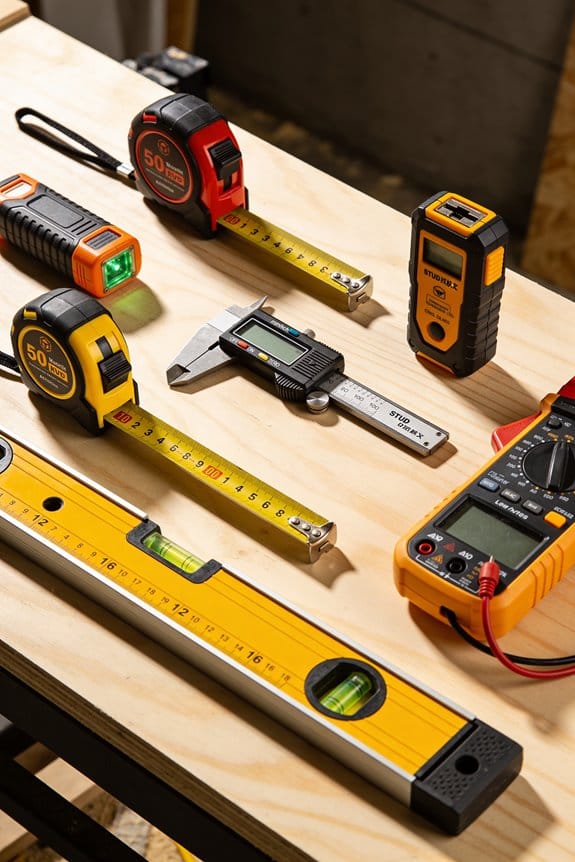
Recommended Products

Editor's Notes: Are you a finder or seeker with style (and a lot of other stuff) to spare? Then Rachel’s classic silhouette is especially for you. Our must-have Rachel Tote features perfectly placed pockets and holds up to a 15-inch laptop.

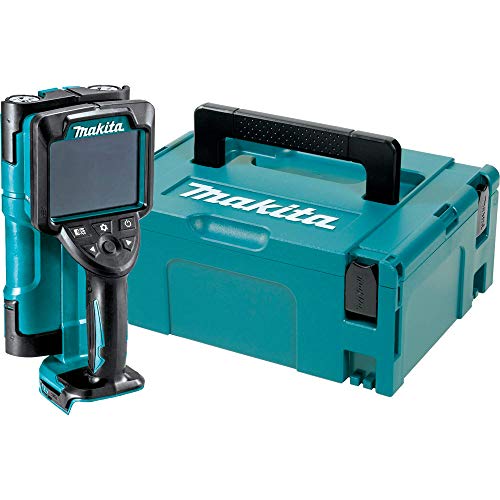
Finds the center, edges, and direction of wood and metal studs up to 2 in. (50 mm) deep

ACCURATE: More sensors = More accuracy. Conventional stud finders have 1 or 2 sensors. The ProSensor MAX had 13, making it the most accurate stud sensing tool on the market. The ProSensor MAX has a max detection depth of 2 1/2" for thick walls. The precision LEDs track the location of studs while displaying the center and edges simultaneously.
When to Hire a Pro: Safety, Structural, and Legal Red Flags
Before you open up a wall, you need to know what might be behind it.
If you’re ever unsure about what’s behind a wall, hire a pro instead of guessing — you can get shocked, flood your house, or weaken a wall. For example, I once saw a homeowner cut into a closet wall and nick a hidden water line; the leak ruined drywall in three rooms before they found it. Call an electrician when you suspect wiring, a plumber for pipes, or a structural contractor for beams.
Why this matters: mistakes can cause injury, big repairs, or revoked insurance claims. A quick rule: if the wall is near a bathroom, kitchen, furnace, or meter, assume utilities run through it. Steps to follow:
- Stop work and call a licensed pro if you find wiring, galvanized or copper pipes, or large timbers.
- Take photos and note exactly where you were cutting.
- Turn off the circuit at the breaker box and the water at the main shutoff if you suspect damage.
If you see sagging ceilings, large cracks, or a history of water damage, call an expert who can assess loads, moisture, and hidden rot. A structural engineer inspects spans and load paths; a contractor can pull a permit and repair. For example, after heavy storms a homeowner noticed a horizontal crack above a window; an engineer confirmed the header was compromised and specified a replacement beam.
Why this matters: bad structural fixes can cause collapse or make resale impossible. Steps to take:
- Photograph the damage from multiple angles.
- Avoid propping things up with temporary blocks longer than 48 hours.
- Get a written assessment with calculations if a beam or header is involved.
You should also consult a licensed contractor or engineer when permits are required, because legal consequences include fines, denied insurance claims, and liability for accidents. For example, a neighbor did a permit-free bathroom move; when a later water claim came up, their insurer refused payout. Ask your local building department if your job needs a permit before you start.
Why this matters: unpermitted work can cost you thousands at inspection time. Steps to follow:
- Call your local permitting office and describe the scope in one sentence.
- If a permit’s required, get a licensed contractor who pulls it and provides receipts.
- Keep the permit card and final inspection report with your house records.
A pro uses diagnostic tools and knowledge to map hidden systems safely, and they document work to protect you legally and structurally. For instance, electricians use circuit tracers, plumbers use small cameras, and structural pros use moisture meters and load calculations — tools you won’t likely have. When a pro finishes, ask for a written report, warranty, and permit closure so you have proof for future buyers or insurers.
Buying Safer Wall Detection Tools: Checklist and Comparison Criteria
Before you buy a wall scanner, know what you actually need and why it matters: choosing the wrong device wastes money and risks hitting something behind the wall.
1) What do you need the device to find?
Why it matters: different targets need different sensors.
Example: If you want to hang a heavy mirror over a fireplace, you need a stud finder that locates wood or metal studs at least 1.5 inches deep.
Steps:
- List targets (studs, live wiring, metal pipes, plastic pipes, voids).
- For each target, write the depth you need (e.g., 1–2 inches for studs, 3–4 inches for larger pipes).
- Match those needs to device modes (wood/metal/AC/sonic).
2) How accurate is the device and how do you calibrate it?
Why it matters: incorrect calibration gives false positives and misses.
Example: A model that auto-calibrates on painted drywall but not textured plaster will misread around a doorway.
Steps:
- Check the manual for calibration steps and time required (e.g., place on wall flat for 3–5 seconds).
- Verify drift correction: ask if it auto-calibrates every scan or needs a manual reset after 10 minutes.
- Test on a known target: mark a stud with a small nail and confirm multiple scans hit the same spot within ±0.5 inch.
3) What detection range and resolution do you need?
Why it matters: range determines how deep you can see; resolution determines how small an object you can resolve.
Example: If you’re locating thin electrical conduit behind 3-inch plaster, you need a device rated for at least 3.5 inches depth and a resolution of 0.5 inch.
Steps:
- Note the wall thickness at the job site (measure in inches).
- Choose devices with specified max depth ≥ wall thickness + 0.5 inch.
- Choose resolution (minimum 0.5 inch for small pipes, 1 inch for studs).
4) How usable is the interface and what’s the battery life?
Why it matters: a confusing display or dying battery slows work and causes mistakes.
Example: On a ladder, you want a bright backlit screen and a device under 1.5 pounds so you can hold it steady.
Steps:
- Check display type (backlit LCD, LED bars) and readability in sunlight or dim basements.
- Verify weight (prefer under 1.5 lbs for overhead work) and grip ergonomics.
- Check battery specs: list expected runtime (e.g., 12 hours on AA or 8 hours on rechargeable) and whether spare batteries are available.
5) What does the warranty and support include?
Why it matters: defects or calibration drift can cost you time and money later.
Example: A one-year warranty that covers defects but charges $50 for calibration service means extra expense after buying.
Steps:
- Compare warranty lengths (months or years) and exactly what’s covered (defects, calibration, shipping).
- Look for free calibration or at least a trial period of 30 days.
- Note customer support hours and return policy (e.g., 30-day return, free return shipping).
6) How does it perform in real use?
Why it matters: specs aren’t the same as real-world results.
Example: Independent tests showed Brand X missed thin copper pipes behind lath-and-plaster while Brand Y detected them consistently.
Steps:
- Read at least three independent reviews or test reports and record recurring failures.
- If possible, borrow or demo the unit on an actual wall like yours.
- Prioritize models with repeatable detection within ±0.5 inch across multiple reviewers.
Quick buying checklist (use this at the store or before checkout):
- Targets needed + required depth (write numbers).
- Calibration method and auto-drift behavior.
- Max depth ≥ your wall thickness + 0.5 inch.
- Resolution ≤ 0.5–1 inch depending on target.
- Display readability and weight ≤ 1.5 lbs.
- Battery runtime and spare/replacement options.
- Warranty length, coverage, and calibration charges.
- At least three independent positive reviews or a hands-on demo.
Follow these steps and your chance of hitting something behind the wall drops significantly.
Recommended Products

7 Year Warranty, Rugged Construction High Sensitivity with 5 Selectable Levels

Digital readout and bar graph allow you to locate visually

Waterproof up to housing; water-resistant housing
Privacy, Building Codes, and Liability for Home Use : What to Watch For
Before you use a wall scanner at home, think about privacy first because scans can reveal more than you expect.
Why this matters: your scan could capture a neighbor’s wiring or personal items and sharing it can breach privacy. Example: you scan a shared apartment wall and the image shows the neighbor’s router and photo frame through a thin partition. Steps:
- Position the scanner so it points only at the area you own.
- Block adjacent rooms with a blanket or cardboard when scanning.
- Disable any cloud upload or automatic sharing in the device app.
- Delete saved scans you don’t need within 24 hours.
Tip: tell any housemates you’ll scan and get verbal consent before you start.
Before you cut into or alter a wall, check local building codes because rules vary and noncompliance can stop work or require repairs.
Why this matters: violating codes can force you to reopen walls or pay fines. Example: a homeowner cut into a load-bearing wall to install a shelf and later discovered the hole required an inspected repair and a permit, adding $800 in contractor fees. Steps:
- Call your city or county building department and ask about permits for cutting studs or rerouting electrical/plumbing.
- Search your municipality’s website for “minor interior work permit” and print the checklist.
- If you find wiring or pipes, stop and call a licensed electrician or plumber for a quote.
- Keep any permits and inspection reports for at least five years.
Consider liability when you borrow a scanner, let someone else use it, or rely on its reading because incorrect readings can cause damage or injury.
Why this matters: you could be held responsible if someone is hurt or property is damaged. Example: you lent your scanner to a friend who missed a hidden pipe, they drilled, flooded a ceiling, and their homeowner’s insurance sought reimbursement from both of you. Steps:
- When lending, write one short agreement: date, device ID, and a note that the borrower assumes responsibility.
- If you hire help, get a contractor’s proof of insurance and verify it covers property damage and injury.
- Use the scanner only as a guide — always confirm with a professional before cutting into walls.
- Photograph the scanned area and save the image with a timestamp before any work begins.
Frequently Asked Questions
Can Pets or Pets’ Heat Affect Thermal Wall Scans?
Yes — I’ve seen it: like a Victorian séance, pet warmth and fur insulation can blur thermal wall scans, so I’ll caution you that pets on or near walls can create false hotspots and mask underlying issues during inspections.
How Do Detection Tools Perform on Plaster Vs Drywall?
Plaster often reduces sensor sensitivity compared to drywall, so I’ll calibrate surface calibration settings higher and use slower scans; drywall gives clearer readings with lower sensitivity, needing less calibration and faster, more reliable detections.
Are There Smartphone Apps That Reliably Detect Studs?
Yes — I’ve found apps claiming 85% accuracy; many use Augmented Reality overlays plus Signal Filtering to improve readings, but I’d still cross-check with a physical stud finder for reliable placement and safety.
Can Wall Detection Reveal Asbestos or Lead Paint?
No—wall detection tools can’t reliably find asbestos or lead paint; they can show voids or studs but not materials. I recommend asbestos indicators screening and certified lead testing by professionals before renovations to be sure and stay safe.
How Accurate Are Radar Detectors Through Brick or Masonry?
They’re fairly limited: I find radar penetration through brick or masonry varies widely, with significant signal attenuation reducing accuracy; thicker, denser walls and moisture cut detection range and resolution, so results can be inconsistent and often unreliable.