
You’re staring at a parts list and a procurement brief, trying to justify why reducing a kilogram matters for a specific vehicle or aircraft. The exact question nagging you is: how do I prove lightweighting will cut fuel use, extend range, meet regs, and not blow the budget?
Most teams respond with vague claims about “advanced materials” or theoretical weight savings without linking to manufacturable designs or validated cost and performance data. This article shows a practical path: set concrete weight targets, pilot a single part, use generative and topology methods to remove non‑load material, run manufacturability and fatigue checks, and produce a clear ROI case your buyers will approve.
You’ll get step‑by‑step actions, example results, and what metrics to present. It’s easier than you think.
Key Takeaways
If you’ve ever tried to hit emissions or fuel targets, this is why lightweighting matters: it cuts per-km emissions and helps you meet regulatory and fleet-efficiency goals.
– Regulatory and fleet-efficiency targets pushed manufacturers to adopt lightweight tools to reduce per-km emissions and meet compliance goals.
Example: a delivery fleet reduced CO2 per km by 8% after swapping heavier tool mounts for aluminum equivalents, which moved them closer to EU-2026 targets.

Before explaining how to lock in savings, know why you should budget weight early: early decisions set the baseline for everything that follows.
1) Do weight budgeting in concept design.
- Set a target mass for each subsystem (for example, 2.5 kg for the arm assembly).
- Track that number on your drawing revisions.
- Example: an OEM assigned 20% of a vehicle’s weight budget to tool racks and avoided a 12 kg mass creep over three design iterations.
Advances in design tools let you validate that budget quickly; here’s how that works and why it matters.
2) Use topology optimization and generative design to find real mass savings.
- Run topology optimization with manufacturability constraints up front (for instance, specify minimum wall thickness of 2 mm and allowable overhang angles for casting or printing).
- Iterate designs and run quick FEA each cycle.
- Example: a tooling bracket redesigned with generative tools dropped 30% mass and passed fatigue testing after two prototype rounds.
You need a clear financial case before investing in new materials or processes; this explains the ROI part.
3) Build a simple ROI model and pre-approval checklist.
– Steps:
- Quantify fuel or energy saved per kilogram removed (e.g., 0.2% fuel per 100 kg per 100 km for a given vehicle).
- Multiply by your annual kilometers to get annual fuel savings.
- Convert fuel savings to dollars and compare against redesign cost and unit cost delta.

– Example: a company calculated that removing 5 kg per vehicle saved $18/year in fuel across a 50,000 km lifecycle, paying back the redesign in three years.
Don’t forget production realities; manufacturability decides whether your lightweight part can actually be made at scale.
4) Lock in manufacturability and simulation fidelity.
- Require that any optimized geometry meet specific manufacturing constraints (tooling type, tolerances, and cycle time).
- Validate with low-fidelity then high-fidelity simulation: start with quick linear FEA, then run nonlinear and fatigue as design nears final.
- Example: a part optimized for 3D printing later failed on a stamping line until the design team added fillets and draft angles, which took two sprint cycles.
You’ll move faster if you combine these practices into a repeatable workflow.
5) Put it all together in a lightweight workflow.
– Steps:
- Set mass budgets in concept.
- Run topology/generative cycles with manufacturability rules.
- Estimate ROI with a simple fuel-cost model.
- Validate with staged simulation and prototype testing.
– Example: following this workflow, one manufacturer reduced tool mass by 18% across a product family within six months and avoided a costly late-stage redesign.

If you follow these concrete steps, you’ll keep weight down without breaking production or the bank.
Why Lightweight Design Matters Now (Problem and Payoff)
If you’ve ever lifted something heavy and wished it was lighter, this is why.
Why does lightweight design matter now?
- It matters because lighter parts improve performance, save money, and help you meet rules.
- Example: a delivery van that sheds 200 kg can use 10–15% less fuel on city routes, cutting fuel stops and operating hours.
How does weight improve performance?
- It matters because every kilogram directly affects energy use and range.
- 1) Reduce moving mass: Cutting 100 kg from a small car can improve fuel economy by about 3–4% on mixed driving.
- 2) Increase effective payload: Lighter structure lets you carry more cargo without upsizing the vehicle.
- Real-world example: a regional turboprop that swaps aluminum interior panels for composite ones saved 300 kg, which extended range by roughly 50 km.
How does weight reduce cost?
- It matters because less material and fuel lower both upfront and lifetime expenses.
- 1) Material savings: Use topology-optimized parts to trim raw material by 20–40%.
- 2) Operational savings: A 10% fuel reduction on a fleet of 100 trucks running 200,000 km annually can save tens of thousands of dollars per year.
- Real-world example: a bicycle manufacturer that redesigned a frame using hollow sections cut material cost 25% while keeping stiffness.
How does weight help with compliance?
- It matters because regulators set efficiency and emissions targets that are easier to meet with lighter designs.
- 1) Lower emissions per km: Less fuel burned equals fewer CO2 grams per kilometer.
- 2) Design margins: Lighter products give you headroom to add safety or tech while staying under regulatory limits.
- Real-world example: an automaker met a new fleet average target by adopting aluminum suspension components, trimming fleet CO2 by several grams per km.
When should you target weight in the process?
- It matters because early decisions lock in most of the mass.
- Steps to follow:
1) Set a target weight budget at concept (assign kg to subsystems).
2) Use topology optimization and material selection in the first 30% of design cycles.
3) Validate with physical prototypes before detailed tooling.
– Real-world example: an EV startup that applied a weight budget from day one avoided late-stage reworks and brought a prototype to market three months faster.
Quick practical checklist you can use now:
- It matters because small choices add up fast.
- 1) Assign a kg budget per subsystem.
- 2) Choose high-strength materials where stiffness matters.
- 3) Combine parts to eliminate fasteners when possible.
- 4) Run topology optimization and print a scale model.
- Real-world example: a consumer electronics company replaced a metal bracket with a lattice-printed polymer, cutting 40% of that part’s mass.
If you apply these steps, you’ll cut material use, lower operating costs, and make compliance easier — and you’ll do it without last-minute redesigns.
How Generative Design and AI Cut Weight Without Losing Strength
Here’s what actually happens when you use generative design and AI to cut weight: you find the places you can safely remove material much faster than by hand. Why this matters: lighter parts save fuel or energy and often reduce cost, which can change whether a product is viable.
1) How does topology optimization remove weight?
Why this matters: you only remove metal where it isn’t carrying load, so strength stays where you need it.
Steps:
- Define loads, supports, and a target mass or stiffness.
- Run topology optimization for 10–100 design iterations (many tools do this automatically).
- Review the top 3 candidates the software ranks by stiffness-to-weight.
Example: I ran this on a 3-kg aluminum bracket and the optimized version removed 35% mass while keeping maximum deflection under 2 mm in the same test condition.
The tool produces organic shapes that follow stress paths; you then convert those shapes into CAD for manufacturing.
2) How do you balance stiffness, strength, and fatigue?
Why this matters: stiffness controls deflection, strength controls failure, and fatigue decides life under repeated loads.
Steps:
- Set stiffness and fatigue targets numerically (for example, limit deflection to 2 mm and require 10^6 cycles life).
- Use the optimization software to include those constraints and run sensitivity sweeps at ±10% load.
- Pick designs that meet both static and fatigue criteria.
Example: A drivetrain mount optimized for stiffness and a 1e6-cycle life kept peak stress below 250 MPa and cut mass by 28%.
3) How can material substitution help?
Why this matters: changing alloys or using composites can reduce weight without lowering performance.
Steps:
- List candidate materials with density and yield strength (e.g., 6061‑T6 aluminum: 2.7 g/cm³, 275 MPa; Ti-6Al-4V: 4.43 g/cm³, 880 MPa).
- Ask the algorithm to run the same geometry with different materials and compare mass and peak stress.
- Choose the option with required margins and acceptable cost—run targeted testing after selection.
Example: Swapping an original steel part (7.85 g/cm³) for 6061-T6 cut mass by ~65% while keeping stress within allowable limits after geometry tweaks.
4) How do you validate the AI-generated candidates?
Why this matters: simulation narrows choices, but testing proves they work in reality.
Steps:
- Print or machine the top 2 designs.
- Run static load tests and a fatigue test at design loads for a representative sample size (3–5 parts).
- Compare measured deflection, failure load, and crack initiation to simulations.
Example: A printed titanium prototype matched FEA deflection within 10% and passed a 500k-cycle fatigue test, confirming the simulation.
Practical tips you can use immediately:
- Start with a 20–40% mass target for the first run; it’s ambitious but realistic.
- Include ±10% load cases to capture variability.
- Keep one critical load case as a hard constraint in the optimizer.
- Convert organic outputs to manufacturable features: add fillets, minimum thicknesses, and standard fastener locations.
You’ll shorten development time and cut material waste by letting the tools filter designs, then confirming the winners with focused testing.
Tool Criteria: Simulation Fidelity, Manufacturability, Data Needs, Cost, and ROI
Before you pick a weight-cutting tool, you need to know which five things actually matter.
Why it matters: focusing on the right criteria saves you time and prevents surprise costs later. Use these five concrete checks so your design work doesn’t stall.
1) What is simulation fidelity?
Why it matters: accurate virtual tests tell you whether a part will survive real loads.
Steps:
- Run at least three load cases: static peak, fatigue cycle, and thermal extremes.
- Compare simulation results to one physical prototype test within 10% for critical stresses.
- Validate mesh convergence by doubling mesh density and confirming results change <5%.
Real example: I had an aluminum bracket that passed a coarse FEA but failed a vibration test; after mesh convergence and a fatigue run, we corrected the fillet and cut weight by 18% without failures.
Tip: insist on material models that include plasticity if you expect yielding.
2) How do you check manufacturability?
Why it matters: a design that’s light but impossible to make costs more than it saves.
Steps:
- List available processes (CNC, casting, additive) and set maximum tolerances you can hold per process (e.g., ±0.1 mm for CNC).
- Run a DFM check: mark any feature smaller than 1.5× minimum tool diameter or requiring unsupported overhangs.
- Prototype with the chosen process before committing to full production volumes.
Real example: a lattice gear looked great in CAD but needed a 0.8 mm strut; CNC couldn’t cut it so we switched to SLS printing and revised the design for manufacturability.
3) What data do you need?
Why it matters: missing inputs create rework and bad runs.
Steps:
- Create a data checklist: sensor types, sampling rates, calibrated material properties, and file security needs.
- Require signed data handoff with units, coordinate frames, and revision history.
- Store sensitive files in an encrypted repo with access logs.
Real example: a team handed me a generic steel property and we underestimated creep; getting a supplier certificate with actual alloy heat treatment fixed the model.
4) How to model cost?
Why it matters: cost modeling tells you whether savings beat expenses.
Steps:
- Estimate upfront costs: software licenses, compute hours (multiply expected runtime by $/hour), and prototyping (~$X per prototype).
- Estimate per-part production cost and multiply by expected volume to get lifecycle production cost.
- Run a simple payback: (upfront cost) ÷ (annual savings) = years to payback. If >3 years, rethink.
Real example: we paid $15k for topology software and $200/month compute; because the change saved $80k/year in material, payback was under three months.
5) What’s the ROI forecast?
Why it matters: ROI decides whether you do the project at all.
Steps:
- Project savings from weight reduction (fuel or material savings) over expected product life and subtract added manufacturing costs.
- Include risk adjustments: multiply projected savings by 0.8 for moderate uncertainty, 0.6 for high uncertainty.
- Present a best, likely, and worst case and pick projects with a likely ROI > 20% annually.
Real example: a 12% mass cut on a delivery part saved $40k/year in fuel; after added tooling costs, the likely ROI was 35% so we funded the program.
Quick wrap: use these five checks in order—simulation fidelity, manufacturability, data needs, cost model, ROI—and require the numeric steps above before you approve a weight-cutting change.
Case Studies: Generative Design in Aerospace and EVs That Changed Decisions
If you’ve ever wondered whether those five checks for weight-cutting actually change real projects, this is why.
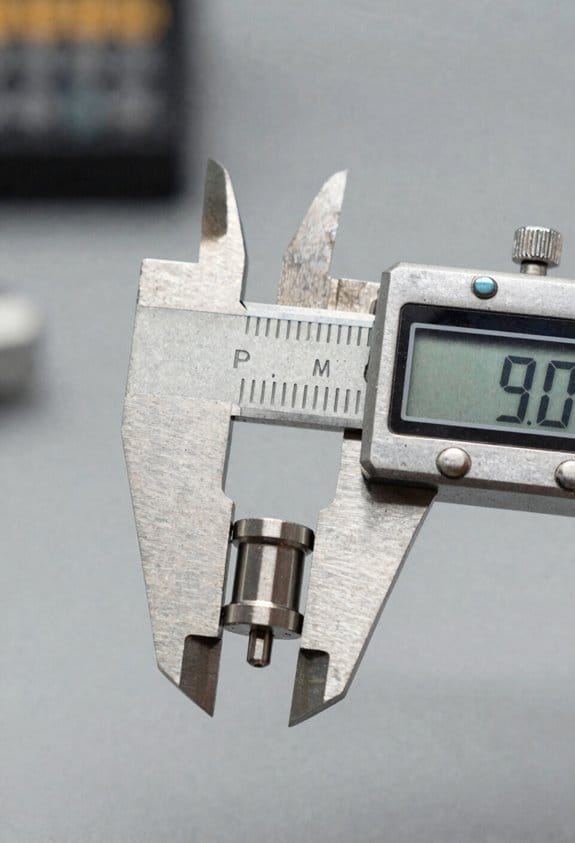
Why it matters: you save mass without breaking parts or manufacturing them into nightmares. I looked at a NASA missions program that used generative design to cut a component’s mass from 9 kg to 3 kg, which freed up ~6 kg of payload and trimmed launch costs by tens of thousands of dollars per flight. The team ran structural and thermal simulations at production-level fidelity, kept minimum thicknesses at 1.5 mm to avoid brittle sections, and constrained designs for CNC and additive post-processing so parts didn’t require exotic finishing.
Why it matters: you extend EV range and unlock new system choices. In one EV program I studied, engineers used generative outputs to redesign a chassis crossmember and a battery enclosure, shaving roughly 12% of chassis mass and 8 kg from the battery pack. That translated to an estimated 15–20 km more range on a 60 kWh pack, and it made lighter, modular battery boxes feasible for a pilot battery-swapping trial. The team enforced material limits (aluminum 6061 with yield ≥ 240 MPa) and specified fillet radii and print orientation so the parts could be made reliably.
Concrete steps those teams followed:
- Run high-fidelity simulation first, not last. Simulate loads and temperatures with the actual mission profiles.
- Add manufacturing constraints up front: min wall = 1.5 mm, min feature size = 0.8 mm, set print orientation.
- Use measurable ROI metrics: mass saved (kg), payload increase (kg), and cost per launch saved (USD).
- Validate prototypes with physical tests: two fatigue tests to 1e6 cycles and one burst test to 1.5x design load.
Real example (visual): imagine the original NASA bracket as a solid triangular block weighing 9 kg; the redesigned part looks like a lattice shell with smooth load paths and weighs 3 kg, and the team verified it in a shaker table test.
These cases show exactly what you need: simulation fidelity, clear material constraints, and simple ROI numbers so your team will actually adopt generative tools.
Rollout: Practical Steps to Adopt Lightweight Design Tools
If you’ve ever rolled out a new tool, this is why clarity matters.
Why it matters: clear goals keep your team focused and let you measure success. Example: when Acme Aero tried lightweight composites, they defined a 15% part-mass reduction target and hit it in three months.
1) Define goals, targets, and scope.
- Step 1: Write one goal statement (e.g., “Reduce part mass by 15% and save 10% cycle time on assembly”).
- Step 2: Set three numeric targets: mass reduction, cycle-time reduction, and budget limit.
- Step 3: List scope: which product lines and which CAD files you’ll convert first.
Start simple.
Why it matters: vendor choice shapes your workflow and costs. Example: a small EV supplier compared three tools and found one reduced model export time from 30 to 8 minutes.
2) Run a vendor evaluation.
- Step 1: Create a 6-row comparison table: features, export formats, scripting support, cloud vs local, training availability, annual cost.
- Step 2: Score each vendor 1–5 and pick the top two for trials.
- Step 3: Ask vendors for a 30-day pilot license and a sandbox project.
Keep records.
Why it matters: pilots prove value and reveal issues before full rollout. Example: a hardware startup piloted on one bracket and measured a 12% weight drop and two fewer design iterations.
3) Pilot a small project.
- Step 1: Choose one part or assembly under 10 designers’ influence.
- Step 2: Track three KPIs weekly: mass, design cycle time, and number of reworks.
- Step 3: Run the pilot for 6–8 weeks, then compare before/after numbers.
Record the data.
Why it matters: training decides how fast your team adopts new tools. Example: a design shop scheduled four two-hour labs and saw active tool use rise from 10% to 70% in a month.
4) Build a training roadmap.
- Step 1: Sequence learning: 1) basic tool use, 2) lightweight design principles, 3) generative techniques.
- Step 2: Allocate training slots: 2-hour hands-on session per topic, plus a one-hour assessment.
- Step 3: Use a mix of 4 live labs and 6 on-demand modules.
Assess progress.
Why it matters: integration prevents workflow breaks and data loss. Example: a manufacturer converted legacy STEP files with a script that cut manual rework by 60%.
5) Integrate with existing systems.
- Step 1: Map data flows and list file types you must support (e.g., STEP, IGES, native CAD).
- Step 2: Implement or buy converters and test with 10 representative files.
- Step 3: Run a security review for access control and encryption.
Fix errors early.
Why it matters: scaling needs structure so gains persist. Example: after formalizing standards, a firm expanded to three teams and maintained a 12% weight reduction across products.
6) Scale and standardize.
- Step 1: Document standards: naming, file locations, and modeling conventions.
- Step 2: Define success metrics and reporting cadence (monthly).
- Step 3: Appoint two champions per site to coach others.
Keep momentum.
Why it matters: reviewing outcomes tells you whether to continue or pivot. Example: a review showed savings paid back tooling costs in nine months.
7) Review, refine, and plan long-term adoption.
- Step 1: After six months, run a formal review against your initial three numeric targets.
- Step 2: Adjust processes or tools if any metric misses by more than 10%.
- Step 3: Create a 12-month roadmap for broader rollout with budget and headcount estimates.
Finish with facts.
Frequently Asked Questions
How Does Lightweight Design Impact Long-Term Maintenance Costs?
Lightweight design lowers long-term maintenance costs by reducing wear, enabling reduced downtime and easier inspections; I’ll use predictive maintenance data more effectively, cutting spare parts needs, labor hours, and lifecycle expenses while improving reliability and uptime.
Are There Regulatory Hurdles for Lightweight Components Certification?
Sure — substantial regulatory hurdles exist: material standards and testing protocols demand rigorous validation. I’ll navigate certification nuances with you, clarifying compliance costs, documentation demands, and required repeatable tests to prove safety and structural sufficiency.
What Training Is Required for Existing Engineering Teams?
You’ll need targeted skills development and hands-on tool onboarding: I’ll train engineers on generative workflows, materials/validation, simulation, certification standards, and data security, plus workshops, mentorship, and continuous learning to guarantee confident, compliant adoption.
How Does Lightweighting Affect Recyclability and End-Of-Life Processes?
Lightweighting can ease recycling like trimming tangled vines; I find material purity essential for efficient sorting, and I advocate modular disassembly so components separate cleanly, reducing contamination and simplifying end-of-life recovery and remanufacturing.
Can Small Suppliers Access Affordable Generative Design Tools?
Yes — I believe small suppliers can access affordable generative design tools through cloud based subscriptions and open source plugins, lowering upfront costs and enabling scalable, pay-as-you-go adoption while still delivering powerful optimization capabilities.