You’re standing over a project with a gap that won’t close and a shelf that won’t sit level, and you can’t tell whether the problem is your measurement or the tool. You ask yourself: is the tape accurate enough, do I need a caliper, or did I just read the wrong mark? Most people assume any measuring tool will do and blame technique instead of matching tool tolerance to the job.
This piece will show you when ±1/16″ from a tape is acceptable and when a 0.001″ caliper is required, how to check a level and zero a caliper, and how those checks prevent wasted material and bad fits. You’ll finish knowing which tool to buy and how to use it for common home projects. It’s easier than it looks.
Key Takeaways
If you’ve ever started a project and realized your cut was off by an inch, this is why measuring tools matter. They stop costly mistakes before they happen and make your results look like the photos you saw online.
Why do tutorials push specific tools? Because they show the tolerances you need to hit: a cabinet door might need to be within 1/16″ to avoid rubbing, a shelf gap should be 1/8″, and a wall layout often needs marks every 16″ on center. For example, a video showing shiplap installation zooms in on 16″ spacing between studs and the creator uses a 25′ tape to check every stud. Use a tape for distances, a 4′ level for straight runs, a digital caliper for gaps under 1/8″, and a laser meter for room lengths over 20 feet.
Before you buy anything, know this: affordable, accurate tools change outcomes because you’ll actually use them. A decent 25′ tape costs $10–$20, a 4′ level $15–$30, and a digital caliper $30–$60; they’re cheap compared with re-cutting materials. I once watched a homeowner avoid re-cutting five cabinet faces by re-measuring with a caliper and finding a 1/32″ offset.
How visual content drives purchases: seeing someone measure step-by-step makes the action easy to copy, so you buy the same tool to reproduce the result. For example, a time-lapse tiling video shows the creator snapping chalk lines every 12″ and using a 4′ level to keep rows flat; viewers then search for “4′ level” afterward. If you want the same finish, get the same tool.
When projects get bigger, lasers are the faster choice because they reduce human error over long distances. A laser meter you can hold steady gives repeatable readings at 30–100 feet, which beats trying to stretch a tape across a room alone. I used a laser to measure a 24′ living room and saved 10 minutes and one extra helper.
Steps to pick the right tool:
- Match the job: use a tape for up to 30′, a laser for over 20′, a 4′ level for wall runs, and a caliper for <1/8" gaps.
- Check accuracy specs: look for ±1/16″ on tapes, ±1/8″ on consumer lasers, and ±0.01″ on calipers.
- Buy one higher-quality piece first: spend $20–$60 on that one tool you’ll use most.
If you follow those steps, your projects will fit better and finish faster.
Quick Checklist: Which Measuring Tools Every DIYer Needs
If you’ve ever marked a board wrong and had to cut a new one, this will help you avoid that waste. Start with the right measuring tools so your projects fit the first time.
What basic measuring tools should you own?
Why it matters: accurate measurements stop mistakes and save money.
1) Tape measure — 25-foot steel tape with a 1-inch standout.
- Example: measuring across a living room for new baseboards; mark every 16 inches for studs.
- How to use:
- Hook the tape on the edge, pull to the other end, lock it.
- Read at the blade’s end; add 0.0625″ if the hook is recessed and you’re measuring inside.
- Retract slowly to protect the blade.
– Maintenance: wipe the blade with a rag and oil the spring if it squeaks.
Which tool gives straight horizontal and vertical checks?
Why it matters: small plumb or level errors make cabinets look crooked.
1) Spirit level — 24-inch aluminum level with two vials (horizontal and vertical).
- Example: leveling kitchen cabinets for doors that close evenly.
- How to use:
- Place the level on the surface.
- Adjust until the bubble centers between the lines.
- Recheck by flipping the level end-to-end.
– Maintenance: check on a known flat surface every six months and replace if vials are cloudy.
When do you need a square for layout and angles?
Why it matters: square corners produce tight joints that don’t gap.
1) Combination square — 12-inch with a 45° and 90° edge and a scribe.
- Example: marking a perfect right angle on plywood for a shelf.
- How to use:
- Tighten the head to the blade at the required position.
- Run the blade along the edge and scribe with the attached pencil.
- Use the spirit level vial for quick checks.
– Maintenance: keep the slide clean and lightly oil the screw.
When are precision tools worth it?
Why it matters: small parts and fittings need measurements within thousandths of an inch.
1) Calipers — digital calipers with 0.001″ resolution.
- Example: measuring a bolt diameter to match a threaded insert.
- How to use:
- Zero the calipers with the jaws closed.
- Place the part between jaws and read the display.
- For internal measurements use the smaller jaws; use the depth rod for holes.
– Maintenance: zero before each use and store in a foam case.
Should you get a laser distance meter?
Why it matters: lasers cut measurement time for long runs and large rooms.
1) Laser distance meter — 100-foot range with area and volume functions.
- Example: measuring three walls and a ceiling height to calculate paint area quickly.
- How to use:
- Point at the target and press measure.
- Use the area function to multiply length and width automatically.
- Hold steady or set on a tripod for long distances.
– Maintenance: keep the lens clean and replace batteries when the display dims.
How should you store and care for tools?
Why it matters: organized, maintained tools last longer and save you time finding them.
1) Storage plan — wall pegboard for frequently used items and a small lockable case for precision tools.
- Example: pegboard outlines with tape for each tool so you always return them to the same spot.
- Steps:
- Mount a pegboard near your workbench.
- Hang the tape measure, level, and combination square where you reach easily.
- Keep calipers and the laser in a padded case and a drawer.
– Maintenance: inspect foam inserts annually and replace worn hooks.
Quick calibration and maintenance routine
Why it matters: uncalibrated tools give wrong numbers that lead to wasted cuts.
Steps:
- Calipers — close and press zero every time before measuring.
- Level — place on a flat surface, flip end-to-end; bubble should mirror.
- Tape — check true length by measuring a known 1-foot block.
Example: before starting a deck board run, zero your calipers, verify your level on the workbench, and measure a 1-foot block with your tape.
Final buying tips
Why it matters: picking the right model prevents you from overpaying or buying junk.
1) Buy the tape measure, level, and combination square first; expect to spend about $15–$40 for each decent model.
2) Spend $50–$120 on digital calipers and $60–$200 on a reliable laser meter if you’ll measure large spaces often.
Example: a 25-foot Stanley tape for $20 plus a $35 24″ aluminum level covers most beginner projects.
Keep these tools organized, zero or check them before use, and replace anything visibly worn.
Recommended Products

Complete Do It Yourself installation instructions; We will support you before and after the sale
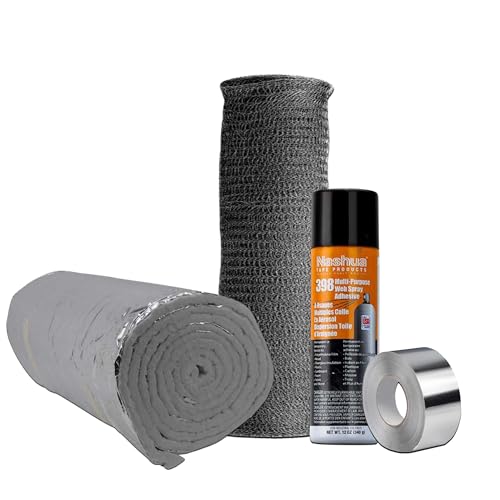
Premium Insulation for Enhanced Safety: 1/4" thick Premier Wrap with protective foil facing ensures optimal insulation, reducing creosote buildup and enhancing the safety of your chimney system.

1/2-Inch x 25-Feet with black markings bonded to steel
Why DIY Projects Spark Measuring‑Tool Demand
If you’ve ever started a DIY project and watched measurements go wrong, this is why.
Why it matters: bad measurements waste materials and time, and they make projects look sloppy. For example, I once cut a bookshelf top 1/2 inch too short because I eyeballed the line and didn’t clamp a stop block.
You need accuracy to get consistent, lasting results. When you choose a measuring tool, match the tool to the tolerance your project requires:
- Tape measure — Use when +/- 1/16 inch is acceptable, like framing studs or cutting plywood. Example: when installing a 48-inch wide shelf, measure twice at both ends and snap the chalk line before cutting.
- Level — Use when plumb or flat within 1/8 inch over 4 feet matters, like hanging cabinets. Example: shim behind the cabinet and check with a 4-foot level at the top and bottom until the bubble is centered.
- Digital caliper — Use when you need +/- 0.001 inch, like fitting a hinge pin or checking dowel diameters. Example: measure a drill bit against the caliper jaws before boring a hole for a press-fit dowel.
Why social recommendations matter: when friends or online peers show clear before-and-after photos, you trust the tool will help. For instance, a neighbor who measured and installed a door stop with a boxed level will convince you to buy the same level.
Why measurement psychology matters: clear markings and reliable readings reduce anxiety because you can *trust* the numbers. One real example: switching from an old faded tape to a new metric/imperial tape with bold graduations cut my marking time from five minutes to two.
How to pick tools in practice — steps:
- Define tolerance: write the acceptable deviation (e.g., +/- 1/8 inch).
- Match tool accuracy: check the tool spec (tape ±1/16, level ±1/8 over 4 ft, caliper ±0.001).
- Test once: measure the same dimension three times and compare.
- Decide and act: if measurements vary, use a more precise tool or add a jig.
How accuracy affects fit and safety: incorrect gaps cause rubbing, load shifts, and failed fasteners. A visual example: a deck board cut 1/4 inch short leaves a visible gap that lets water pool against the frame.
Basic calibration habits that save time and material — why it matters: uncalibrated tools lie, and you’ll waste pieces. One specific routine I follow:
- Check zero: close caliper jaws and reset to zero before use.
- Verify tape: hook the tape on a known 12-inch block to ensure it reads 12.00.
- Test level: place a level on a known flat surface, then flip it; the bubble should return to center within the spec.
Final practical tips you can use now:
- Mark with a pencil, then scribe with a knife for cleaner cuts.
- Use a stop block on a miter saw when making repeat cuts; clamp it and cut a test piece.
- Keep one reliable tool: a 25-foot tape with bold numbers, a 4-foot level, and a cheap digital caliper covers most projects.
Pick the simplest tool that meets your tolerance, check it once, and you’ll save time and scrap.
How Project Tutorials Convince Viewers to Buy Measuring Tools
If you’ve ever watched a tutorial and then bought the tool they used, this is why.
Why it matters: seeing a tool used removes uncertainty about whether it will work for your project. A step‑by‑step demo shows you setup, measurement points, and the final fit, and that lowers the chance you’ll buy the wrong thing. For example, watching a woodworking video where the creator centers a dovetail with a 6‑inch steel ruler and a marking knife makes it obvious how precise the cuts need to be and why the ruler matters.
How tutorials reduce perceived purchase risk
Why it matters: knowing what to expect makes shopping decisions easier.
1) They show the exact measurement technique, like marking every 1/16 inch when laying out a countertop seam.
2) They use close shots so you can see scale — a camera zoom on a caliper jaw tells you it’s reading 0.01 inch.
3) They repeat the same step several times so you can judge consistency.
A real example: a tile installer demo that measures and snaps a chalk line three times at 1/8 inch increments lets you judge whether a $15 chalk reel will hold tension.
How to use a tutorial to decide what to buy
Why it matters: following simple checks stops impulse purchases.
1) Note the exact specs shown: length, resolution, range, or blade thickness. Write them down.
2) Compare those specs to your project needs — if the creator uses a 12‑inch square but you work on 4‑foot panels, get at least a 16‑inch or a rip guide.
3) Watch for repeatability: if the host measures the same point three times and you can see identical readings, the tool likely holds calibration.
Real example: when watching a plumbing tutorial, the creator measures pipe OD with a digital caliper showing 0.02‑inch repeatability; you can compare that to the caliper specs before buying.
How to spot affiliate bias and check claims
Why it matters: creators earn when you buy, so recommendations can be skewed.
1) Look for clear disclosure in the video description or on‑screen. If they say “affiliate link,” treat the recommendation as potentially biased.
2) Search for independent reviews of the exact model — look for measured accuracy in millimeters or inches, not just opinion.
3) If the presenter claims a tool saves 50% time, find another source or a user comment that measures actual time saved.
Example: a creator links to a $200 laser distance meter and says it speeds layout; check third‑party tests that show that model’s accuracy is ±1.5 mm at 30 meters.
Quick checklist before you buy from a tutorial
Why it matters: a short checklist prevents buyer’s remorse.
1) Did you note the exact spec numbers shown?
2) Does the tool’s range match your project size?
3) Are there independent tests confirming accuracy?
4) Is the recommendation disclosed as an affiliate link?
A clear buy/no‑buy action: if the tool’s range or resolution is smaller than your project’s needs, don’t buy it.
Use tutorials to learn first, then buy
Why it matters: you’ll waste less money if you validate needs before buying. Watch the demo to learn technique and tolerance, then compare specs and independent tests to models that meet those tolerances. For example, learn how a woodworker uses a 0.5 mm router bit for inlay work, then buy a bit rated for that same diameter and made of carbide for durability.
Which Measuring Tools Creators Mention Most: And Why
If you’ve ever watched makers swap tools on camera, this is why.
Creators keep recommending the same measuring tools because they fix the same problems you’ll face: wrong cuts, crooked shelves, and wasted time. Use a tape measure for quick checks under 2 meters — hold it tight, read to the nearest 1 mm, and mark with a sharp pencil. Example: when hanging a 1.2 m shelf, measure the bracket centers twice, mark once, then drill; you’ll avoid a 20 mm gap between brackets.
Before I show how to use each tool, know why each one matters in one sentence: accuracy at the right scale saves materials and hours of rework. For a long run — say, measuring a room for baseboard — a laser measure prevents the cumulative errors that happen with a long tape.
1) How to use a tape measure for accurate cuts
Why it matters: a bad tape reading makes your whole project fit poorly.
Steps:
- Lock the blade and hook it over the edge; press the hook until it seats.
- Read the measurement at eye level to avoid parallax; note millimeters.
- Double-check by measuring from the opposite side.
Example: cutting a 600 mm cabinet shelf — measure twice, cut once, and clamp before cutting.
2) How to use a level to get things flat and plumb
Why it matters: an unlevel installation looks wrong and fails sooner.
Steps:
- Place the level across the surface or against the stud.
- Adjust until the bubble sits centered, or use the vial numbers on digital levels.
- Shim or plane as needed and recheck.
Example: installing a towel bar — adjust shims behind the mount until the bubble centers.
3) How to use a square for right angles
Why it matters: misaligned corners leave gaps and stress joints.
Steps:
- Place the square flush against the edge.
- Sight along the blade to confirm a full contact across the face.
- Mark the line and cut or fasten along that line.
Example: cutting a 90° corner for a picture frame — press the square firmly and scribe a cut line.
4) How to use a laser measure for long distances
Why it matters: long tapes sag and add several millimeters of error per meter.
Steps:
- Aim at the target and hold steady or use a tripod for repeats.
- Take three readings; use the median value.
- Note the stated accuracy (e.g., ±1.5 mm at 10 m) and plan cuts accordingly.
Example: measuring a 6 m living room — use the laser to get within a few millimeters instead of wrestling a 6 m tape.
Why creators mention brands: they show features you can test yourself. Look for specs like range (meters), accuracy (±mm), and resolution (smallest display unit). For instance, a laser with 0.5 mm resolution at 20 m is overkill for rough framing but useful for cabinetry.
How influencers add trust: they’ll demonstrate setup and common mistakes so you can copy the exact steps. Try replicating their setup on a small task — measure a door frame, install a strip of trim, then compare your result to theirs to build confidence.
Quick buying checklist you can use:
- For short, frequent work: tape measure, 3–5 m, stainless blade, 1 mm markings.
- For straightness: 600–1200 mm spirit level with a 0.5° vial or a digital level.
- For joinery: 250 mm carpenter’s square, steel.
- For long runs: laser measure with at least 30 m range and ±2 mm accuracy.
You’ll save time and material if you pick one reliable tool for each task and practice the three steps I gave per tool.
Recommended Products

GL722 Dual Grade Laser for long range, high accuracy elevation control; Automatic self-leveling, advanced radio remote, grade matching, Planelok, and automatic axis alignment allow quick and accurate set-ups for any fine grading or major construction project

dS Configurator App – Connects to scope via Bluetooth connection with custom ballistics profile

Spectra Precision DG813 Pipe Laser with RC803 IR/Radio Long-Range Remote - Long Runtime
Which Projects Need Levels and Squares: And Why
If you’ve ever hung a shelf that droops after a week, this is why.
Why it matters: a slight tilt or misaligned angle makes fittings wear out and leaves gaps that collect dust and stress.
Use a spirit level when you install shelves, cabinets, or doors because even 1/8 inch over 4 feet (about 3 mm over 1.2 m) makes doors stick and shelves tilt. Example: when you mount a 4-foot floating shelf, put the level across the bracket tops, adjust until the bubble centers, then tighten screws and recheck. Steps:
- Mount one bracket loosely.
- Place the level on it and mark the second bracket.
- Tighten both brackets and verify with the level.
Before you cut framing or stair stringers, do this: check right angles with a square so load-bearing parts bear evenly. Why it matters: misaligned framing shifts loads and causes squeaks or sagging over time. Example: when framing a window rough opening, use a carpenter’s square at each corner and measure diagonals — they should match within 1/8 inch. Steps:
- Clamp the header and sill.
- Place the square in each corner and mark plumb lines.
- Measure both diagonals; adjust until within 1/8 inch.
Think of a straight edge like a transfer tool for uneven surfaces.
Why it matters: when surfaces aren’t flat, a transferred reference keeps mating parts aligned and reduces gaps. Example: if your floor slopes under a cabinet, rest a 6-foot straight edge across the cabinet footprint, scribe the high points onto the cabinet base, then trim those spots. Steps:
- Lay the straight edge where the assembly will sit.
- Use a pencil to mark contact points.
- Trim or shim until the marks line up.
Before you measure tolerances, measure twice and secure the workpiece.
Why it matters: loose parts shift between measurements and produce repeated cuts. Example: cutting ten identical shelf pins: clamp the board, measure and mark once, verify the mark, then cut the first piece and compare the rest to it. Steps:
- Clamp the material.
- Measure and mark one feature.
- Re-measure the marked feature, cut, and use the cut piece as a template.
I follow safety protocols every time because a slipping square or level can cause injury or damage tools. Example: when measuring overhead, use a step ladder at the recommended height and keep both feet planted; hold the level with one hand and mark with the other. Steps:
- Position ladder on solid ground.
- Secure the workpiece or use a clamp.
- Take the measurement, then descend to adjust.
Final practical tip: for most room-scale work, a 4-foot level and an 8-inch combination square cover 90% of jobs; use a longer straight edge for spans over 6 feet.
How Bluetooth and Digital Features Boost DIY Measuring‑Tool Appeal
If you’ve ever scribbled measurements and then second-guessed a cut, this is why Bluetooth and digital features matter: they cut mistakes and save time.
Bluetooth sends measurements straight to your phone or tablet so you don’t have to write numbers down. For example, when you’re measuring wall stud spacings for a built-in shelf, you can tap the tool and have distances saved in an app as a list of exact numbers. Steps:
- Pair the tool to your phone via the manufacturer’s app (usually Bluetooth settings → select device).
- Take a measurement and tap the send button.
- Check the saved list on your phone and export it if needed.
This avoids transcription errors and gives you a numbered record like 16.25″, 32.5″, 48.75″.
Before you start a layout, know that live updates speed up adjustments: changes on the tool can update a plan in real time. Picture moving a laser-measured line on a floor plan while laying tiles; when the measurement changes, the app shifts the guide so your cuts match the room. Steps:
- Open a compatible plan or sketch in the app.
- Enable live-sync in the tool’s settings.
- Move the tool and watch dimensions update on-screen.
This saves repeated measuring and helps you get repeatable cuts to within a few millimeters.
Digital ergonomics change how long you can work without errors because displays, buttons, and haptics reduce strain. For instance, a backlit, high-contrast screen with large numbers helps when you’re under a sink or in low light; a single big send button minimizes fumbling when you wear gloves. Steps:
- Check the display size and contrast before buying.
- Try the button placement while holding the tool in a work glove.
- Prefer tools with vibration or a beep for confirmation.
You’ll measure more consistently and make fewer slips over a long afternoon.
When lasers or sensors give decimals, digital readouts handle conversions and rounding for you, so you get consistent units and fewer mistakes. Say you measure 2.137 meters for a cabinet face and need inches; switch units in the app and it shows 84.13″, already rounded to your chosen precision. Steps:
- Take the measurement.
- Change units in the app or device settings.
- Set the decimal places you want.
That single setting keeps all your cuts consistent across materials.
For projects that need repeatable layouts or team input, these features help with record keeping and collaboration. Example: installing identical window trims in three rooms — you can store each room’s measurements with photos and share the file with a helper so they cut pieces to the same spec. Steps:
- Save each measurement with a label (Room A, Window 1).
- Attach a photo if the app allows.
- Share the project file via email or cloud link.
Your helper gets exact numbers and visuals, reducing back-and-forth.
Recommended Products

ROOF & WALL SCANNER: The RWS is a non-destructive moisture scanner for detecting & evaluating moisture content, tracing & mapping leaks in roofing & waterproofing systems up to approximately 10 cm (4") in depth

Digi-Pas 2-AXIS WIRELESS MASTER Precision Level replaces Old-fashioned Spirit Vial Levels. Tedious repetition of checking 'bubble' position between tiny graduation lines is NOW THINGS OF THE PAST

Your unit is calibrated prior to shipment with a new nist-traceable calibration certificate with data
Beginner Tool Guide: Models, Budgets, and Buy‑Tips
Here’s what actually happens when you start buying measuring tools for home projects: you overspend on features you won’t use and skimp on the one thing that matters — accuracy. You need reliable readings so your cuts fit, shelves sit level, and layouts stay square.
Start with three basics you can learn quickly: a tape measure, a level, and a square. Why these first? Because they cover nearly every measuring task for small projects and repairs. Example: when hanging a 36-inch shelf, you’ll use a tape to mark 18 inches from the wall edge, a level to keep the shelf straight, and a square to transfer a true 90° from the face to the side.
Tape measure: what to check and why it matters.
- Why: your layout and cut lengths depend on the tape’s reach and durability.
- Look for these specs: 16–25 feet length for most homes, a 0.025–0.035 inch blade thickness for stiffness, and a spring lock that holds under tension.
- Step-by-step buying guide:
- Measure the largest span you expect — if you have long rooms, pick 25 ft.
- Test blade stiffness in-store by pulling it out 6 feet; it should cant without sagging.
- Check the end hook for two-way movement; that compensates for hook thickness when measuring inside or outside.
- Example: a 25 ft tape with a 0.030 in blade and a positive-lock mechanism will let you span a living room and mark door jambs easily.
- Tip: basic $10 tapes work for quick tasks; spend $30–$40 if you measure on ladders or do rough carpentry.
Level: what to choose and why precision matters.
- Why: a crooked level gives you a crooked install, which is obvious on long shelves or tiled backsplashes.
- Pick by length and vial precision: 24 inches is a sweet spot for furniture and cabinets, 48 inches for longer runs like countertops.
- Step-by-step buying guide:
- Decide typical jobs: furniture and cabinets → 24 in; wall runs and flooring → 48 in.
- Look for vials rated ±0.0005 in/ in for pros, ±0.0015 in/ in for homeowners.
- Choose an aluminum frame if you need durability and light weight.
- Example: use a 48-inch level with ±0.0005 accuracy when aligning a set of kitchen cabinets so the counter seam stays within a millimeter across the run.
- Tip: shorter torpedo levels are handy for plumbing and tight spots; get one with a magnetic edge if you work on metal studs.
Square: what kind to buy and why stiffness matters.
- Why: a true 90° is the basis for frames, cuts, and layouts, so the square must not warp.
- Decide between sizes: 7-inch combination squares for small woodworking and trim, 12–16 inch rafter squares for layout and framing.
- Step-by-step buying guide:
- Choose steel or cast aluminum for reduced warp over time.
- For woodworking, get a 7 in combination square with a hardened blade and a lock that holds without play.
- For framing, pick a 12–16 in rafter square with clear markings in 1/8 in increments.
- Example: you’ll use a 7-inch combination square to mark a perfect lap joint on a 2×4, ensuring the mating face sits flush.
- Tip: heavier squares resist bending during repeated use; check edges for burrs that could skew marks.
Digital rangefinder option: when you should upgrade and what to expect.
- Why: rangefinders speed up long measurements and reduce ladder time.
- If you measure large rooms often or need quick exterior distances, a laser rangefinder saves minutes and improves repeatability.
- Step-by-step buying guide:
- Pick one with at least ±1/16 inch accuracy at 30 feet.
- Choose 165–330 ft range for most homes; 500+ ft only if you measure yards or exteriors frequently.
- Look for features you’ll use: continuous measurement, area/volume calculations, and a backlit display for dim sites.
- Example: use a 165 ft laser to map a basement room quickly, then calculate carpet area without remeasuring corners.
- Tip: expect to pay $80–$200 for useful home models; prices under $50 often lack accuracy or range.
Final shopping checklist you can use in the store:
- Confirm tape length and blade stiffness by flex test.
- Match level length to typical job size and check vial sensitivity.
- Verify square material and locking action for play-free use.
- If buying a rangefinder, test a sample measurement at 30–50 ft for accuracy.
Buy tools that match the projects you actually do, not the fanciest models in the aisle. A 25 ft stiff tape, a 24–48 in level depending on your work, and a 7–16 in steel square cover most home jobs reliably.
Recommended Products


Self locking mechanism allows blade to be extended smoothly
25FT Ruler with Markings: This measuring tape presents inches, feet, and fractional measurements on one face and metric scales on the reverse, accommodating both the imperial and metric systems
How Video Formats (Timelapse, Step‑by‑Step) Drive Tool Purchases
If you’ve ever watched a project video and wondered which tool to buy, this explains why it matters: the way a video is shot changes how you judge speed, ease, and needed gear. For example, a timelapse of a deck build lets you see how long framing takes and whether someone uses a 48-inch level across multiple joists or a 24-inch torpedo level for quick checks.
Why that matters: timelapses show workflow and scale quickly. In a 30-second timelapse of a one-day fence install, you can tell whether the crew repeatedly reaches for a long level or a compact one based on how often they pause. Watch for pauses and replacement patterns.
How step-by-step footage helps: it exposes specific tool features so you can compare real performance. For instance, a close-up showing a tape measure’s hook bending under tension tells you the hook might be flimsy; a slow-motion shot of a level vial lets you judge sensitivity by how long the bubble wobbles. This matters because features like hook durability and vial responsiveness affect accuracy on the first try.
Concrete steps to use video to choose tools:
- Pause at moments showing measurements and note the lengths used (e.g., 8 ft fence posts, 48 in level).
- Count how often each tool is picked up during the job; frequent use implies suitability for everyday tasks.
- Zoom in on close-ups and look for wear or flex during repeated actions.
- Compare clips across videos: if two users build the same thing and one switches tools more, note which tool they preferred.
Real example: I watched a garage-shelf tutorial where the builder measured every 16 inches with a tape that had a reinforced hook and a sturdy blade; they never re-measured, and the shelves aligned perfectly. That convinced me to buy the same tape for racking jobs.
Why motion and angles matter: seeing recoil, bounce, or steady readings tells you how a tool behaves under use. A slow pan showing a drill held at different angles reveals grip comfort and balance, which helps you avoid wrist strain. Look for multi-angle shots that expose seams, fasteners, and grip texture when durability or comfort is the deciding factor.
Quick checklist before buying from a video:
- Note shown measurement values and common task sizes you have at home.
- Match those sizes to tool lengths and ranges in product specs.
- Prioritize tools you saw used frequently and without hesitance.
- Skip tools that bend, wobble, or require extra adjustments on camera.
Real example: In a shed-build timelapse, the crew repeatedly reached for a 6-inch torpedo level when checking plumb in tight corners; they used a 48-inch level only for final alignment. I ended up buying the 6-inch for daily use and borrowing the longer one for big jobs.
Watch deliberately, pause when needed, and map what you see to your own tasks and measurements so you pick the tool that actually fits your work.
How Contractor Research and Local Trends Shape DIY Tool Choices
If you’ve ever watched a contractor on a job, this is why.
Why it matters: you’ll buy tools that actually hold up and save time, instead of ones that sit in the garage unused.
I talk to local contractors who test brands and methods, and they tell me what lasts in our climate. For example, a contractor I know in Seattle compared three laser distance measurers on a rainy siding job: the one with rubber seals kept working after a week of damp mornings. That feedback drives what homeowners search for and buy.
Why it matters: knowing neighborhood trends helps you pick the right tool for the project you’ll do next.
Neighborhood trends — like a spike in laminate flooring or backyard decks on our block — make certain measuring and cutting tools more useful. A neighbor down the street installed laminate in three rooms last summer, and people noticed the same pull saw and spacers showing up at local stores. When you see that trend, you’ll prioritize a straightedge, a tapping block, and a good pull saw.
Why it matters: contractors choose tools to cut rework and speed up day-to-day jobs, which affects what you should buy.
Contractors compare durability, accuracy, and portability because they work on multiple sites each week and redoing work costs them money. A roofer I talked with uses a compact cordless impact that weighs under 3 pounds so he can climb ladders all day without swinging a heavy tool. When pros publish preferences online or adopt new tech on a visible job, homeowners notice, Google the model, and buy based on proven local performance.
Concrete steps to use this info when you shop:
- Ask one contractor what model they used on a nearby job, and why.
- Search that model plus your town name to see local reviews and photos.
- Match the tool features to your job: water resistance for outdoors, under 3 pounds for overhead work, and accuracy within 1/8 inch for flooring.
Example: if you’re installing a deck, get a 16-foot aluminum straightedge, a 3-pound cordless drill, and a laser level rated to ±1/8 inch at 30 feet — these are what local crews used on the two recent deck builds on my street.
You’ll end up with tools suited to your climate, your neighborhood’s common projects, and the same features contractors rely on.
How to Choose the Right Measuring Tool for Common Home Projects
If you’ve ever hung a picture or installed a shelf, this is why the right tools matter: you want it straight and solid so it doesn’t fall.
For hanging pictures or shelving, use a tape measure for length and a small level for plumb. Why this matters: a crooked shelf looks bad and can spill things. Real example: measure 24 inches from the stud center to center for a narrow shelf, mark the wall, then use a 9-inch torpedo level to check vertical and horizontal. Steps:
- Measure from a fixed reference (floor or ceiling) and mark.
- Use the stud finder and mark stud centers.
- Re-measure between marks with your tape to confirm 24 inches.
- Use the level to make final adjustments.
Check blade stiffness (steel blades with spring back) and blade markings; use a tape with at least a 10-foot standout if you’re measuring across rooms.
Before you start a carpentry project, you need to pick squares and rulers that give you accurate cuts and repeatable layouts.
Why this matters: bad edges make joints that gap or don’t fit. Real example: when cutting a 2×4 to frame a window, you’ll use a 12-inch framing square for layout and a 48-inch steel ruler for marking rip cuts. Steps:
- Verify your square’s 90-degree corner against a known straight edge.
- Lay the ruler flat and scribe with a sharp pencil.
- Cut and re-check the parts against the square.
Look for clear graduation marks in both inches and fractions and durable, chamfered edges that won’t nick after repeated use.
The fastest way to lay out large rooms is using a laser distance meter instead of a long tape.
Why this matters: you’ll save time and get more accurate overall dimensions. Real example: measuring a 20-by-15-foot room for tile, use a laser meter with at least 100-foot range and ±1/16 inch accuracy to get diagonals and square the space. Steps:
- Place the meter on one corner and record the two adjacent walls.
- Measure the opposite corner to get the diagonal.
- Compare diagonals; they should match within 1/4 inch for a square room.
Compare range, battery life (look for 8+ hours runtime or rechargeability), and accuracy specs before buying.
You don’t need fancy instruments for rough plumbing or electrical fits if you’re just checking clearances, but you do need accurate small measurements for final work.
Why this matters: pipes and conduit must fit through holes and into fittings precisely to avoid leaks and poor connections. Real example: measuring a 1/2-inch copper tube for a compression fitting, use digital calipers showing 0.01-inch resolution to check outer diameter and wall thickness. Steps:
- Zero the caliper on a flat surface.
- Measure the tube in two places and record both readings.
- Confirm the fitting tolerance (usually ±0.02 inch) before assembly.
Prioritize resolution (0.01 inch or 0.1 mm), repeatability, and a comfortable grip for repetitive checks.
Quick buying checklist — three parallel items:
- Tape measure: 25-foot, steel blade, 10-foot standout.
- Level: 9–24 inches, vial and magnetic base for metal frames.
- Laser meter: 100-foot range, ±1/16 inch accuracy, rechargeable battery.
Follow these steps and specs and you’ll buy the right tools for each job the first time.
Recommended Products

EXTENSION PLATE LEVEL FOR TALL INSTALLS: Extends to reach tall walls, high door frames, and oversized windows, ensuring fast, precise installations on any jobsite.
PROFESSIONAL GRADE QUALITY: STABILA tools are factory tested and durable; built to handle real world job site conditions while providing craftsmen with the dependability and consistent accuracy they expect and deserve.gr

Accuracy certified, top and bottom readings
Frequently Asked Questions
How Do Measuring Tools Influence Resale Value of Renovated Homes?
I believe accurate dimensions from quality measuring tools boost market perception of renovated homes, showing professionalism and reducing future fixes; that confidence raises resale value, attracts buyers faster, and supports higher offers in competitive markets.
Are There Eco-Friendly Measuring Tools Available?
Yes — I’ve found eco-friendly options like recycled tape measures and bamboo rulers, plus digital tools with long-life batteries; they reduce waste and often match traditional accuracy, so I’d recommend trying them on projects.
Can Measuring-Tool Trends Predict Upcoming Home Design Styles?
Yes — I can use measuring-tool trends to forecast styles: shifts toward digital precision and portable tools hint at minimalist material finishes, while spatial psychology-informed layouts favor modular, scalable designs—so tools reveal practical priorities shaping future home aesthetics.
Do Insurance Companies Require Specific Measuring Documentation?
Yes — I often find insurers do require insurance documentation tied to policy specifics; you’ll need measured plans, photos, and signed reports for claims or coverage changes, so confirm required formats and approved measuring methods first.
How Do Rental Property Owners Track Tool Inventory and Costs?
I track tool inventory and costs by scheduling regular inventory audits, using barcodes and a spreadsheet; I log purchases, maintenance, rentals for expense tracking, and reconcile monthly to spot losses, depreciation, and budget adjustments.