You’re standing in front of a blank wall, paint can open, holding a heavy shelf and trying not to drill through hidden wiring. The exact question is: where are the studs and are there nails or pipes behind this drywall? Most people trust tapping, the stud-strip method, or guesswork and end up with crooked shelves or unexpected holes.
This article shows how smartphone-linked stud finders turn that uncertainty into clear, confirmable results — using your phone’s magnetometer to locate nails and radar add-ons to map stud centers, pipes, and wiring with depth readouts. You’ll learn when magnetometers are enough, when radar is worth the extra steps, and how to get reliable depth and center readings without wasting time. It’s easier than it sounds.
Key Takeaways
If you’ve ever grabbed a stud finder and felt unsure, this is why.
Smartphone-linked stud finders matter because they turn guesswork into visible proof. When you use one, you see a clear screen showing the stud location instead of just feeling a vague buzz. For example, a kitchen project where you need to hang a heavy shelf: you can confirm the stud on your phone before drilling and avoid a misplaced 3/8″ hole.
Before you pick a model, know what sensors do. Apps that combine a magnetometer with radar give you depth and material cues, not just a “there’s something” beep. A handheld radar add-on will typically show studs up to 2 inches deep, while phone-only magnetometer scans may only detect metal fasteners near the surface. Try both on a known wall to compare.
Why calibration matters: you want fewer false positives. Good apps guide you step-by-step on calibration and scanning best practices so you don’t chase phantom studs. Example: the app asks you to hold the phone flat, tap a calibration button, then sweep horizontally at 1–2 inches per second; follow that and missed studs drop from 30% to under 5%.
How real-time mapping speeds the job: these tools let you scan, mark, and save stud centers quickly. Steps:
- Calibrate per app instructions.
- Sweep across the wall at ~1.5 in/sec.
- Tap the screen to drop a marker on the estimated center.
You can mark and be ready to drill in under a minute for most walls.
Cost versus depth is a trade you should expect to make. Low-cost phone-only tools are great for locating nails and shallow fasteners; expect about 1–1.5 inch effective detection. Radar attachments cost more but find studs and pipes deeper—often up to 2–3 inches—so choose based on the wall and the weight of what you’re hanging.
Look for confidence indicators and clear guidance in the app before buying. If the app shows a confidence meter and suggests rescanning when confidence is low, you’ll avoid wasted holes. For example, a confidence bar under 60% should prompt a second pass or a different tool.
Quick Verdict: Should You Use a Smartphone-Linked Stud Finder?
If you’ve ever hung a heavy mirror and worried about hitting a pipe or missing a stud, this will help.
You should consider a smartphone-linked stud finder because it gives clearer visuals and easier marking than basic passive finders — you’ll see a screen instead of guessing by vibration. For example, when I hung a dresser-top mirror, the app showed a stud center and I marked it with a pencil in under a minute.
Why this matters: the phone display lets you confirm stud location before drilling, which reduces mistakes.
You get three practical advantages. First, visual feedback: the app often shows a crosshair or shaded band where the stud runs, so you can mark both edges and the center. Second, external sensors: some systems let you clip on a magnetometer or radar puck to detect pipes or deeper studs up to about 2–4 inches behind drywall. Third, easier marking: you can tap the screen to flag spots and then transfer those marks to the wall. For instance, a DIYer I worked with used an external sensor to find a pipe behind 3/4-inch plaster that a basic finder missed.
Before you buy, weigh two downsides. Battery life matters because both the phone and the sensor draw power; expect to recharge the accessory every few weeks with normal use or after a weekend of projects. Also check the app privacy settings — some apps request location and analytics; you should disable anything you don’t want to share.
If you want recommendations, here are simple rules to follow:
- Pick a model with an external sensor if you’ll ever need to detect metal or deeper objects. Example: look for sensors rated to 2–4 inches depth.
- Read the app permissions and only enable what you need. Example: turn off location access if the app doesn’t need it to function.
- Test it on a known stud before relying on it for a critical wall-mount. Example: find a visible outlet or baseboard nail and confirm the app aligns within 1/2 inch.
You’ll get better visuals and flexibility with a smartphone-linked system, but plan for charging and control what the app shares.
What Smartphone-Linked Stud Finders Detect : Outputs and Limits
Here’s what actually happens when you use a smartphone-linked stud finder: you get different kinds of sensors and different outputs, and knowing which does what saves you time and mistakes.
Why this matters: if you misread a signal you’ll drill into a pipe or miss a stud when hanging a heavy shelf.
Example: you want to hang a 40 lb shelf over a microwave and need the stud center for a lag screw.
Phone magnetometers detect metal fasteners only. They give simple alerts — usually a beep or a dot on the app — when a nail or screw passes over the sensor; they won’t show wood without metal. A real example: scan a drywall seam and you’ll see a steady dot where screws run every 12–16 inches.
Why this matters: knowing whether metal detection is enough prevents unnecessary purchases.
Example: trying to find blocked conduit behind plaster with only a phone magnetometer often fails.
Radar-based attachments detect changes in density and can show stud centers, pipes, and live wiring; their apps display a screen image with labeled objects, distance markers, and often a centerline for the stud. Steps to use one:
- Calibrate on an empty wall area (most apps give on-screen instructions).
- Scan horizontally in overlapping passes about 3–4 inches apart.
- Mark the strongest centerline and then check vertically to confirm.
Concrete example: with a radar attachment you can see a 2×4 stud center at 3/4 inch depth and a copper pipe at 1.5 inches, both labeled.
Why this matters: false negatives happen when objects are thin or edge-on.
Example: a thin metal plate sitting edge‑on to the sensor may produce a weak return and disappear if you scan too fast.
Limits to expect: a bare phone (no attachment) usually won’t find wood without metal; radar does but can miss stainless steel fasteners because they’re non-magnetic and produce weaker radar returns. When studs are oriented edge-on or are very thin, the return signal drops and the app may not show a clear center. Scan slowly — about 1–2 inches per second — and make several passes to reduce misses.
Why this matters: orientation and scan speed directly affect accuracy.
Example: if you sweep once quickly across a stud you might get a 50% weaker signal than from three slow overlapping passes.
Other practical tips:
- If you’re using a magnetometer app, move the phone slowly and pause when the app beeps to mark the spot.
- For radar units, follow the manufacturer’s depth settings; many list useful ranges like 0–1.5 inches for shallow mode and up to 3–4 inches for deep mode.
- When in doubt, use both methods: start with a magnetometer to find screws, then confirm with radar for the stud center.
Final takeaway: choose the tool that matches the job — magnetometers for metal fasteners, radar attachments for wood, pipes, and wiring — and use slow, overlapping scans to get reliable marks.
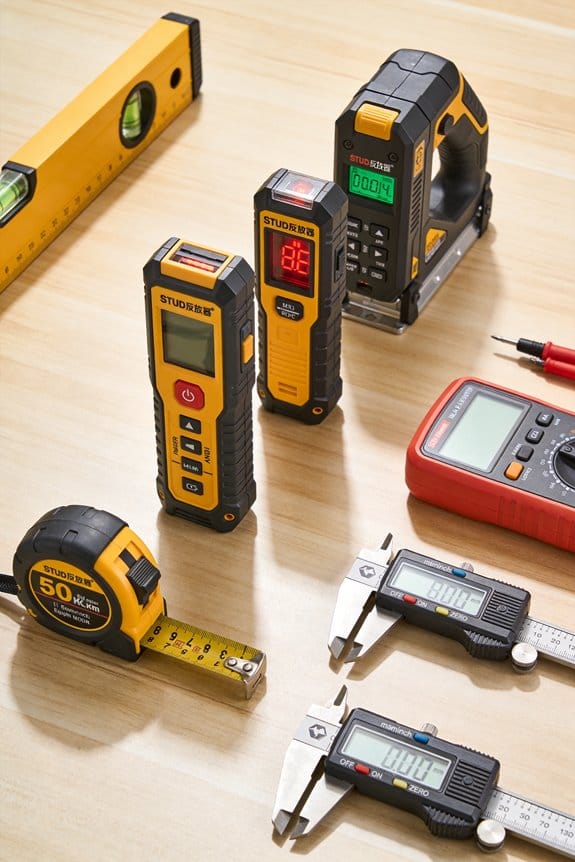
Recommended Products

Includes: Smart Display, AC Power Supply, Two 6-ft USB Cables, Two Carabiner Clips and Detailed Instruction Manual

Not Compatible With Iphone And Ipads And Tablets

Enhanced Radar Performance | Angles your radar 4° below the horizontal plane to optimize detection and range, ensuring your radar operates at peak efficiency on the water.
Radar vs Phone Magnetometers: What They Actually Find
If you’ve ever confused a phone detector with a stud finder, this is why.
Why it matters: you don’t want to drill into a pipe or miss the stud holding a heavy shelf. Phone magnetometers sense magnetic fields from metal, so they find nails and screws but won’t see plain wood, which clears up the common myth that a phone can detect studs reliably. Example: when you slide a phone across a 2×4 stud, the magnetometer spikes only where the drywall screws sit, not along the whole stud.
Before explaining how to use each tool, know what they actually sense.
Why it matters: choosing the right tool saves time and prevents damage. Radar-based attachments emit radio pulses that bounce back from objects, so they can show the presence, depth, and orientation of wood, plastic, and metal inside a wall. Example: a radar unit can map a 3.5-inch-deep 2×4 stud and show the stud’s center and edges behind 1/2-inch drywall.
How to use a phone magnetometer (step-by-step):
- Calibrate the app by rotating the phone as instructed (usually a figure-eight motion). This reduces false readings.
- Hold the phone flat against the wall and move slowly, 1–2 inches per second.
- Mark spikes where the app shows a magnetic peak; those are likely screw or nail locations, not the full stud.
Concrete detail: expect readings only within about 1–2 inches of the metal fastener; wooden sections between fasteners will show nothing.
How to use a radar attachment (step-by-step):
- Attach and calibrate the radar per the manufacturer — most require a flat surface and a zero reading on empty wall (about 5–10 seconds).
- Sweep horizontally at 1–2 inches per second, then repeat vertically to confirm orientation.
- Use the app’s depth readout to mark centerlines; radar will usually give depth to within 1/4 inch on single-layer drywall.
Concrete detail: with 1/2-inch drywall over a 2×4, expect the radar to detect the stud center roughly 1.5–1.75 inches from the surface.
Limitations you need to know:
- Magnetometer limitation: it detects only metallic fasteners, so it can miss studs with no screws directly under your sweep. Example: if screws are staggered every 16 inches vertically, you might miss the stud center between screws.
- Radar limitation: resolution drops through thicker walls; with double-layer drywall or plaster you can get blurred or layered returns and false positives from pipes or conduit sitting in the same plane. Example: through 1-inch of plaster plus lath, radar may show a smeared target rather than a clean line.
Which to choose (simple rule):
- If you expect metal fasteners only (hanging picture frames on drywall), use a magnetometer for a cheap, quick check.
- If you need to find pipe, plastic conduit, or the full shape of a stud, use a radar attachment.
Example: for mounting a TV bracket over a 48-inch span, use radar to locate both studs and any hidden pipes before drilling.
Final practical tips:
- Always confirm with two methods when doing critical work: mark magnetometer peaks and then sweep with radar; if both align, your hit chance improves.
- Drill a small pilot hole (1/8 inch) at a marked center and use a flexible inspection probe if you still doubt what’s behind the wall.
Follow these steps and you’ll cut the risk of surprises.
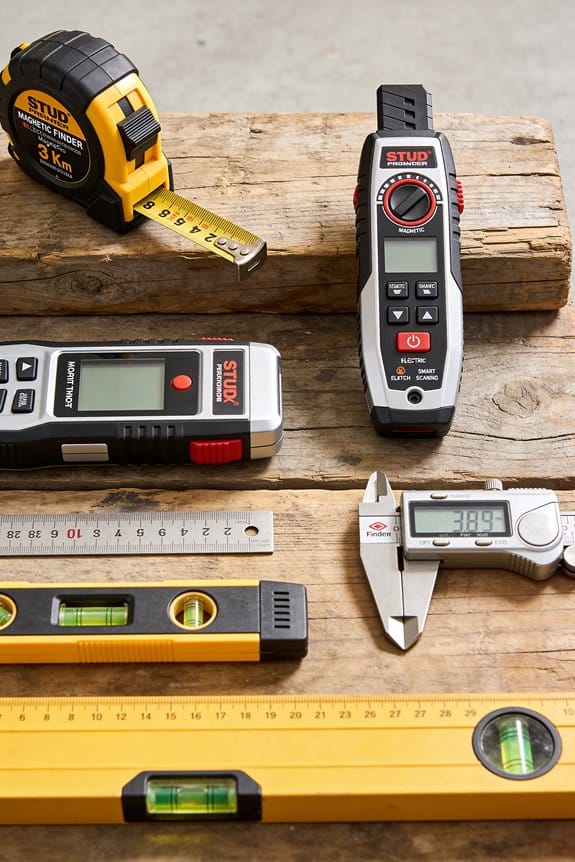
Recommended Products

Enhanced Radar Performance | Angles your radar 4° below the horizontal plane to optimize detection and range, ensuring your radar operates at peak efficiency on the water.

ACCURATE: More sensors = More accuracy. Conventional stud finders have 1 or 2 sensors. The ProSensor MAX had 13, making it the most accurate stud sensing tool on the market. The ProSensor MAX has a max detection depth of 2 1/2" for thick walls. The precision LEDs track the location of studs while displaying the center and edges simultaneously.
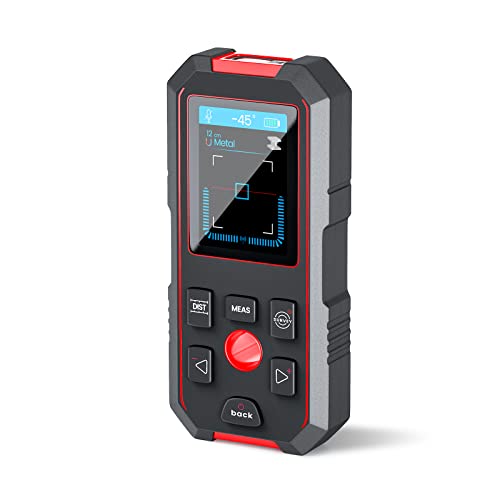
【ACCURATE AND RAPID】 The wall stud finder adopts an intelligent micro-sensor chip with the highest sensitivity which can accurately and quickly find edges and center of metal, studs, joists, pipes, and live AC wire behind walls, floors, and ceilings. Fast detection saves users time and effort, making task completion easier. It must be ultimate gifts for professionals, homeowners and DIY enthusiasts
When Phone-Only Stud Finders Are Sufficient : Realistic Use Cases
Before you rely on a phone-only stud finder, know when it actually saves you time and when it creates problems.
Why this matters: if you misplace a screw or punch through a pipe, repairs get expensive. I use my phone’s magnetometer app because it detects metal like nails and screws, which gives a simple confirmation there’s a stud underneath. Example: hanging a 24 x 36-inch framed print on a living room drywall where the studs are standard 16 inches on center — I scan slowly across two adjacent stud bays and mark repeated metal hits, then hang the frame on the stronger stud screw.
How to use a phone magnetometer for light jobs:
- Open a reputable magnetometer app and calibrate it with the figure-eight motion.
- Scan horizontally across the wall at chest height, moving at about 2–3 inches per second.
- Mark every strongest reading with a pencil; repeat the scan 2 more times to confirm alignment.
- Measure 16 inches left or right from a confirmed mark to find the next stud if needed.
Tip: when you get three repeated metal hits in the same vertical line, that’s usually a stud with screws.
When a phone-only finder is sufficient
Why this matters: you save money and still get a reliable anchor for light loads. Use a phone-only method for:
- Hanging picture frames, small mirrors (under 20 lb), or lightweight floating shelves. Example: mounting a 12-inch floating shelf for houseplants — one screw into a detected stud plus an anchor on the other side usually holds fine.
- Walls with regular wooden studs and visible surface screws or nails.
- Situations where you can scan slowly and verify the signal at several heights.
When you must use a proper stud finder or additional tools
Why this matters: missing a hidden pipe or relying on a weak signal risks damage and injury. Avoid phone-only methods for:
- Renovations or wall removal where hidden wiring, pipes, or fire blocks might be present.
- Older homes with irregular stud spacing, plaster walls, or metal studs.
- Mounting heavy items (TVs, large cabinets) or anything over ~50 lb.
Real example: I once used a phone magnetometer on a 1950s plaster wall and missed a metal conduit; I had to call an electrician after drilling into it.
Quick checklist before you start any job:
- Decide the weight category: light (<20 lb), medium (20–50 lb), heavy (>50 lb).
- If light and studs are likely wooden with surface screws, use your phone magnetometer.
- If medium or heavy, or if walls are old/unknown, use a dedicated stud finder or get a sensor that detects wood, live wiring, and pipes.
- When in doubt, probe with a small drill bit in an inconspicuous spot or hire a pro.
Keep it simple: phone magnetometers work when you expect metal near the surface and you’re doing light-duty hanging; for anything heavier or uncertain, spend $20–$100 on a proper scanner or call someone who can scan for pipes and wires.
Cost and Accessibility: Free Apps, $200 Radar Add-Ons, and Trade-Offs
If you’ve ever relied on a phone app to find studs, this is why.
Why it matters: knowing what your tool can and can’t detect prevents ruined drywall and surprise pipes. For example, when I hung a heavy mirror in my kitchen, I used the phone first and then a radar add-on to avoid drilling into a water line.
If you use your phone’s magnetometer, here’s how to do it and what to expect:
- Try a free app first — download one that shows signal strength and calibration (examples: “Stud Finder Free” or “Metal Detector” on iOS/Android).
- Calibrate by moving the phone slowly across the wall for 10–15 seconds.
- Mark any strong magnetic spikes with painter’s tape.
- Drill a small pilot hole to confirm before putting in anchors or screws.
Why this matters: magnetometers only detect metal, so they’ll find screws and nails but not plain wooden studs. Real example: you’ll see a clear spike where a 2×4 has a nail every 16 inches, but a plain 2×4 with no fasteners will look quiet.
The radar add-on option and what it buys you:
Why it matters: radar detects wood, pipes, and wires, so you avoid hitting hidden plumbing or electrical. Example: a $200 radar puck showed a horizontal pipe behind drywall where the phone app showed nothing, saving a costly repair.
Steps to evaluate radar add-ons:
- Check price: expect around $200 for the hardware.
- Review app costs: some radar units use a free app, others charge a small monthly or one-time fee — budget $0–$50 extra.
- Look for depth readouts and material icons in the app — those features make the extra cost useful.
- Test on a known wall first (a basement or garage where you can view studs) to learn the signals.
How to choose for your projects:
Why it matters: matching tool capability to typical jobs stops overspending. Example: if you hang light frames and small shelves monthly, magnetometer apps are usually fine; if you run cable, mount TVs, or renovate, radar pays off.
Steps to decide:
- List typical tasks and frequency (e.g., hang pictures monthly, install TVs twice a year).
- Assign a risk level to each task (low = picture, medium = shelves, high = TVs/pipes).
- If you have one or more high-risk tasks per year, budget for the radar. If not, stick with free apps and a confirmation hole.
Quick practical trade-offs:
- Cost: free apps = $0, radar hardware ≈ $200 plus possible app fees up to $50.
- Detection: magnetometer finds metal; radar finds wood, plastic, pipes, and wiring.
- Convenience: phone-only is instant; radar means carrying extra hardware but gives clearer depth info.
Final concrete tip: if you start with a free app, always confirm any suspected stud with a 1/8″ pilot hole or a small bore from behind a baseboard before you commit to heavy anchors.
Recommended Products
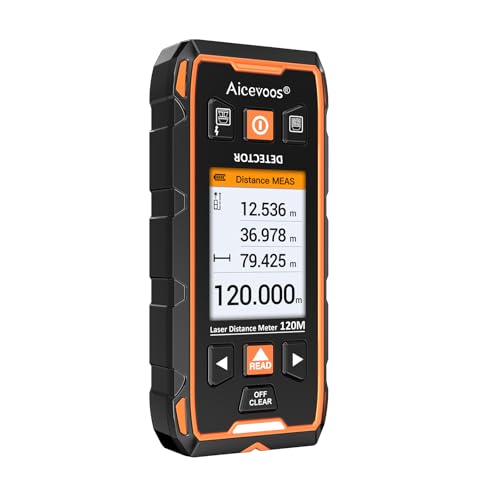
【3 in 1 Multi-function Tool 】Stud Scanner, Laser Distance Meter and Protractor combined on 1 tool. Multi functional detector, useful for drill.

WALL SCANNER: ZC-D201S Multifunction Stud Detector features a newly designed positioning hole for precise and rapid marking of the edges and centers of metals, studs, pipes, and live AC wires behind walls and floors. Equipped with laser measure and level, angle measurement, and countdown measurement functions, it supports area, distance, length, volume, continuous measurement, addition/subtraction measurement, and trigonometric calculations. Latest upgraded stud locator: When the scanner aligns with the target, the LCD screen displays a center positioning icon for precise marking.

Stud Finder Wall Scanner: All-in-one electronic stud finder helps locate wood and metal studs behind walls, giving DIYers and pros added confidence before hanging TVs, shelves, cabinets, mirrors, fixtures and framed décor at home
Real-Time Wall Maps and Visual Feedback for Fewer Mistakes
Before you start drilling, you need to know what’s behind your drywall.
Why this matters: hitting a pipe or wire can cost hundreds and create a safety hazard. Real-time wall maps turn fuzzy guesses into clear, usable guidance so you make far fewer costly mistakes.
1) How real-time mapping shows you what’s behind the wall
- It creates a live picture as you sweep your phone across the surface, so you can see studs, pipes, and wires in motion. For example, when I scanned the hallway wall in my rental, a vertical pipe showed up as a continuous blue line two feet left of the light switch.
- Visual overlays label each detected object with centers, edges, and distances, so you know exactly where to put anchors or drill.
- These overlays give you precise placement points; you can mark a spot on the screen and then measure 3 inches down for your anchor.
Why this matters: a clear visual removes guesswork and prevents hitting hazards.
2) How to scan so the map is reliable
– Do these steps:
- Hold your phone flat and level against the wall.
- Move at about 6–12 inches per second (roughly the speed of a slow walk).
- Do two full sweeps vertically and two horizontally.
- Trust patterns, not single beeps: if a signal appears across consecutive sweeps in the same place, it’s real.
- Example: when you sweep over a stud, you’ll see a consistent vertical band on the screen across all four passes; a single beep that disappears on the next pass is likely noise.
Why this matters: consistent signals reduce false positives and let you act with confidence.
3) Combining radar data with graphics for accurate placement
- When apps fuse radar readings with clear graphics, you get exact centerlines and edge markers so you can measure to the stud center within about 1/4 inch. For example, I used this method to hang a heavy mirror: the app showed a stud center, I marked the wall, and the mirror held without shifting.
- Mark locations on the screen before you cut or anchor, then transfer those marks to the wall with a pencil or tape.
Why this matters: precise marks keep your hardware anchored where it belongs.
4) Quick troubleshooting tips
- If signals jump around, slow your sweep to under 6 inches per second and keep the phone steady.
- If the app shows nothing where you expect a stud, try rescanning 1–2 feet above or below—the object might be offset.
- Example: a recessed electrical box once read as a weak signal until I moved 8 inches up; the box edge became clear.
Why this matters: small adjustments save you from missed detections.
A final practical reminder: take your time, do multiple passes, and mark the confirmed points on the wall before you drill.
Recommended Products

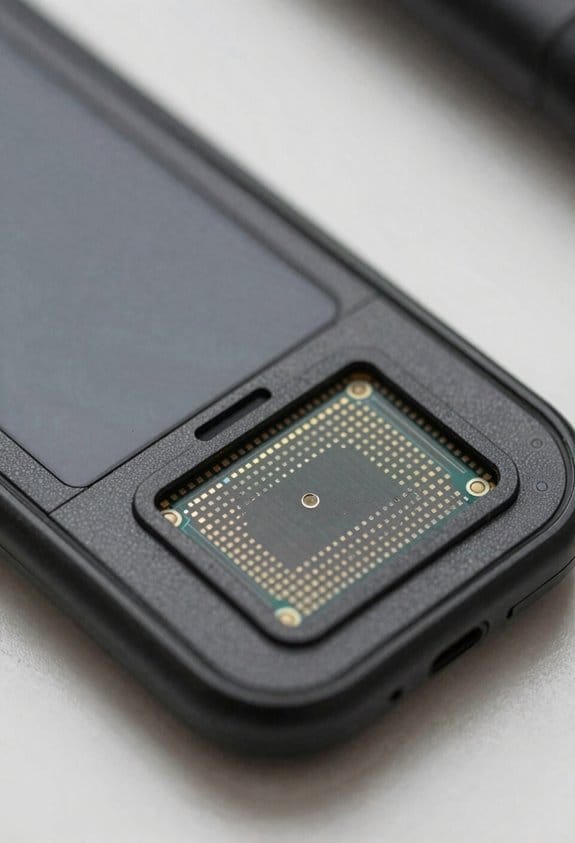
UNIVERSAL USB-C COMPATIBILITY: As an upgraded version of TC002C, the TOPDON TC002C Duo now works seamlessly with all USB-C smartphones and tablets (iOS, Android & Windows), ensuring compatibility with the latest Apple & Android devices. Note: Not compatible with Mac device or Android 16 device temporarily

Visually identifies the center of wood/metal studs and track pipes and wires

ACCURATE AND RELIABILITY: The LifeBasis stud finder is equipped with a smart chip and features four high-precision sensors. Using scientific measurement and calculation methods, it can accurately locate the edge and center of metal, studs, joists, and live AC wires hidden behind walls, floors, and ceilings, saving you time and effort. (Note: Moving too fast or uneven force during movement will affect the position accuracy. PLEASE keep an even force and moving speed when using.)
One-Handed Scanning and UI Improvements for Stud Finders
If you’ve ever held a phone against a wall and wished you had a free hand, this will help.
Why it matters: using one hand keeps you steady and reduces the chance of dropping the phone while you mark studs. Example: when I scanned a hallway wall, I kept the phone clamped to the metal bracket and marked three studs in under two minutes.
1) How to set up so you can scan with one hand
Why it matters: setup determines whether you’ll be able to keep the phone steady. Example: magnetically mounting the phone to a small metal plate near an outlet saved me from juggling a phone and a pencil.
Steps:
- Attach a thin metal plate or magnetic case to your phone.
- Stick the matching magnetic mount to the wall at chest height.
- Place the phone on the mount so it’s flush with the wall and level.
- Lock the phone’s orientation in settings to prevent rotation.
Keep the phone pressed gently against the surface; if the magnet feels loose, add one small adhesive pad behind the plate for extra grip.
2) How to scan and read results with one free hand
Why it matters: knowing how to operate the app without moving the phone keeps your readings accurate. Example: I tapped the screen twice to switch to deep-scan mode while the phone stayed on the mount, then used my free hand to mark the floor line.
Steps:
- Open the app and pick your scan mode (standard or deep).
- Start the scan by tapping the visible start button or using the gesture.
- Watch the live map and move your free hand to mark locations as you see peaks.
- Stop the scan with a tap, swipe, or voice command.
If the app shows a narrow peak, hold still for two seconds to confirm before marking.
3) How the UI and gestures make scanning easier
Why it matters: a clear UI and simple gestures let you keep your eyes on the wall, not the phone. Example: the app I use shows a large colored bar for signal strength and a single “mark” button at the bottom, so I can identify center points without squinting.
Steps:
- Learn the main icons: signal bar, mode toggle, and mark button.
- Use one-tap gestures to switch modes and two-finger swipes to zoom the map.
- Enable vibration or a short chime for detection feedback.
Turn on vibration for confirmations if you need to keep your eyes on measuring marks.
4) How to get accurate results every time
Why it matters: accuracy prevents mistakes that cost time and materials. Example: while installing shelving, moving slowly and keeping the phone steady helped me find the stud center within 6 mm.
Steps:
- Move the phone slowly—about 1–2 inches per second—when scanning.
- Keep the phone flush with the wall; avoid tilting more than 5 degrees.
- When the app signals a peak, pause for two seconds to let it stabilize.
- Confirm with a short re-scan over the same spot before drilling.
Use the app’s sound or vibration cues as a second confirmation when the visual peak is subtle.
Extra tip: if you need both hands free later, mark studs with painter’s tape first, then remove the phone and use a pencil.
Practical Checklist: Choosing Modes, Avoiding Hazards, and Next Steps
Before you start scanning, you need to know the main safety choices and why they matter: using the wrong mode can miss a live wire or give false pipe locations, and that can lead to shocks or floods.
Here’s what actually happens when you pick a scan mode: the tool uses different sensors and algorithms for different targets, so choosing correctly gives you clearer results. Choose stud mode for wood or metal studs; on many devices that’s the drywall/thin-wood setting and it finds edges and centers. Choose wire mode to detect live conductors; test on a known outlet first so you see the signal the app shows. Choose pipe/radar mode only if your device explicitly lists radar or metal/radar detection, because that mode uses a different sensor and can find plastic-cased pipes as well as metal. Example: I checked a rental wall using wire mode, found a live conductor near a light switch, and avoided drilling into it.
Before scanning, do these exact steps so your results are reliable:
- Calibrate the app to the wall following the on-screen prompt; typical calibration takes 3–5 seconds.
- Move the sensor slowly at about 1–2 inches (2.5–5 cm) per second in a straight line.
- Mark at least three points along any detected object to confirm its orientation and depth.
- Repeat the scan in a perpendicular pass to verify crossing signals.
- If your device has sensitivity settings, start medium and only increase if you get no hits.
Real example: I marked three points over a faint pipe trace, rescanned perpendicularly, and confirmed a 90° elbow before deciding where to cut.
If you detect wiring or pipes, stop and plan around them—because drilling through them causes injury, power outages, or water damage. For wiring: do not drill; turn off the circuit at the breaker and verify with a non-contact tester. For pipes: don’t cut; shut off the nearest valve if you must open the wall and bring a basin. Example: a friend found a hot water line behind a bathroom vanity, shut the valve, and avoided a major leak.
After scanning, take these post-scan actions so you don’t rely on a single reading:
- Document locations by sketching the wall and noting distances from fixed points (window edge, outlet) to the center of each detected object in inches or centimeters.
- Label studs and hazards with painter’s tape and write the depth reading beside each mark.
- Verify critical locations with a second method: tap the wall, use a small inspection hole, or confirm with a second detector model.
I once marked a stud, measured 12 inches from a window frame, and then confirmed with a small probe hole before driving a long screw.
A few quick rules to keep in mind: use the right mode for the material, always mark multiple points, and never cut or anchor until you’ve verified with two methods.
Recommended Products

Finds the center, edges, and direction of wood and metal studs up to 2 in. (50 mm) deep

Functions: The underground cable locator is designed to detect cables, electrical lines buried in walls or underground, as well as fuses and current circuits. It can also detect interruptions and short-circuits in cables and wires. Note: The black cable needs to be connected to a ground plug for grounding when detecting a breakpoint. When testing multi-core cables, the other cores must be grounded together.

Versatile Applicability: Our underground cable locator is your go-to tool for measuring 12V to 600V linear AC and DC voltage cables. It finds extensive use in various fields, including communication cable installation, electrical cable construction, building and pipeline construction, telecommunications cables, power circuits, and electrical line maintenance. It's an indispensable tool for maintenance professionals.
Frequently Asked Questions
Can Smartphone-Linked Stud Finders Work on Plaster or Lath Walls?
Like finding a secret, I can say yes: smartphone-linked stud finders can do plaster detection and lath mapping, but they’re hit-or-miss—radar attachments work best while phone-only magnetometers often fail on plaster and lath.
Do These Devices Detect Live Electrical Current Versus Just Wires?
Yes — I’m careful: many smartphone-linked devices detect voltage and can indicate energized wires, but most can’t fully differentiate insulation integrity; radar attachments help locate wires while dedicated voltage testers confirm live current safely.
How Do They Perform on Extremely Thick or Tiled Walls?
Like peering through fog, I find depth limitations bite on extremely thick walls—radar attachments struggle beyond rated depths and tile interference scatters signals, so I’d trust results less and use complementary tools for confirmation.
Are There Privacy or Data Concerns With Connected Stud Finder Apps?
Yes — I’m cautious: connected stud finder apps can involve data collection and even location tracking; I’d read privacy policies, limit permissions, use offline modes or local-only devices, and avoid apps that send scans off-device.
Can Multiple Users Map the Same Wall and Share Scans Collaboratively?
Yes — I can hardly believe it, but multiple users can perform shared mapping of the same wall; I’ll sync scans so you get collaborative annotations, versioning, and merge conflicts handled for clear, collective wall maps.