
You’re standing at a wall with a drill in hand, staring at a stud finder that beeps but still leaves you unsure if there’s a pipe or live wire behind the drywall.
Maybe you’ve paused mid-drill because the display shows conflicting signals and you don’t want to punch into plumbing or electricity.
Most people trust a single sensor readout and assume a beep means “safe” or “solid.” This article will show you how to use radar, magnetic induction, and AC sensing together so you can tell studs from metal or plastic pipes and avoid live conductors.
You’ll get clear steps to cross-check readings, interpret what each sensor reveals, and drill with confidence.
It’s easier than it looks.
Key Takeaways
If you’ve ever worried about cutting into a wall, this is why.
Multi-sensor scanners combine radar, induction, and AC sensors so you get overlapping evidence of what’s behind your wall. For example, if you’re locating a line of rebar in a concrete garage wall, the radar shows a consistent echo pattern, the induction sensor detects metal, and the AC sensor is quiet—together they confirm steel rebar, not a live wire.
Before explaining how, know why this matters: cross-checking sensors reduces surprises and costly mistakes.
How multi-sensor fusion helps you
- Sensor fusion means the unit compares signals from each sensor and highlights detections that appear in more than one mode. For instance, when you scan a plaster wall and see a persistent mark across radar and induction, that persistent mark is likely a metal pipe about 1–2 inches across.
- Practical step: start in the unit’s universal mode, then retest in the concrete or drywall mode to confirm the target. Do this every time you switch wall types.
Why mode selection changes results
If you pick the wrong mode, your depth and material readings will be off. For example, scanning a 6-inch concrete slab in drywall mode can underreport depth by 30–50%. Switch to concrete or deep mode for thicker masonry.
How to choose a mode
- Choose drywall mode for single-layer drywall up to 1 inch total thickness.
- Choose universal for mixed walls like drywall over masonry up to 2 inches.
- Choose concrete for solid masonry walls and slabs 2–8 inches thick.
- Choose deep for melt-in or large metal objects and when you need maximum penetration.
Why proper technique prevents false targets
If you scan sloppy, you’ll get inconsistent readings that are hard to trust.
10 Best Zircon Stud Finders That Never Miss a Wall
Technique steps (do these every time)
- Establish a baseline sweep: place the scanner on the wall, sweep once left-to-right to set a reference.
- Perform straight, overlapping passes spaced about 1 inch apart for drywall and 2–3 inches for concrete.
- Verify perpendicularly: sweep vertically across the same area to triangulate the target.
- Mark the center where multiple passes line up and measure from a fixed edge so you can relocate it later.
Interpreting outputs so you can tell what’s what
Before you drill, know whether the target is metal, plastic, or live.
- Echo pattern and depth readout: a sharp, narrow echo and a depth under 2 inches often means a metal pipe or stud; a broad, diffuse echo at 3–6 inches may be a plastic pipe. Example: while renovating a kitchen wall, a narrow echo at 1.5 inches with a metal tone meant a copper water line running horizontally.
- Metal tone and induction response: if induction flags metal and the tone is strong, you’re probably over steel or copper; if induction is silent but radar shows an echo, think plastic.
- AC sensor: if the AC indicator lights up and you detect a fluctuating signal that changes with your hand position, treat it as a live conductor and avoid cutting. Example: in a bathroom remodel, a steady AC readout 2 inches deep matched the position of a light switch circuit running vertically.
One critical habit
Always verify any suspected live conductor with a non-contact voltage tester before you cut; reading alone isn’t enough.
Follow these steps, and you’ll dramatically reduce surprises behind the wall.
Quick Takeaways: Scan Safely and Accurately With Multi-Sensor Scanners
Before you start scanning, you need to know why a multi-sensor scanner is useful: it combines radar, electromagnetic induction, and wire detection so you find hidden objects more safely and with fewer misses. For example, when you scan a plaster wall before installing a TV mount, the radar finds studs, induction highlights metal pipes, and wire mode shows live conductors so you don’t drill into anything live.
1) Check battery life and plan for runtime.
Why it matters: dead power stops work and can ruin a day on a job.
Steps:
- Charge batteries to 100% before you arrive.
- Confirm the scanner runtime — aim for at least 6 hours for a full workday.
- Bring one spare battery or a power bank rated for your model.
Real example: on a Saturday kitchen remodel, I swapped in a fresh battery after four hours and avoided an afternoon delay.
If you want accurate results, learn the modes and signals so you interpret readings correctly. Why it matters: misreading a signal can lead to a drilled pipe or a shocked hand.
Steps:
- Read the two-minute quickstart for mode icons and beep patterns.
- Practice on a known wall: mark a stud, a copper pipe, and a live outlet, then scan to match signals to objects.
- Repeat until you can identify the three main beeps within three tries.
Real example: I trained a helper for 20 minutes on a workshop wall and they stopped mistaking conduit for studs.
Think of accessories like adapters and cases as parts that speed your work and protect your gear. Why it matters: the right clip or marker keeps the tool usable and prevents damage.
Steps:
- Buy the manufacturer’s case and one adhesive marker strip.
- Fit a belt clip or tripod adapter if you’ll scan ceilings or high walls.
- Label spare batteries with the date charged so you use the freshest first.
Real example: using a tripod adapter let me hold the scanner steady on a two-story stairwell and get a clean pass.
You don’t need to panic about privacy when using material-detection tools: they detect metal and wiring, not people or personal data. Why it matters: responsible use prevents unintended alarms or homeowner concerns.
Steps:
- Explain to occupants you’ll only scan for hidden objects and not record anything.
- Avoid scanning outside the project area without permission.
- Store scans on-device only if the owner agrees, or delete them after the job.
Real example: I told a homeowner I’d only scan inside the laundry room; they watched me and relaxed when I deleted the device log afterward.
Final practical checks before you drill:
- Confirm zero volts on suspected live wires with a non-contact tester.
- Re-scan the exact spot in two different modes.
- Mark confirmed hazards with a high-visibility tape.
Real example: before mounting a mirror, I re-scanned and found a thin braid of grounding wire I’d missed on the first pass.
Keep your use simple, predictable, and documented. Use charged spares, practice on known walls, carry a few accessories, and tell people what you’re doing so you stay safe and get the job done.
What Multi-Sensor Detection Does: What You’ll Find and Why It Matters
If you’ve ever started a renovation and hit a surprise pipe or live wire, this is why multi-sensor detection matters. It keeps you safe and stops delays.
Why this matters: you avoid drilling into live AC wiring or cutting a water line, which can lead to injury, expensive repairs, or project shutdowns. For example, I once marked a wall and avoided cutting a hidden copper pipe two inches behind drywall, saving a day of repairs.
How it helps — step-by-step:
- Scan the wall slowly in a grid pattern so you cover the whole area.
- Note each beep or reading and mark it with painter’s tape; mark depth next to the tape.
- Re-scan with different sensor modes to confirm material type.
What you’ll find and how to read it: the tool shows studs, metal pipes, plastic conduit, and live AC wiring, and reports depth for each item. When the sensor mix shows a ferrous metal signature, you’re usually over nails or steel conduit; a non-ferrous signature (like copper) often means plumbing; a distinct live-wire indicator means live AC is nearby. For example, on a kitchen remodel I used the tool to map two copper water lines running vertically at 16 inches on center, both sitting 1.25 inches deep.
Practical tips for planning:
- Mark stud edges and centers so you know exact fastener points.
- Draw the route of pipes and wiring on a project sheet to avoid rework.
- When in doubt, probe with a small drill bit at low speed in a marked spot.
Why material differentiation matters: if a return signal is wood, you’ll use a wood screw into the stud; if it’s metal, you’ll avoid nailing or you’ll use a different anchor. For example, on a bathroom shelf install I switched to toggle anchors after the scanner showed plastic conduit running behind the drywall at 3/4 inch depth.
Quick safety checklist:
- Verify live-wire alerts before cutting or sanding.
- Double-scan suspicious readings from two angles.
- Keep a gap of at least 1 inch from any detected pipe or wire when fastening.
Using this method saves time and protects structures and people by turning hidden hazards into clear, mapped information.
How Radar, Induction, and AC Sensors Work in Multi-Sensor Scanners
Here’s what actually happens when you scan a wall with a multi-sensor tool: you get three different types of readings that each tell you something concrete about what’s behind the surface, and together they help you avoid surprises.
Why this matters: using all three sensors reduces the chance you’ll hit a pipe or live wire when you drill.
Radar — how it works and why you use it
Why it matters: radar finds layers and depths behind drywall or concrete so you can estimate how deep a stud or void is.
How it works, step by step:
- The device emits short radio pulses and times how long reflections take to come back.
- Signal processing translates those time delays into depth measurements and shows boundaries between materials.
- You read the display to see relative depth and edges — not exact material type.
Real-world example: when you scan an exterior wall before installing a wall anchor, radar can show a ¾ inch gypsum board, a 1½ inch air gap, and then a concrete backing at about 2¼ inches deep.
Tip: hold the scanner flat and move it at about 1–2 inches per second for the cleanest radar image.
Note: radar can struggle with very wet or highly conductive materials, which blur reflections.
Induction (magnetic) — how it works and why you use it
Why it matters: induction tells you where metal is and gives clues about whether it’s ferrous or non-ferrous so you avoid pipes or hidden brackets.
How it works, step by step:
- An induction coil generates a magnetic field into the wall.
- Metal objects create secondary fields or change the coil’s response; the device measures that change.
- Response pattern and signal strength help distinguish ferrous (strong, sharp response) from non-ferrous (weaker, broader response).
Real-world example: scanning above a sink, you might see a sharp ferrous spike at 1 inch (a steel screw) and a wider, weaker response at 2 inches (a copper water pipe).
Tip: sweep slowly and make overlapping passes; metal closer to the surface will produce a higher, narrower peak.
AC detection — how it works and why you use it
Why it matters: AC detection warns you about live electrical conductors so you don’t get shocked or cut power.
How it works, step by step:
- The sensor measures the electric field or induced current from alternating-current wiring.
- When the measured field exceeds a set threshold, the device gives visual and audible alerts.
- Some units estimate relative distance by signal strength, but they don’t measure wire depth precisely.
Real-world example: when checking above an outlet, the detector will chirp and show a strong field within ¾–1 inch if a switched hot conductor runs just behind the drywall.
Tip: turn off nearby appliances when you test to reduce background noise and get a clearer reading.
How to use them together (practical sequence)
Why it matters: combining readings cuts false positives so you can drill safely and faster.
Steps to follow:
- Start with radar to map layers and mark any depth indications.
- Sweep with induction to mark metal peaks over the radar map.
- Finish with AC detection to mark live wiring zones.
Real-world example: before mounting a heavy shelf, radar shows a stud at 1½ inches, induction finds no metal there, but AC detection lights up 1 inch to the left — you’ll pick a different anchor point.
Tip: if one sensor flags something and the others don’t, mark it and rescan at a 45° angle to confirm.
Quick troubleshooting checklist
Why it matters: small checks keep you from misreading the sensors.
- Calibrate the scanner per the manual before use.
- Remove nearby large metal objects that can skew induction readings.
- Repeat scans at different orientations if readings contradict each other.
Real-world example: a metal ladder leaned against the wall can create a false-wide metal response across the entire area; moving the ladder clears the signal.
Follow these steps and you’ll read multi-sensor results like a pro, avoid unnecessary holes, and pick safer mounting points.
Recommended Products

ACCURATE: More sensors = More accuracy. Conventional stud finders have 1 or 2 sensors. The ProSensor M150 has 9, making it the most accurate stud sensing tool on the market.
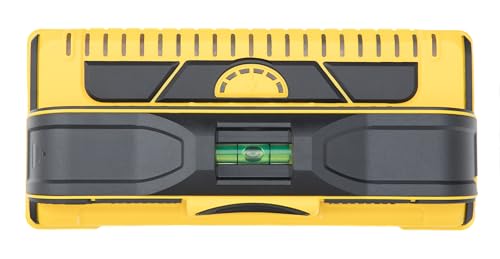
Higher accuracy, better technology: with 13 patented sensors, the M210 detects studs more accurately

5-in-1 Multi-Mode Scanner for Versatile Detection: Featuring Standard (3/4"), Deep (1-1/2"), Metal (2-3/8"), and AC (2") modes with audio alerts, the Mecurate stud finder ensures accurate detection of studs, metal, and wires for hassle-free home improvement.
What Each Sensor Reveals: Studs, Metal, Plastic Pipes, and Live Wires
Here’s what actually happens when you run a multi-sensor scanner across a wall: each sensor gives a different clue about what’s behind the drywall, and reading those clues keeps you from drilling into the wrong thing. Why this matters: you can avoid costly repairs and dangerous shocks. Example: I once used a scanner before mounting a TV and avoided hitting a water line that would have dripped into my living room TV stand.
What a stud sensor shows you and how to use it
Why this matters: knowing where studs are keeps screws secure and prevents hitting hidden framing.
1) Run the stud mode slowly along the wall at eye level, moving about 6 inches per second.
2) Mark the center when the device beeps or the LED flashes; mark the edges when the signal shifts.
3) Measure 16 inches from one center to find adjacent studs (or 24 inches in some older homes).
Real-world example: when hanging a bookshelf, I marked three stud centers across the wall before drilling so every bracket hit solid wood.
The stud sensor often detects both wood and metal; if the beep is sharp and the width narrow, you’re likely over wood. If the signal stays solid across a wider area, you may be over a metal plate.
How radar and induction help tell different metals apart
Why this matters: different metals react differently, so you can avoid drilling into pipes, conduit, or old nails.
1) Scan with radar to get depth and echo patterns; note strong, sharp echoes at consistent depth.
2) Switch to induction/metal mode and compare the tone: a steady low tone usually means ferrous metal (steel), while a fluctuating higher tone suggests non-ferrous metal (copper or aluminum).
Example: while installing a towel bar, radar showed a deep echo at 2 inches and induction gave a high, warbling tone — that told me it was a copper pipe, so I shifted my bracket over 3 inches.
If depth reads less than 1 inch with a strong low tone, expect nails, screws, or conduit close to the surface.
How to spot plastic pipes with radar plus EM comparison
Why this matters: plastic pipes can still cause big water damage if you hit them, even though they don’t show on metal-only modes.
1) Run radar mode and note clear, repeating echoes that trace a linear path; mark those echoes every 8–12 inches.
2) Switch to electromagnetic/induction mode; if the induction response is weak or absent where radar showed echoes, you likely have plastic pipe.
Example: I mapped a bathroom wall and followed radar echoes that matched the shower valve height, then avoided that line when drilling for towel hooks.
Plastic pipes often show as consistent echoes at plumbing heights (12–48 inches off the floor) and usually lack metal tones.
Detecting live wires safely with induction and AC detection
Why this matters: you must avoid energized conductors to prevent shocks or fires.
1) Use the AC detection or live-wire mode and hold the scanner flat against the wall; listen for a steady audible alert and watch for a persistent LED.
2) Move slowly up and down a 6–12 inch area to get a depth estimate; many units will display depth in inches or centimeters.
Example: I was replacing an outlet plate and found a live-wire alert 2 inches behind the plaster, which made me call an electrician instead of continuing the DIY.
If you get a live-wire signal, stop drilling. Call a professional if the wire location conflicts with your planned work.
Quick rules of thumb to keep you safe
Why this matters: simple checks prevent most mistakes.
1) Always scan twice: once horizontally and once vertically.
2) Mark suspected features every 8–12 inches to track lines.
3) If radar shows an echo but induction is quiet, presume plastic; if both show strong signals, presume metal.
Example: before cutting a hole for a new thermostat, I scanned both ways, marked a 12-inch line, and found a horizontal metal conduit 1 inch deep so I relocated the cut.
One bold practice to adopt now
Why this matters: drilling blindly costs money and risks safety. Use this rule: always validate with at least two sensor modes before you drill. Example: verify a stud with stud mode and radar depth, then drill a 1/8-inch pilot hole to confirm.
End with a final concrete tip: keep a paper map of marks for each wall you scan and note sensor modes and depths; that map saves time on future projects.
Recommended Products
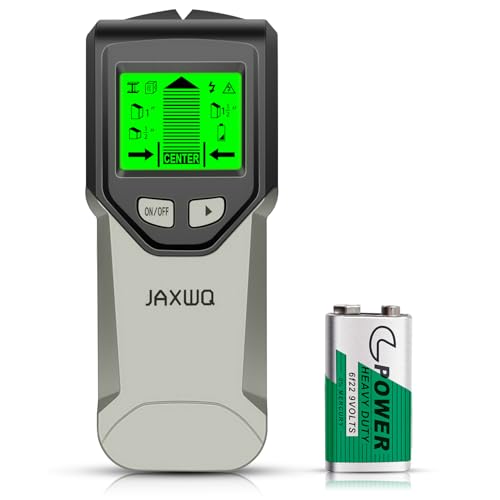
Accurate and Rapid: The wall stud finder adopts an intelligent micro-sensor chip with the highest sensitivity which can accurately and quickly find edges and center of metal, studs, joists, pipes, and live AC wire behind walls, floors, and ceilings. Fast detection saves users time and effort, making task completion easier. It must be ultimate gifts for professionals, homeowner,s and DIY enthusiasts
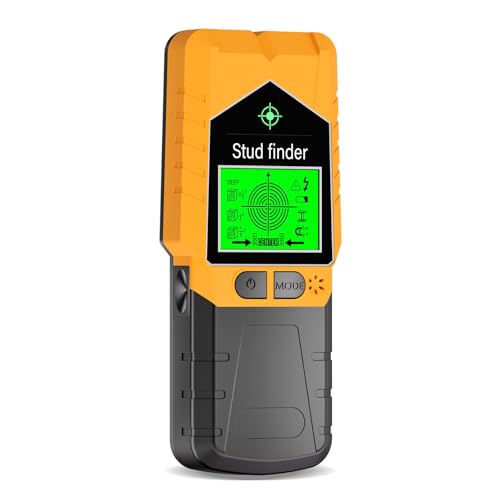
🧱【6-in-1 Wall Scanner】Detects wood/metal studs at 3 depths, deep ferrous metal (60mm), AC live wires (51mm), and magnetic screws. All-in-one solution.

𝐄𝐧𝐡𝐚𝐧𝐜𝐞𝐝 𝐏𝐫𝐞𝐜𝐢𝐬𝐢𝐨𝐧 𝐚𝐧𝐝 𝐒𝐩𝐞𝐞𝐝 𝐒𝐭𝐮𝐝 𝐅𝐢𝐧𝐝𝐞𝐫 𝐌𝐨𝐝𝐞𝐥: Efficiently and Accurately locates edges and centers of metal, studs, joists, pipes, and live AC wires in walls, floors, and ceilings,saving time and effort
Choose the Right Mode: Drywall, Universal, Concrete, Deep Scan
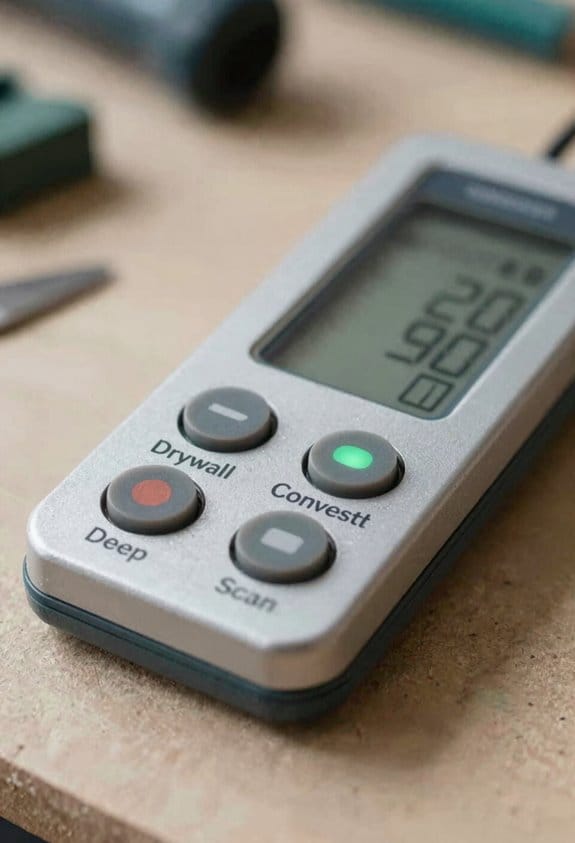
Before you pick a scanner mode, know why it matters: using the wrong mode can hide a live wire or make you drill into a pipe.
If you want reliable results and to avoid costly mistakes, match the scanner mode to the surface and material thickness you’re working on. For example, when you’re hanging a 4×8 sheet of drywall in a finished room, use drywall mode because it senses shallow wooden studs better; you’ll spot studs 3/4–1 1/2 inches deep with higher sensitivity. In a kitchen with plaster over lath, try universal mode because it balances metal and wood detection across mixed layers; you might see both studs and nail lines at 1–2 inches. When you’re fixing a concrete porch step, switch to concrete mode so the scanner boosts penetration and ignores surface clutter like paint and aggregate; expect deeper readings with fewer false positives around rebar. If you’re chasing something buried under several inches of masonry—say a conduit under a 4-inch concrete slab—use deep scan; it sacrifices fine resolution but can locate objects 2–4 inches deeper than normal modes.
Why this matters: wrong mode increases signal interference and gives misleading depth readings.
Real-world example: I once scanned a garage wall in universal mode and missed a copper pipe behind thin paneling; switching to drywall mode immediately revealed the pipe marker.
How to choose and use the modes (step-by-step):
1. Identify your surface and material thickness. Measure or estimate thickness in inches.
2. Pick the mode that matches:
- Drywall mode — for drywall, thin paneling; best for 3/4–1 1/2 in. depth.
- Universal mode — for mixed materials like plaster, lath, or unknown multi-layer walls.
- Concrete mode — for concrete, masonry, or block surfaces; filters surface clutter.
- Deep scan — when you need extra penetration for objects buried several inches deeper.
3. Calibrate or perform a reference sweep on a known empty section for 10–15 seconds.
4. Mark detections lightly with a pencil, then verify by rescanning perpendicular.
5. If sensor feedback looks noisy or detections contradict expectations, switch modes and repeat steps 3–4.
Why verify with a second sweep: sensors can misread orientation or layered materials.
Real-world example: On a basement wall with drywall over concrete, I marked a line in drywall mode then rescanned in concrete mode; the second pass showed a metal conduit offset 1.5 inches deeper.
Quick troubleshooting tips:
- If you get many scattered hits, lower sensitivity or use concrete mode to reduce surface clutter.
- If you miss obvious studs, increase sensitivity or switch to drywall mode.
- If depth readings change when you tilt the device, recalibrate and rescan flat against the surface.
Final practical rule: match mode to substrate, watch the sensor feedback, and switch modes when results contradict your measurements.
Recommended Products

ACCURATE: More sensors = More accuracy. Conventional stud finders have 1 or 2 sensors. The ProSensor M210 has 13, making it the most accurate stud sensing tool on the market. The ProSensor M210 has a max detection depth of 1 1/2". The precision LEDs track the location of studs while displaying the center and edges simultaneously.

Newest Upgraded Stud Finder - FNIRSI stud finder have Newly Designed Positioning Hole which can accurately and quickly mark up edges and center of metal, studs, pipes, live AC wire behind walls, floors. Fast detection saves users time and effort

Accurate and Rapid: The wall stud finder adopts an intelligent micro-sensor chip with the highest sensitivity which can accurately and quickly find edges and center of metal, studs, joists, pipes, and live AC wire behind walls, floors, and ceilings. Fast detection saves users time and effort, making task completion easier. It must be ultimate gifts for professionals, homeowner,s and DIY enthusiasts
Scan Like a Pro: Setup, Passes, Verification, and Common Pitfalls
If you’ve ever fumbled trying to get a clean scan, this is why.
Why it matters: consistent setup saves you time and gives accurate locations instead of confusing ghost readings.
1) How do you set the scanner up?
– Step 1: Place the scanner flat against the wall with the handle horizontal and the faceplate flush; use a thin pencil line at the top as a visual reference.
Example: when you’re scanning over a 12-inch-wide outlet box, align the scanner’s top edge with the pencil line so each pass starts from the same spot.
– Step 2: Start with a steady reference sweep: move the tool 12–18 inches per second in a straight line for 6–12 inches before you begin the real passes.
Example: on drywall over a stud, that starter sweep establishes the sensor baseline so the first real pass isn’t a junk reading.
Why it matters: choosing the right mode and holding the tool steady reduces false positives and keeps readings repeatable.
2) Which mode and grip should you use?
– Step 1: Select the mode for the material—wood stud mode for framing, metal mode for pipes, and deep-scan for anything behind thick material; check the device label or manual for exact mode names.
Example: for a 3/4-inch plaster wall over lath, select deep-scan and expect reduced resolution but better penetration.
– Step 2: Hold the scanner with both hands, elbows tucked to your sides, and keep your wrist locked so the device stays level.
Example: when scanning above shoulder height, brace your forearm against the ladder for steadiness.
Why it matters: straight, overlapping passes reveal consistent peaks and let you confirm center lines.
3) How should you make scanning passes?
– Step 1: Make straight, overlapping passes left-to-right or top-to-bottom, spacing each pass about 1–2 inches apart.
Example: over a 16-inch stud bay, do eight passes spaced 1.5 inches apart to map the edges clearly.
– Step 2: Repeat the pattern at least four times at the same speed and spacing to confirm persistent signals.
Example: if a center peak appears on all four repeats, that’s strong evidence of a stud or conduit.
Why it matters: a perpendicular pass helps you pinpoint centers versus edges.
4) When should you do a verification pass?
– Step 1: After your primary passes, do one perpendicular pass across the strongest signal to find the peak center.
Example: if your left-to-right passes show a peak at 10 inches, do a vertical pass crossing at 10 inches to locate the highest reading.
– Step 2: Use changes in depth/readout or signal strength to decide whether the reading marks an edge or the center; mark the highest-reading point.
Example: if the device reads highest at one point and drops 30% two inches each side, mark that highest point as the center.
Why it matters: simple maintenance avoids flaky scans and reduces wasted effort.
5) What common pitfalls should you avoid?
– Step 1: Watch for diagonal motion—scan straight or your peaks smear; if your device drifts 10 degrees, reset and re-scan.
Example: on a textured wall, a diagonal sweep produced inconsistent peaks until I kept the handle perpendicular.
– Step 2: Check batteries before you start; swap in fresh ones if voltage is low (use fresh alkaline or charged Li-ion specified by the manual).
Example: I keep a single spare AA battery in my toolkit so low power never ruins a job.
– Step 3: Clean the sensor face and battery contacts monthly or after dirty jobs, and check for firmware updates quarterly.
Example: after installing cabinets, a wiped sensor immediately fixed odd intermittent readings.
If readings conflict, slow down and re-scan.
Final practical note: when you mark a location, mark both the highest-reading point and the two edge-drop points so you know the full width; that gives you a measurable center and edge with numbers you can trust.
Recommended Products
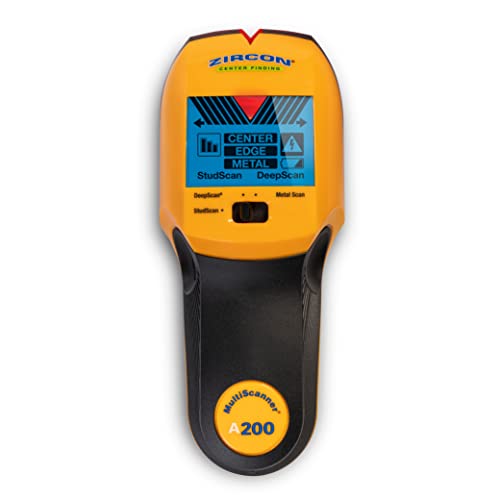
Multi-Purpose Wall Scanner: Zircon MultiScanner A200 helps locate wood studs, metal studs, edges, centers and stud direction, giving DIYers and pros clearer guidance before mounting TVs, shelves, cabinets, mirrors and fixtures

ACCURATE: More sensors = More accuracy. Conventional stud finders have 1 or 2 sensors. The ProSensor MAX had 13, making it the most accurate stud sensing tool on the market. The ProSensor MAX has a max detection depth of 2 1/2" for thick walls. The precision LEDs track the location of studs while displaying the center and edges simultaneously.

【Multifunctional & Handheld Detector】This professional Wall Detector Scanner quickly scans walls, ceilings, floors and pipes etc., to accurately identify hidden metals, non-metals, wires and water lines etc. Its smart warning system provides real-time hazard alerts, making it ideal for pre-drilling inspections to avoid pipe damage and electric leakage accidents.
Which Scanner Features Matter: Models, Depth, and Buying Tips
Before you start hunting for pipes or wires, know that detection depth tells you how safe and effective the scan will be. If you’re scanning a 6-inch drywall, a 1–2 inch depth is fine; for a 6-inch concrete wall, aim for 4–6 inches or more. Example: when I checked a basement wall with rebar 5 inches deep, a scanner rated to 6 inches found it every time.
Think of sensor types like different tools for different materials. Why it matters: radar sees through concrete better, induction works well on metal near the surface. Example: on an older house with plaster and lathe, radar spotted wooden studs behind lath while an induction sensor missed them. Steps to compare:
- Look for “GPR” or “radar” if you’ll scan concrete.
- Pick “electromagnetic/induction” for standard drywall.
- Read specs for material recommendations.
If you’ve ever run out of power mid-job, battery life matters because it dictates how much work you’ll finish without interruption. For routine weekend jobs, pick a scanner with 8+ hours or swappable batteries. Example: on a full-day remodel, a 10-hour-rated scanner let me scan two rooms before swapping batteries.
The difference between models comes down to accuracy and features. Why that matters: a model with visual display and depth readout reduces guesswork. Example: a model with a live scan overlay showed a clear stud edge, saving me from drilling. Steps to pick a model:
- Choose visual display and numeric depth readout.
- Prefer ±10% accuracy or better if you can find the spec.
- Check for calibration modes for different wall types.
You don’t need expensive extras if you only do small jobs, but accessories improve comfort and reach. Why that matters: extension handles and cases make scanning faster and protect the unit. Example: using a telescoping handle allowed me to scan a vaulted ceiling without a ladder. Steps to evaluate accessories:
- Look for compatible extension handles and cases.
- Confirm the mount type (thread or clamp).
- Check if the manufacturer sells spare parts.
Before you buy, check warranty and resale because they’ll save you money later. Why that matters: a 2-year warranty covers sensor failures that show up after heavy use. Example: a unit I owned developed a sensor fault in year two and the warranty covered replacement. Steps for buying:
- Get at least a 1-year warranty, preferably 2.
- Keep original receipt and register the product.
- Buy well-known brands if you plan to resell.
Here’s what actually happens when you compare specs and reviews before checkout: you avoid surprises on the job. Why that matters: matching depth, sensor type, battery, and accessories to your projects means fewer mistakes. Example: a friend bought a drywall-only unit for masonry work and had to return it twice. Steps to finalize your purchase:
- List typical wall types and target depths you need.
- Match scanner specs to that list.
- Read three user reviews focused on those wall types.
Recommended Products
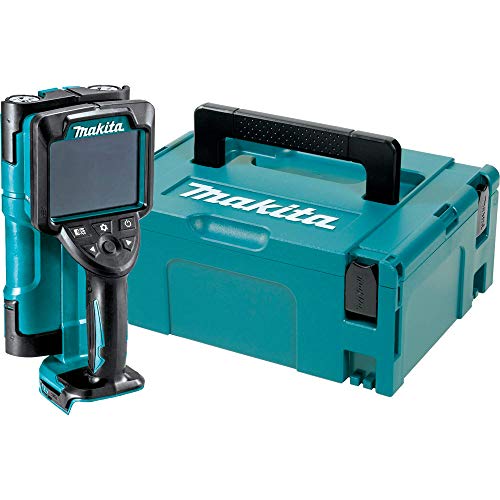
Ideal for efficient and accurate detection of a wide surface area with a large 4.1 inch screen

Vibrant 2.4" Backlit Color LCD Screen: Locate studs, metals, and live AC wiring hidden behind walls with Audio Alerts and Visual Indicators for easy identification of hidden objects

Visually identifies the center of wood/metal studs and track pipes and wires
Frequently Asked Questions
Can Multi-Sensor Scanners Detect Objects Behind Metal Studs?
A stitch in time saves nine: I can usually detect objects behind metal studscan using multi-sensor scanners, though detection of hidden voids is trickier—radar and induction help, but depth/material and stud interference can limit accuracy.
How Do Moisture or Insulation Affect Detection Accuracy?
Moisture interference and insulation attenuation can reduce accuracy; I’ll caution you that moisture layers scatter radar and induction signals while dense insulation attenuates returns, so I recommend multiple passes, mode changes, and recalibration to confirm targets.
Can These Scanners Differentiate Between Pipe Types Reliably?
Yes — I’ll say they can, though imperfectly: like a detective reading footprints, I use material composition and signal interpretation to distinguish metal, plastic, or copper pipes, but depth, insulation, and overlaps sometimes blur the picture.
Are Firmware Updates Necessary for Maintaining Accuracy?
Yes — I recommend firmware maintenance to preserve accuracy calibration; I’ll update device firmware when available, since manufacturers fix sensor fusion bugs, improve depth mapping, and keep detection reliable across materials and changing field conditions.
Can Scanners Detect Buried Wiring in Floors or Ceilings?
I can: a renovator once found live buried wiring beneath a floorboard, sparing a shock. I’ll detect buried wiring and ceiling wiring with multi-sensor scanners, though depth, material, and repeated passes affect reliability.