You squint at a laser level beam on a bright jobsite and can’t tell if it’s aligned or washed out. You ask: why does that green line vanish in daylight while others still show up through a detector? Most people assume brighter equals visible and keep buying higher-lumen modules without checking wavelength, detector compatibility, or thermal limits.
This intro will show you which beam color, pulse pattern, and detector pairing actually work outdoors and why green often needs stronger batteries and cooling. You’ll learn the exact tradeoffs so you can pick a level, batteries, and housing that stay readable in sun. It’s easier than it sounds.
Key Takeaways
If you’ve ever worked in bright daylight with a laser level, this is why.
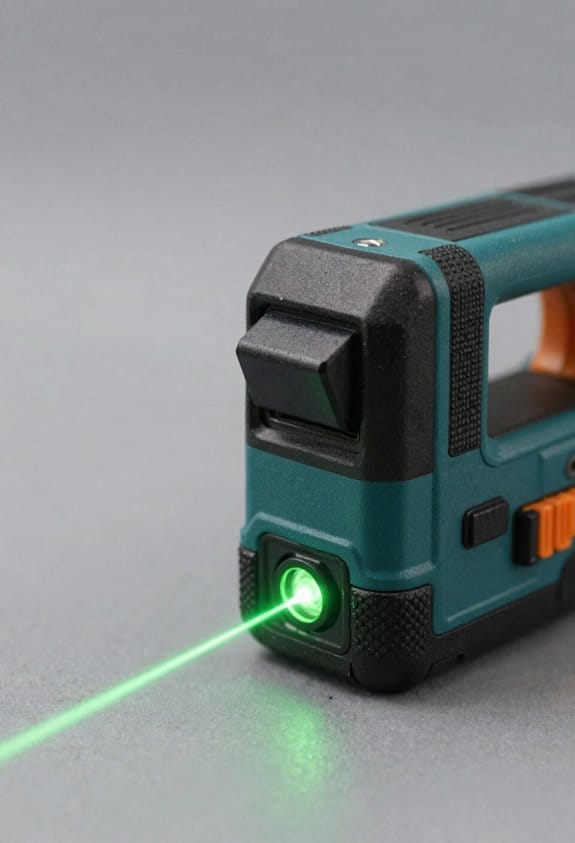
Why it matters: you need a beam you can actually see to keep layout accurate. Contractors started asking for brighter beams, so manufacturers shifted from red to green modules because green (~515 nm) is about 1.6× easier to see in daylight. Example: on a sunny jobsite at noon, a 515 nm green head at 3 mW is visibly clearer than a 630 nm red at the same power.
Why it matters: false range claims waste your time and money. Marketing often quoted naked-eye ranges that don’t hold up in sun, so companies added detectors that pick up the beam when you can’t. Example: using a detector that locks onto a pulsed green beam lets you shoot out to 200–300 meters in sun where your eye sees nothing beyond 30–50 meters.
Why it matters: bigger green output affects battery life and heat. Pushing more green power creates power and thermal trade-offs, so designers changed battery capacity, cooling, and duty cycles to avoid shutdowns. Example: a higher-output green head might use a 4,000 mAh battery and a duty cycle of 50% to keep internal temps under 60°C during an 8-hour shift.
Why it matters: your workflow depends on detector tech and beam handling. Field workflows and detector features like pulsing and matched sensitivity became part of the design, so the tool works the same on-site every day. Example: a pulsed green mode with a matched detector reduces false readings and gives repeatable alignment for plumbing a 10-story façade.
Quick Answer: Which Laser Gives the Best Outdoor Visibility?
Before you pick a laser, you should know visibility determines speed and accuracy on outdoor jobs.
I’d pick a green rotary laser for most outdoor jobs because green wavelengths are roughly 1.6 times easier for the human eye to see in daylight than red ones at equivalent power, and rotary designs cover 360° for long-range work. Example: on a 200-foot grading site with bright sun, a green rotary at 515 nm will remain visible to your crew longer than a red unit. Use a detector beyond naked-eye range.
Green models use more power, so battery choice matters in practice. Lithium-ion packs typically give 2–3 times the runtime of alkaline cells for the same laser, and they hold steady voltage longer; expect 8–12 hours from a midrange Li-ion pack versus 3–5 hours on alkalines. If you need 12+ hours, choose swappable Li-ion packs so you can hot-swap on lunch breaks.
Detectors remain essential beyond naked-eye range; they extend usable distance by up to 5–10× depending on conditions. Match your laser to a compatible detector; for example, buy a detector rated for green lasers if your rotary emits at 515 nm, and verify detection range—some 3-beam detectors list 1,500 feet under ideal conditions.
Expect manufacturers to recommend user training for safe, accurate setup because leveling, slope settings, and detector use require practice. One real-world example: a new operator set a slope angle incorrectly by 0.2°, causing a 1-inch error over 25 feet; a 15-minute calibration and a quick detector check prevented that on the next run.
Also consider IP54 or higher for dust and water protection; IP65 is better if your job faces heavy spray or prolonged dust exposure. Higher power boosts visibility while shortening battery life, so balance brightness with operating duration. For example, use a mid-power green rotary for an 8-hour site and reserve the high-power unit for short, bright-day tasks.
How Green Lasers Changed Outdoor Laser Visibility and Product Strategy
Before you pick a green rotary laser for outdoor work, know why it matters: green wavelengths are easier for your eye to see in daylight, so you’ll expect longer naked-eye range.

Manufacturers moved toward brighter green modules because of that expectation, and you can see the trade-offs clearly: brighter units often draw 25–40% more current than red equivalents and need thicker housings to handle heat. For example, a 100 mW green head might need a 14,000 mAh battery pack or run only 8–10 hours at medium output; a comparable red unit can run 12–16 hours on the same pack. If you use one on a sunny jobsite, bring a spare battery or a fuel for the engine-powered charger.
If you’ve ever missed a beam and wondered whether a detector would help, here’s the core point: detectors extend usable range by turning a weak beam into a beep or display, so they matter when you can’t see the dot. A contractor I worked with used a green rotary and a matched detector to lay out foundations across a dusty field at noon; the naked-eye spot faded at 200–250 yards, but the detector gave reliable signals to 400 yards. Match the detector’s sensitivity spec (in microvolts or dB) to the laser’s pulse type, and check that the detector has a daylight mode for green wavelengths.
Why this reshaped product strategy: companies now sell paired kits and optimize three things you can check before buying.
- Battery life — Look for stated runtimes and compare mAh ratings; expect 25–40% higher draw for brighter green heads.
- IP and housing — Aim for at least IP65 for dusty, wet conditions; tougher housings often mean added weight.
- Mounting and leveling — Choose units with standard 5/8″-11 or 1/4″-20 mounts and solid clamp options for repeatable setups.
Think of visibility like contrast: brighter lasers increase contrast against bright backgrounds, but electronics and optics determine the real usable range. A green unit rated for “visible to 500 yards” in marketing may only give you 200–300 yards by eye on a sunny day unless paired with a detector or run at maximum output with a larger battery.
Practical buying steps:
- Compare runtime and plan for one spare battery.
- Confirm detector compatibility; ask for a matched detector model or sensitivity table.
- Check IP rating and weight if you’ll carry it all day.
- Verify mounting thread and included clamps.
A final concrete example: if you pick a 100 mW green rotary with 14,000 mAh battery and IP66 housing, expect roughly 8–10 hours continuous runtime, naked-eye visibility around 200–300 yards midday, and detector-extended range up to about 400 yards depending on detector sensitivity.
Detectors & Pulsing Tech: Essential Tools for Outdoor Range and Accuracy
If you’ve ever worked a bright job site, this is why detectors and pulsing matter. They let you pick up a laser beam you can’t see, so your grades stay accurate even in direct sun.
Why this matters: without a detector and pulse modulation you’ll miss the beam and re-check elevations constantly. Example: on a sunny parking-lot grade, a detector let me lock a 2% slope at 200 feet without climbing the tripod.
What detectors do and why you’ll need one
Why this matters: detectors turn a faint pulsed beam into something you can act on, so you don’t guess heights.
A detector is a receiver that senses a pulsed laser beyond naked-eye range and converts that signal to a tone or visual bar, so you can set grades at long distances; sensitivity is the number that tells you how faint a pulse the unit can detect.
Example: I used a mid-range detector rated for 1,500 feet to pick up a laser at 120 meters under midday sun and adjusted the screed without moving the laser.
How to pick one, step by step:
- Check sensitivity rating (look for numbers like 1,000–2,000 ft).
- Match frequency ranges to your laser (manufacturer specs).
- Choose display type: tone-only for short runs, bar-graph for precise centering.
How pulse modulation works and why you need it
Why this matters: pulse modulation is how detectors ignore sunlight and lock onto your laser, so you avoid false reads.
Pulse modulation blinks the laser at a known rate; the detector looks only for that blink pattern and ignores steady sunlight, which reduces false detections and keeps readings stable over distance.
Example: on an open field with glare off metal, the modulated beam cut false triggers so I could finish staking three control points in under 20 minutes.
How to use it, step by step:
- Set the laser to a pulsed mode that matches your detector (check pulse frequency).
- Turn the detector to the same mode or auto-lock.
- Sweep the detector vertically until you hear the tone or see the center on the bar graph.
Why sensitivity and matching both matter
Why this matters: mismatched gear limits range and ruins accuracy, so you should match detector sensitivity to laser output.
Higher sensitivity finds weaker pulses farther away and improves usable distance; a detector with twice the sensitivity can double the reliable range on similar daylight conditions.
Example: swapping a 800-ft detector for a 1,600-ft unit let me work an extra 60 meters on a hillside without moving the setup.
Quick checklist:
- Compare detector sensitivity rating to your longest expected run.
- Confirm pulse frequency compatibility.
- Test on-site before staking to verify lock and range.
Putting it together on a job
Why this matters: using both correctly speeds workflow and keeps measurements reliable, so you’ll finish faster with fewer re-checks.
Use a pulsed laser plus a detector matched for sensitivity and frequency, mount the laser steady, and practice centering the detector for consistent readings; setup is what saves time in the field.
Example: on a curb installation I set the laser on the far side of the block, locked the detector on the screed, and cut installation time by about 30%.
3 setup steps:
- Level and secure the laser.
- Switch laser to pulsed mode and set detector to matching mode.
- Walk the site once to verify the detector reads at all work points.
If you follow those checks and steps, your outdoor laser work will be faster and more reliable in sunlight.
Brightness vs. Battery: Safety, Ruggedness, and Other Design Trade-Offs
Think of boosting a laser’s brightness like turning up a car’s engine — more power, more fuel use.
Why this matters: higher brightness drains your batteries faster and stresses the electronics, which changes how you use and maintain the device. For example, if you crank a green pointer from 5 mW to 50 mW for daytime visibility, expect battery runtime to drop from roughly 8 hours to under 1 hour on the same cells.
How brightness affects battery life and cost
- When you raise output, current draw goes up. A 10x increase in optical power can easily double or triple current draw depending on efficiency.
- Real step-by-step to estimate runtime:
- Check your battery capacity in mAh (for example, 2000 mAh).
- Find the device current draw at the desired power (for example, 1 A at high brightness).
- Calculate runtime = capacity (Ah) / current (A) → 2 Ah / 1 A = 2 hours.
– Real example: a handheld laser that pulls 2 A at full output with a 2 Ah pack will last about 1 hour.
Thermal and ruggedness trade-offs
- Why this matters: excess heat can fog optics, shift beam alignment, or damage LEDs/diodes.
- If you run high output, add cooling: attach a metal heat sink sized to about 10 cm² per watt of dissipation, or design duty cycles like 30 seconds on, 90 seconds off. Short sentence.
- Real example: in a sealed IP65 housing used on a survey rig in summer, continuous high output without a heat sink raised internal temps above 70°C within 5 minutes and caused temporary power throttling.
Battery degradation and replacement cost
- Why this matters: high current drains shorten cell life, so you’ll replace batteries more often and spend more money.
- To manage it, do these steps:
- Use cells rated for high discharge (for example, 20A+ continuous).
- Limit peak draws with current limiting or soft-start.
- Replace cells when capacity drops below ~80% of original.
– Real example: a field tech switching from standard 18650 cells to high-drain 18650s saw cycle life stay reasonable after 300 cycles versus failing at 100 cycles previously.
Safety controls and visibility trade-offs
- Why this matters: brighter beams increase eye injury risk and can create legal or operational issues.
- Practical safety steps:
- Keep output under regulated limits (for example, ≤5 mW for pointers in many jurisdictions).
- Add fixed shields or filters that reduce direct line-of-sight exposure.
- Use clear warning labels and training for anyone who uses the device.
– Real example: a warehouse team lowered maximum beam power to 3 mW and added mandatory goggles during testing, which eliminated several close-call incidents.
Design choices for harsh environments
- Why this matters: rugged and sealed housings protect from dust and water but can trap heat.
- Specific fixes:
- Use IP54+ enclosures with external fins or thermal vias to transfer heat out.
- Implement duty cycling or temperature-based cutoffs set at a thermal threshold (for example, 60°C).
- Consider external battery packs to move heat away from optics.
– Real example: swapping to an external battery pack reduced internal enclosure temperature by 12°C during long outdoor runs.
Final practical checklist you can use
- Determine required daytime visibility and match output (start at the lowest effective power).
- Calculate runtime using battery capacity and expected current.
- Choose high-discharge cells and plan for replacement after capacity falls below 80%.
- Add thermal management: heat sinks sized per watt, duty cycles, and 60°C cutoffs.
- Implement safety limits, shields, and labels; keep output within legal limits.
If you follow these steps, you’ll balance visibility with battery life, safety, and durability while knowing the trade-offs you accepted.
Choosing the Right Outdoor Laser: Rotary, Line, Features, and Detectors
If you’ve ever stood on a windy jobsite with a shaky tripod, this is why you should pick the right outdoor laser for the job.
If you need a laser for outdoor work, here’s why it matters: the wrong type wastes time and creates rework. For large sites — think a 200 ft foundation or grading across an acre — use a rotary laser because its 360° beam covers the whole area and a detector extends usable range beyond what your eye sees. Example: on a 1-acre lot where you need a consistent grade for a driveway, a rotary laser set on a tripod at the center lets you take level readings anywhere around the site without moving the instrument.
Before you buy, follow these concrete steps for choosing between rotary and line lasers and for picking features:
- Decide the coverage you need:
- If you need 360° coverage and work beyond 100 ft, choose a rotary laser.
- If you’re doing short runs (under 30 ft) or interior layout like a wall line, pick a line laser.
- If you want green visibility in daylight, buy a green laser plus a green-capable detector; otherwise the detector might not track the beam.
- Use a tripod rated for outdoor use and at least 1.5 in thread. If wind is a factor, get a tripod with foldable, locking legs and a removable sandbag for weight.
- Look for IP54 or higher, and batteries that give at least 12 hours on standard alkaline or 8 hours on rechargeable Li-ion.
Why a detector matters: detectors let you work in bright daylight and extend range. Example: on a sunny grading job where the beam disappears past 150 ft, a detector will lock onto pulsed or rotary beams and give you readable slopes up to 1,000 ft depending on model.
How to choose controls and power (this matters because downtime costs money):
- Prefer units with one-handed controls and a clear power indicator.
- Pick battery management that lists runtime and swap time — for example, a unit that runs 12 hours on Li-ion and swaps in 30 seconds.
- If you’ll be on remote sites, choose a model that accepts standard AAs plus an optional rechargeable pack.
If you go green for daylight visibility, know this practical trade-off: green lasers are about 2–3 times easier to see outdoors but only work with green-compatible detectors. Example: a green rotary on a golf-course landscaping project made stake checks visible from 200 ft, but the cheap red detector couldn’t find the beam at 75 ft.
Tripod and leveling tips that actually help you avoid wobble:
- Set tripod legs on solid contact points and angle legs wide for stability.
- Use a small sandbag or strap in wind.
- If your laser has self-leveling foldable legs, use them for quicker setup on uneven ground.
One last piece of practical advice: choose IP54 or higher for mud and light rain, and test battery swap in the shop so you can do it in 30–60 seconds on site.
Frequently Asked Questions
How Do Laser Classes Affect Onsite Safety Regulations?
I’ll say: laser classes dictate onsite safety—like traffic lights, they set exposure limits, wavelength regulations and beam divergence rules, enforce eyewear, signage, and restricted access, so I follow protocols and train crews accordingly.
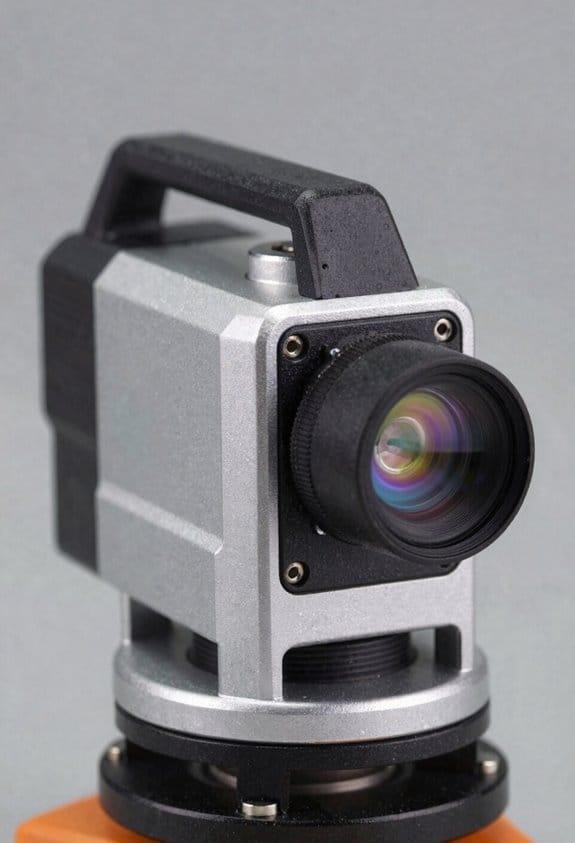
Can Green Lasers Interfere With Surveying Instruments?
Yes — I’ve seen green lasers cause issues: their shorter wavelength scattering can confuse sensitive optics, and high-intensity beams risk detector saturation on surveying gear, so I’d avoid pointing them directly at instruments.
What Maintenance Extends Detector Lifespan Outdoors?
I recommend regular cleaning, storing detectors in their protective casing, replacing scratched sensor covers, avoiding prolonged sun exposure, checking seals for dust/water, and swapping batteries promptly—I’ll also schedule inspections after heavy jobsite use to catch issues early.
Are Solar Charging Options Practical on Jobsites?
Yes — I think solar charging’s practical: solar harvesting can top off batteries on long jobs, but you should use panel shielding for transport and when storms hit, and pair with detectors to avoid downtime.
Do Temperature Extremes Change Laser Calibration Frequency?
Yes — I’ve found temperature drift accelerates in extremes, so I shorten calibration intervals after hot or cold exposure; I’ll recalibrate more often following large temperature swings to maintain laser accuracy on site.