You’re standing on a campus site staring at a set of layout drawings while the crew reports that the anchor bolts in the far building are ten millimeters off — which one coordinate is wrong?
You’ve watched prefab modules arrive that won’t sit square with factory references and felt the pressure as schedules slip.
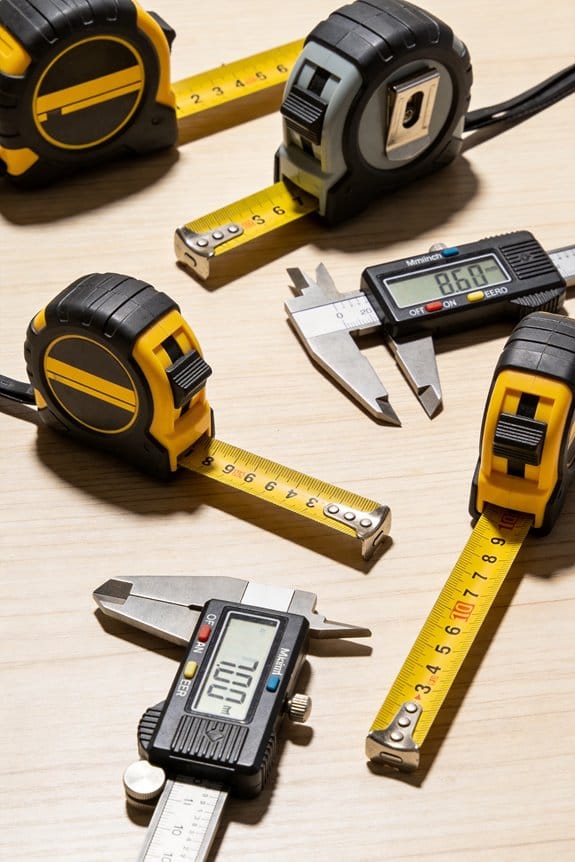
Most teams assume handheld tape checks or short-range total stations are enough to catch those errors until it’s too late.
This article shows exactly how long-range measuring tools cut layout drift, keep control networks consistent across hundreds of meters, and prevent costly rework so prefabricated parts align with factory coordinates.
You’ll get practical device checks, step-by-step workflows, and clear ROI examples.
It’s easier than you think.
Key Takeaways
If you’ve ever watched a project miss a mark by inches across a big site, this is why.
– Faster, site‑wide measurements cut decision time and prevent costly rework, saving days of crew time on large projects.
Before you move heavy equipment or pour concrete, measure the whole site with a long-range device so you see offsets across acres. Example: on a 200-acre solar farm, a single comprehensive scan trimmed stake corrections from three days to eight hours. Do this in 3 steps: 1) set up at two opposite corners, 2) run full-site sweep, 3) export coordinates to your site plan.
– Extended-range tools reduce alignment errors and clashes by providing accurate control across acres, avoiding costly offsets.
Why this matters: when your trusses and roads use the same control grid, you won’t discover a misalignment after erection. Example: a highway widening job used a 1,000‑m range total station to align guardrails and pavement; that kept lateral error under 15 mm. Steps: 1) establish true-coordinate control points every 200–300 m, 2) check one control point after major pours.
– Long-range scans enable remote approvals, progress tracking, and clash detection for faster sign-offs and fewer site delays.
This shortens approval cycles so contractors can keep crews working instead of waiting. Example: a bridge contractor sent weekly 360° scans to the city inspector and cut site visits from twice a week to once a month. Do this: 1) schedule scans at major milestones, 2) upload to the cloud, 3) tag issues for reviewers.
– Regular environmental compensation and calibration maintain millimeter-level accuracy over long distances, preventing drift and cumulative errors.
You want measurements that don’t shift when temperature or air changes. Example: a transmission-line survey team recalibrated instruments every four hours and applied atmospheric refraction corrections, holding positional drift under 10 mm over 2 km. Steps: 1) log temperature, pressure, and humidity each session, 2) run instrument calibration every 4 hours, 3) apply refraction corrections in your software.
– Shared true-coordinate control grids support modular construction and power corridor staking, ensuring factory fit and regulatory clearances.
That keeps factory-built modules plugging in on day one without on-site trimming. Example: a modular hospital project used a single control grid tied to local survey monuments so modules arrived and seated within 5 mm tolerances. Steps: 1) tie your control grid to two permanent monuments, 2) distribute coordinates to off-site fabricators, 3) verify three random module corners on arrival.
Why Long-Range Measuring Matters in 2026: Speed, Precision, Risk
If you’ve ever stood on a big jobsite wondering whether a wall will line up with steel delivered tomorrow, this is why long-range measuring matters.
Why it matters in one sentence: it cuts decision time and prevents costly rework by giving you fast, reliable site-wide measurements.
I use long-range devices to scan sites in under an hour instead of days, which shortens surveys and frees crews to keep working. For example, on a 10-acre civil job I measured control points from one tripod in 45 minutes, saving a full day of crew time and preventing a misaligned trench by 120 mm.
Before you calibrate, know this: fast calibration keeps data accurate so you can trust numbers between formal checks.
How to use it:
- Calibrate daily when temperatures change by more than 5°C.
- Run a two-point check (left/right targets) every 4 hours on big pours.
- Log calibration values and compare to the instrument’s baseline.
A quick example: on an elevated slab pour, a 4-hour check spotted a 0.7 mm shift that would have produced a 10 mm mismatch across the deck.
The difference between raw readings and corrected readings comes down to environmental compensation.
Why it matters in one sentence: uncorrected temperature, pressure, or humidity causes systematic errors that grow with distance.
How to apply it:
- Enter current temperature, barometric pressure, and relative humidity into the device before each long-range run.
- For distances over 200 m, repeat inputs every two hours or when weather changes.
- If you can, use a nearby weather station feed to automate inputs.
Real example: on a 300 m bore alignment the uncorrected reading drifted 15 mm; after applying compensation the drift dropped to 2 mm.
You should validate models before fabrication for tight schedules and fewer surprises.
Why it matters in one sentence: early validation prevents clashes and saves money by catching errors before parts are made.
Steps to validate:
- Measure three control sections across the model footprint.
- Compare measured points to the BIM within 5 mm tolerance.
- If discrepancies exceed tolerance, mark for rework and remeasure after adjustments.
Example: checking three control sections on a facade job revealed a 20 mm offset in the curtain-wall anchors; correcting that before shop drawings saved several thousand dollars and two weeks.
Quick checklist you can use on-site:
- Calibrate: daily when >5°C change.
- Spot-check: every 4 hours for high-precision tasks.
- Compensate: input temp/pressure/humidity for runs >200 m.
- Validate: measure 3+ control sections before fabrication.
You’ll get fewer clashes, clearer progress tracking, and faster sign-offs when measurements are timely and corrected for conditions.
How Modular Construction Increases Demand for Long-Range Precision
If you’ve ever watched a big prefab module miss its mark by inches, this is why.
Why it matters: misaligned modules cause crane holds, utility reconnects, and big costs. One real example: on a 40-unit hotel job, a 10 mm slab offset stopped erection for two days while crews shimmed and re-leveled. Keep that kind of delay off your schedule.
How precise surveying and staking reduce on-site adjustments
Why it matters: factory-made pieces assume the field coordinates match the plant.
1) Set a single control grid shared with the factory using true coordinates (NAD83 or your local datum).
2) Perform a check from the plant: have them set a reference monument and send the control file to you.
3) On site, run a closed-loop survey and verify three control points to within ±5 mm horizontally and ±10 mm vertically.
Example: on a modular apartment tower, crews used a GNSS base and total station to match the plant coordinates; they caught a 12 mm rotation error before modules left the plant.
Use a reliable total station or robotic total station and record results in a digital log.
How long-range tools help crews place heavy modules safely
Why it matters: you need to confirm clearances and connections before the lift.
1) Use a long-range total station or laser scanner capable of 300–800 m to check pick points and path clearance.
2) Pre-check the vertical profile and utility chase locations from a safe distance.
3) Confirm orientation marks on the module align to field marks within 15 mm.
Example: a hospital expansion used a 500 m range instrument to verify overhead crane clearance and avoided a conduit clash during a 20 t module lift.
Keep photographs with scale bars and the instrument logs as proof.
Why panel tolerances matter and how to manage them
Why it matters: tighter tolerances mean less on-site trimming and fewer surprises.
1) Specify panel tolerances in the contract: for example, +/- 5 mm for panel length and +/- 10 mm for rotation for finished edges.
2) Require factory to provide a dimensional report (measurements at four corners and midpoints).
3) Inspect incoming panels against the report and accept or quarantine within one hour of delivery.
Example: on a school build, tightening wall panel tolerances from +/- 15 mm to +/- 5 mm dropped on-site rework by 70%.
How to coordinate digital models with field measurements
Why it matters: mismatched models cause fit issues that take days to fix.
1) Exchange an IFC or coordinate-tagged model early, with a clearly labeled origin point.
2) Tie the model to your jobsite control using at least three verified survey points.
3) Run a clash-check and a field-to-model comparison before the first module arrives.
Example: a mixed-use job ran a field-to-model comparison and found a 25 mm slab thickness mismatch in the model; correcting it prevented adjustments across 12 modules.
Save the comparison reports alongside your daily field notes.
Practical checklist for predictable, safe, and efficient installations
Why it matters: following a short list keeps work consistent and auditable.
1) Share a common coordinate system and reference file with the factory.
2) Verify site control to ±5 mm horizontally and ±10 mm vertically.
3) Use long-range instruments (300–800 m capability) to pre-check lift paths and utility connections.
4) Specify and enforce panel tolerances (for example, ±5 mm length).
5) Require factory dimensional reports and inspect panels on delivery within one hour.
6) Run a model-to-field comparison before assembly.
Example: a contractor followed this checklist on a 60-module senior-living project and completed installations two weeks ahead of the planned schedule.
Keep copies of control files, instrument logs, dimensional reports, and inspection photos in your project folder.
Why Data Centers and Power Projects Need Extended Measurement Ranges

If you’ve ever walked a data center campus and tried to line up measurements between buildings, this is why long-range tools matter. Why it matters: without distances that reach across roads and utility corridors you’ll miss offsets and need rework. For example, at a 20‑acre campus I surveyed, racks and roadways were set by a single baseline that ran 800 meters; measuring that with a short-range tool would have required multiple tie-ins and introduced 30–50 mm of error.
Data centers span acres and need measurements across buildings, roads, and corridors. Use a laser or total station rated for at least 1,000 meters (reflective prism) or 500 meters reflectorless when you expect open sightlines. Step 1: set two control points on opposite ends of the campus, 800–1,200 m apart. Step 2: verify both points with a GPS RTK fix and a redundant instrument check. Step 3: run long-range checks every 100–200 m along your baseline to catch drift. This reduces rework and keeps your schedule predictable.
Before you stake a high-voltage corridor, know that clearance and staking errors cause safety and regulatory failures. Why it matters: a missed offset can violate clearance limits and force costly redesigns or vegetation removal. Example: on a 300 m transmission segment I surveyed, a 200 mm stake error would have reduced required conductor clearance by 150 mm under sag conditions — unacceptable to the utility.
For power corridors, use a total station or long-range laser with sub-5 mm accuracy at 500 m when staking towers or verifying conductor clearances. Step 1: measure tower base positions and guy anchor points to +/- 5 mm horizontally. Step 2: profile ground every 25–50 m if terrain varies. Step 3: model conductor sag using measured tower heights and span lengths to verify minimum clearances under worst-case temperature conditions.
Terrain profiling matters when routes cross slopes or buried obstacles. Why it matters: slopes and subsurface features change trench depth, conduit length, and cooling requirements. Concrete example: a cable route over a ravine required an extra 2 m of depth at the crossing because subsurface voids reduced load-bearing capacity; that only showed up after a long-range profile and targeted local scans.
Combine long-range distance checks with focused local scans. Step 1: run long baselines every 200–500 m with your long-range instrument. Step 2: at points of change (crossings, corners, equipment pads) perform detailed scans or TLS captures within 50 m for millimeter-level detail. Step 3: reconcile baseline and local scans in your CAD or BIM model and flag discrepancies over 10 mm for field review.
Practical tips for your next job: carry a reflective prism set and a backup GNSS unit, aim for baselines of at least 800 m where campus size demands it, and log a redundant instrument check every 100–200 m. This approach lowers risk, prevents schedule slippage, and gives you the positional certainty needed for safe electrical clearances and reliable cable/pipeline installations.
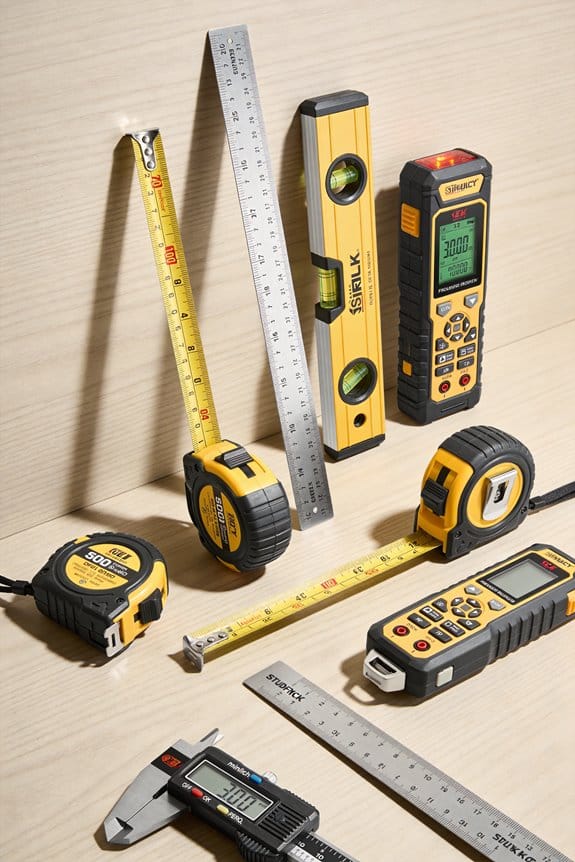
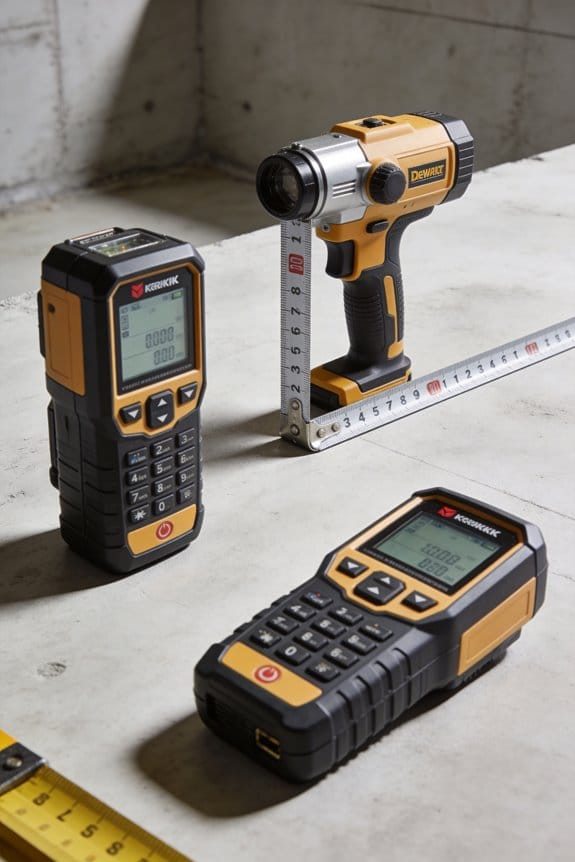
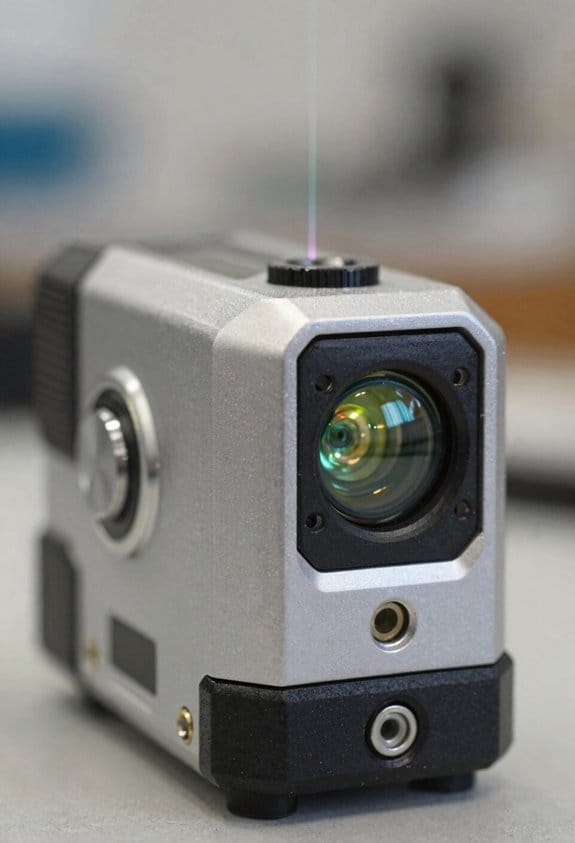
Which Long-Range Tools Do Contractors Use on Site?

Here’s what actually happens when you pick long-range tools for a big site: you want control that’s accurate, quick checks that don’t slow crews, and detailed scans where things are complex.
I’ll explain why each tool matters in one sentence: getting control points right prevents layout errors that cost you days of rework. Many contractors use a mix of long-range total stations, laser distance meters, reflector-based surveying systems, drone lidar, and tripod laser scanners to cover different tasks on large sites.
Total stations — why they matter: they give you precise angles and distances for control and layout so foundation lines and column grids land within millimeters.
Example: on a 200 m runway layout I set control at 4 corners, then tied every station back to those points so pile caps matched the plans.
Steps:
- Set the tripod over a known control point and level it.
- Measure backsight to a second control to verify within 2–3 mm.
- Run layout shots to stake the positions at required offsets.
Tip: use reflectors in open areas to extend range to 500–1,000 m.
Reflector-based surveying systems — why they matter: they let a surveyor push range without losing precision when open sightlines exist.
Example: for a 600 m sewer trench run I used a reflector on a rod to transfer control from one end to the other every 200 m.
Steps:
- Place reflector at known location.
- Aim total station and confirm angle/distance.
- Move reflector progressively to extend control.
Typical range: 1,000 m with line of sight; accuracy stays within a few millimeters.
Laser distance meters — why they matter: they give you fast spot checks so trades can confirm measurements in minutes.
Example: an electrician needed cable tray clearances; I took five LM shots across the run and reported averages in under 10 minutes.
Steps:
- Pick two fixed points you can reach.
- Measure distance to each point; take 3 readings and average.
- Record results and call out any deviation >10 mm.
Common specs: handheld LD meters reach 100–300 m and read to ±1–2 mm at short ranges.
Tripod laser scanners (terrestrial lidar) — why they matter: they capture detailed existing conditions so you don’t miss pipes, bolts, or surface profiles.
Example: scanning a mechanical room took three setups, produced a dense point cloud, and showed an obtruding beam 40 mm off plan that we re-routed.
Steps:
- Plan scan positions to get 50–70% overlap.
- Set targets or use cloud registration to align scans.
- Process the point cloud and export slices or BIM-ready models.
Typical output: millions of points per scan and sub-10 mm spatial accuracy.
Drone lidar — why it matters: it covers rough or high terrain quickly so you can map features without walking every slope.
Example: for a 150 ha cut-and-fill estimate, drone lidar flew two battery swaps and delivered vegetation-penetrating points that matched RTK control within 20–30 mm.
Steps:
- Establish RTK/GNSS groundcontrol or use PPK workflows.
- Fly at 80–120 m AGL with 30–40% swath overlap.
- Process returns and classify ground vs. vegetation.
Useful numbers: typical point density 5–20 pts/m² depending on altitude and sensor.
How to pick tools on a job — why it matters: choosing right saves time and avoids rework from mismatched accuracy levels.
Example: on a mixed site I used total stations for slab layout, laser meters for quick contractor checks, and a scanner for existing utilities; that combo cut layout time by 40%.
Steps:
- Identify required tolerances (e.g., ±5 mm, ±10 mm, ±25 mm).
- Match tool to tolerance: total station for <10 mm, scanner/drone for site capture, laser meter for quick checks.
- Plan workflows so data flows to BIM or CAD without re-entry.
Rule of thumb: don’t use a laser meter where you need survey-grade control.
Use these tools together and you’ll reduce rework and speed coordination across complex projects.
How Long-Range Sensing Links to Digital Twins and Scheduling

If you’ve ever watched a building site where plans and reality don’t match, this is why.
Why it matters: keeping your digital model synced to the site stops rework and delays in one step. For example, on a highway widening project I saw LiDAR scans show as-built shoulder widths that were 0.4 m different from plans, which prevented a paving crew from starting the wrong pass.
How long-range sensors feed a digital twin and schedule
Why it matters: you get a live picture of progress so decisions are based on data, not guesses.
- Set up sensors: mount a LiDAR unit at 80–120 m from the work area or schedule weekly drone photogrammetry flown at 100–120 m altitude with 80% image overlap.
- Capture cadence: scan daily for fast activities or weekly for slower trades; store raw files in a shared cloud bucket with a timestamped folder structure like /project/site/2026-03-21/.
- Ingest into the twin: use a processing tool (CloudCompare, Autodesk ReCap, or a vendor API) to convert scans to point clouds or meshes and push them into your digital twin model with the same coordinate system.
Concrete example: on a warehouse expansion I scheduled drone flights every Monday at 09:00; the uploaded meshes auto-aligned to the BIM within two hours so the team could see foundation progress before the afternoon shift.
How the twin keeps your schedule accurate
Why it matters: updated models let you spot delays early and reassign resources before tasks slip.
- Automate comparisons: set a script or tool to compare the current twin to the planned model and produce a delta report (e.g., volume removed, structural elements placed).
- Map deltas to tasks: link each type of delta to a schedule item using a lookup table (for example, “excavation volume change” -> Schedule ID EXC-101).
- Trigger alerts: when a delta exceeds your threshold (say 10% or 0.5 m), automatically notify the planner and crew foreman with the affected Schedule ID and suggested response.
Concrete example: on a bridge deck pour, automated delta checks flagged that formwork was 12% behind, which triggered a night shift and avoided a three-day delay.
How to use trends to predict delays and resource needs
Why it matters: trends show if a small deviation will compound into a big delay so you can act early.
- Gather history: keep the last 6–12 scans per area and compute metrics like daily progress rate, average deviation, and variance.
- Fit a simple forecast: use linear regression on your progress rate to forecast completion date and confidence interval; if predicted completion shifts by >2 days, flag it.
- Plan countermeasures: for flagged items, choose from standard responses (add crew +1, extend shift by 2 hours, or resequence tasks) and simulate impact for 24–72 hours.
Concrete example: on a façade installation, trend analysis showed a 0.7% daily slowdown; adding one extra crew member restored the planned finish date in a 48-hour simulation.
Quick checklist to link sensor outputs to schedule tools
Why it matters: a checklist gets you running without guessing.
- Verify coordinate systems match.
- Define capture cadence.
- Choose processing tool and export format.
- Create mapping from deltas to Schedule IDs.
- Set thresholds for alerts.
- Automate ingestion and reporting.
Concrete example: use a CSV mapping like “scan_delta_code,ScheduleID,threshold” so your processing script can send precise JIRA or Primavera updates.
Validation and fast decision rules
Why it matters: quick validation stops false alarms from wasting time.
- Confirm anomalies with a spot check (photo or on-site measurement) within 4 hours.
- If spot check confirms, apply one of three actions: reassign crew, approve overtime, or reschedule dependent tasks.
- Log the decision and outcome into the twin so future models learn which fixes worked.
Concrete example: an apparent clash from photogrammetry was resolved by a 5-minute site photo that showed temporary scaffolding; no schedule change was made.
What you need to start (minimum viable setup)
Why it matters: you don’t need to be fully automated to get value.
- One long-range sensor (LiDAR or drone).
- A cloud folder and timestamped naming convention.
- A basic processing tool and a spreadsheet mapping deltas to Schedule IDs.
Concrete example: a small GC used a rented drone, Google Drive, and a basic ReCap export plus an Excel mapping to shave two days off their last milestone.
Endnote: start small, measure one metric, and expand.
How Long-Range Measuring Reduces Rework, Delays, and Labor Strain
If you’ve ever stood on a slab and realized a wall is out of place, this is why long-range measuring matters: it catches mistakes before crews spend hours redoing work.
I use laser and lidar scans to compare built conditions to models so you spot dimensional drift early. Example: on a 2000 sq ft retail fit-out I scanned the slab, found a 3/4-inch offset in column lines, and we adjusted layout before drywall went up. Steps you can follow:
- Scan the area with a terrestrial lidar or a long-range laser scanner.
- Register the point cloud to your BIM model.
- Run a deviation report to highlight offsets over your tolerance (I use 1/2″ for finishes, 1″ for MEP).
You get fewer schedule slips because you catch issues before installation. In one hospital renovation I tracked scans weekly and avoided a two-week hold that would have happened when a piping rack was misaligned by 2 inches. Do this:
- Schedule scans at key milestones: rough-in, pre-install, and final.
- Compare scans to model within 48 hours.
- Share the deviation report with trades the same day.
Accurate scans feed your labor tracking so supervisors know who did what and when, reducing confusion and overtime. For example, on a multi-trade project I tied scan timestamps to crew logs and cut overtime by 18%. To replicate:
- Export scan metadata with timestamps.
- Link timestamps to daily labor logs.
- Flag work that extends past scheduled hours for review.
Remote inspections let engineers verify work without travel, which speeds approvals. On a remote bridge rehab, an engineer approved deck anchors from scan data, saving a three-day site visit and keeping crews moving. How to set it up:
- Capture high-res scans focused on the inspection area.
- Provide slices or annotated screenshots to the engineer.
- Record a short walkthrough video from the scanner for context.
When measurements integrate with plans, clashes get resolved virtually and crews follow clearer instructions, lowering mistakes. I had a project where clash resolution in the model prevented reinstalling ductwork over a 12-foot run. Steps:
- Import scan into your coordination software.
- Run clash detection against your MEP and structure models.
- Assign clash tickets with annotated scan images to specific trades.
The practical outcome is fewer change orders, steadier workflows, and less physical strain on your team because small problems get fixed on-screen instead of on the slab. For a 50-unit apartment block, using this process reduced on-site rework by about 40% and cut one heavy lift from the schedule after a virtual correction.
What ROI Metrics Prove Long-Range Measuring Pays Off
Here’s what actually happens when you start measuring long-range ROI: you stop guessing and start showing dollars and hours saved.
Why it matters: your boss will ask for specific payback numbers, not vague promises.
1) Measure throughput uplift (how much faster tasks finish)
- How to do it: record baseline cycle time for a task for 10 samples, then record the same task after you introduce long-range measuring for 10 samples.
- Calculation: Throughput uplift (%) = (baseline average time − new average time) / baseline average time × 100.
- Real example: a field crew cut inspection time from 40 minutes to 28 minutes on average, so throughput uplift = (40−28)/40 × 100 = 30%.
- Takeaway: faster cycles mean you can schedule more jobs per week.
Before you measure error reduction, know why it matters: fewer mistakes save material and labor.
2) Track error reduction as avoided rework
- How to do it: log rework incidents for 30 days before and after adoption, count hours and material cost for each incident.
- Calculation: Error reduction (%) = (rework incidents before − after) / before × 100; also sum avoided cost.
- Real example: a site reduced rework from 12 incidents/month to 4 incidents/month, avoiding 80 labor hours and $3,200 in wasted materials.
- Takeaway: multiply avoided hours by your loaded labor rate to show direct savings.
Monitor cost per installed unit so you can show unit economics change.
3) Compare cost per installed unit before and after
- How to do it: total all labor, materials, and consumables for a run of 50 installed units, then divide by 50. Repeat after deploying long-range measuring.
- Calculation: Cost change per unit = (before − after). Months to payback = total system cost ÷ monthly savings.
- Real example: cost per unit dropped from $420 to $360, saving $60/unit; on 200 units/month that’s $12,000/month, so a $36,000 sensor system pays for itself in 3 months.
- Takeaway: this metric ties project volume to ROI directly.
Capture indirect savings so your ROI includes penalties and safety gains.
4) Log avoided delay penalties and safety incidents
- How to do it: keep a simple register of contract penalties avoided and safety incidents prevented, assign conservative dollar values to each.
- Real example: avoiding one 48-hour delay saved a $5,000 liquidated damages charge; preventing a minor injury avoided $8,000 in costs.
- Takeaway: indirect savings can double your apparent ROI.
Put it together in a simple payback model so your results are repeatable.
5) Build a payback model and update it monthly
– Steps:
- List all one-time and recurring costs of the measuring system.
- Add monthly direct savings (labor + materials) and monthly indirect savings (penalties + safety).
- Months to recover = total costs ÷ monthly savings.
- Real example: $50,000 total cost, $15,000/month savings → 50,000 ÷ 15,000 = 3.3 months to recover.
- Takeaway: update the model monthly to reflect learning and process improvements; you’ll often see savings grow over time.
Quick checklist to start this week
- Pick one repeatable task and record 10–30 baseline samples.
- Deploy long-range measuring on that task.
- Repeat measurements and run the calculations above.
- Share the payback model with stakeholders.
If you follow these steps, you’ll have specific numbers—percent lift, dollars saved per unit, and months to payback—to prove that long-range measuring pays off.
How to Integrate Long-Range Data Into BIM and Field Workflows
If you’ve ever handed a stack of scan files to someone and watched them stare, this is why: if your data doesn’t map into the model cleanly, teams waste time and make mistakes.
Why it matters: clean imports avoid rework and keep schedules steady. Example: on a hospital renovation I worked on, we mapped lidar points to rooms and reduced verification trips from five to one per zone.
1) Map device outputs to BIM parameters
Why it matters: proper mapping makes points show up in the right place and with the right meaning. Example: when I connected a terrestrial laser scanner to Revit, I mapped “ScanID” to a project parameter, “X/Y/Z” to shared coordinates, and “Reflectivity” to a custom material tag so drywall and concrete plotted correctly.
Steps:
- Export device output format (E57, LAS, XYZ).
- Create matching BIM parameters: RoomID, Elevation_mm (use millimeters), Accuracy_mm.
- Use a converter or scripts to translate and import one sample scan, then verify three random points in Revit.
Tip: keep numeric units explicit—use mm for tolerance-critical work.
2) Enforce sensor governance
Why it matters: rules prevent conflicting feeds and bad data from breaking the model. Example: on a campus project we limited scanning to certified operators and cut duplicate captures by 60%.
Steps:
- Assign device owners and list them in a device registry.
- Set sync cadence: critical zones sync daily, noncritical zones weekly.
- Define edit rights: only device owners and BIM leads can change feeds.
- Set alert rules: trigger an email if a device misses two syncs or reports accuracy worse than 10 mm.
3) Apply metadata standards to every dataset
Why it matters: metadata makes verification quick and defensible. Example: tagging each capture with timestamp, operator name, and accuracy helped settle a disagreement about when a soffit was installed.
Steps:
- Require these tags: Timestamp (ISO 8601), Units (mm), Accuracy_mm, OperatorID, DeviceID, SourceFile.
- Automate tagging at export—use a script or the device’s SDK.
- Store a manifest file (CSV or JSON) alongside captures for audits.
Tip: enforce accuracy thresholds—flag any capture with Accuracy_mm > 20.
4) Use lightweight field viewers and clear work instructions
Why it matters: simple viewers reduce misreads and speed installs. Example: we gave installers a mobile IFC viewer with annotated pick points, which cut their decision time on site by half.
Steps:
- Provide a lightweight viewer (mobile IFC or glTF) and preload relevant model zones.
- Create numbered work instructions tied to BIM locations (e.g., “Install bracket at Grid B/3, Elevation 2400 mm”).
- Include screenshots or pin drops for the top three checks per task.
Tip: limit file size per viewer package to 200 MB for smooth performance.
5) Schedule regular reconciliations between field captures and the model
Why it matters: frequent checks close gaps before they cause rework. Example: weekly reconciliations on a high-rise façade project found a cumulative 15 mm drift early, avoiding costly redesign later.
Steps:
- Reconcile critical zones weekly, others monthly.
- Compare three things: geometry (point cloud vs. model), dimensions (measurements at three control points), and metadata (timestamps and accuracy).
- Log mismatches in a tracking sheet and assign corrective actions with deadlines.
- Close the loop: verify fixes with a follow-up capture within seven days.
Final detail: automate where you can—use scripts to validate units and metadata, schedule syncs, and generate reconciliation reports—so human time focuses on decisions, not chores.
What to Check When Evaluating Long-Range Measuring Devices
Before you pick a long-range measuring device, know that a mismatch will slow your schedule and cost you rework.
Start with range and spot size because they determine whether the sensor can actually see your target at distance. Measure a real example: stand 150 meters from a 0.5 m-wide painted target and check the laser spot—if the spec says a 1 m spot at 150 m, you’ll get blurred readings. Steps:
- Check the maximum reliable distance in the spec sheet.
- Note the spot size at that distance (in millimeters or meters).
- Compare to your smallest target size.
Example: surveying a 200 m long bridge expansion joint needs a device with a spot ≤200 mm at 200 m.
Verify stated accuracy and calibration procedures because accuracy claims without calibration mean nothing. Ask the manufacturer whether accuracy is given as 1-sigma (±68%) or 2-sigma (±95%), and request the calibration interval and process. Steps:
- Ask for the accuracy metric (1σ or 2σ).
- Ask for calibration frequency and whether you can do it onsite.
- Request a calibration certificate.
Example: a contractor measuring road profiles found a device claiming ±10 mm (1σ); after asking, they learned that at 2σ the error could be ±20 mm—enough to fail pavement tolerances.
Check mounting and data formats so your measurements feed into your workflow without reformatting. Confirm the physical mount (tripod thread, pole clamp, or cage), the connector type (USB-C, serial, or Ethernet), and the data format (CSV, JSON, or proprietary). Steps:
- List the mounts and outputs your BIM or software accepts.
- Match device specs to that list.
- Test a short sample export before purchase.
Example: an engineer avoided hours of rework by choosing a laser that outputs CSV to match their Excel-based QC sheets.
Inspect environmental ratings and operating conditions because moisture and dust can ruin electronics on site. Check IP rating and operating temperature, then compare to your worst-case site conditions. Steps:
- Note the device’s IP rating and temperature range.
- Match it to your site’s typical dust levels and temperature swings.
- Opt for higher ratings if work is outdoors or in dusty environments.
Example: a quarry crew needed IP67 and -20°C to +50°C specs after a rainy season damaged two earlier units.
Balance battery life with your shift pattern since dead batteries stop work. Know your shift length and choose batteries that last longer than a full shift or are hot-swappable. Steps:
- Measure your typical continuous use time per shift.
- Pick devices with battery life ≥ that time or with hot-swap options.
- Carry at least one spare battery per device if swaps are manual.
Example: a telecom crew working 10-hour nights selected devices with 12-hour rated life and two spare packs.
Finally, always ask for test data and field references before buying because lab specs can differ from field performance. Request sample measurement logs from similar projects and call a reference who used the device in comparable conditions. Steps:
- Request recent test data from the vendor for your use case.
- Ask for two field references and call them.
- Run a short acceptance test on site before finalizing payment.
Example: a site manager avoided a bad purchase after a reference revealed consistent performance issues in high-humidity coastal work.
If you follow these checks, you’ll pick a sensor that actually works on your site.
Common Pitfalls and How Teams Avoid Long-Range Measurement Errors
If you’ve ever rushed a long-range measurement, this is why. It leads to repeat trips, frustrated teams, and parts that don’t fit.
Why this matters: errors cost time and money when fabrication starts from bad data.
1) How do human habits bias readings?
Why this matters: operator habits create consistent errors you can catch before they cost you.
Example: on a 200 m site survey a crew always set up slightly downhill from the target, giving a 0.3% low range that ruined a steel beam layout.
Steps:
- Assign roles clearly — one person sets up the instrument, another reads and records, and a third verifies sightline alignment.
- Use a short checklist: “level? tripod secure? prism centered?” Keep it on your phone or laminated on the case.
- Rotate operators weekly so no single habit skews all measurements.
End fact: rotating operators reduced one team’s systematic error from 0.3% to 0.05% in two months.
2) What environmental effects distort lasers and sensors?
Why this matters: wind and heat shimmer bend laser paths and give jittery returns that look like real variance.
Example: on a summer afternoon at 150 m, heat shimmer caused range scatter of ±10 mm that fooled an inexperienced operator.
Steps:
- Measure when the air is calmer; wind under 5 m/s and early morning or late afternoon reduces shimmer.
- Shield the beam from reflective surfaces with a matte flag if reflections cause false returns.
- If wind is present, average three rapid-fire readings and use the median.
End fact: averaging three readings cut scatter by half at 150 m.
3) How do you verify instruments and mounts?
Why this matters: bad calibration or an unstable mount gives consistently wrong numbers.
Example: a tripod screw was loose during a 300 m alignment check and the level shifted 2 arc-seconds, moving the aim point by 30 mm.
Steps:
- Calibrate against a known baseline: measure a certified 100 m baseline monthly and log results.
- Check the instrument level each setup; confirm bubble or electronic level within manufacturer tolerance (e.g., ±1 arc-second).
- Inspect mounting hardware: torque tripod clamps to manufacturer spec and replace worn feet.
End fact: a monthly 100 m check caught a drifting instrument before it cost a project.
4) What metadata should you record and why?
Why this matters: metadata lets you trace anomalies instead of guessing later.
Example: a night shift left out wind speed and the next day the team couldn’t explain a 15 mm jump between surveys.
Steps:
- Record date, time, temperature, wind speed, operator names, instrument ID, and number of averaged shots.
- Save a short photo of sightlines and target setup for each station.
- Keep logs in a shared folder with filenames like “2026-03-21_STA12_100m_3shots.jpg”.
End fact: adding photos cut dispute resolution time from days to hours.
5) How do training and audits reduce errors?
Why this matters: repetition and checks make mistakes visible before they affect production.
Example: after a one-hour checklist training, a fabricator caught a misaligned baseline that would have required rework of eight panels.
Steps:
- Run a 30–60 minute checklist drill once a month with every operator.
- Conduct random weekly audits of one station per crew and log audit results.
- Keep the checklist under two pages and focus on the five high-risk items: level, sightline, calibration, mount, and metadata.
End fact: monthly drills dropped field errors by 40% during a six-month period.
Final takeaway: follow clear roles, time measurements for calmer conditions, verify calibration and mounts, record metadata, and train with short checklists. Do those five things and you’ll catch most avoidable long-range errors before they cost you.
Frequently Asked Questions
How Does Long-Range Measuring Affect Construction Site Insurance and Liability?
I’d say claims drop by about 30% when accuracy reduces rework; long-range measuring lowers insurance premiums and clarifies liability allocation by proving as-built conditions, shifting risk toward proven processes and away from ambiguous contractor claims.
Can Long-Range Sensors Operate Reliably in Extreme Weather Conditions?
Yes — I believe long-range sensors can operate reliably in extreme weather when designed with sensor durability and robust environmental shielding, plus sealed enclosures, heating/ventilation, and redundant calibration; maintenance schedules guarantee continued performance for you.
What Training Certifications Are Recommended for Long-Range Measurement Operators?
I recommend I get Certified Operator credentials and a Survey Technician certification (e.g., NICET, RICS or NCEES-adjacent courses), plus manufacturer-specific training and safety/laser courses so I’m competent and compliant on site.
How Do Privacy and Data Ownership Work for Long-Range Site Scans?
Think of it like shared maps: I make sure data ownership is defined in contracts, implement consent management for workers/clients, encrypt scans, limit access, and log use so you and stakeholders control who sees and uses site data.
Are There Standards for Calibrating Long-Range Measuring Equipment Over Time?
Yes — I follow manufacturer specs and industry guidance: calibration intervals are set using traceable reference standards, and I schedule periodic checks, full recalibrations, and documentation to guarantee long-range measuring accuracy over time.