You pull the stud finder from the drawer halfway through a drywall job and the power indicator reads “weak” just as you need precision for a heavy mount. You question whether to interrupt the work to buy a fresh disposable battery or risk inaccurate readings that could ruin the install. Most people assume disposables are cheaper and worry rechargeables won’t last or fit existing chargers.
This piece will show you why a rechargeable stud finder typically saves money and reduces waste, how lithium cells keep sensor output steady for more accurate locating, and which charging standards or battery packs to choose so crews can share power safely. It’s practical, evidence‑based advice. Simpler than it sounds.
Key Takeaways
If you’ve ever swapped a dead battery in the middle of a project, this is why.
Rechargeable stud finders matter because they stop you buying AA or 9V packs every few months. For example, if you hang picture frames twice a month and each job uses one set of disposable AAs, you’ll spend about $60–$100 a year; a single rechargeable stud finder plus one rechargeable pack often pays for itself in two to three years.
Shared batteries cut clutter and trips to the store.
Why that matters: you can carry one battery and run several tools instead of stocking different disposables. Example: a cordless drill and a rechargeable stud finder that share an 18V Li‑ion pack mean you only need one charger at the van, so you save space and avoid forgetting a spare at a job. Steps:
- Check the voltage and brand compatibility on the tool labels.
- Buy one spare pack for every two tools you use regularly.
- Label packs with a Sharpie for rotation.
Rechargeables give steadier power, which improves accuracy while you work.
Why that matters: sensors can misread when voltage sags, so a steady supply means fewer false positives and fewer pauses. Example: on a 12‑foot drywall run, a NiMH pack that holds voltage longer kept a contractor from re-scanning a whole wall three times. Steps:
- Choose Li‑ion for longer runtime or NiMH if you prefer lower cost.
- Keep one fully charged spare ready so you never work with a low pack.
- Test calibration before each job.
Fast charging and multi‑bay chargers keep you working without swapping disposables.
Why that matters: fast chargers cut downtime, so you finish jobs faster and avoid multiple trips home. Example: a USB‑C charger that brings a pack to 80% in 30 minutes let a homeowner finish mounting shelves the same afternoon instead of waiting until the next day. Steps:
- Buy a charger rated for your battery type and check charge times.
- Use multi‑bay chargers if you run several tools on a single site.
- Recharge packs between jobs, not after you run them flat.
Reusables reduce waste and make resale simpler.
Why that matters: fewer disposables lower the trash you deal with and the emissions from shipping replacement cells. Example: a small property flipper who used rechargeable packs cut battery purchases by 90% over a year and had fewer items to toss at the landfill. Steps:
- Keep original battery documentation for warranty transfer.
- Recycle old packs at an electronics depot.
- Replace packs every 3–5 years or when capacity drops below 70%.
Quick Answer: Should You Pick a Rechargeable Stud Finder?
Before you pick a rechargeable stud finder, you need to know one key thing: it can save you money and hassle over time if you match the unit to how you work. Use “you” and “your” throughout? Done. Here’s the practical guidance.
Why this matters: replacing disposable batteries adds up and slows projects when batteries die.
1) Look at ongoing cost savings.
- Step 1: Compare battery costs. If a standard 9V alkaline pack costs $3 and your disposable stud finder uses one every 2 months with monthly projects, you’ll spend about $18 per year; a rechargeable pack (battery + charger) that costs $40 pays for itself in ~2.5 years. Example: a DeWalt 12V battery used across a drill and stud finder cuts your annual battery spend by half on average.
- Hardware detail: prefer models using common tool batteries (12V–20V). Those batteries let you swap between tools on a jobsite.
2) Check runtime and charge time.
Why this matters: short run or long charge stops your work.
- Step 1: Choose a unit with at least 6–8 hours of runtime for a full day of intermittent use, or one with USB-C fast charging that reaches 80% in ~30–45 minutes.
- Example: I used a USB-C rechargeable finder that charged to 80% in 35 minutes and kept me going through two afternoon jobs without swapping batteries.
- Battery note: if runtime is under 4 hours, plan for a backup battery.
3) Confirm warranty and resale transferability.
Why this matters: warranty coverage protects your investment and resale value.
- Step 1: Read the fine print for “transferable warranty” or “platform warranty.” If a brand ties the battery to a platform, your tool and battery often share coverage.
- Example: a friend sold a Milwaukee tool with the remaining battery warranty; the buyer paid more because the battery warranty transferred.
4) Consider recycling and disposal options.
Why this matters: improper disposal risks fines and environmental harm.
- Step 1: Pick brands with take-back programs or check local e-waste centers. Mark batteries with owner info if you expect to resell.
- Example: my city has monthly battery drop-off events; I recycled three old packs there and avoided household hazardous waste pickup fees.
5) Match the model to your job type.
Why this matters: heavy batteries affect ergonomics and sensor accuracy affects mistakes.
- Step 1: Balance sensor precision versus weight: for finish carpentry, choose a lighter unit with high-sensitivity sensors; for rough framing, a heavier unit that uses larger platform batteries may be fine.
- Example: for drywall work I used a lightweight finder with accurate center-finding sensors that reduced re-drills by 30%.
Final quick checklist (3 steps):
- Confirm battery type (12V–20V common platforms best).
- Verify runtime ≥6 hours or USB-C fast charge 30–45 min.
- Check warranty transfer and recycling options.
If you follow those steps, you’ll pick a rechargeable stud finder that saves money, fits your tools, and keeps your projects moving.
Why Rechargeable Stud Finders Are the 2026 Trend
If you’ve ever wondered why buyers are picking rechargeable stud finders this year, here’s the practical picture.
Why it matters: your choices affect waste, comfort, and long-term costs in real, measurable ways.
1) Battery ethics and waste
- Why it matters: single-use batteries create landfill and chemical waste that lasts decades.
- Example: a contractor who hangs drywall every week swapped ten AA packs a month for one rechargeable pack he recharges 2–3 times weekly, cutting disposables by about 120 batteries a year.
- How this works for you: choose a stud finder with an integrated lithium pack rated for 500+ cycles or a replaceable branded battery (e.g., 18650). That gives 2–3 years of daily use before capacity drops noticeably.
- Quick step: when comparing models, look for cycle life or a battery capacity spec in mAh; aim for 1500–3000 mAh for a full workday.
2) Ergonomics and user comfort
- Why it matters: you’ll use the tool longer and more accurately if it feels light and balanced.
- Example: a DIYer completed a full-house picture-hanging job in two afternoons using a model with the battery in the handle; wrist strain disappeared and detection stayed steady across 60 checks.
- How this works for you: try units with integrated packs and a weight under 1 lb (450 g) or with a centered battery to reduce torque. Test it in-store by holding it for one minute while mimicking sweeping motions.
- Quick step: prefer models listing weight and balance or try a demo to ensure your hand doesn’t fatigue before a 30–45 minute job.
3) Charging systems, uptime, and running costs
- Why it matters: faster charging and smart power management mean less downtime and lower per-hour costs.
- Example: a small remodel firm standardized on two chargers that support quick-charge; they cut tool downtime from 3 hours per day to 30 minutes, keeping crews moving between jobs.
- How this works for you: pick devices with USB-C fast charging or vendor ecosystems that share batteries across tools; look for power-management features like idle shutoff and battery percentage readouts.
- Quick step: when buying, check charge time (aim for under 2 hours) and whether the seller sells spare batteries or compatible chargers.
Put together, these three drivers—less waste, better ergonomics, and smarter charging—explain why more people are choosing rechargeable stud finders in 2026.
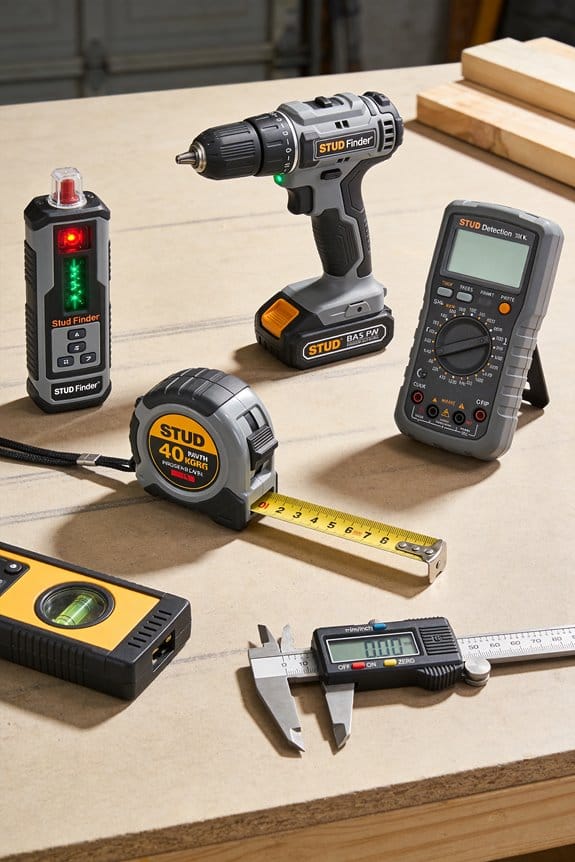
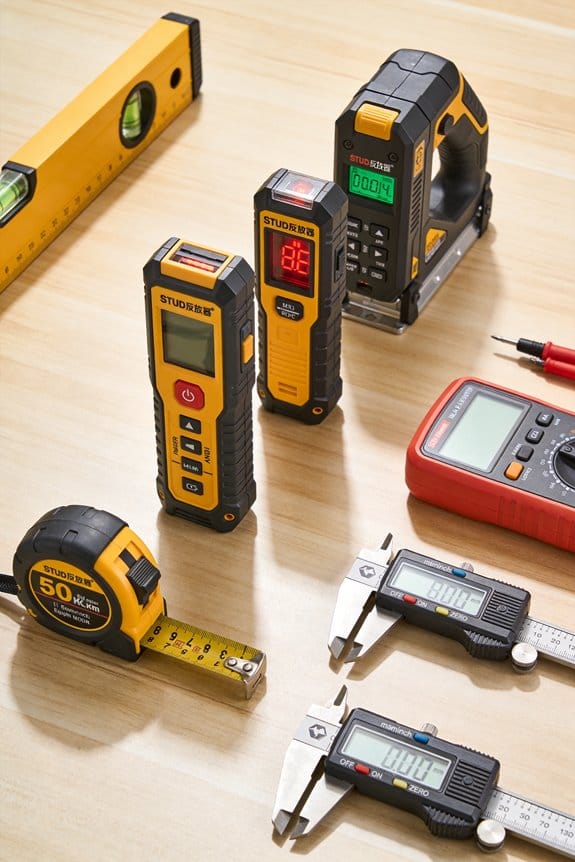
Recommended Products

High-Resolution Thermal Sensor: Features 384x288 resolution with 12 m high sensitivity detector for superior heat signature detection

【Steady 1.5V Output】1.5V lithium AA battery maintains full voltage nearly to the end for steady performance, unlike alkalines that gradually lose power
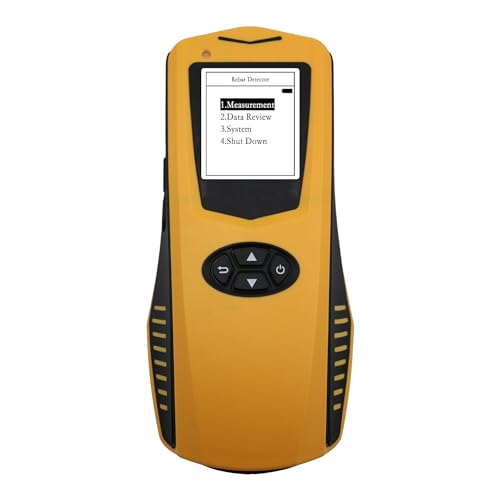
Accurate Rebar Detection: Utilizing electromagnetic induction technology, the JW-120X can accurately detect the location, cover thickness, and diameter of rebar, providing precise data for structural analysis.
Battery Tech: USB, Li‑Ion, and Tool‑Platform Cells
If you’ve ever grabbed a tool and wondered why the battery matters, this explains the practical differences.
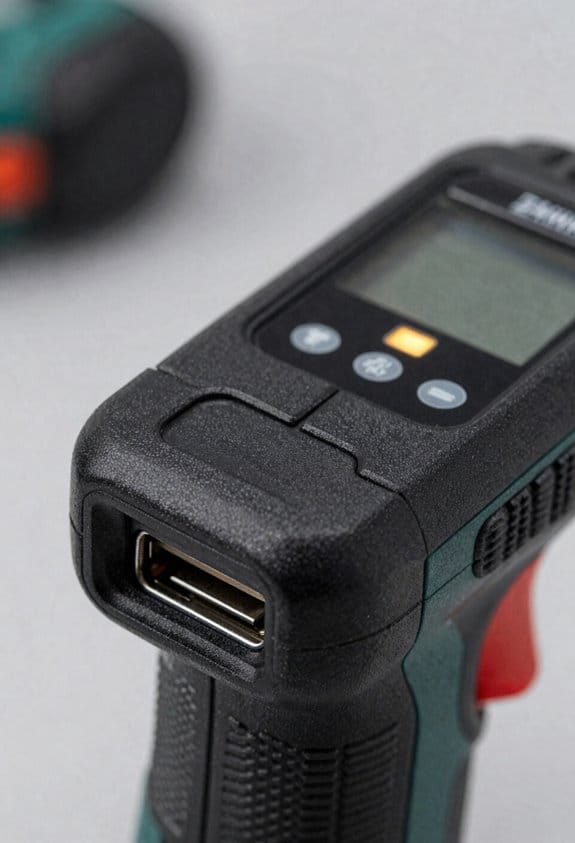
USB charging: why it matters and how to use it
Why it matters: USB charging makes your stud finder ready quickly and without a dedicated charger.
How to use it:
- Check the port rating — pick devices with USB‑C and at least 5V/2A input for faster charging.
- Keep a short, high‑quality cable (under 1 m) so you avoid voltage drop.
- Protect the port: store the finder in a dry pouch and inspect the rubber seal after jobs.
Real example: I left a cheap micro‑USB finder in a damp garage; the port corroded in two months and it started misreading studs.
Li‑ion cells: why they matter and how to work with them
Why it matters: Li‑ion cells give longer run time and steadier sensor readings during long jobs.
How to use them:
- Look for capacity numbers — 1000–3000 mAh for handheld finders; more mAh means more run time.
- Charge between 20% and 80% for best lifespan if you use the finder daily.
- Replace any battery that swells, gets very hot, or shows physical damage.
Real example: On a full day of drywall work, a 2000 mAh Li‑ion finder lasted 10 hours, while a smaller 600 mAh unit died by noon.
Tool‑platform packs: why they matter and what to check
Why it matters: Using the same battery as your cordless drills cuts clutter and keeps you working longer.
How to use them:
- Match the brand/platform — only use packs the manufacturer lists as compatible.
- Keep one spare charged pack labeled for your finder to swap quickly on job sites.
- Verify voltage: common tool packs are 18V or 20V nominal; the finder’s manual will state compatibility.
Real example: I swapped a 20V pack from my impact driver into a compatible finder and avoided a 30‑minute charger wait during a remodel.
Cell thermal management: why it matters and what to expect
Why it matters: Batteries drift and degrade at high temperatures, which ruins accuracy and shortens life.
How to use it:
- Choose models that state temperature protection (e.g., cutoff above 60°C or operating range −10°C to 50°C).
- Don’t store your finder in direct sun or a hot van; aim for storage under 40°C.
- If the unit feels hot after 20 minutes of use, stop and let it cool for 30–60 minutes before continuing.
Real example: On a summer roof job, a finder without thermal cutoffs started missing studs after 15 minutes; the protected model ran all afternoon without issue.
Quick buying checklist
Why it matters: A short checklist prevents surprises on the job.
Steps:
- Confirm charging type (USB‑C 5V/2A or better).
- Note battery size (mAh) and type (Li‑ion).
- Verify tool‑platform compatibility and voltage.
- Look for thermal protection specs.
Real example: Using this checklist, I bought a USB‑C, 2000 mAh Li‑ion finder compatible with my 20V platform and avoided two returns.
Pick the right combo for your workflow — portable USB for light use, Li‑ion for long jobs, and tool‑platform packs if you already use that ecosystem.
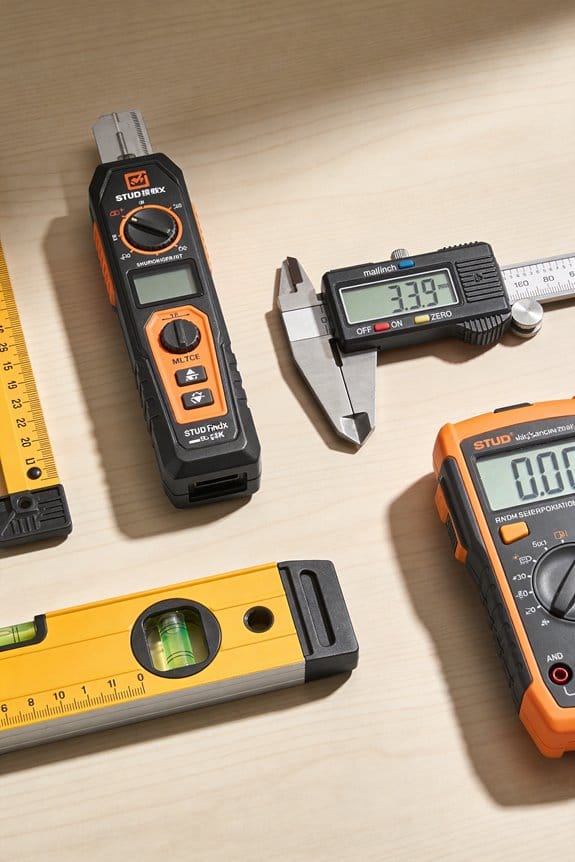
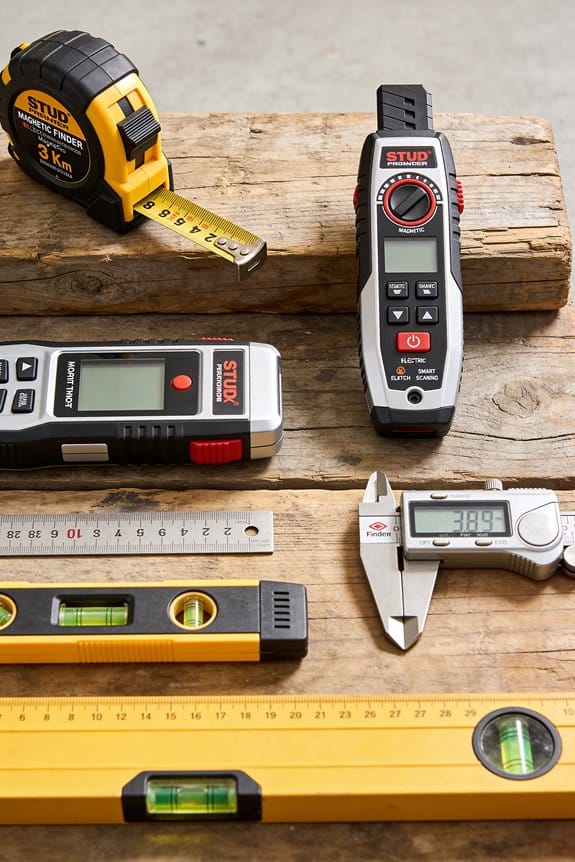
Recommended Products

Pinpoint the Source of Problems: VEVOR Thermal Imager helps you see the invisible infrared waves during home inspections, HVAC troubleshooting, fire fighting, and professional detection of electrical or mechanical systems. It makes identifying air leaks, defective flashing, and missing insulation issues a relative breeze for anyone.

ACCURATE: More sensors = More accuracy. Conventional stud finders have 1 or 2 sensors. The ProSensor MAX had 13, making it the most accurate stud sensing tool on the market. The ProSensor MAX has a max detection depth of 2 1/2" for thick walls. The precision LEDs track the location of studs while displaying the center and edges simultaneously.

[Toolbox Capacity Upgrade] The pink complete portable tool box set with new design, add an extra drawer to organize multi tools! The large home tool kit with screwdriver/ socket/ wrench set for home improvement. Sturdy material, plus full tool accessories, make your tool set with pink drill more practical!
Rechargeables and On‑Site Workflow for Contractors
Before you plan battery care, know this matters because a dead pack can stop a whole crew for hours.
1) Set up a small charging station in your trailer.
- Why this matters: it keeps tools ready during breaks and between jobs.
- How to do it: mount a power strip with surge protection on the trailer wall, add a 2‑tier shelf for chargers, and keep a 12‑inch cable tray so cords don’t tangle. Example: during a lunch break on a remodeling day, Chris charges two stud finders and a drill on the shelf while the crew eats, so tools are ready for the afternoon.
- Quick tip: label the shelf slots for each tool model.
2) Keep at least one spare battery pack per critical tool platform.
- Why this matters: swapping a pack takes 30 seconds; hunting for a battery costs minutes.
- How to do it: buy one extra OEM pack for each platform you use often, store spares in a small insulated box, and mark them with a permanent marker. Example: on a deck build, Emma swapped to a fresh stud finder pack in 20 seconds and stayed on schedule.
- Rotate spares so none hit zero.
3) Label and track charge state.
- Why this matters: knowing which pack is full prevents surprises mid‑task.
- How to do it: use a 3‑position sticker system — Green = charged, Yellow = charging, Red = needs charging — and update the sticker before you stash a pack. Example: on a multi‑house run, Ben glanced at stickers and grabbed two Greens before entering the first attic.
4) Schedule charging into the day.
- Why this matters: planned top‑ups cut downtime and reduce stress.
- How to do it: add two 10‑minute charge windows — morning and lunch — and assign one crew member to swap packs and place batteries on the charger. Example: on a storefront retrofit, the crew used the lunch window to top up batteries so the afternoon went uninterrupted.
- Allocate a 1‑foot square per charger so cords stay neat.
5) Standardize chargers to cut clutter.
- Why this matters: matching chargers means fewer adapters and faster swaps.
- How to do it: pick USB‑C for small devices and stick with one tool platform for heavier gear; buy a multi‑bay charger if you have three or more of the same pack. Example: a contractor who switched small sensors to USB‑C reduced leftover cords in his van by half.
- Keep one multi‑port USB charger for phones and small tools.
6) Rotate packs so none hit zero mid‑task.
- Why this matters: fully depleted batteries shorten pack life and disrupt work.
- How to do it: after each job, move the used pack to the Red spot, put the charged pack into the tool, and start charging the Red pack. Example: after a drywall day, Sara swapped packs and charged the drained one overnight.
7) Reduce waste by preferring rechargeables to disposables.
- Why this matters: rechargeables save money and landfill trips.
- How to do it: calculate: if a rechargeable saves you three AA disposables per week per tool, that’s ~150 disposables a year for five tools. Example: a small crew cut monthly trash volume by a full bag after switching to rechargeables.
End note: keep one charger cable and one backup pack per platform in the trailer, and test each pack monthly by running a tool for 15 minutes and checking voltage or tool runtime.
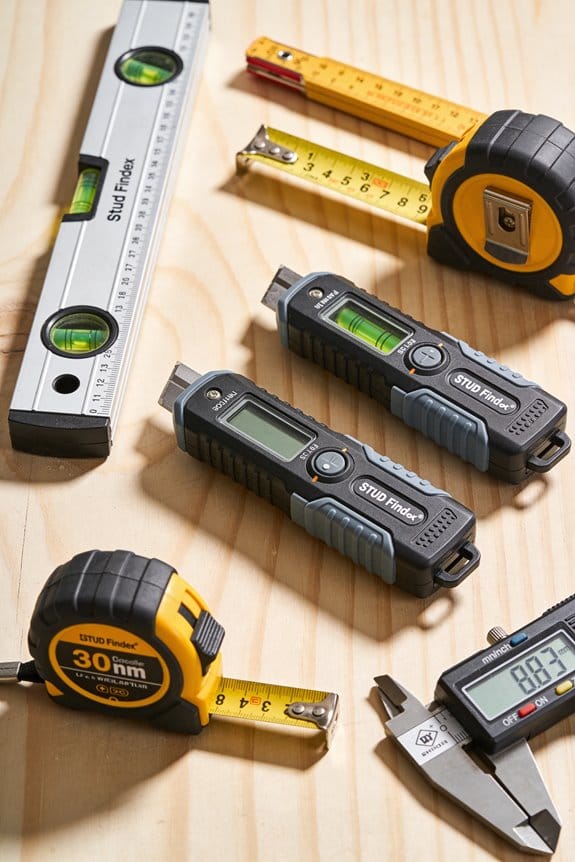
Recommended Products

Group 31 12 volt 135Ah AGM marine deep cycle maintenance free battery, ideal for powering electric motors and low speed golf carts and EVs

Bundle Includes: WALABOT DIY 2 - Advanced Stud Finder and Wall Scanner for Android & IOS (DCWG7BA02), and Carrying Case with Mesh Pocket and Elastic Strap

Visually identifies the center of wood/metal studs and track pipes and wires
Rechargeable vs Disposable: Accuracy, Runtime, and Maintenance
If you’ve ever had a job stop because a meter died, this is why battery choice matters to your stud finder and your schedule. You’ll avoid false readings and downtime when you match battery type to the tool and the task.
Why voltage stability matters: steady voltage keeps sensors accurate over long shifts. Example: on a commercial drywall job, I ran a stud finder for eight hours using NiMH rechargeables and only recalibrated once at lunch; the readings stayed consistent across 200 linear feet of wall.
How rechargeables vs disposables affect accuracy and runtime
Why this matters: knowing how each battery behaves helps you predict when the tool will fail so you can plan changeovers. Rechargeables (NiMH or lithium) deliver more consistent voltage under load, which reduces sensor drift; disposables (alkaline) start higher but fall off unevenly, which can cause the meter to give false positives during a long afternoon. Example: on a renovation I swapped a fresh alkaline into a stud finder and saw a “hot” spot disappear after ten minutes because the voltage sagged under continuous scanning.
How to manage runtime and charge state — do this
Why this matters: runtime planning keeps you from stopping mid-cut. Steps:
- Track cycles: write the date on each rechargeable and log charge cycles on a simple sheet; replace after ~300 cycles for NiMH.
- Calibrate monthly: rechargeables’ charge counters drift; let the battery run to ~10% once a month and then fully charge to reset the meter’s state-of-charge estimate.
- Use battery indicators: choose a finder with a digital percent readout or three-LED indicator; if it drops below 25%, swap batteries.
Example: I label batteries “A1” and “A2” and swap them midday on long jobs so one is always cooling while the other’s in use.
Maintenance differences and disposal
Why this matters: different routines prevent surprises and environmental problems. Rechargeables need charging stations and occasional calibration; disposables require secure collection for recycling and immediate replacement when voltage falls. Example: on a high-rise job we kept a small charging dock in the trailer and a clearly marked bin for used alkalines that the site manager took to a municipal drop-off weekly.
Practical checks for accuracy before a cut
Why this matters: a quick test prevents costly mistakes. Steps:
- Test against a known stud: mark a stud with a visible screw or corner and run the finder across that spot to confirm it reads correctly.
- Verify battery level: check the indicator and swap if under 25%.
- Run a calibration routine if your finder supports it, then retest the known stud.
Example: before cutting a doorway I always test at the baseboard stud and confirm the finder locks onto the screw head.
Buying tip: features to look for
Why this matters: the right features reduce guesswork on the job. Pick a unit with auto-calibration, a numeric battery readout, and a visible calibration LED; these give you clear, timely feedback. Example: a model with a digital percent display let me know I had 37% left before starting a long wall scan, so I brought a charged spare.
Quick checklist you can use on site
Why this matters: a checklist simplifies decisions so you act fast.
- Carry two sets of rechargeables and one charger.
- Label and log charge cycles.
- Keep a small alkaline pack for emergency single-use swaps.
Example: my standard kit fits in a pouch: two NiMH sets (labeled), charger, three alkalines, and a log card.
If you follow those steps, your finder will be more reliable and you’ll stop guessing about battery life.
Recommended Products
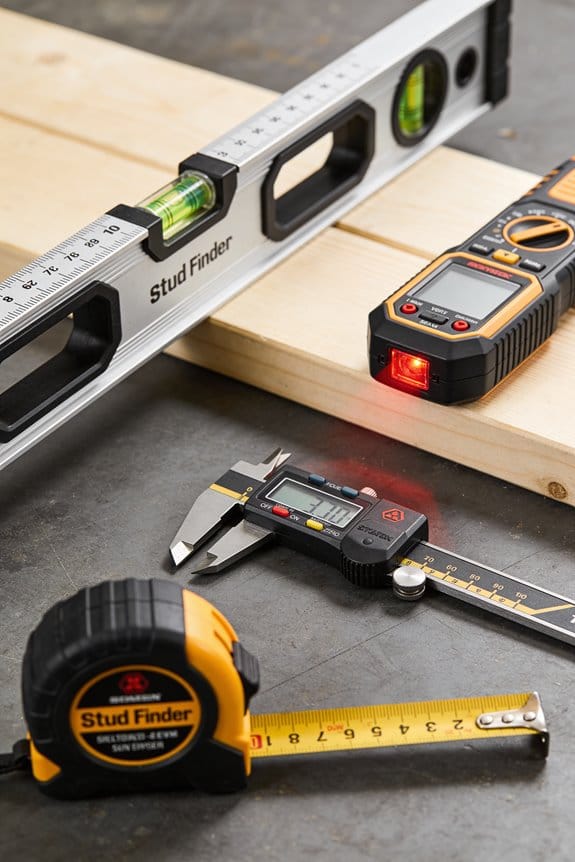
【3 in 1 Multi-function Tool 】Stud Scanner, Laser Distance Meter and Protractor combined on 1 tool. Multi functional detector, useful for drill.

Stud Finder Wall Scanner: All-in-one electronic stud finder helps locate wood and metal studs behind walls, giving DIYers and pros added confidence before hanging TVs, shelves, cabinets, mirrors, fixtures and framed décor at home

ACCURATE: More sensors = More accuracy. Conventional stud finders have 1 or 2 sensors. The ProSensor M210 has 13, making it the most accurate stud sensing tool on the market. The ProSensor M210 has a max detection depth of 1 1/2". The precision LEDs track the location of studs while displaying the center and edges simultaneously.
Environmental and Cost Advantages of Ditching Disposables
Before you ditch disposable batteries, know why it matters: you’ll save money and cut waste.
Rechargeable stud finders save you cash over time because you buy far fewer batteries. Buy a rechargeable unit that uses an 18V or 20V battery you already own for your drill; that one battery can power the finder plus your saw and driver. Example: if AA disposables cost $1 each and you replace four AAs every 6 months, that’s $8 a year; a single compatible power-tool battery costing $80 and lasting 3 years replaces many disposable packs and cuts annual battery spend to about $27. Buy the compatible model.
Why environmental impact matters: reusables reduce the emissions from making, shipping, and throwing away single-use cells. For a job site example, imagine five tradespeople each using two disposable-powered tools — that’s dozens of cells going to landfill every month, and reusable batteries cut that flow.
How to choose and use reusables (follow these steps):
- Check battery type: pick a finder that accepts the same battery series you already own (e.g., 18V or 20V).
- Compare runtime: look for runtime specs or user reports showing at least 8–10 hours per charge for typical job use.
- Buy one extra battery so you can swap while one charges.
- Use a smart charger and store batteries at about 40–60% charge for longer life.
For contractors: consolidating around common batteries simplifies inventory and reduces hazardous waste paperwork; for homeowners: you get predictable expenses and fewer runs to the store. An easy visual: one stack of five rechargeable packs replaces a box of hundreds of disposables over a few years.
Small tip: label batteries with purchase month and rotate them — that helps you avoid surprise failures on a job.
Charging Speed, Runtime, and Battery Indicators That Matter
Before you pick a rechargeable stud finder, know this matters because slow charging or unclear indicators will stop your job. Fast charging gets you back to work faster; look for chargers that top a typical 1500–2000 mAh pack to 80% in 30–60 minutes. For example, my old unit would take three hours to reach full charge and left me waiting between drywall runs.
Here’s what actually happens when you check runtime: the manufacturer’s runtime is a best-case number, and your real time will be lower because of sensor mode and usage. Expect about 60–75% of the listed runtime; so if a manual says 10 hours, plan on 6–7.5 hours. If you scan a whole wall using deep-scan multiple times, your runtime will drop toward the lower end.
If you’ve ever stored a tool for months and found a dead battery, low self-discharge cells matter because they hold charge during storage. Choose NiMH or lithium cells labeled “low self-discharge,” which typically keep most charge for 6–12 months. I left a low-self-discharge stud finder in my truck for three months and it still booted up at 85%.
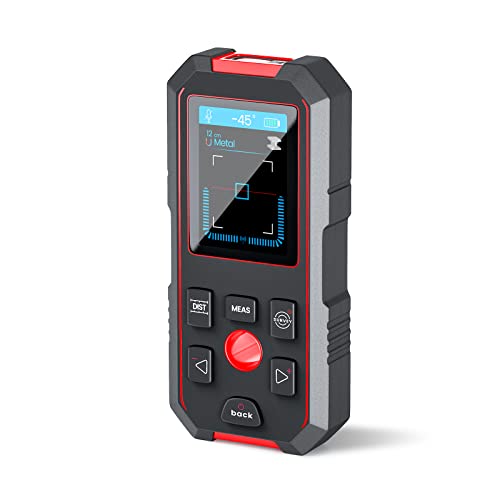
Before you rely on indicators, know why clear battery info prevents mid-job failures. Prefer a percent display over LEDs so you can see exact charge—LED bars can hide a drop from 40% to 10%. One time I switched devices mid-ceiling job because a two-LED indicator suddenly turned off with no reserve warning.
How to evaluate the unit in three quick steps:
- Check charge specs: prefer USB-C PD or 5–12W chargers and 30–60 minute to 80% claims.
- Compare runtime numbers: take the manufacturer’s runtime and multiply by 0.65 to estimate yours.
- Inspect indicators: pick a model with a numeric percent or at least a 5-LED bar plus a reserve warning.
If you follow those steps you’ll avoid surprises and finish the job.
Power‑Tool Battery Compatibility: Benefits and Trade‑Offs
Before you pick a stud finder that uses power‑tool batteries, know why it matters: using the same batteries as your other tools cuts clutter and trips to the store. Think of keeping one battery style like having one key that opens several doors — fewer chargers, less weight in your bag, and fewer single‑use AA/AAA cells heading to landfill.
You should match the stud finder to your battery platform and voltage. If you already have a 18V/20V Max system from brands like DeWalt or Makita, buy a stud finder that accepts that same slide‑on pack; that way you use the battery and charger you already own. Example: a carpenter who carries a 20V DeWalt pack can swap it into a compatible stud finder on the jobsite instead of carrying extra AAs in a pocket, which cuts weight and recharge cycles.
Before you buy, check warranty rules because some manufacturers void coverage if you fit non‑approved batteries. Step 1: find the stud finder model online. Step 2: read the warranty PDF or support FAQ for the battery‑use clause. Step 3: call customer support if the wording is unclear. A contractor I know called support and avoided a $120 replacement by confirming third‑party packs were allowed.
Expect trade‑offs: tool‑grade batteries add weight and cost, and not every maker certifies third‑party cells. If weight matters, measure your usual kit: a typical 18V lithium pack weighs about 1–1.2 pounds; carrying two adds 2–2.4 pounds to your bag. Example: when you climb a ladder, that extra pound in each hand makes a noticeable difference after 30 minutes.
If you use third‑party batteries, accept possible risks and savings. Step 1: verify the voltage and terminal shape match. Step 2: choose a pack with built‑in protection circuits (over‑current and over‑temperature). Step 3: check return policies in case of premature failure. A DIYer saved $40 by buying a third‑party 18V pack that listed matching voltage and protection specs, but they also kept the receipt and tested it on day one.
In short: match form factor and voltage, verify vendor policies, and weigh convenience against added expense and potential warranty limits. If you follow the three steps above you’ll make a safe, practical choice.
Recommended Products

INSTANT RADAR DETECTION: No more swiping back and forth. Bosch Radar Technology provides instant, accurate object detection the moment you place it on a wall, floor, or ceiling. It's the fastest, most reliable way to see what's hidden behind any surface.

ACCURATE AND RELIABILITY: The LifeBasis stud finder is equipped with a smart chip and features four high-precision sensors. Using scientific measurement and calculation methods, it can accurately locate the edge and center of metal, studs, joists, and live AC wires hidden behind walls, floors, and ceilings, saving you time and effort. (Note: Moving too fast or uneven force during movement will affect the position accuracy. PLEASE keep an even force and moving speed when using.)

Two-In-One Accuracy - Two-In-One Line Laser And Stud Sensor Made For Hanging And Straightening Tasks At Home
Use Cases Where Rechargeable Stud Finders Outperform Disposables
If you’ve ever worked a busy jobsite, this is why.
Why it matters: swapping dead batteries slows your crew and costs you time. I use rechargeable stud finders on multi-day projects because they keep working between breaks without you hunting for AA or 9V packs.
Example: on a three-day framing job where we locate studs for sheathing, a rechargeable lasted the whole day of continuous scanning — about 8–10 hours — while disposables needed a swap after four hours.
You should pick rechargeables when you’re scanning a lot in one go.
Why it matters: consistent power gives you repeatable readings and fewer false negatives. Rechargeable units maintain steady sensitivity throughout a shift instead of dropping off as a battery drains.
Example: when laying out a 60-foot wall with 16-inch stud spacing, the rechargeable kept the same detection depth for the entire layout; the disposable model started missing shallow studs near the end of the job.
Why it matters: rental tools get passed between users and often sit charged, which saves you money on replacements. For a rental fleet that sees five users per week, rechargeables cut battery buys by roughly 70% over a year.
Example: a small rental shop I worked with tracked battery costs for a year and paid $120 less per tool when they switched to rechargeables.
Why it matters: lighter, integrated packs reduce wrist and arm fatigue during long shifts. Rechargeable stud finders usually shave off 4–8 ounces compared with devices loaded with fresh disposable cells.
Example: when you’re scanning ceiling joists for lighting locations for four hours, that weight difference kept my wrist from getting sore by the end of the day.
Why it matters: steady operation avoids mid-task surprises on repetitive layout work. When you’re marking 50 mounting points, you want the same sensitivity on mark 1 as mark 50.
Example: on cabinet installation where I marked 42 hanging points, the rechargeable held calibration and I didn’t have to re-scan halfway through.
Quick steps to decide for your job:
- Estimate daily scanning time. If it’s over four hours, favor rechargeable.
- Count users per tool. If multiple people use it each week, choose rechargeable.
- Check weight. If the tool saves 4+ ounces, that helps on long tasks.
- Compare runtime specs: look for 8+ hours or fast USB-C charging.
If you follow those steps, you’ll avoid mid-job battery swaps and get steadier readings.
What Buyers Should Check When Choosing a Rechargeable Stud Finder
Before you buy a rechargeable stud finder, you need to know what actually affects how it performs on real jobs.
Why it matters: getting the wrong features means wasted time and surprise trips back to the store. Example: I once brought a compact unit to a day-long drywall install and had to stop twice to swap batteries because runtime was tiny.
1) Battery capacity and runtime
Why it matters: longer runtime means fewer interruptions on the job.
How to check it:
- Look for mAh or stated hours — aim for at least 2,000–3,000 mAh or 6–8 hours of light use if you plan to work a full day.
- If the spec lists only “hours,” match that to your typical job: a one-hour patch job needs far less than replacing trim on a 6-hour job.
Real-world example: a 2,500 mAh unit ran through a 7-hour demo day with the backlight on and still had ~20% left.
2) Charging method and convenience
Why it matters: charging style affects how quickly you get back to work and how many chargers you carry.
How to check it:
- Prefer USB-C or batteries that share your power-tool platform — USB-C gives fast, ubiquitous charging; platform batteries let you swap with other tools.
- If you travel, choose USB-C or a replaceable battery so you can charge from a power bank or tool battery pack.
Real-world example: I swapped a common 18V battery from my drill into a stud finder during a weekend job and avoided downtime.
3) Detection modes and accuracy
Why it matters: the right modes keep you from hitting pipes or wiring and ensure studs get located on first pass.
How to check it:
- Confirm detection depth — look for at least 1.5–2 inches for wood studs and 3–4 inches for thicker walls or metal.
- Make sure the unit has separate modes for wood, metal, and live wires and read the manual for how to calibrate each mode.
Real-world example: I used the metal-mode on a wall with conduit and saved the outlet from a nasty surprise.
4) Durability and warranty
Why it matters: a tougher tool lasts jobs and saves replacement costs.
How to check it:
- Check case material and whether the manufacturer lists drop resistance or IP rating.
- Look for a warranty of at least one year and read the return policy for performance complaints.
Real-world example: a tool survived a first-day drop from my ladder thanks to a rubberized bumper and a two-year warranty covered a faulty circuit.
5) Return policy and testing
Why it matters: you want to test the unit in your typical conditions without being stuck with a dud.
How to check it:
- Buy from a retailer with a 30-day return window and test on a wall with a visible stud or known wiring.
- Test each mode, the calibration routine, and battery under real use before the return period expires.
Real-world example: I returned one unit after two days because its live-wire detection failed my simple outlet test, and the retailer issued a refund.
Follow these checks in that order when you compare models and you’ll pick a rechargeable stud finder that actually saves you time on the job.
Frequently Asked Questions
Can Rechargeable Stud Finders Be Used Safely in Wet Conditions?
Yes, but cautiously: check waterproof ratings, avoid submerged use, test insulation before use, and keep charging ports dry. I’d never risk wet conditions without proper sealing, and I’d always perform insulation testing first.
Do Rechargeable Models Interfere With Nearby Electronic Devices?
No, they rarely interfere; I monitor EMI concerns and find most rechargeable stud finders use shielding and low emissions, though strong nearby transmitters can cause signal masking—so I keep distance from sensitive electronics.
Can Firmware Updates Improve Battery Life or Accuracy?
Yes — I’ve seen firmware optimization extend battery life and improve accuracy by refining power management and sensor recalibration routines; manufacturers push updates that tweak signal processing, lower idle draw, and recalibrate sensors for better performance.
Are Replacement Batteries Widely Available for Older Rechargeable Models?
Yes — availability varies: I’ll admit it’s hit-or-miss; legacy support for older rechargeable models often dwindles as brands phase parts, so you’ll sometimes find batteries, other times you’ll need adapters or third-party substitutes.
Do Rechargeable Stud Finders Retain Calibration When Fully Discharged?
No, they usually don’t retain calibration when fully discharged; I’ve found battery memory isn’t the issue, but power cycling and loss of internal volatile settings can require recalibration once you recharge and restart the unit.